Why Repotting House Plants Is Essential For Their Long Term Health
How Root Bound Conditions Affect Plant Growth And Vitality
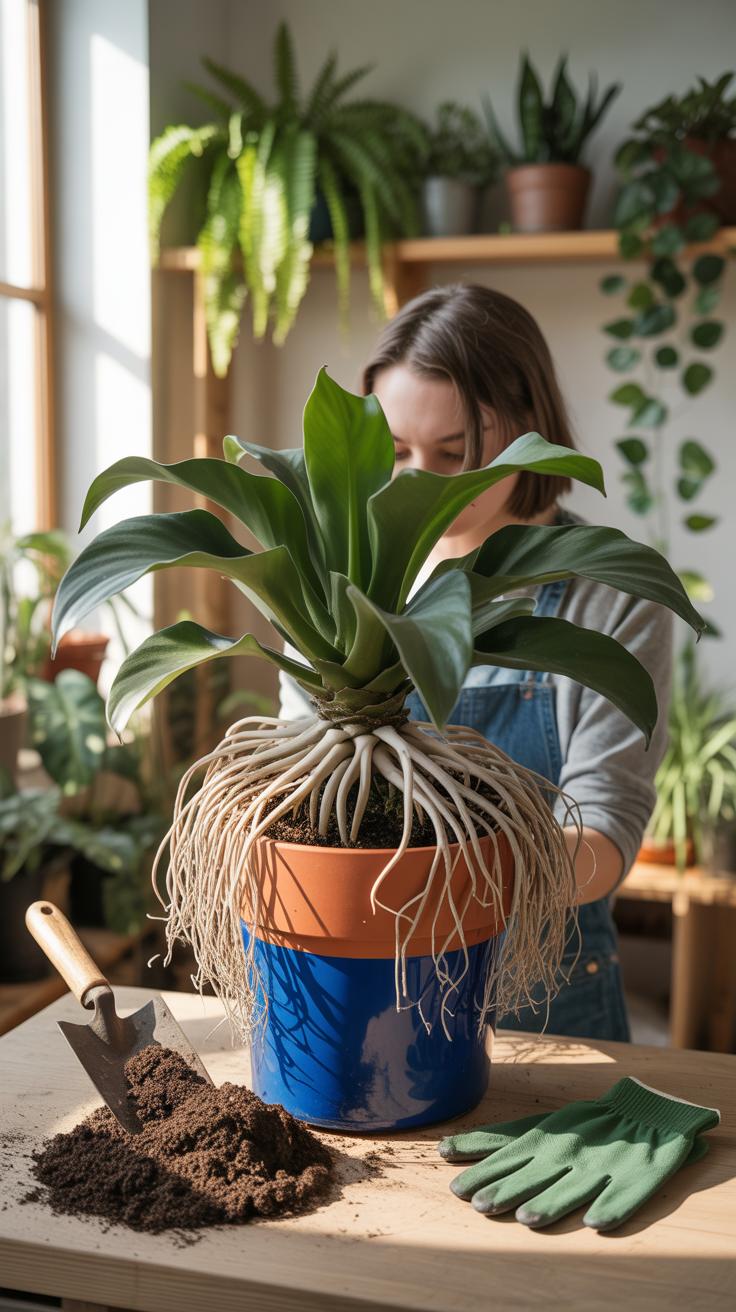
Root bound plants suffer when their root systems outgrow the current container. The roots begin to circle the inner walls of the pot. This creates a dense, tangled mat that blocks water and oxygen. The plant stops growing because the roots cannot expand into new areas. You will see stunted leaves and poor development as the physical space runs out completely.
Congested roots lose their ability to function efficiently over time. They take up too much space and leave no room for soil. Without enough soil, the plant cannot hold moisture between waterings. This causes rapid dehydration and stress. The plant will eventually decline and die if you do not provide a larger pot. Strategic repotting breaks this cycle and restores normal plant growth.
The Connection Between Fresh Soil Nutrients And A Thriving Houseplant
Houseplants rely entirely on the limited soil in their pots for food. Most potting mixes contain a specific amount of organic matter. Plants consume these minerals within several months. Once the nutrients disappear, the plant cannot manufacture enough energy for new growth. Old soil also becomes compacted, which prevents the roots from breathing. Fresh soil provides a new supply of essential minerals.
Repotting replaces old, depleted soil with a fresh growing medium. This new soil has a better structure for air and water flow. It helps maintain the correct pH balance for nutrient uptake. Over time, salts and minerals from tap water build up in old dirt. This buildup can burn sensitive roots and cause brown leaf tips. New soil flushes out these toxins and promotes a healthier root environment.

When To Repot Plants Recognizing The Right Time To Make The Move
Visual And Physical Signs That Tell You A Plant Needs A New Pot
Plants communicate their needs through clear physical indicators. Check the drainage holes at the bottom of the pot first. Roots circling the interior or pushing through the bottom indicate the plant has exhausted its current space. This condition stunts growth and prevents the soil from holding moisture. If you see roots matted on the surface, the plant requires immediate intervention.
Monitor the water absorption rate during your routine maintenance. Soil that dries out within two days of a deep watering has lost its structural integrity. The root mass has likely replaced most of the soil volume. You may also notice the plant looks top heavy or falls over easily. These mechanical failures mean the root system needs a wider base for proper stability.
The Best Seasons Of The Year To Repot Most Common Houseplants
Timing determines how fast a plant recovers from transplant shock. Aim to repot during the early spring months when the plant enters its active growth phase. Increased light levels trigger new root development and cellular repair. This natural surge of energy helps the plant anchor itself in new substrate quickly. Avoid repotting during the peak of summer heat to prevent moisture stress.
Winter serves as a rest period for most tropical and temperate houseplants. Lower light levels and cooler temperatures slow down metabolic processes significantly. Repotting during late fall or winter forces a dormant plant to expend energy it does not have. This often leads to root rot or permanent wilting. Wait for the first signs of new green shoots before you move any plant.
Choosing The Right Potting Soil For Repotting Indoor Plants Successfully
Understanding The Difference Between Potting Mixes For Various Plant Types
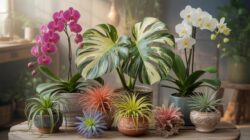
Standard indoor plants require specific soil structures to thrive within containers. Tropical foliage plants need moisture retention paired with aeration. Succulents and cacti demand fast drainage to prevent root rot. Using garden soil is a mistake because it packs down too tightly. This prevents oxygen from reaching the roots. Commercial potting mixes use peat or coco coir to create a lightweight environment for root growth.
Aroids like Monstera or Philodendron thrive in chunky mixes. These mimics their natural habit of growing on trees. Ferns require soil that stays damp but not soaked. Choosing the wrong mix leads to stagnant water or bone-dry roots. You must match the drainage capabilities of the soil to the watering needs of the plant species. High-quality mixes allow excess water to flow out of the pot quickly.
Key Ingredients To Look For In A High Quality Potting Soil Mix
Quality potting soil relies on three primary components. Peat moss or coconut coir provides the base structure and holds water. Perlite or pumice creates air pockets and improves drainage. These volcanic materials prevent the soil from compacting over time. Vermiculite helps with nutrient retention and keeps moisture near the roots longer. Always check the label for these specific materials to ensure the mix supports long-term plant health.
Avoid mixes that contain high amounts of wood filler or sawdust. These cheap materials decompose fast and strip nitrogen from the soil. Look for bark chips if you are repotting orchids or large tropicals. Good soil feels light and springy when squeezed. It should not feel heavy like clay or sand. Fresh mix ensures your plants have the physical support and oxygen access they need to recover from the repotting process.
What You Need Before You How To Repot A Plant Tools And Materials
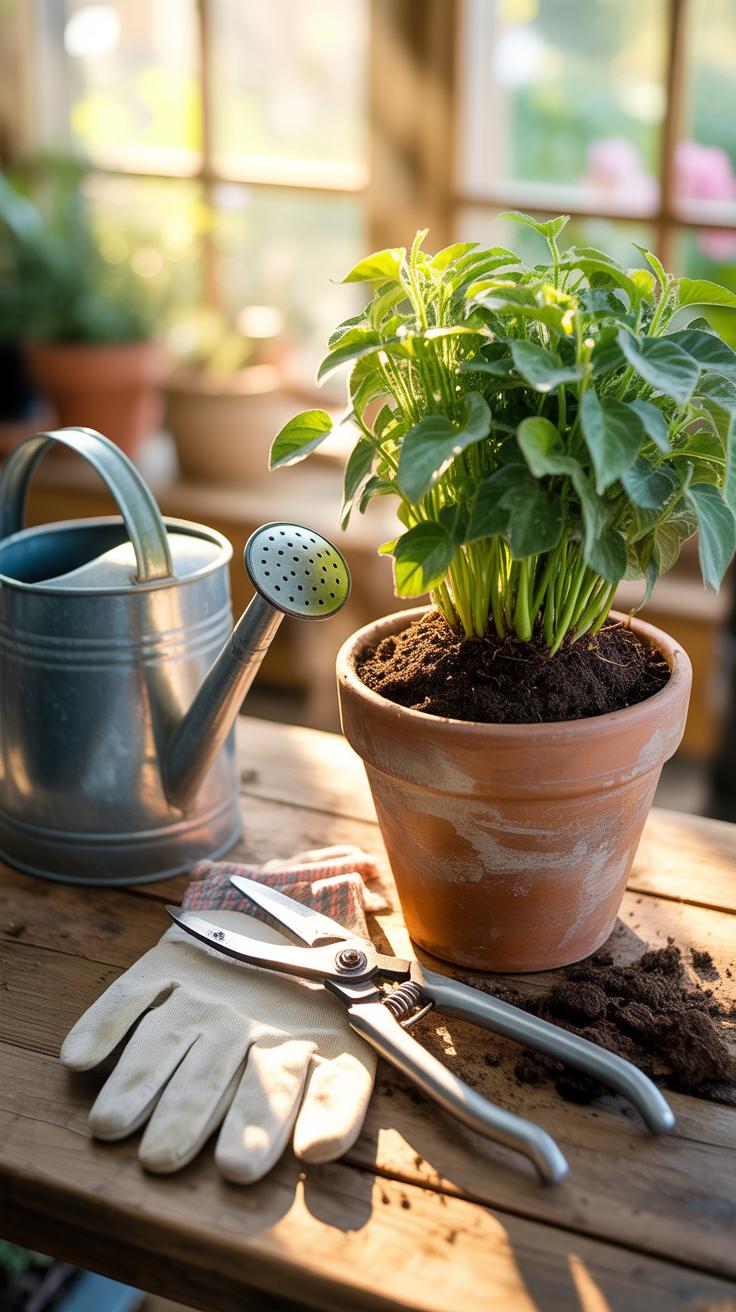
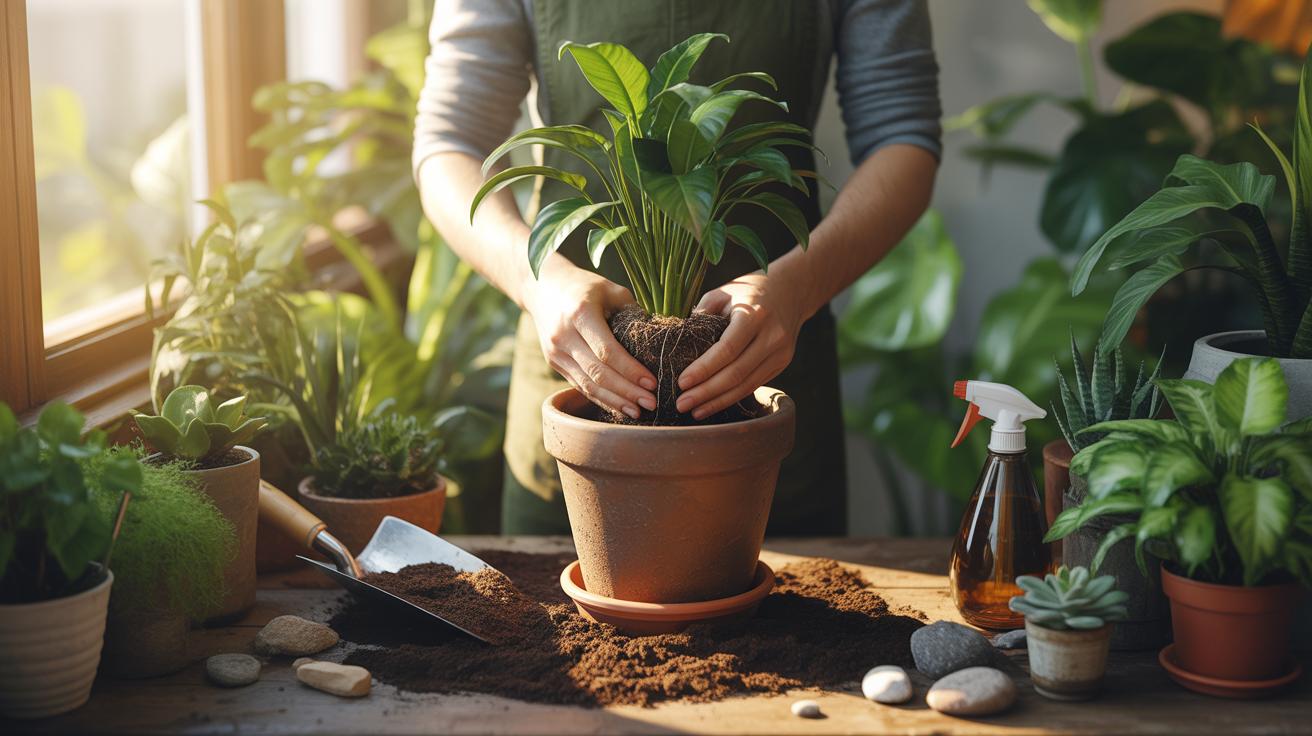
Essential Tools And Supplies To Gather Before You Begin Repotting
Preparation prevents mess and plant stress. You must gather all physical components before removing a plant from its current container. Exposed roots dry out quickly and suffer permanent damage if left in the air too long. A clean workspace ensures pathogens do not enter fresh soil. Organize your gear to make the transition fast and efficient.
- Fresh Potting Mix: Use a high quality medium designed for your specific plant species. Standard indoor mixes work for most plants but succulents requires rapid drainage. Old soil loses nutrients and structure so you must always use a fresh bag.
- Sterilized Pruning Shears: Sharp blades allow you to trim dead or circling roots without tearing tissue. Clean the metal with isopropyl alcohol before use to prevent the spread of bacteria. Dull tools crush stems and increase the risk of fungal infections.
- Hand Trowel: This tool helps you move soil into narrow gaps between the root ball and the pot wall. It provides precision that prevents air pockets from forming. Air pockets cause roots to dry out and eventually die back.
- Watering Can: You need a water source immediately after the move to settle the soil. Proper hydration collapses small air gaps and secures the plant in its new home. Use room temperature water to avoid shocking the sensitive root system.
- Tarps or Newspaper: Repotting is a dirty process that involves loose dirt and moisture. Covering your work surface makes cleanup fast and keeps your living space clean. It also allows you to easily collect and discard old spent soil.
Layout your tools in the order you will use them. Place the new pot and soil on your left and the plant on your right. This assembly line approach reduces the time roots spend outside of a substrate. Efficiency is the key to preventing transplant shock. Check that your shears are sharp and your water is ready before you start the process.
To plant a garden is to believe in tomorrow, and giving your plant a new home is a simple act of faith that it will flourish for years to come.
— Audrey Hepburn
How To Choose The Correct Pot Size And Drainage For Your Plant

Select a new container that is only one or two inches wider in diameter than the current one. Moving a plant into a massive pot creates a dangerous situation where the soil stays wet for too long. Excessive soil volume holds moisture that the small root system cannot absorb. This lead to anaerobic conditions and root rot within weeks of repotting.
Drainage holes are non negotiable for long term plant health. Water must exit the bottom of the pot to prevent salts and minerals from building up in the substrate. If you find a decorative pot without holes use it as a cachepot. Place the plant in a functional plastic nursery liner with drainage inside the decorative vessel. This setup ensures your plant survives the upgrade.
How To Repot Plants A Clear And Simple Step By Step Walkthrough
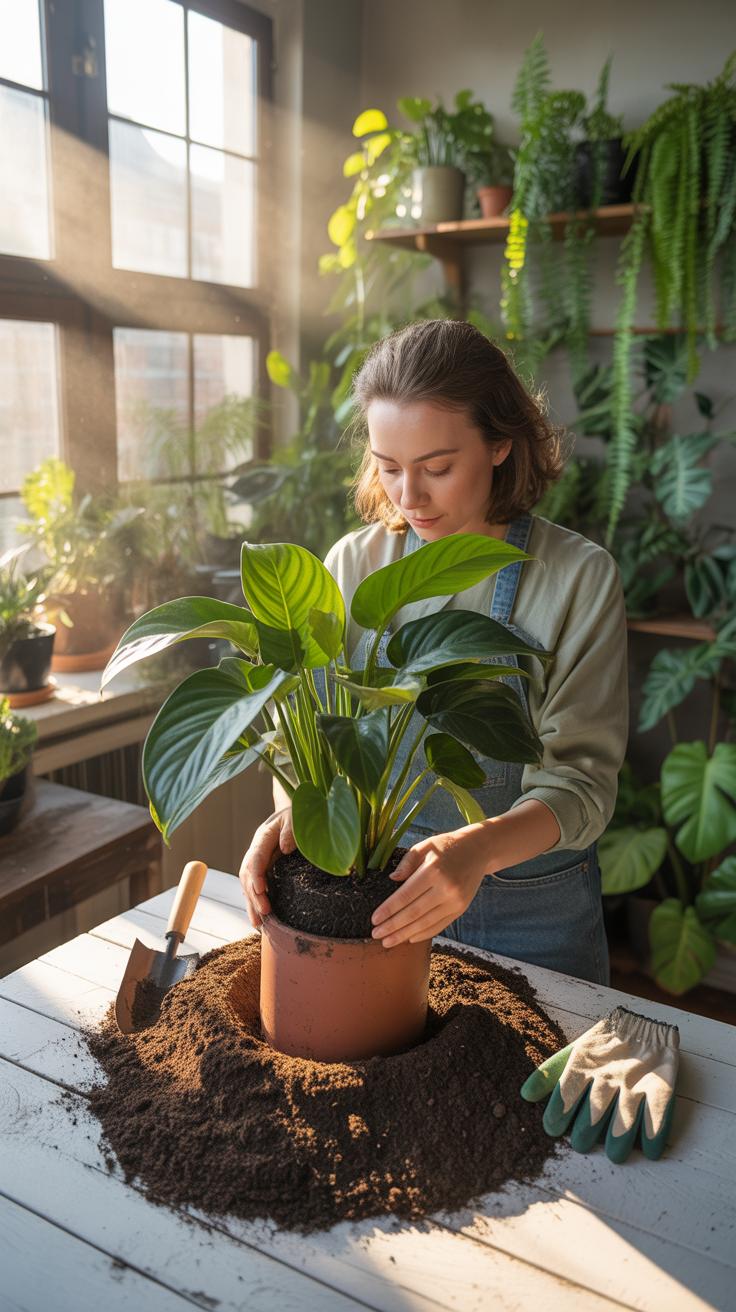
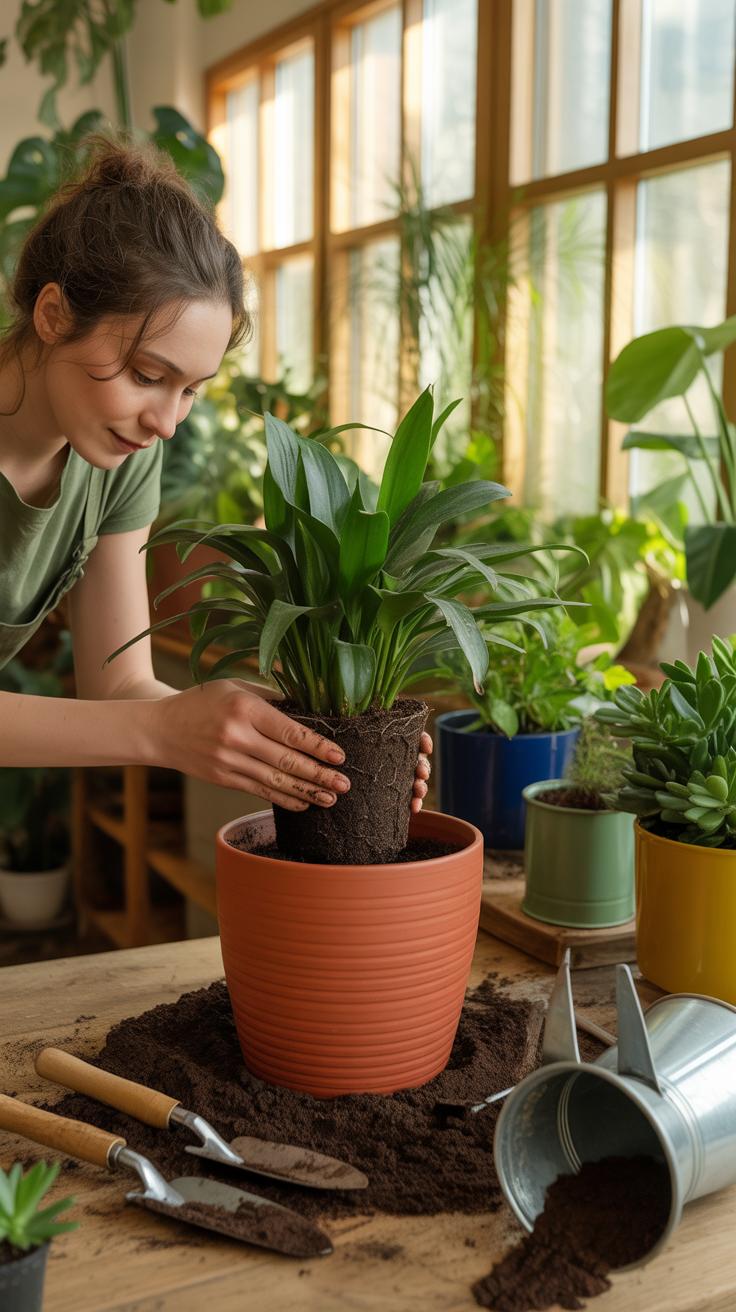
How To Safely Remove A Plant From Its Current Container Without Damage
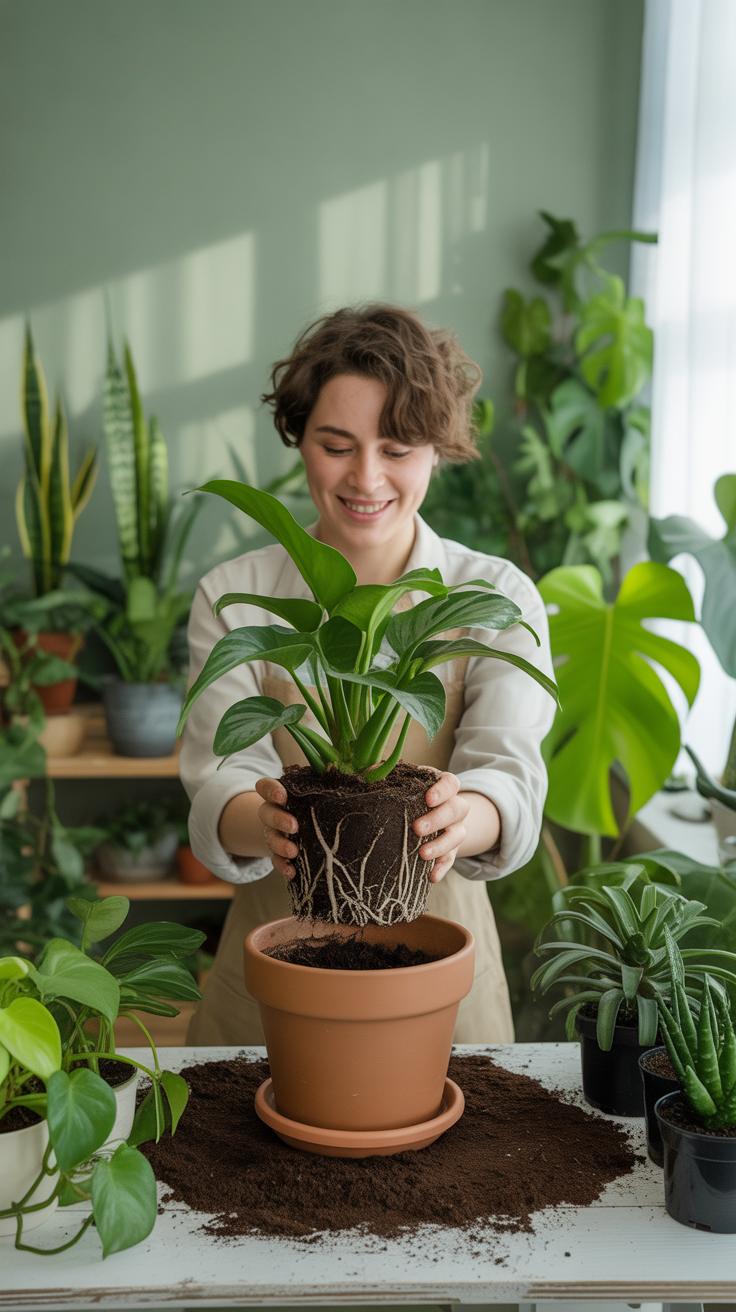
Stop pulling the plant by its stem. This action severs critical root hairs and damages the vascular system. Instead, place one hand over the soil surface with the plant stem between your fingers. Turn the pot sideways or upside down. Use your other hand to squeeze the sides of the container. This pressure breaks the suction between the root ball and the walls.

Gravity should do most of the work during this stage. If the plant remains stuck, use a long knife or a flat trowel. Slide the tool along the inside edge of the pot to release the soil. Pulling the plant directly can snap the main root system. Once the plant slides out, check the roots for rot or pests. Healthy roots appear white or tan.
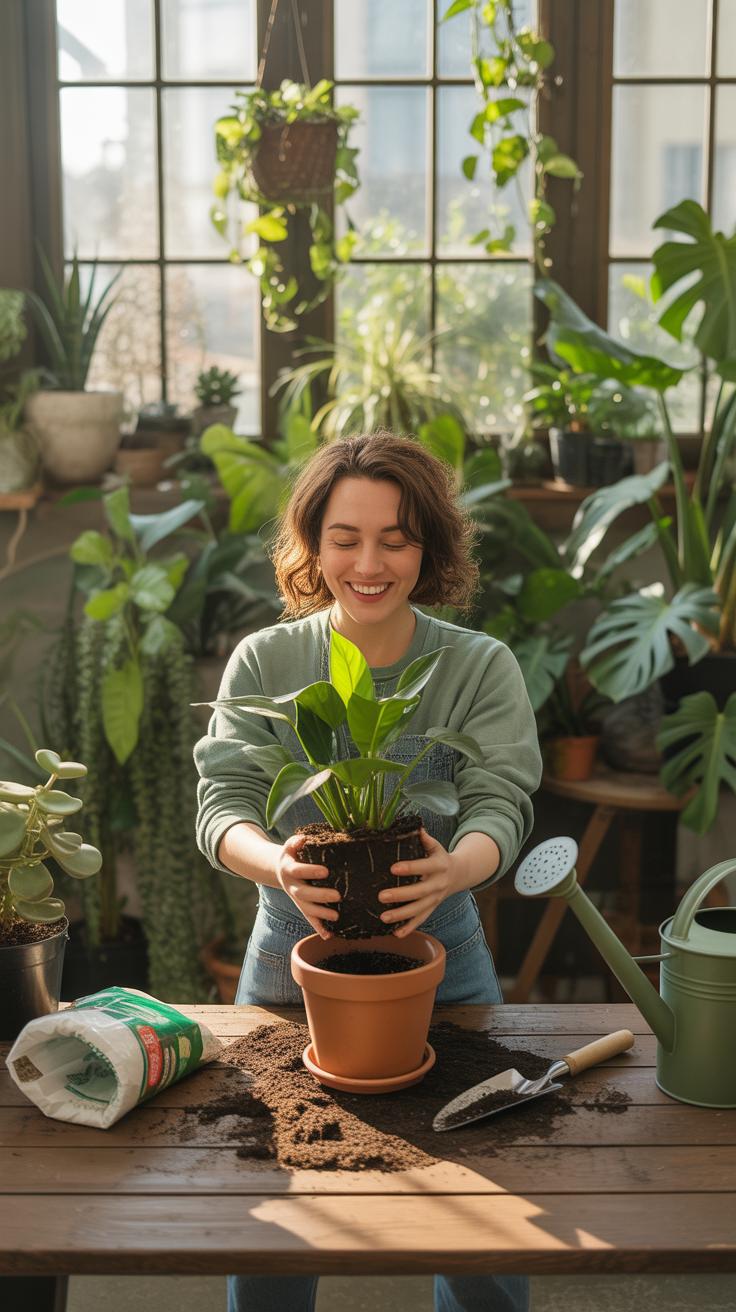
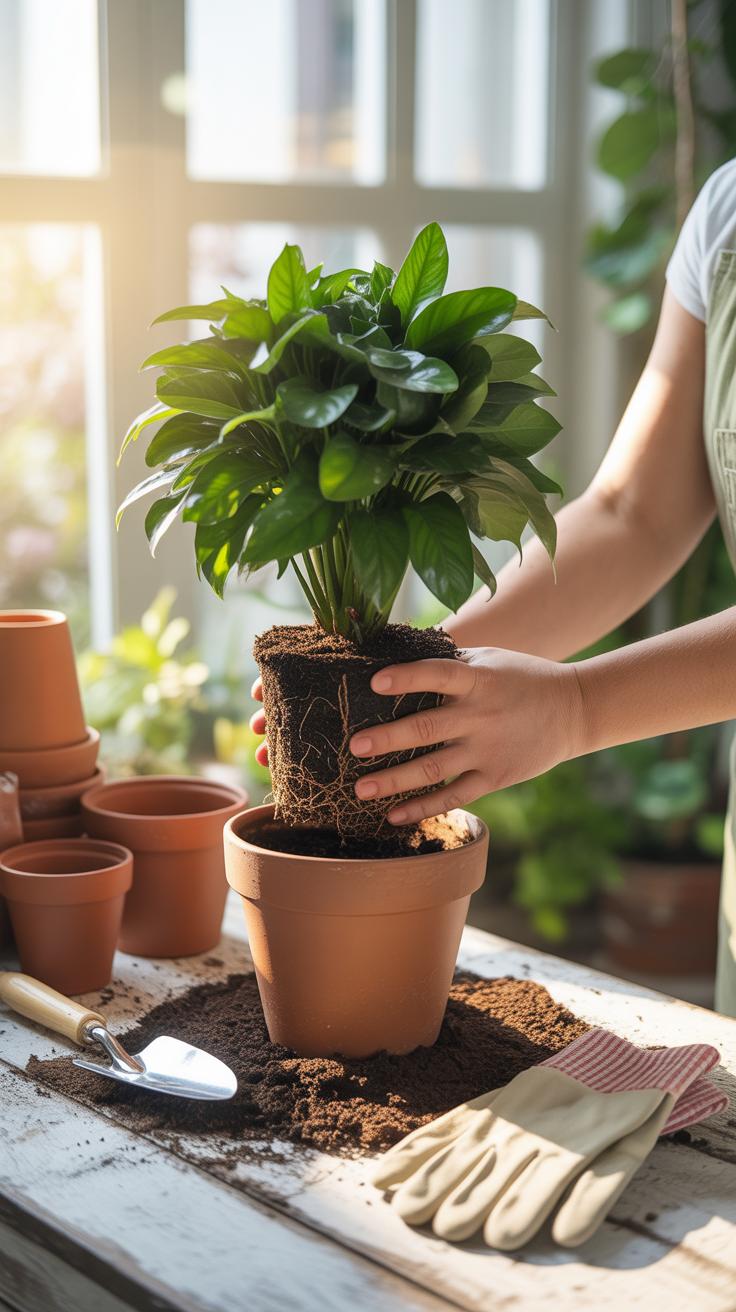
Properly Placing And Settling Your Plant Into Its New Pot
Standard repotting requires a container only two inches larger than the current one. If the pot is too big, the excess soil stays wet for too long. Excessive moisture leads to root rot because oxygen cannot reach the roots. Start by adding a base layer of fresh potting mix to the bottom. This ensures the plant sits at the correct height.
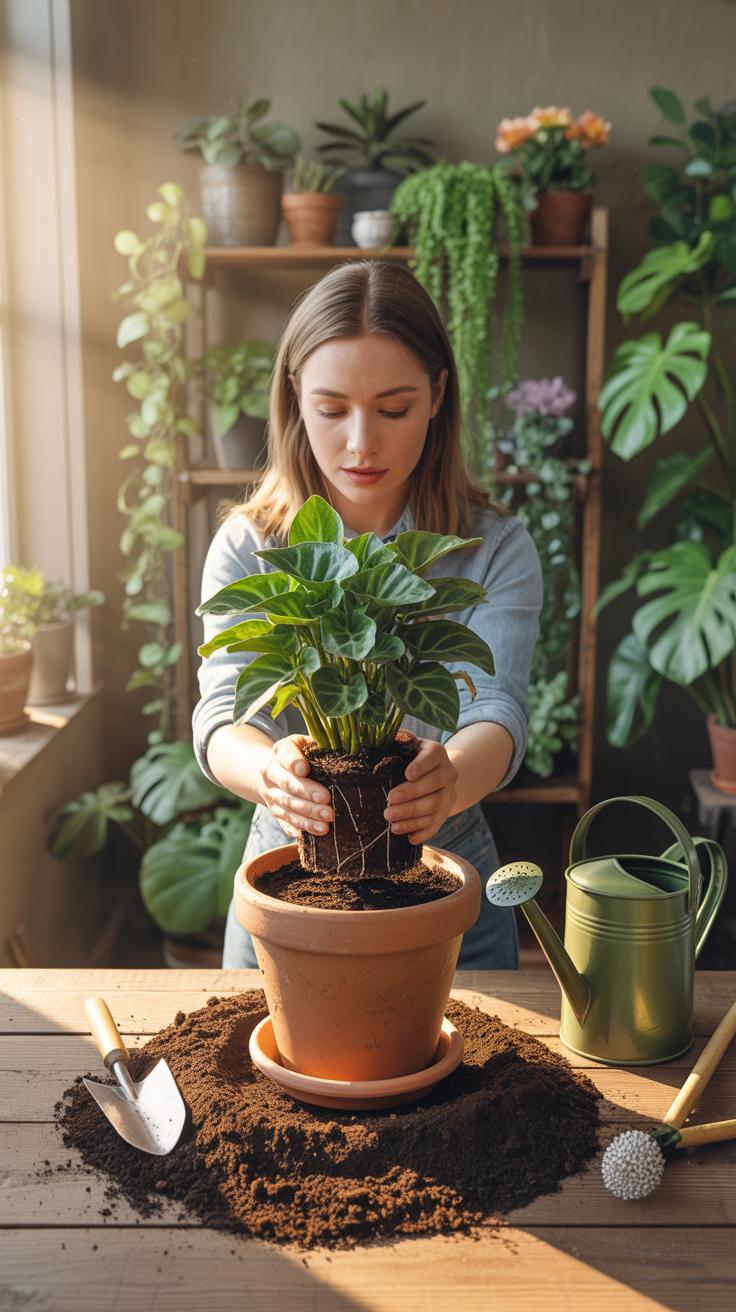
- Center the Root Ball: Place the plant in the middle of the new container. Proper centering ensures even root growth and prevents the plant from tipping over. It also makes watering more efficient across the entire soil surface later on.
- Set the Soil Line: Keep the top of the root ball one inch below the rim of the pot. This space allows water to pool and soak in during future waterings. Burying the stem too deep promotes crown rot and fungal infections.
- Fill the Gaps: Add fresh potting soil around the sides of the root ball. Use your fingers to press the soil down firmly but not too hard. Eliminating large air pockets prevents the roots from drying out while still allowing for necessary drainage.
- Add Water Immediately: Give the plant a thorough watering right after you finish filling the pot. Water helps the soil settle around the roots and reduces transplant shock. Continue adding water until it flows freely out of the drainage holes at the bottom.
- Final Inspection: Check for any exposed roots or sinking soil after the first watering. Add more mix to any low spots to maintain a level surface. A level surface prevents water from channeling down one side and missing the roots on the other side.
Avoid packing the soil too tightly after the final fill. Hard soil prevents water from penetrating and blocks air flow to the roots. Proper settling relies on water and light finger pressure rather than force. Keep the plant in indirect light for several days. This allows the root system to recover without the added stress of direct sun exposure.
How To Repot Indoor Plants That Are Delicate Oversized Or Root Sensitive
Special Considerations When Repotting Succulents, Orchids, And Cacti

Succulents and cacti require dry roots before you move them. Wet soil causes fungal rot during the transition. Use a gritty mix with high mineral content like perlite or pumice. Do not water these plants immediately after repotting. Wait one week to let damaged roots callous over. This prevents pathogens from entering the plant tissue. Handle cacti with thick gloves or folded newspaper to protect your skin.
Orchids have air-seeking roots that break under pressure. Never use standard potting soil for these epiphytes. Use fir bark or sphagnum moss to ensure high oxygen flow. Rinse the old media away with lukewarm water to avoid temperature shock. Trim dead, mushy roots with sterilized shears before placing the plant in a vented pot. Keep the crown above the media line to prevent crown rot.
Tips For Handling Large Or Heavy Indoor Plants During The Repotting Process
Large plants require a horizontal approach. Lay the container on its side on a tarp. Run a long serrated knife around the inner edge to break the soil seal. Slide the root ball out slowly rather than pulling the stem. This protects the main vascular system of the plant. Ask a partner to hold the weight of the foliage while you inspect the exposed root system.
Check the root ball for circling roots that cause girdling. Slice three vertical notches into the root mass to encourage outward growth. Place the plant in its new heavy container before adding soil. Ensure the plant sits at the same depth as its previous pot. Tamp the soil firmly to eliminate large air pockets. This stabilization prevents the heavy top from leaning or falling over later.
How To Replant Plants And Care For Them Immediately After Repotting

Watering And Light Guidelines To Follow Right After Repotting A Plant
Water your plant thoroughly immediately after you place it in the new container. This initial saturation settles the soil and eliminates large air pockets around the root system. Use room temperature water to avoid chilling sensitive roots. Ensure the liquid drains completely from the bottom holes. Do not let the pot sit in standing water because this causes immediate root rot during a vulnerable stage.
Place the newly repotted plant in a spot with medium or indirect light. Avoid direct sunlight for at least one week even if the plant usually prefers high light levels. Harsh rays increase transpiration and put unnecessary stress on the foliage while roots are settling. Move the plant back to its permanent location once you see signs of stability. Stable light helps the plant recover faster.
Understanding Transplant Shock And How To Help Your Plant Recover Quickly
Transplant shock happens when a plant fails to adapt to its new environment or root disturbance. You will see wilting, yellowing leaves, or leaf drop shortly after the move. This is a physiological response to root damage or changes in soil chemistry. Do not panic and do not add fertilizer. Fertilizing a shocked plant burns new root tips and makes the damage much worse.
Keep the humidity high around the plant to reduce moisture loss through the leaves. Monitor the soil moisture daily but do not overwater. The plant needs a stable environment to regrow fine root hairs. Wait for new growth to appear before resuming your standard feeding schedule. Most plants recover within two to four weeks if you leave them alone. Patience is your most effective tool here.

Common Repotting Houseplant Mistakes And How To Easily Avoid Them
Why Choosing A Pot That Is Too Large Can Actually Harm Your Plant
Standard nursery practice dictates moving up only one pot size at a time. This usually means a diameter increase of two inches. If you choose a pot that is too large, you create a massive volume of excess soil. This soil holds water that the root system cannot reach or absorb. Saturated soil lacks oxygen and leads directly to root rot.
The plant focuses all its energy on root expansion to fill the empty space rather than growing new leaves or flowers. This stall in visible growth often frustrates owners. Large containers also stay wet for much longer periods. This moisture imbalance creates a breeding ground for fungus gnats. Stick to the incremental size rule to keep the plant healthy and focused on upward growth.
Overwatering Poor Drainage And Other Post Repotting Errors To Watch Out For
Many people water too heavily immediately after repotting. They assume the plant needs extra moisture to recover from the stress. However, damaged roots cannot process water efficiently. Pushing water into a fresh environment without established drainage flow causes the soil to become a stagnant mud pit. Always ensure the new container has functional drainage holes to prevent water from pooling at the bottom.
Another common error involves packing the new soil too tightly. High compaction removes the air pockets necessary for root respiration. You should settle the soil by tapping the pot on a hard surface rather than pressing down with your hands. Avoid fertilizing for at least one month after the move. Fresh potting mix already contains nutrients and adding more can cause chemical burns on sensitive newly formed roots.
Frequently Asked Questions

How do I know when it is finally time to repot my indoor plants?
Most plants signal they need more space through visible cues like roots growing out of drainage holes or pushing through the soil surface. You might also notice that water runs straight through the pot without soaking in. Following essential houseplant repotting tips is crucial here; if your plant’s growth has stalled during the spring or summer, it is likely root-bound and desperate for a fresh nutrient boost and a larger home.
What is the easiest way to repot a plant without damaging the fragile roots?
To protect your greenery, always water the plant a day before moving it to keep the root ball cohesive. Turn the pot sideways, place your hand over the soil surface with the plant stem between your fingers, and gently tap the bottom. One of the best houseplant repotting tips for beginners is to avoid pulling the stem; instead, let gravity help the plant slide out naturally before loosening the roots.
Do I need to buy expensive designer pots and premium tools to repot successfully?
Absolutely not! You can achieve professional results on a budget by upcycling containers like yogurt tubs or old buckets, provided you drill drainage holes in the bottom. Simple household items, such as an old kitchen spoon for digging or a mesh coffee filter to cover drainage holes, work perfectly. Focus on quality potting soil rather than fancy equipment to keep your plants thriving without overspending on your hobby.


