What Is Rock Garden Design And Why Is It So Popular
The Origins And History Of Rock Gardens Around The World
Rock garden design started in China and Japan centuries ago. Ancient designers used stones to represent mountains and islands in miniature landscapes. These early gardens focused on Zen principles and meditation. They valued natural shapes over artificial structures. This approach influenced global aesthetics by prioritizing the raw form of stone. The focus remains on balance between hard elements and soft vegetation.
Europe adopted this style during the Victorian era. Botanists wanted to grow high altitude plants from the Alps in local settings. They built rockeries to mimic mountain drainage and soil conditions. This technical shift turned rock gardening into a disciplined science. Designers began using local limestone and granite to create native habitats. Today rock garden design blends these ancient spiritual roots with modern ecological requirements.
Why Homeowners Are Choosing Rock Garden Design Over Traditional Lawns
Traditional lawns demand high water usage and constant chemical treatments. Rock garden design offers a sustainable alternative that survives harsh climates. Homeowners reduce their utility bills by replacing grass with drought resistant stones and gravel. This shift supports local ecosystems by eliminating toxic fertilizers. It provides a permanent landscape solution that does not require weekly mowing or expensive irrigation systems.
Modern rock gardens increase property value through superior curb appeal and low maintenance needs. Busy owners prefer these designs because they require minimal physical labor once installed. Rocks do not die during heatwaves or freeze in winter. This durability makes them ideal for steep slopes or areas with poor soil quality. Tactical placement of boulders creates natural focal points that traditional turf cannot match.

Key Principles Of Rock Garden Landscaping You Should Know
How To Work With Natural Contours And Terrain In Rock Garden Landscaping
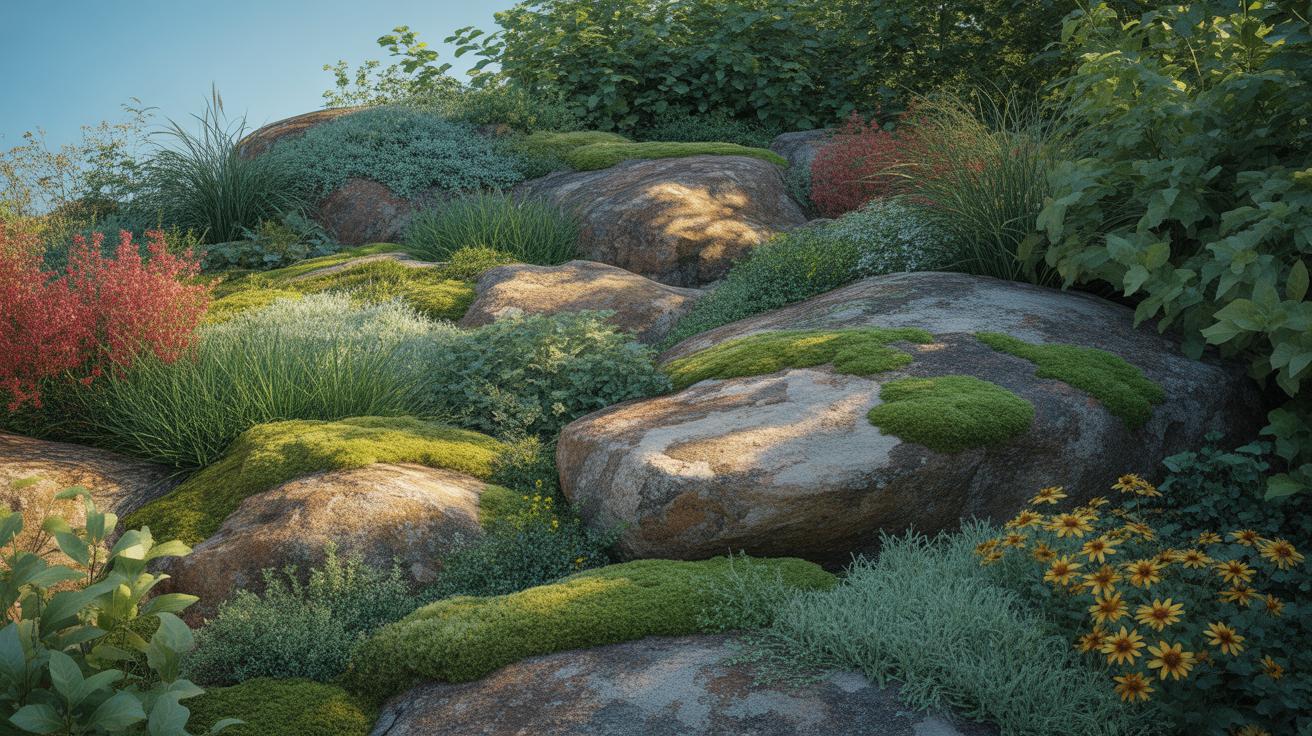
Effective rock garden design requires you to follow the existing land. You must identify high and low points before moving any material. Natural slopes provide the best drainage for alpine plants. Use the grade to create visual depth without forcing structural changes. This approach reduces labor and prevents soil erosion. You want the rocks to look like they emerged from the ground.
Burial depth serves as a critical tactic for stability. You must bury at least one third of each stone. This anchors the weight and mimics natural outcrops. Angle the rocks back into the slope to direct water toward plant roots. Never place rocks flat on top of the soil. Proper positioning ensures the garden survives seasonal freeze and thaw cycles without shifting or collapsing.
Balancing Aesthetics And Function In Your Rock Garden Layout
Your layout must prioritize drainage over visual appeal. Alpine species die in standing water. Use a mix of crushed stone and grit to facilitate fast water movement. Place the largest rocks first to establish a structural skeleton. Size variations create a sense of scale. Small stones fill gaps and act as mulch. This dual approach manages moisture levels while creating a cohesive look.
Select stone types that match your local geology. Mixing different rock colors or textures looks messy and unprofessional. Use one dominant material to maintain a unified theme. Strategic gaps between stones provide planting pockets for specialized flora. This balance allows you to control the microclimate for each plant. A functional layout reduces long term maintenance and ensures your rock garden remains stable for decades.

Creating A Rock Garden Planning Your Space From Scratch
How To Assess Your Yard’S Slope, Drainage, And Sun Exposure Before Creating A Rock Garden
Proper rock garden design requires a site with excellent drainage. Most alpine plants rot in standing water. Observe your yard during heavy rain to identify high spots and low basins. Use existing natural slopes to facilitate water runoff. If your land is flat, you must build raised mounds or berms. This elevation ensures gravity pulls moisture away from sensitive plant root zones.
Sun exposure dictates your entire plant palette. Most traditional rock gardens require six to eight hours of direct sunlight daily. Track the movement of shadows from buildings and trees throughout the day. South facing slopes provide the highest heat and light intensity. This mimics the harsh mountain environments where these plants thrive. Check the soil type to ensure it is lean and gritty rather than heavy clay.
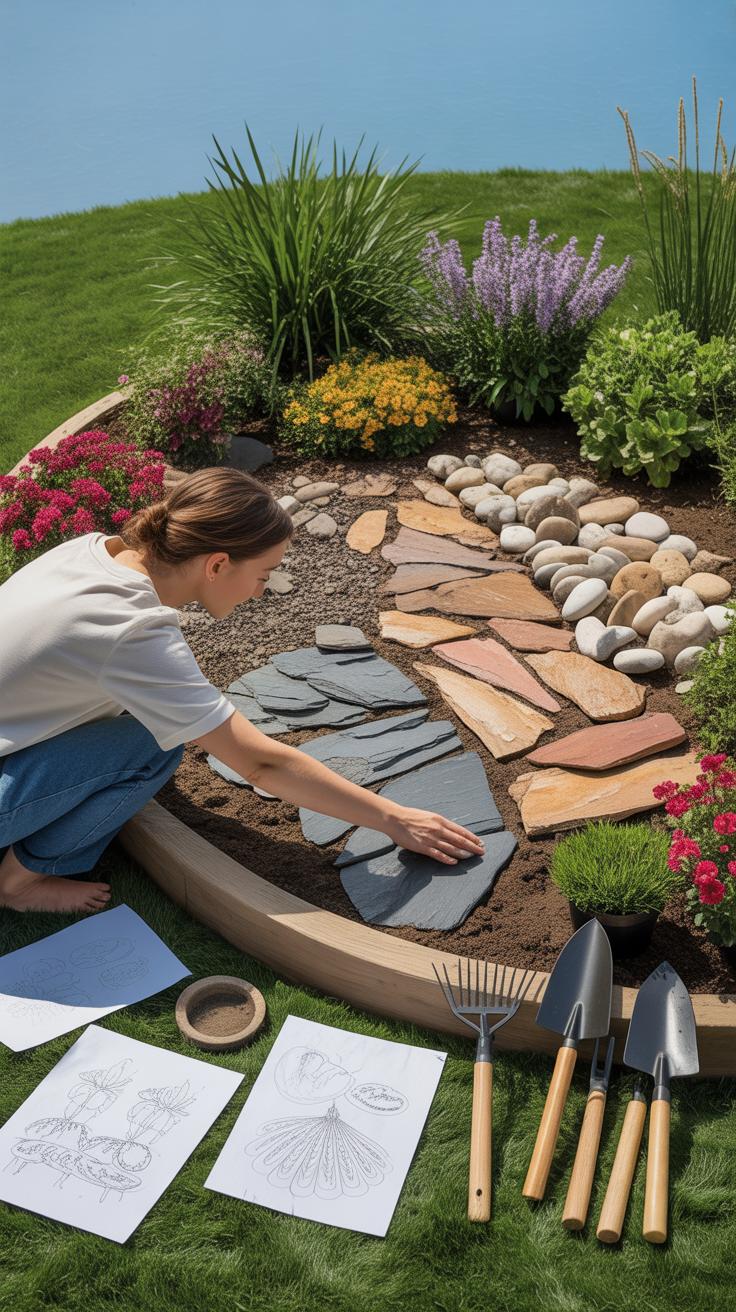
Sketching Your Rock Garden Plan: Mapping Zones, Paths, And Plant Areas
Strategic sketching prevents expensive mistakes during stone placement. Map out your primary focal points first. Use large keel stones to anchor the design. These heavy boulders should look like natural outcrops partially buried in the earth. Mark the transition zones between these stones. Ensure your layout follows the natural contours of the land. This approach creates a stable foundation for the smaller rocks and grit.

Designate clear paths for maintenance and foot traffic. Use flat stepping stones that match the color and texture of your main boulders. These paths protect plants from being crushed during weeding or pruning. Group your plants into zones based on their specific water and light needs. Place moisture loving species at the base of slopes and drought tolerant varieties near the top. This organization ensures long term survival for the entire ecosystem.
Making A Rock Garden Choosing The Right Rocks And Materials
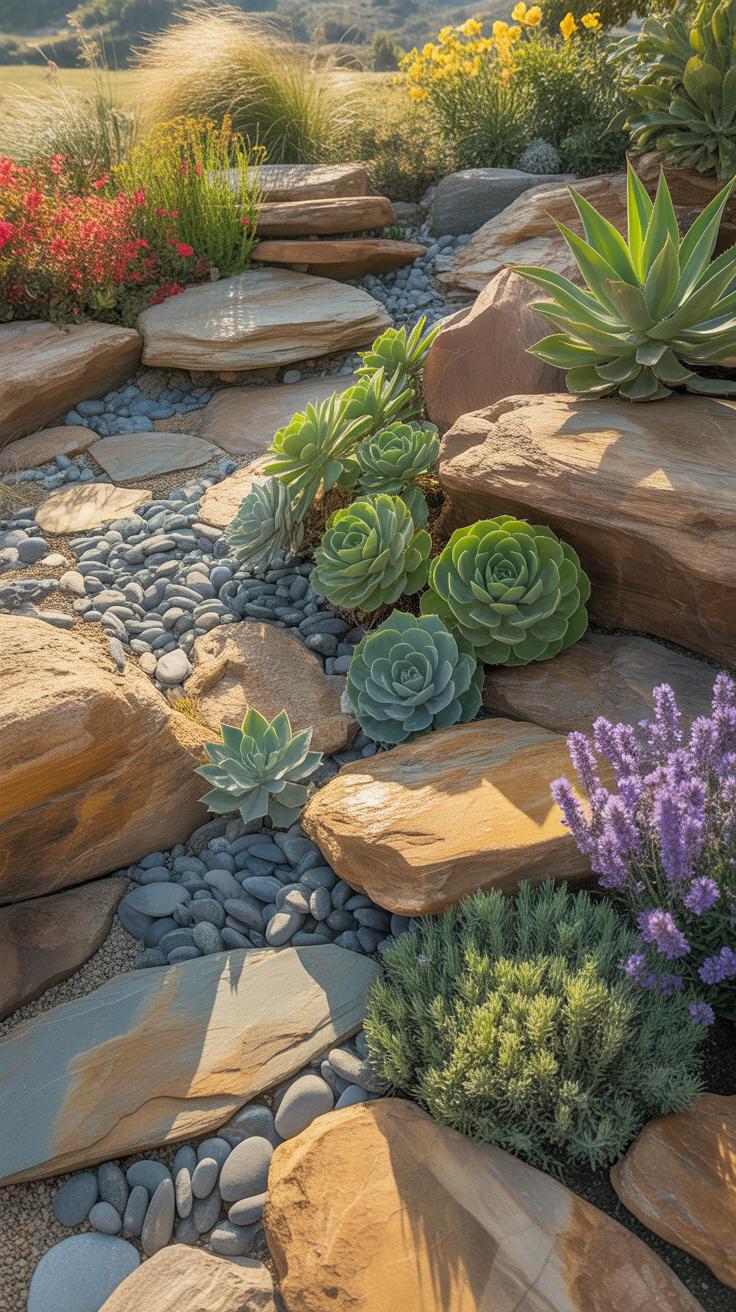
The Best Types Of Rock For Making A Rock Garden That Looks Natural
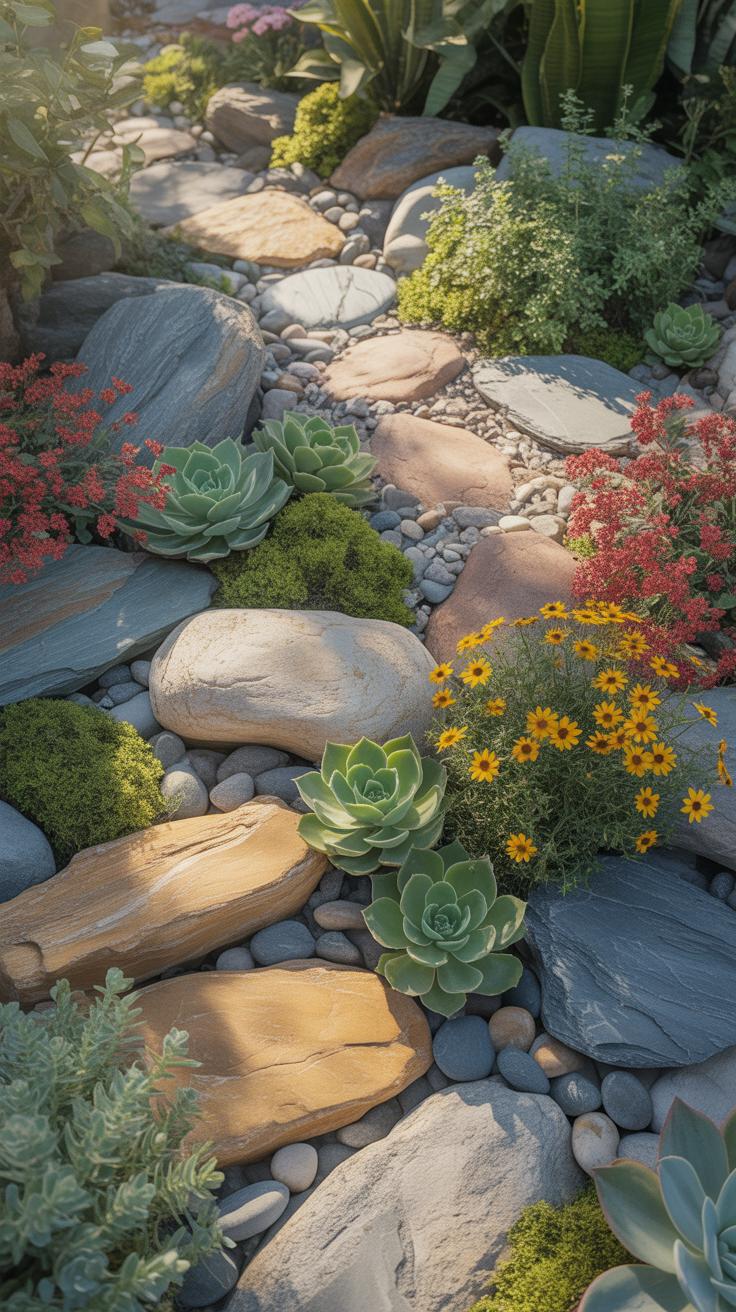
Authentic rock gardens require local stone to mimic natural outcrops. Sedimentary rocks like sandstone and limestone are the industry standard. These rocks feature porous surfaces that allow moss and lichen to grow over time. They often have visible bedding planes. You should align these planes horizontally during installation. This technique replicates natural geological layering seen in mountain environments and older English rockery designs.
Avoid mixing different rock types within one garden. Consistency creates a professional look. Igneous rocks like granite are durable but look out of place in soft landscapes. Select weather-worn stones rather than freshly quarried ones. Sharp edges signal human intervention and ruin the natural aesthetic. Use one primary rock source to maintain visual unity. Ensure the stones match the localized geology for the most convincing result.
To find a stone is to find a story written by the earth itself. Every rock placed with care holds the quiet warmth of a memory that will last forever.
— Edith Wharton
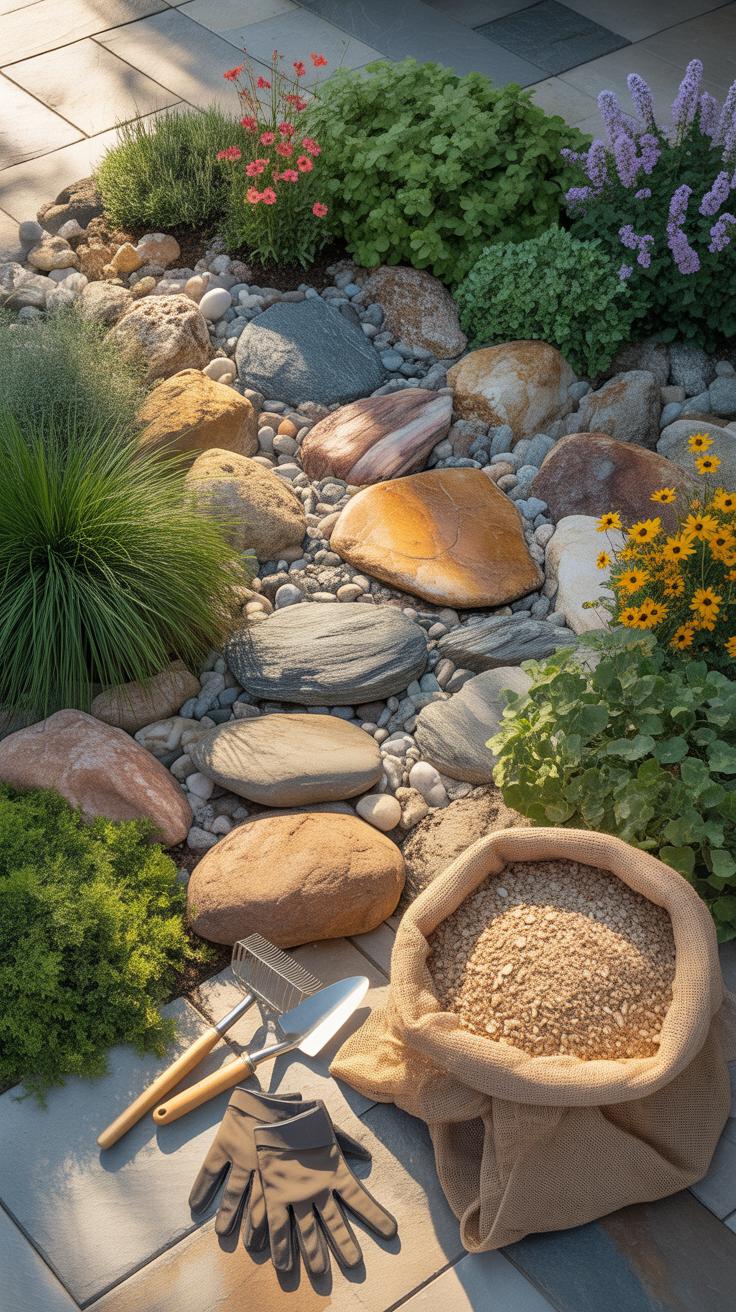
Essential Materials And Tools You Will Need Before You Begin
Preparation requires specific hardware and soil components to ensure long-term stability. You must manage heavy weights and provide high-drainage environments. Standard garden soil fails here because it retains too much water for alpine species. You need a mix of grit, compost, and loam. Structural tools help you move large boulders safely. Gather all equipment before you start moving any earth or heavy stone.
- Pry Bars and Rollers: Use heavy-duty steel bars to lever large stones into precise positions. Wooden rollers or PVC pipes allow you to move heavy boulders across the ground without ruining your turf or straining your back during the build.
- Horticultural Grit and Sharp Sand: These materials are vital for creating the free-draining soil mix that rock plants require. Mix them with loam to prevent root rot. Use extra grit around the plant crown to keep moisture away from the foliage.
- Geotextile Fabric: Lay this heavy-duty weed barrier beneath your base layer of stones. It prevents the soil from mixing with your drainage layer while stopping invasive weeds from pushing up through the cracks. It ensures the structural integrity of your garden mounds.
- Mallets and Chisels: Steel stone chisels and heavy mallets allow you to trim small corners of rock for a better fit. Use these tools to create planting pockets or to adjust how two stones sit together. This ensures a tight and professional finish.
- Spirit Level and String Lines: Accurate grading depends on these tools. Use them to ensure your stones tilt slightly backward into the slope. This direction forces water toward the roots rather than letting it run off the front face of the rock.
Safety gear is the final requirement for this project. Wear steel-toed boots to protect your feet from shifting stones. Use heavy leather gloves to prevent cuts and improve your grip on rough surfaces. Protective eyewear is necessary when using a chisel to shape stone edges. High-quality tools reduce physical strain and improve the speed of the build. Organize your workspace to keep these items accessible during the heavy lifting.
How To Make A Rock Garden Bed A Step By Step Approach
Preparing The Ground, Laying Weed Barriers, And Setting Your Foundation Stones
Clear all vegetation from the site before digging. Excavate the area to a depth of six inches to remove root systems. Compact the subsoil to prevent the garden from sinking over time. Lay a heavy duty non-woven geotextile fabric across the entire base. This barrier prevents soil mixing and stops weeds while allowing water to pass through. Secure the edges with landscape staples.
Position your largest stones first to create the structural base. Bury at least one third of each stone underground to mimic natural outcrops. Tilt the stones backward slightly so rain flows toward the roots of your plants. Use a crowbar to maneuver heavy rocks into place. Ensure every foundation stone is stable and does not wobble when stepped on. Group rocks in odd numbers for a natural look.
How To Layer Soil And Gravel For Drainage When Building A Rock Garden Bed
Apply a three inch layer of coarse drainage material over the weed barrier. Use crushed stone, pea gravel, or broken bricks to facilitate rapid water movement. Rock garden plants perish in standing water, so this transition layer is critical. Avoid using fine sand as it can clog the geotextile fabric. Ensure the drainage layer slopes away from nearby building foundations or paved surfaces to prevent water damage.
Add the growing medium on top of the drainage layer. Mix one part loam, one part grit, and one part leaf mold or compost. This specific ratio provides enough nutrients while ensuring the soil remains porous. Pack the soil firmly around the base of your rocks to eliminate air pockets. Leave space at the surface for a final mulching layer of gravel. This top dressing protects plant crowns from rot.
Rockery Garden Ideas To Inspire Your Outdoor Space
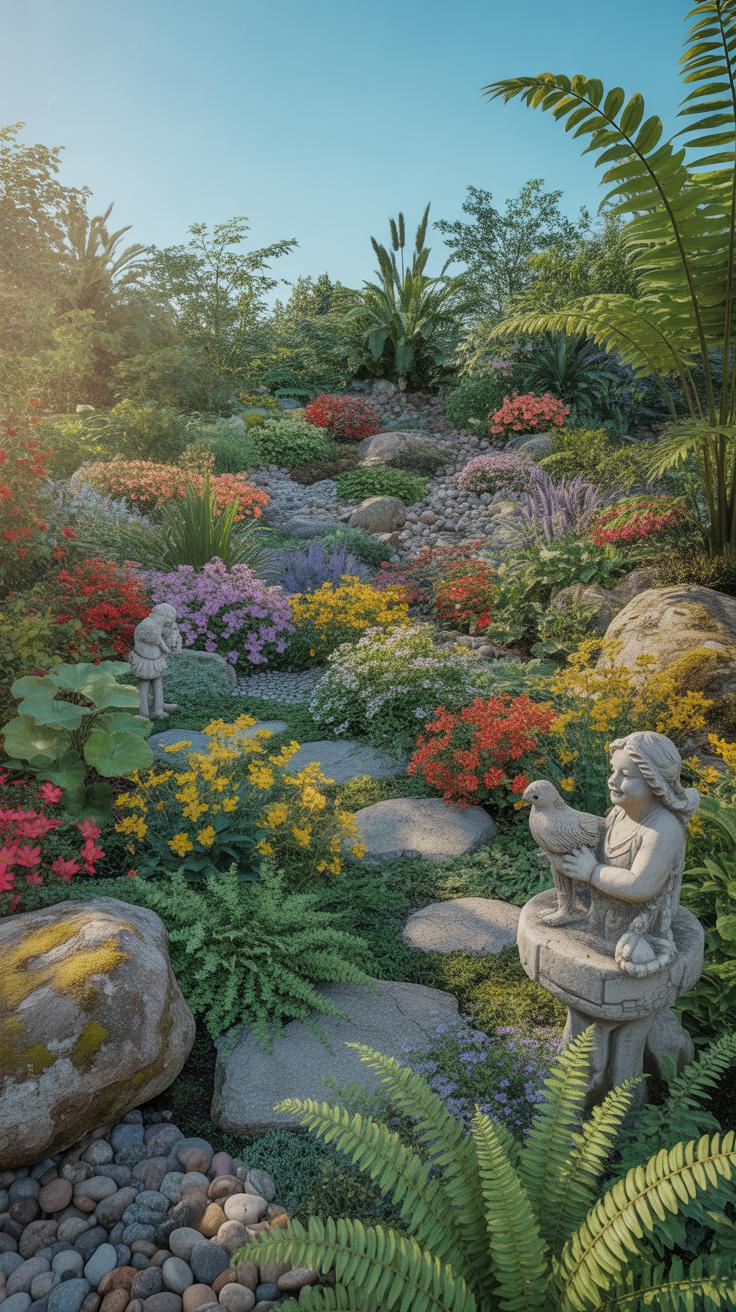
Creative Rockery Garden Ideas For Small Yards And Tight Spaces
Small yards require vertical thinking to maximize square footage. Build a crevice garden by stacking flat slate or limestone slabs vertically with narrow gaps. This technique mimics natural alpine cliff faces and saves ground space. Use gritty, fast-draining soil between the stones. These tight pockets create a stable microclimate for small plants. Vertical stacking provides depth without expanding the garden footprint.

Select miniature plant species to maintain proper scale in confined areas. Slow growing conifers and dwarf succulents prevent the rockery from becoming overgrown. Use uniform stone types to avoid visual clutter in small zones. Light colored rocks reflect sun and make tight spaces feel open. Proper drainage remains the top priority for health. Small rockeries function well in containers or as raised corner beds.
How To Use Rockery Features As Focal Points In Your Garden Design
Large boulders act as the primary anchor for garden layouts. Position a single massive rock to draw the eye immediately. This mirrors the Japanese Zen tradition where stones represent mountains or islands. Offset the boulder from the center to create a dynamic visual balance. Surround the base with smaller transition stones to ground the feature. Use heavy rocks that look weathered and natural.
Create contrast by pairing rugged stone textures with soft foliage. Use dark basalt or granite to make bright green plants pop. Strategic lighting also enhances these features after dark. Point low voltage uplights at the rock face to show off its texture. This turns a daytime garden element into a dramatic nighttime sculpture. Ensure at least one third of each rock sits below the ground level.
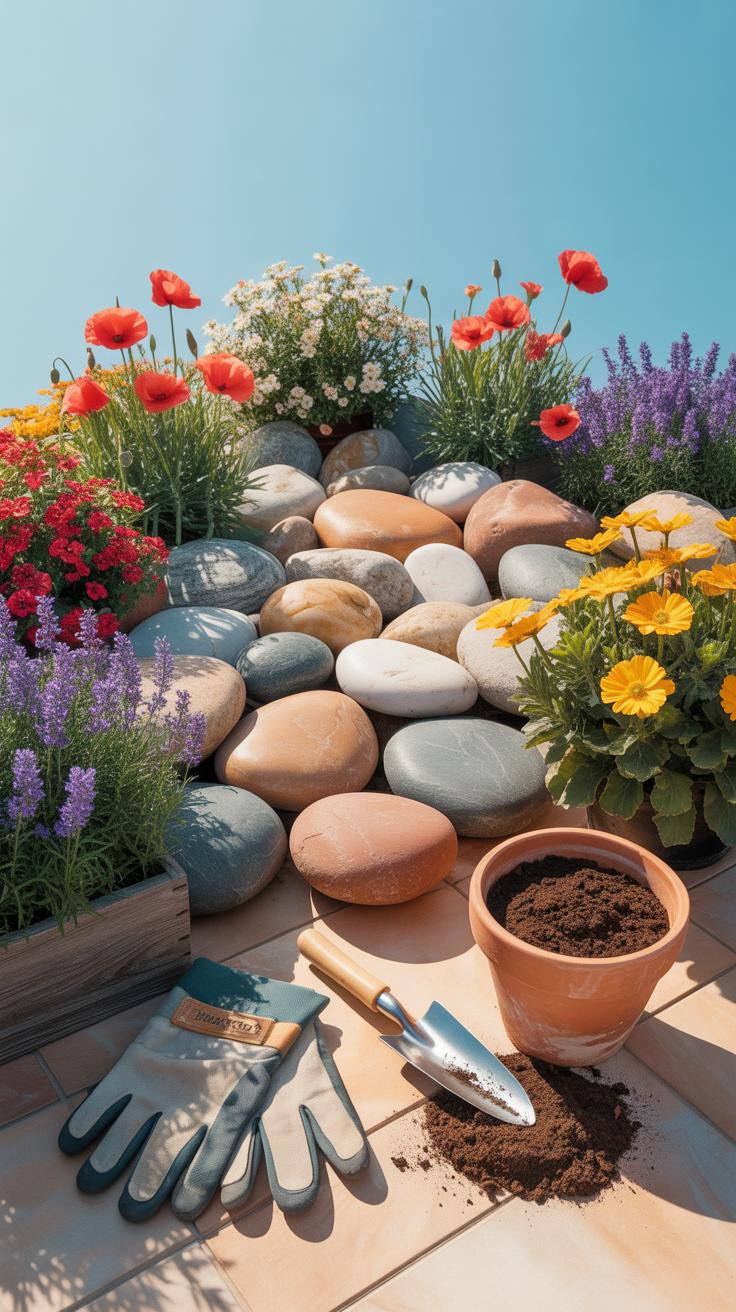
Rock Garden Ideas Plants That Thrive Among Stones

The Best Alpine And Drought Tolerant Plants For Rock Garden Ideas
Alpine plants thrive in lean soils with high mineral content. These species evolved to handle extreme wind and intense sun in high altitudes. They require excellent drainage to prevent crown rot during dormant winter months. Select dwarf varieties to maintain the scale of your rock garden. These plants naturally suppress weeds by forming dense mats over the soil surface.
- Saxifraga: These cushion-forming plants thrive in vertical crevices. They prefer northern exposures or light shade in hotter climates. Their roots grip small amounts of grit and moisture trapped between rocks. Use them to bridge gaps between large boulders effectively.
- Sedum: This genus offers extreme drought tolerance and thick succulent leaves. They store water to survive long dry spells. Stonecrop species spread quickly over rock surfaces without requiring deep soil pockets. They provide consistent ground cover and prevent soil erosion on steep slopes.
- Sempervivum: Commonly known as Hens and Chicks, these monocarpic perennials are indestructible. They grow in tight rosettes that fit perfectly into small stone pockets. They require almost no supplemental water once established. These plants mimic the rugged look of natural mountain outcrops.
- Aubrieta: This trailing perennial creates a carpet of color over stone faces. It is a classic choice for rock walls and steep inclines. It requires full sun and alkaline soil to perform best. Prune it hard after flowering to keep the growth habit compact and tidy.
- Phlox Subulata: This creeping variety forms a moss-like mat that handles foot traffic. It softens the hard edges of large stones. The plant prevents weed seeds from germinating by blocking sunlight from the soil. Use it as a living mulch to regulate soil temperature.

Drought-tolerant selections reduce long-term maintenance needs. Focus on perennials that favor poor soil over rich organic matter. Over-fertilizing these plants leads to weak growth and poor form. Group species with similar water requirements to ensure survival. Use gravel mulch around the base of each plant. This keeps foliage dry and mimics the natural alpine scree environment.
How To Position And Space Plants To Mimic A Natural Rocky Landscape
Natural rock formations feature plants growing in clusters rather than symmetrical rows. Study how wind and water deposit seeds in mountain crevices. Place your largest specimens near the base of boulders where moisture collects. Use small mosses or succulents in tight cracks on top of the rocks. This creates the illusion that the plants have inhabited the space for decades.
Vary the height and texture of your greenery to add depth. Avoid planting on every square inch of available soil. Negative space highlights the beauty of the stones. Leave some areas bare or covered only with gravel. Strategic spacing allows each plant to reach its natural spread without overcrowding. Focus on asymmetrical balance to achieve a professional and rugged aesthetic in your design.
Rock Gardens Landscaping Designing For Low Maintenance And Longevity
How To Design Rock Gardens Landscaping That Requires Minimal Upkeep Year Round

Low maintenance starts with proper site preparation and material selection. Strip all existing vegetation and roots before placing stones. Use a heavy-duty landscape fabric to prevent weed growth from the soil below. Select local stones that match the natural geology of your area. Large boulders provide structure without needing care. These heavy elements reduce the total plantable surface area and lower your long-term workload.
Choose slow-growing perennials and alpine species that thrive in poor soil. Use inorganic mulch like crushed gravel or river stone instead of wood chips. Stone mulch does not decompose or require annual replacement. It regulates soil temperature and keeps moisture near plant roots. Position plants in groups based on their water needs. This grouping ensures efficient hydration and prevents overwatering. A well-designed rock garden functions as a self-sustaining ecosystem.
Seasonal Care Tips To Keep Your Rock Garden Looking Its Best
Maintenance schedules focus on prevention and debris removal. Clear fallen leaves and organic matter every autumn to prevent soil buildup between rocks. Excessive organic material creates a medium for weed seeds to germinate. Check the stability of smaller stones after the ground thaws in spring. Soil shifts during freeze-thaw cycles can displace rocks and expose plant roots. Direct action during these windows prevents large-scale failures later.
Prune dead growth from alpines and succulents in early spring to encourage new health. Small hand tools work best for precision in tight crevices. Inspect drainage holes and gravel paths for blockages. Proper water runoff prevents root rot and keeps the rocks clean. Use a high-pressure hose to wash away sediment after heavy storms. Consistent monitoring ensures the garden retains its sharp aesthetic. Tactical care keeps the landscape looking intentional and professional.
Rock Garden Ideas Landscaping Blending Rocks With Water And Hardscape Features
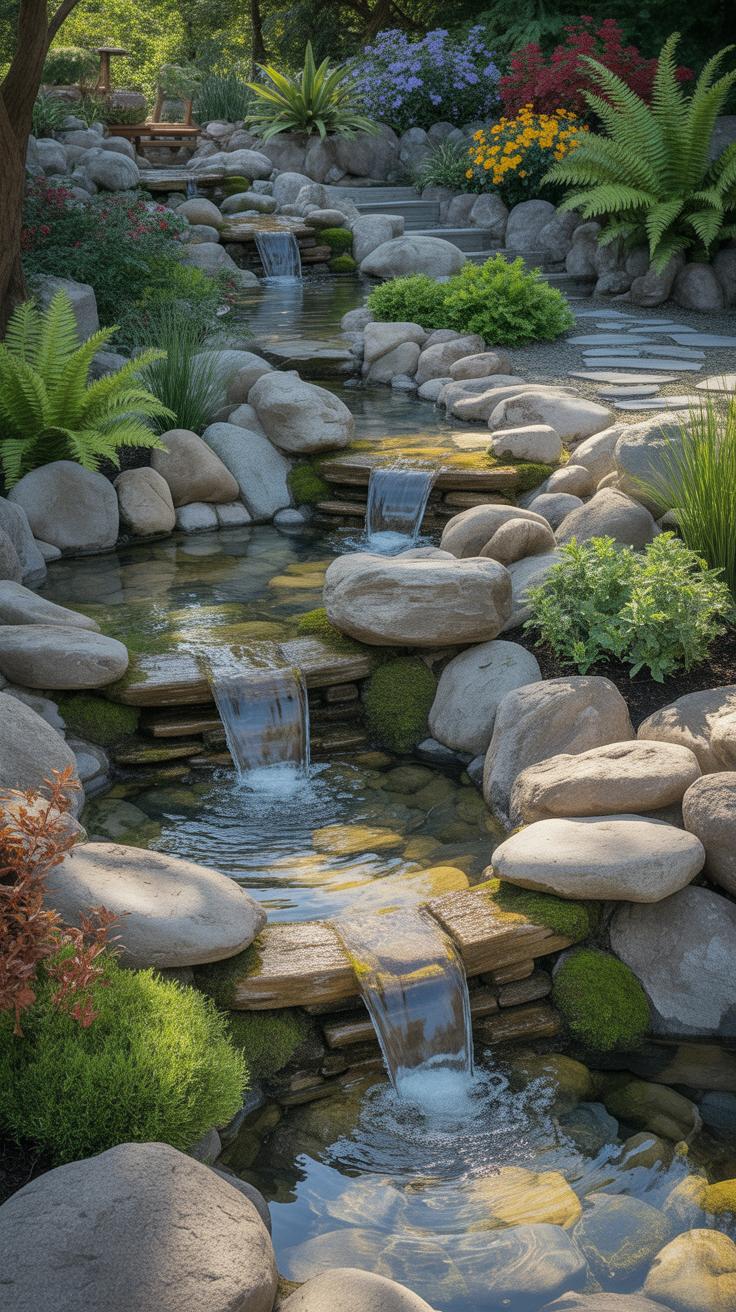
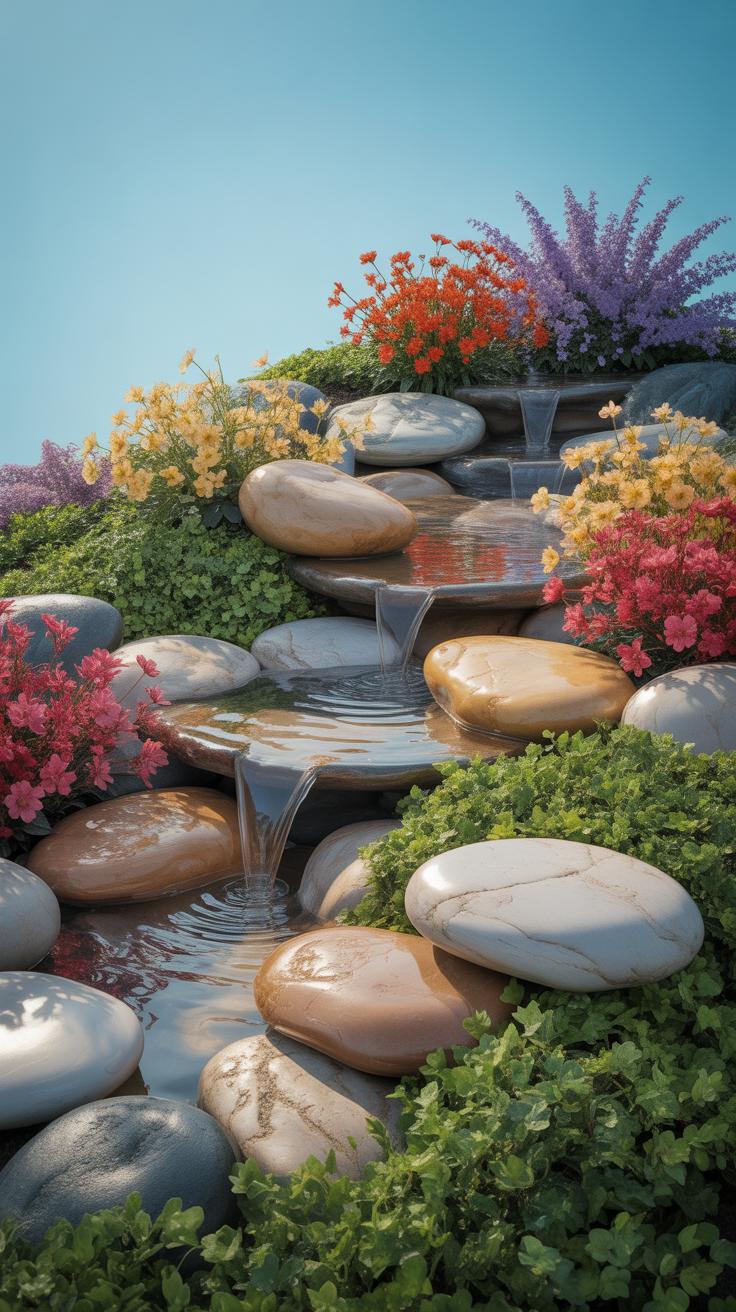
How To Incorporate Water Features Into Rock Garden Ideas Landscaping
Water features create essential dynamic movement within a static rock landscape. You must select a water style that matches your slope. Use a bubbling basalt column for flat ground to minimize splash and water loss. For steep inclines, install a cascading stream using flat ledge stones. Ensure you line the water path with heavy EPDM rubber to prevent leaks. Hide the edges with smaller river rocks for a natural look.
Sound control is a tactical priority when placing water. Position your waterfall near seating areas to mask street noise. Use granite or slate to provide a sharp shelf for the water to break against. This produces a louder and more distinct sound. Keep the pump accessible for easy maintenance during the winter months. Always balance the water volume with the pond size to avoid overflowing your rock garden during heavy rain.
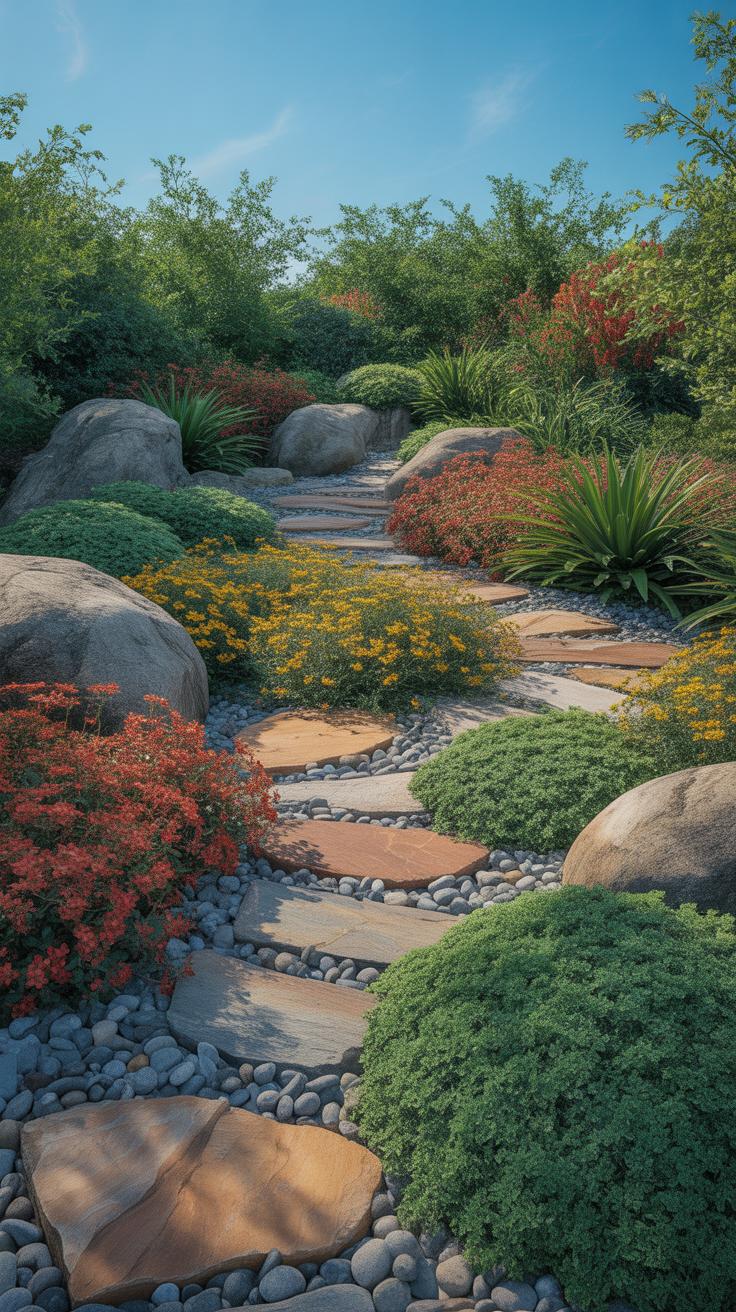
Using Pathways, Stepping Stones, And Retaining Walls To Enhance Your Rock Garden
Hardscape features provide physical structure and define the flow of movement. Use large flagstone slabs for primary paths to ensure stability underfoot. Bury at least one-third of each stone into the soil. This prevents shifting and mimics natural rock outcroppings found in alpine environments. Fill the gaps with pea gravel or low-growing groundcover. This keeps the soil cool and reduces the growth of unwanted weeds around your rocks.
Retaining walls solve elevation changes and prevent soil erosion on steep hills. Dry-stack stone walls allow for natural drainage without the need for mortar. Use local stone to create a cohesive look with the rest of your garden. Leave small gaps between the stones for resilient rock plants like sedum or thyme. These plants help anchor the wall over time. Solid hardscaping increases the longevity of your design and reduces long-term maintenance needs.
Common Rock Garden Design Mistakes And How To Avoid Them
Why Poor Drainage And Wrong Rock Placement Ruin Rock Garden Designs
Poor drainage kills alpine plants by rotting their roots. Most rock garden species evolved on slopes or scree fields where water moves quickly. Flat ground or heavy clay soils trap moisture around the crown. Designers must build raised mounds or use high-grit soil mixes to ensure survival. Without proper elevation and porous materials, your garden becomes a graveyard for expensive specimens during the first wet season.
Wrong rock placement destroys the visual logic of the space. Beginners often scatter small stones across the surface like polka dots. This looks unnatural and fails to provide cool root runs for plants. Professionals bury at least one third of each stone to mimic natural outcroppings. Align the grain of the rocks in the same direction. This creates a cohesive geological look that suggests the stones are part of a buried ledge.
How To Correct And Refresh An Existing Rock Garden That Has Lost Its Appeal
Refreshing a tired rock garden starts with aggressive weeding and thinning. Overgrown plants often hide the stone structure you worked hard to build. Remove invasive species and prune back woody perennials that have lost their shape. Focus on restoring the balance between hardscape and softscape. If the soil has settled too much, add a new layer of gravel mulch to suppress weeds and improve the clean aesthetic.
Analyze the rock positions if the garden still looks cluttered. You may need to reset large stones that have shifted or sunk too deep. Add supplemental grit or expanded shale to planting pockets to restore drainage. Replace dead or leggy plants with species that offer better year round texture. Strategic upgrades to the stone layout often fix design flaws without requiring a full site excavation. This tactical approach saves time and money.
Frequently Asked Questions

What are the best types of plants for a beginner rock garden?
When starting your first rock garden design, prioritize hardy, drought-tolerant perennials that thrive in well-draining soil. Succulents like hens-and-chicks, creeping thyme, and stonecrop are excellent choices because they tuck beautifully into crevices. These low-maintenance options provide vibrant texture and color without requiring constant watering, making them perfect for novices who want a professional look with minimal effort as they learn the basics of stony landscapes.
How do I properly layer rocks and soil for a stable garden?
To ensure a successful rock garden design, start by clearing the area and laying a landscape fabric to prevent weeds. Position your largest “anchor” boulders first, burying them about one-third deep to mimic a natural outcrop. Fill the gaps with a gritty soil mix consisting of topsoil, sand, and pea gravel. This layered approach ensures structural stability and excellent drainage, which is vital for keeping your alpine plants healthy and vibrant.
Can I create a beautiful rock garden on a limited budget?
Absolutely! You can achieve a stunning look without high costs by sourcing materials locally. Check construction sites or local farms for free fieldstones, or use inexpensive river rocks from home improvement stores. Focus on slow-growing plants that you can propagate yourself over time. By prioritizing a smaller focal point rather than a sprawling landscape, you can master an elegant aesthetic while keeping your initial investment very manageable and affordable.


