
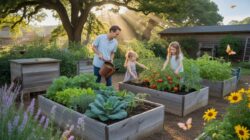
Starting Seeds Indoors Why ItS The Smartest Move For Home Gardeners
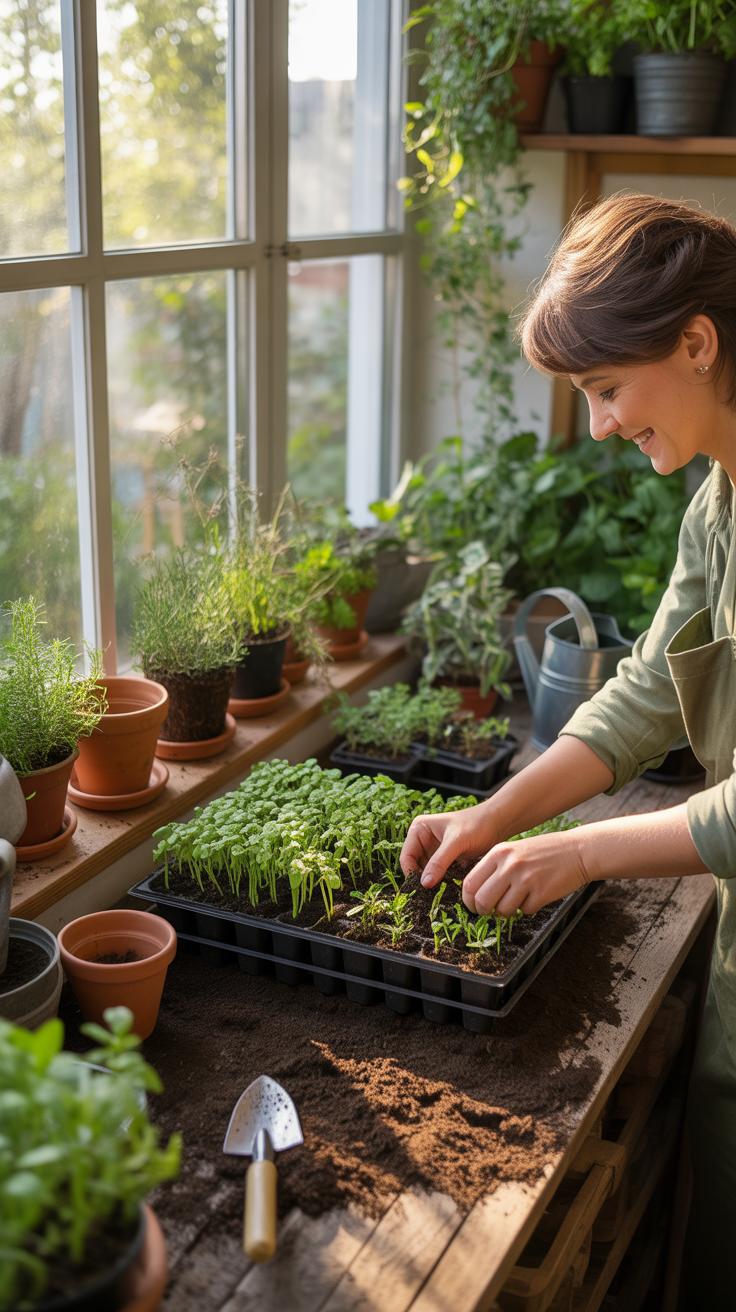
The Real Benefits Of Starting Seeds Indoors Before The Season Begins
Starting seeds indoors gives you total control over the environment. You manage the light, water, and temperature to ensure high germination rates. Most commercial nurseries sell a limited variety of plants. Starting your own seeds allows you to access thousands of heirloom and organic varieties. This method eliminates the risk of bringing soil-borne pests or diseases into your home from external greenhouses.
This strategy saves significant money over time. A single packet of seeds costs less than one plastic transplant at a retail store. You also gain better planning capabilities for your garden layout. By controlling the growth timeline, you ensure your plants are the correct size for the transition. Reliable indoor setups reduce crop failure and maximize the productivity of every square inch of your growing space.
How Indoor Seed Starting Gives You A Head Start On Warmer Growing Conditions
Indoor starting bypasses the constraints of local frost dates. You begin the growth cycle while the ground outside is still frozen or wet. This lead time is essential for crops with long maturation periods like peppers or tomatoes. These plants need a specific number of heat units to produce fruit. Starting early ensures they hit peak production before the first autumn frost hits.
A controlled indoor environment builds a robust root system before the plant faces outdoor stress. Seedlings grown inside develop thicker stems and better leaf structures under consistent light sources. When the weather warms up, these established plants take off immediately. They do not waste time recovering from transplant shock or fighting early spring weeds. This tactical advantage results in an earlier harvest and a higher total yield.

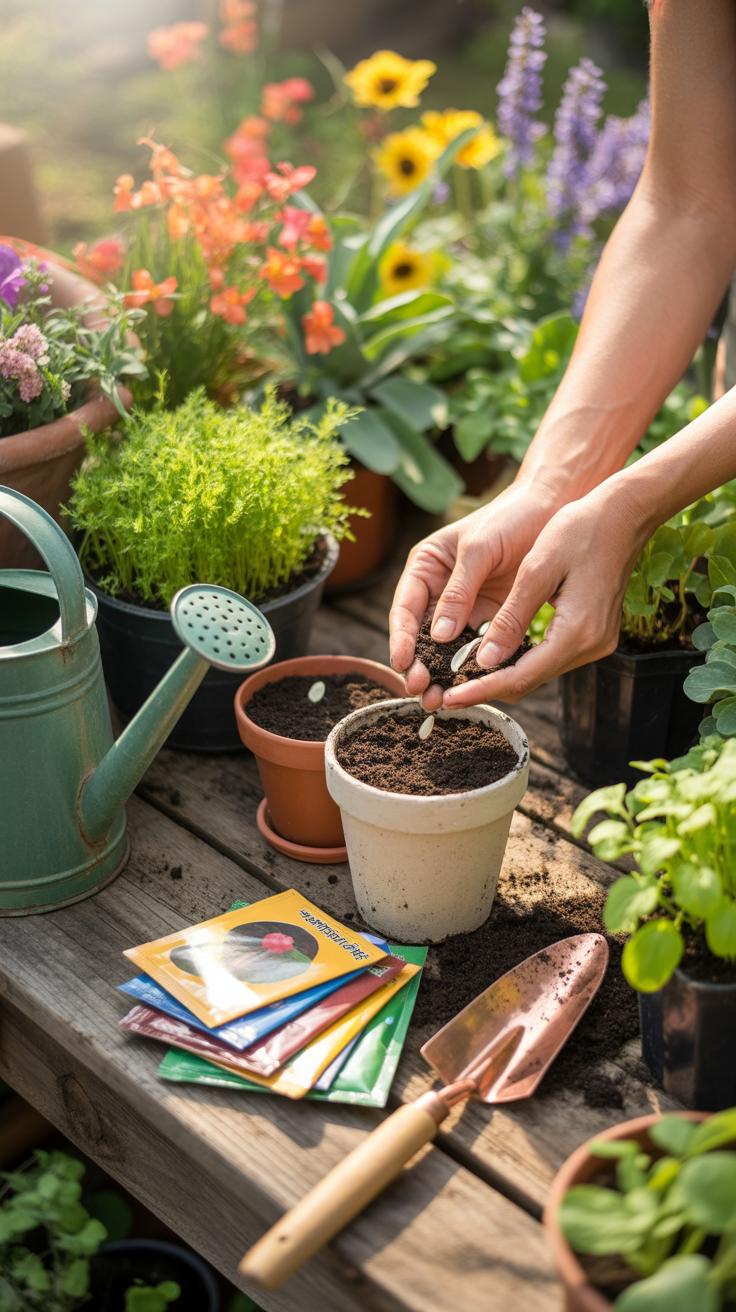
Seed Starting Essentials Choosing The Right Supplies For A Beautiful Setup
Must Have Seed Starting Supplies Every Home Gardener Should Own
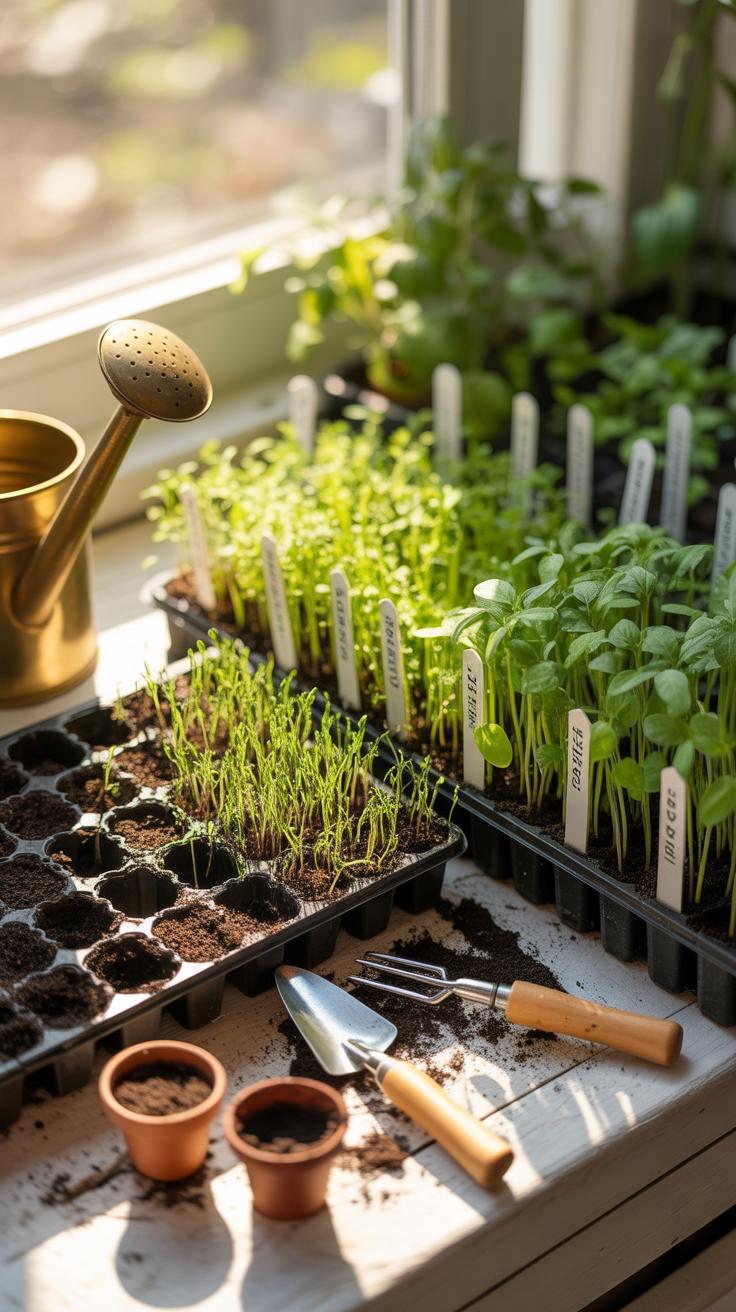
Success begins with a controlled environment. You need specific tools to manage moisture, light, and temperature. Low-quality materials lead to damping off or leggy stems. High-quality trays and domes provide the structural integrity required for consistent growth. Professionals use modular systems that allow for easy transplanting. These supplies ensure your seedlings survive the critical first three weeks of life.
- Seed Starting Trays: Use heavy-duty plastic or silicone trays with drainage holes. These containers hold the growing medium and prevent root rot. Durable materials resist cracking and allow for repeated use over many growing seasons.
- Humidity Domes: Clear plastic covers trap moisture and heat around the seeds. This creates a greenhouse effect necessary for rapid germination. Remove the dome once the first true leaves appear to prevent fungal issues through air circulation.
- Full Spectrum LED Lights: Standard room lighting is insufficient for plant growth. LED shop lights provide the specific blue and red wavelengths needed for photosynthesis. Keep lights three inches above seedlings to prevent weak and tall stems from forming.
- Heat Mats: Waterproof mats warm the soil from the bottom. Most seeds germinate faster when the soil temperature stays between seventy and eighty degrees Fahrenheit. This tool is vital for peppers and tomatoes which require consistent warmth to sprout.
- Oscillating Fans: Moving air strengthens the stems of young plants. Airflow mimics natural wind and reduces the risk of mold growth on the soil surface. Use a small fan on a low setting for a few hours each day to toughen growth.
Organization keeps your workspace functional. Use waterproof labels to track different plant varieties and planting dates. Proper shelving units maximize vertical space in a small home. Maintain a clean environment to stop pests before they start. Investing in the right gear reduces the labor required for daily maintenance. Quality supplies turn a messy hobby into a streamlined and successful production system.
How To Choose The Best Seed Starting Mix For Healthy Germination
Standard potting soil is too heavy for new seeds. It often contains wood chips and large particles that block small sprouts. Choose a specialized seed starting mix that is light and fluffy. These mixes usually contain peat moss or coconut coir mixed with perlite. This combination allows tiny roots to penetrate the medium without resistance. Good drainage is the most important factor for success.
A sterile medium prevents soil-borne diseases. Look for mixes that do not contain garden soil or compost to avoid pathogens. High-quality mixes hold enough water to stay damp but do not become soggy. Avoid products with heavy synthetic fertilizers for the germination phase. Large amounts of nutrients can burn delicate new roots. Focus on moisture retention and aeration to ensure your seeds have the best start possible.

Seed Starting Indoors Setting Up The Perfect Germination Environment
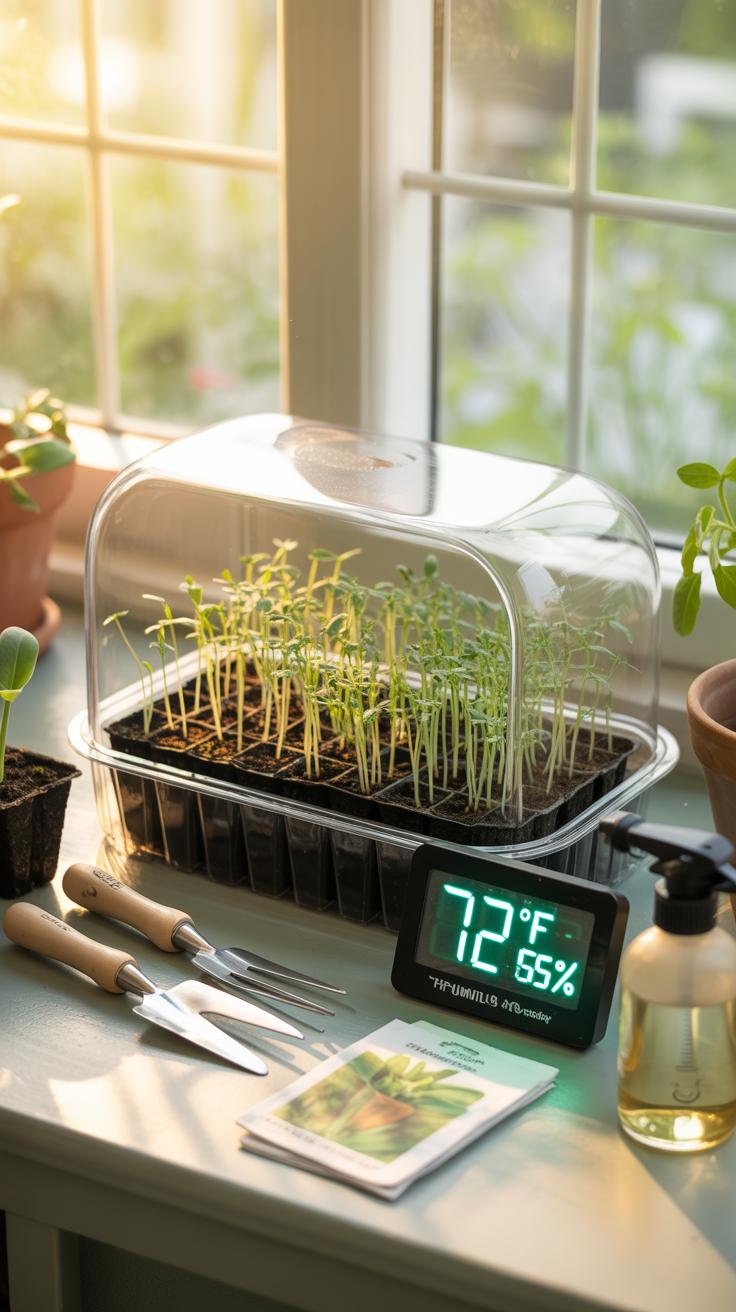
Understanding Temperature And Humidity Requirements For Seed Germination
Germination requires specific thermal conditions to trigger metabolic activity within the seed. Most vegetable and flower seeds thrive between 65 and 75 degrees Fahrenheit. Ambient room temperature often falls short because evaporation cools the soil surface. Use waterproof heat mats to maintain consistent soil warmth. This mimics the natural transition to spring. Consistency prevents seed rot and ensures uniform sprout timing.
Humidity control is equally vital for success. High moisture levels soften the seed coat to allow the embryo to emerge. Use clear plastic domes or silicone covers to trap water vapor. This creates a miniature greenhouse effect. Remove these covers immediately once sprouts appear to prevent fungal diseases like damping off. Proper airflow must follow high humidity to strengthen the developing root systems and stems.
How To Use Grow Lights And Natural Light To Support Early Seedling Growth
Natural light from windows usually fails to provide enough intensity for young plants. Seedlings reach for distant light and become weak or leggy. This structural failure ruins the plant before transplanting. Use full-spectrum LED or fluorescent grow lights to provide concentrated energy. Position these lights only two to three inches above the leaf canopy. Adjust the height as the plants grow to maintain this close distance.
Timing matters as much as intensity for healthy growth. Seedlings need roughly 14 to 16 hours of light daily to thrive indoors. Use a simple plug-in timer to automate this cycle. Total darkness for at least eight hours allows the plant to rest and process nutrients. This schedule prevents stress and mimics a perfect summer day. High-quality light produces stocky stems and deep green leaves ready for the outdoors.
Starting A Garden From Seeds Planning Your Indoor Garden With Style
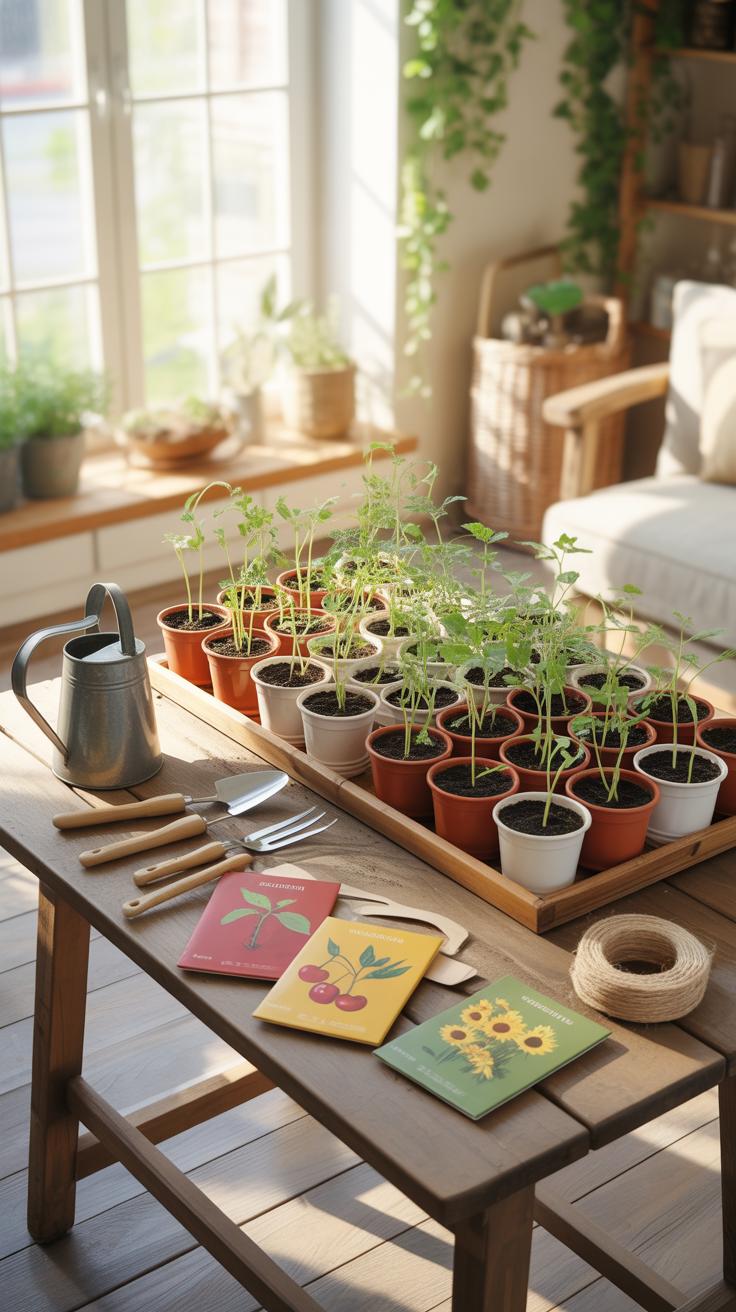
How To Create An Aesthetically Pleasing Seed Starting Station In Any Room
Standard seed trays often look cheap and messy. Replace plastic with terracotta or ceramic vessels to match your home decor. Use modular shelving units made of steel or wood to organize your space. Position your station near a south facing window to utilize natural light. Add full spectrum LED grow lights to ensure healthy growth. Clean lines and durable materials keep the setup professional.
Hidden utility is the key to a stylish indoor garden. Use a vintage sideboard or a baker’s rack to host your trays. These pieces provide flat surfaces and storage for supplies. Cover soil bags in canvas bins to hide visual clutter. Use uniform labels made of slate or copper for a cohesive look. A well organized station functions as a design feature rather than a chore.
Mapping Out Your Planting Schedule Before You Sow A Single Seed
Timing determines the success of your garden. Check your local frost dates to establish a baseline. Most vegetables require six to eight weeks of indoor growth before transplanting. Calculate your start dates by working backward from the last frost. This prevents plants from becoming root bound in small starters. Accurate timing ensures your seedlings remain strong and healthy for the outdoor transition.
Use a simple calendar to track your progress. Log the germination time for each specific seed variety. Some seeds sprout in three days while others take two weeks. Monitor soil temperature with a probe to maintain consistency. Steady heat speeds up the process and reduces the risk of rot. Stick to your schedule to manage your indoor space efficiently. Proper planning eliminates the chaos of staggered growth.
Vegetable Seed Starting Top Varieties That Thrive From Indoor Sowing
Best Vegetables To Start From Seed Indoors For A Productive Home Garden
Focus on crops with long growing seasons or those that require high heat to germinate. Tomatoes and peppers remain the standard for indoor sowing because they need several months of warmth to produce fruit. Starting these seeds inside gives plants an essential head start before the final frost. This method ensures your harvest begins weeks earlier than crops sown directly in the ground.
Select brassicas like broccoli and kale for early spring production. These cool-season crops benefit from established root systems before the summer heat arrives. Onions also require an early indoor start due to their slow growth rate from seed. Avoid starting root vegetables like carrots as they do not transplant well. Stick to varieties that tolerate root disturbance to maintain high productivity in your home garden.
Understanding Seed Packet Labels So You Sow At Exactly The Right Time
Read the back of every seed packet to locate the specific sowing window. Most labels calculate timing based on the average last frost date in your region. You must count backward from this date to determine your start week. Sowing too early leads to leggy plants that struggle to survive. Sowing too late wastes precious weeks of the natural outdoor growing season.
Pay close attention to germination temperatures and light requirements listed on the label. Some seeds need constant heat from a mat to sprout effectively. Others require specific light exposure or a period of cold to break dormancy. Follow these instructions to the letter to ensure a high success rate. Ignoring these technical details often leads to poor germination and wasted materials in your indoor setup.
How To Grow From Seeds A Step By Step Approach For Confident Beginners
Sowing, Watering, And Covering Seeds For The Best Possible Germination Rates
Place seeds at a depth equal to twice their width. Press the soil down firmly to ensure contact with the seed coat. Use a fine mist to hydrate the medium without washing away the seeds. Proper moisture triggers the metabolic process known as imbibition. Keep the soil damp but not soaked. Excess water replaces oxygen and causes the seeds to rot.
Maintain a consistent temperature between sixty-five and seventy-five degrees Fahrenheit. Use a heat mat to provide bottom heat if the room is cold. Cover the seed tray with a clear plastic dome to trap humidity. Remove this cover immediately when the first green shoots emerge. Light is not required for most seeds to sprout but is vital for the growth stage that follows.
To plant a garden is to believe in tomorrow, especially when those first green shoots bring a touch of living grace to your windowsill.
— Audrey Hepburn
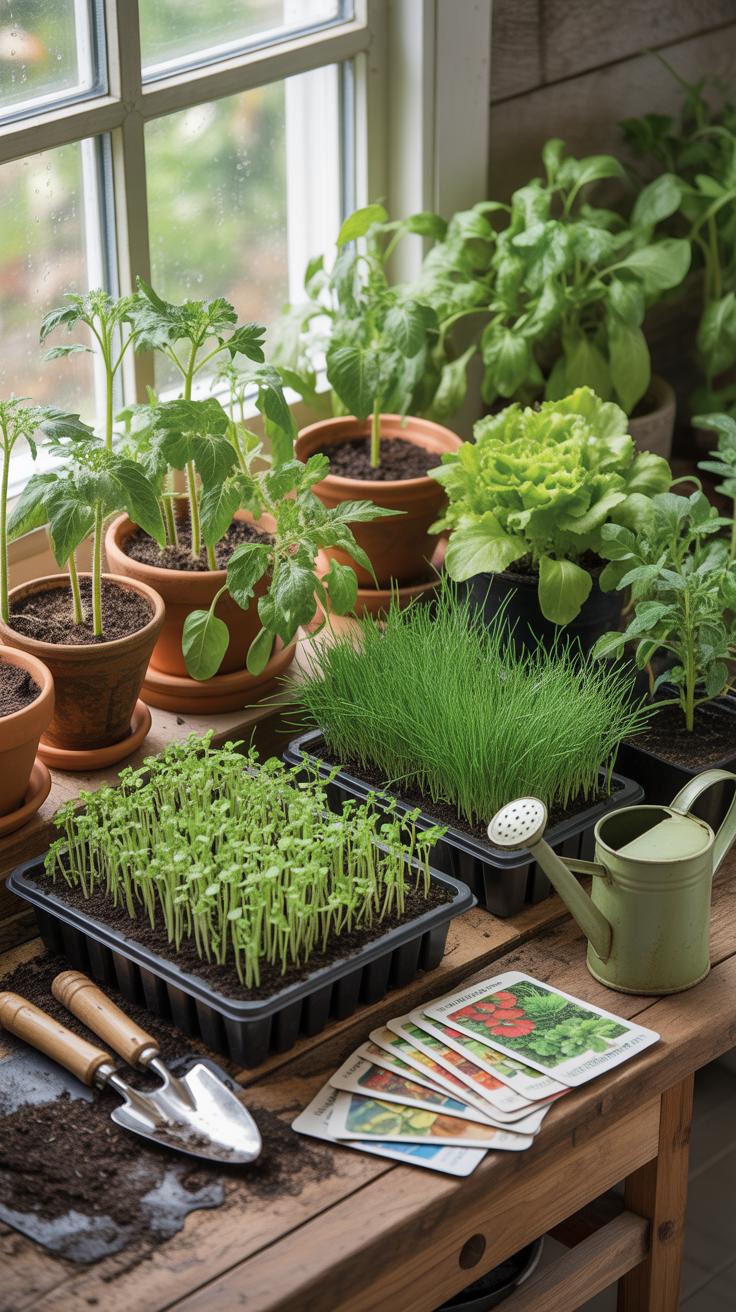
What To Do After Germination: Thinning Seedlings And Managing Early Growth
Move seedlings under a bright light source for fourteen to sixteen hours daily. Position the light two inches above the leaves to prevent stretching. Maintain good airflow with a small fan to strengthen the stems and prevent fungal diseases. Monitor the first set of true leaves as they develop. These leaves perform photosynthesis and signal that the plant needs more space to grow.
- Thinning: Select the strongest plant in each cell and remove the others using sharp scissors. Snip the smaller plants at the soil line to avoid damaging the roots of the keeper. You must do this to prevent overcrowding and competition for vital nutrients.
- Light Height Adjustment: Raise your grow lights as the plants get taller to maintain a two-inch gap. Keeping lights too far away creates weak and leggy stems. Strong plants need intense, close light to build thick stalks and healthy foliage throughout the early growth stage.
- Air Circulation: Run a small fan on a low setting near your seedlings for several hours each day. This physical stress mimics outdoor wind and forces the plant to create a sturdier cellular structure. Moving air also clears away excess moisture that leads to damping off.
- Bottom Watering: Place the seed tray in a shallow basin of water for ten minutes instead of pouring water from above. This allows the soil to wick up moisture through the drainage holes. It keeps the foliage dry and prevents the growth of mold or moss.
- Fertilization: Apply a half-strength liquid fertilizer once the second set of true leaves appears. Young plants have limited nutrient reserves in their initial seed casing. Adding a balanced water-soluble feed provides the nitrogen and phosphorus necessary for rapid root and leaf development during this phase.
Prepare the surviving plants for the transition to larger containers or the outdoors. Monitor the roots to ensure they do not become pot-bound. If roots circle the bottom of the tray, transplant them immediately. Use a high-quality potting mix for the next stage. Keep temperatures stable as the plants gain mass and prepare for the hardening off process in later weeks.
Seed Starting Ideas Creative And Stylish Containers You Can Use At Home
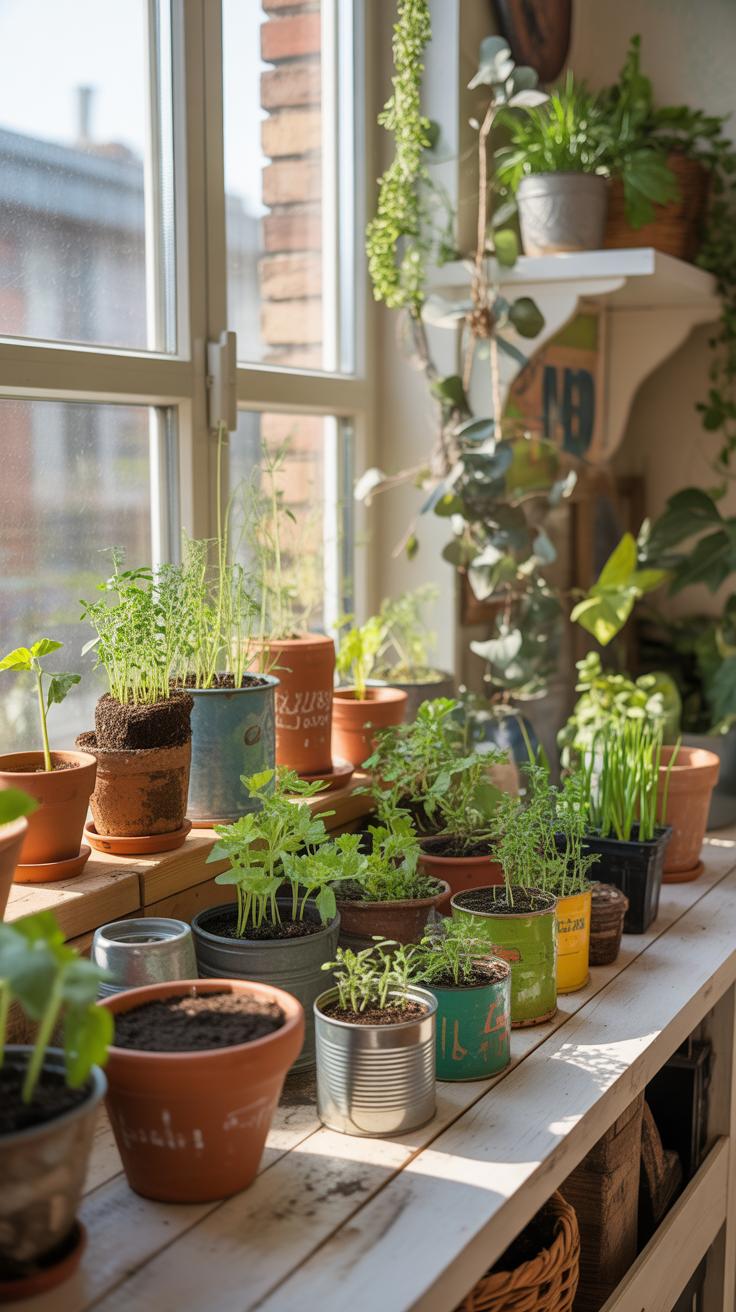
Upcycled And Decorative Containers That Double As Beautiful Home Accents

Repurpose vintage ceramic vessels or mid-century stoneware to maintain a high-end aesthetic. These containers offer superior thermal mass compared to thin plastic. Excess moisture is the primary risk when using non-traditional pots. You must drill drainage holes in the bottom using a masonry bit. This prevents root rot and fungal growth. Proper drainage ensures oxygen reaches the roots during the germination phase.
Select heavy glass jars or enamelware for a clean look on window sills. Transparent glass allows you to monitor root development and moisture levels directly. Use a layer of horticultural charcoal at the base if the vessel lacks drainage holes. This absorbs impurities and prevents stagnant water from souring the soil. Group these containers together to create a humid microclimate. This strategy improves growth rates in dry indoor air.
DIY Seed Starting Trays And Biodegradable Pots That Are Eco Friendly And Chic
Construct your own seed starting pots using compressed newspaper or raw pine wood. These materials align with minimalist design principles and reduce plastic waste. Paper pots allow for air pruning of the roots. This process creates a stronger root structure by preventing circling. Wood trays provide structural integrity and a natural texture. They fit well in rustic or Scandinavian interior styles.
Utilize natural fibers like coir or peat for a cohesive look. These biodegradable materials allow for direct transplanting into the garden. This method eliminates transplant shock. Seedlings remain undisturbed during the move. Ensure you keep these pots evenly moist to prevent them from wicking water away from the soil. Use 100 percent natural wool felt as a tray liner. This adds insulation and manages water distribution effectively.
Growing Seeds Strong Watering Feeding And Caring For Seedlings The Right Way
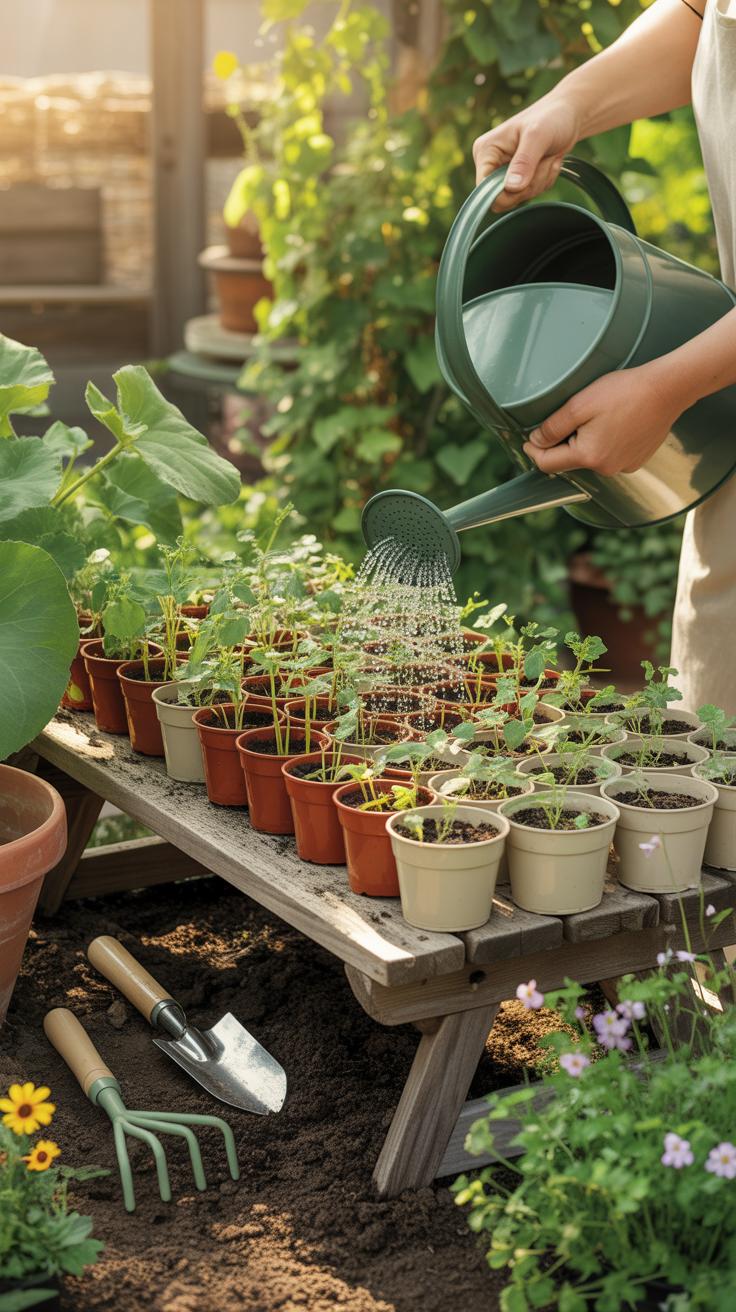
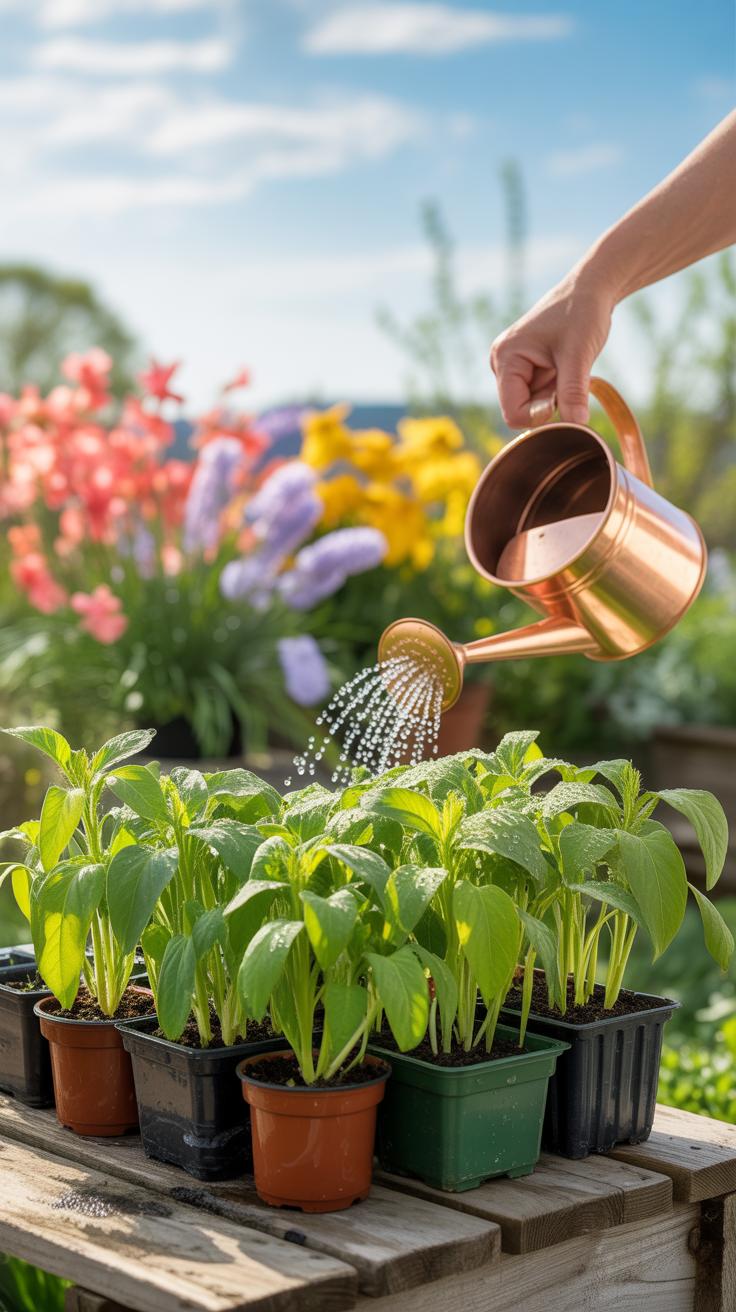
How To Water Seedlings Properly Without Overwatering Or Causing Root Rot
Surface watering creates a high risk for fungal pathogens and damping off. Instead of pouring water from above, use bottom-watering. Place your seed trays in a larger basin of shallow water. The capillary action of the soil pulls moisture up to the roots where it belongs. This method keeps the delicate foliage dry and prevents the soil from compacting under the weight of falling drops.
Check soil moisture levels daily by touching the surface. Only water when the top layer feels slightly dry. Overwatering saturates air pockets in the compost and suffocates roots. If you see algae or mold on the surface, you are watering too often. Maintain consistent moisture levels rather than cycling between bone dry and soaking wet. This consistency builds a stable environment for young root systems.
When And How To Fertilize Young Seedlings For Steady, Healthy Development
Seeds contain enough stored energy to support initial growth until the first set of true leaves appears. Do not apply fertilizer to germinating seeds or brand new sprouts. The salts in fertilizers can burn tender roots and stunt growth. Wait until the plant has at least two sets of true leaves. These leaves indicate that the seedling has exhausted its internal fuel and needs external nutrients.
Use a liquid organic fertilizer diluted to half or quarter strength for the first few applications. High nitrogen levels encourage green leafy growth, but too much phosphorus can be detrimental early on. Feed seedlings once every two weeks. If the leaves turn pale yellow, the plant likely needs nitrogen. Avoid synthetic pellets that release nutrients too quickly. Slow, steady feeding produces stocky plants that survive the transition to the garden.
Grow Strong Seedlings Hardening Off And Transitioning Plants Outdoors
What Hardening Off Means And Why It Is Critical For Seedling Survival
Hardening off is the process of acclimating indoor seedlings to outdoor conditions. Indoor environments lack wind and have stable temperatures. Outdoor environments feature direct sunlight and fluctuating weather. Without this transition, seedlings experience transplant shock. Their leaf cuticles are too thin to handle UV rays. Their stems are too weak to survive gusts. This step ensures survival after you move plants outside.
This process thickens the plant cell walls. It builds up a protective waxy layer on the leaves. You are essentially training the plant to regulate moisture loss. Sudden exposure to the sun will scorch delicate tissue. Strong winds can snap brittle stems grown under grow lights. Tactical hardening off prevents total crop loss. It bridges the gap between a controlled environment and the harsh reality of nature.
A Practical Two Week Hardening Off Timeline To Prepare Seedlings For The Garden
Start the process on a calm day with mild temperatures. Place your seedlings in a shaded, sheltered spot for one hour. Bring them back inside immediately after the time limit expires. Increase the outdoor duration by one hour each day. Move them into dappled sunlight by day four. Monitor for wilting or leaf spots. Keep the soil moist as the outdoor air dries plants faster.
By the second week, your plants should stay outside for several hours. Gradually expose them to full sun for the entire afternoon. Leave them out overnight only after the risk of frost passes. Ensure night temperatures remain above fifty degrees for warm weather crops. If the weather turns severe, retract the plants to the indoors. This structured routine builds physical resilience. It prepares the seedlings for permanent placement in your soil.
Frequently Asked Questions

What are the most essential seed starting tips for a beginner?
The most important strategy for beginners is to prioritize light and temperature. Even the most stylish indoor garden will fail without 12 to 16 hours of bright light daily. Use a heat mat to encourage germination and ensure you use a sterile, soil-less seed starting mix rather than garden soil. These fundamental seed starting tips will help prevent common issues like “damping off” and ensure your seedlings grow strong and healthy.
How can I start seeds indoors without making a mess in my living space?
To keep your home looking pristine, set up a dedicated potting station using a silicone mat or a decorative deep tray to catch excess soil. Use a small watering can with a narrow spout to prevent splashes. Incorporating these practical seed starting tips allows you to enjoy the gardening process while maintaining a clean, curated aesthetic. Choosing uniform, high-quality ceramic or glass vessels can also turn your nursery into a beautiful focal point.
Is it possible to start seeds on a budget using everyday household items?
Absolutely! You can create an eco-friendly and affordable garden by upcycling items like egg cartons, yogurt cups, or even hollowed-out citrus peels as natural planters. Just ensure you poke drainage holes in the bottom of any recycled container. By following these accessible indoor gardening methods, you can grow a lush variety of plants without investing in expensive kits. Creative DIY solutions prove that beautiful home gardening is accessible to everyone regardless of their budget.


