
What Makes DIY Concrete Planters So Popular Among Home Gardeners
The Durability And Natural Appeal Of Concrete As A Planting Material
Concrete provides unmatched structural integrity for outdoor gardening. It consists of cement, water, and aggregates like sand or stone. This mixture creates a heavy stone-like material that resists high winds and heavy rain. Unlike lighter materials, concrete does not tip over easily. It protects roots from temperature swings due to its high thermal mass. This quality keeps soil cooler in summer and warmer in winter.
The aesthetic of concrete fits the Brutalist and Modernist design traditions. It offers a neutral gray tone that makes green foliage and bright flowers stand out. Its raw texture develops a unique patina over time. Many gardeners value how it grows moss or weathers naturally in the elements. This material bridges the gap between industrial construction and organic growth. It serves as a permanent architectural element in any landscape.
How Concrete Planters Compare To Plastic Terracotta And Wood Alternatives
Concrete outperforms plastic in longevity and environmental impact. Plastic degrades under ultraviolet light and cracks after a few seasons. It also offers zero insulation for plant roots. Terracotta is breathable but fragile in freezing temperatures. Water inside the clay pores expands when frozen, causing the walls to shatter. Concrete handles these freeze-thaw cycles much better than traditional clay. It remains a superior choice for permanent outdoor installations.
Wood planters rot quickly when they touch wet soil. Even treated lumber eventually decays or leaches chemicals into the ground. Concrete is chemically inert once fully cured and will not rot. It weighs more than wood or plastic, which prevents theft and wind damage. While wood requires frequent staining or sealing, concrete requires almost zero maintenance. It provides a stable home for plants that will last for decades without needing replacement.

Essential Materials You Need To Get Started With DIY Cement Projects
Choosing The Right Concrete Mix For Small Scale Planter Projects
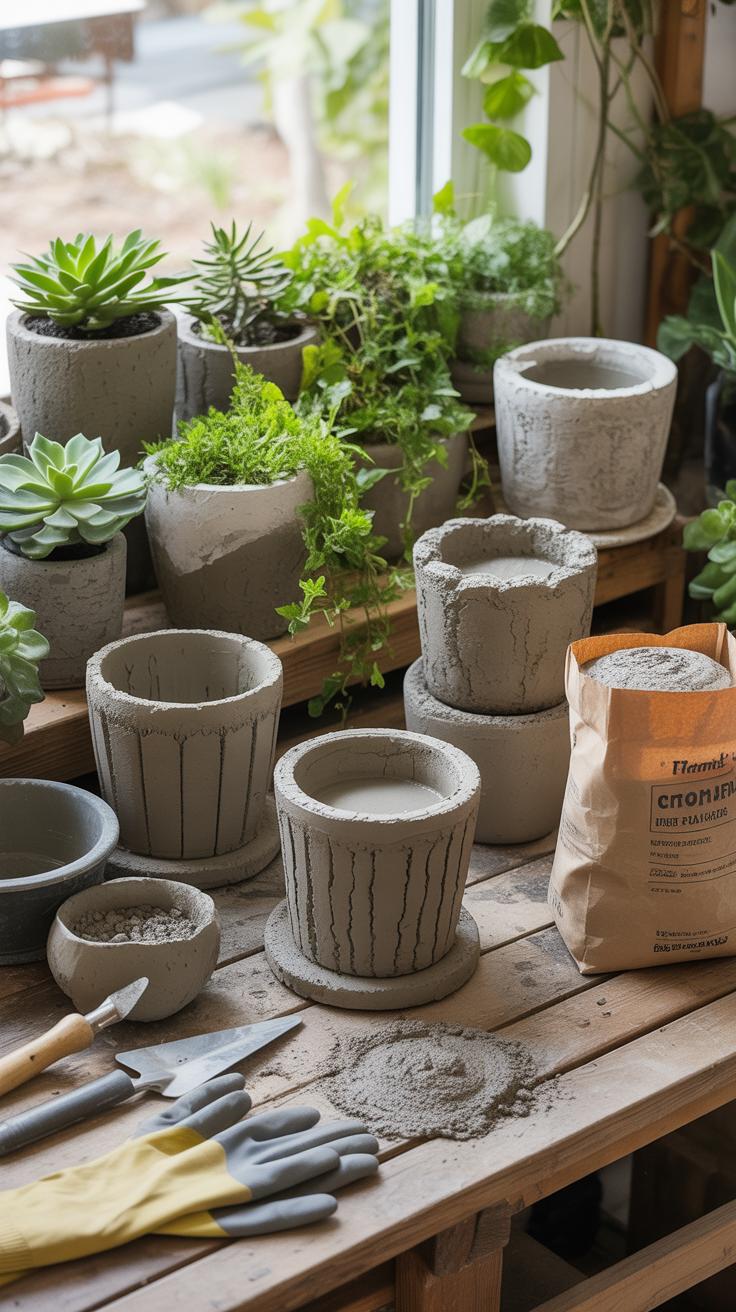
Standard concrete contains large stone aggregates that ruin the finish on small planters. You must choose a high-strength sand mix or a specialized countertop mix for these projects. These mixes omit large rocks to ensure a smooth surface and sharp edges. Quikrete and Sakrete offer specific commercial bags labeled as glass fiber reinforced concrete or sand mix that work best for thin walls.
The water-to-cement ratio determines the ultimate strength of your planter. Adding too much water makes the concrete easy to pour but increases the risk of cracking as it dries. Use a stiff consistency similar to peanut butter for hand-packed molds. For poured molds, use a flowable consistency but avoid a watery soup. Proper mixing ensures your planter survives freeze and thaw cycles outdoors.
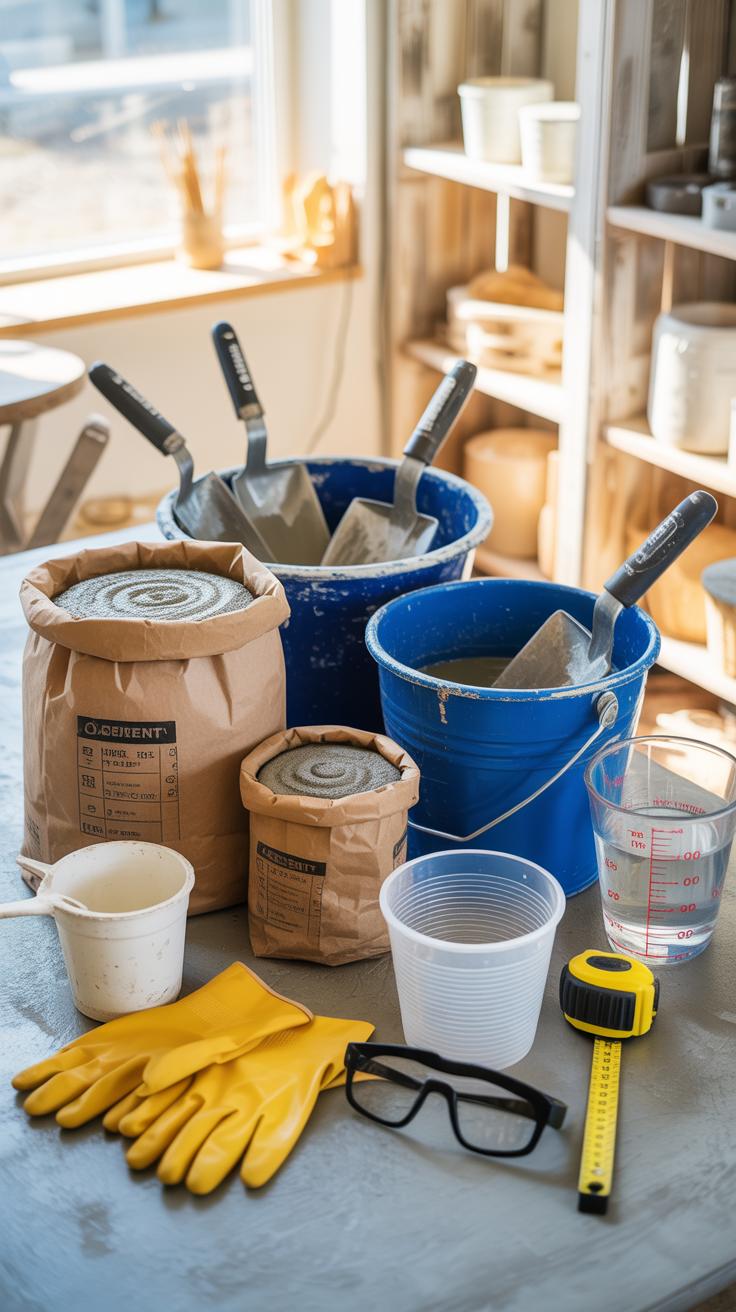
Must Have Tools And Supplies Before You Begin Your Cement Crafts
Preparation prevents project failure when working with fast-setting cement materials. You need a dedicated mixing vessel like a five-gallon bucket or a heavy-duty plastic tub. Using power drills with mixing paddles saves time and ensures a homogenous blend without dry pockets. Always wear alkaline-resistant gloves and a dust mask to protect your skin and lungs from caustic portland cement.
- Molds and Forms: Use non-porous materials like plastic containers, melamine-coated wood, or silicone. These surfaces allow the concrete to release cleanly after it cures for twenty-four to forty-eight hours.
- Release Agents: Commercial release sprays or simple vegetable oil prevent the wet concrete from bonding to your molds. Apply a thin, even coat to every surface that touches the wet mix.
- Vibration Table: A vibrating plate or a palm sander held against the mold removes trapped air bubbles. Eliminating these voids ensures a dense structure and a professional, pit-free surface finish.
- Reinforcement Mesh: Small planters benefit from galvanized hardware cloth or alkali-resistant glass fibers mixed into the wet cement. This reinforcement prevents structural failure and holds the piece together if it drops.
- Abrasives: Diamond sanding pads or eighty-grit sandpaper help smooth rough edges after demolding. Sanding the bottom ensures the planter sits level on flat surfaces and removes any sharp flashing from the pour.

Organize your workspace before adding water to the dry mix. Cement begins its chemical hydration process immediately and gives you a short working window. Keep a clean water source and measuring containers nearby to maintain consistency between batches. Set your molds on a level surface to prevent lopsided results. Proper organization allows you to focus on removing air bubbles before the mix sets.
Beginner Friendly Concrete DIY Planter Shapes And Mold Ideas
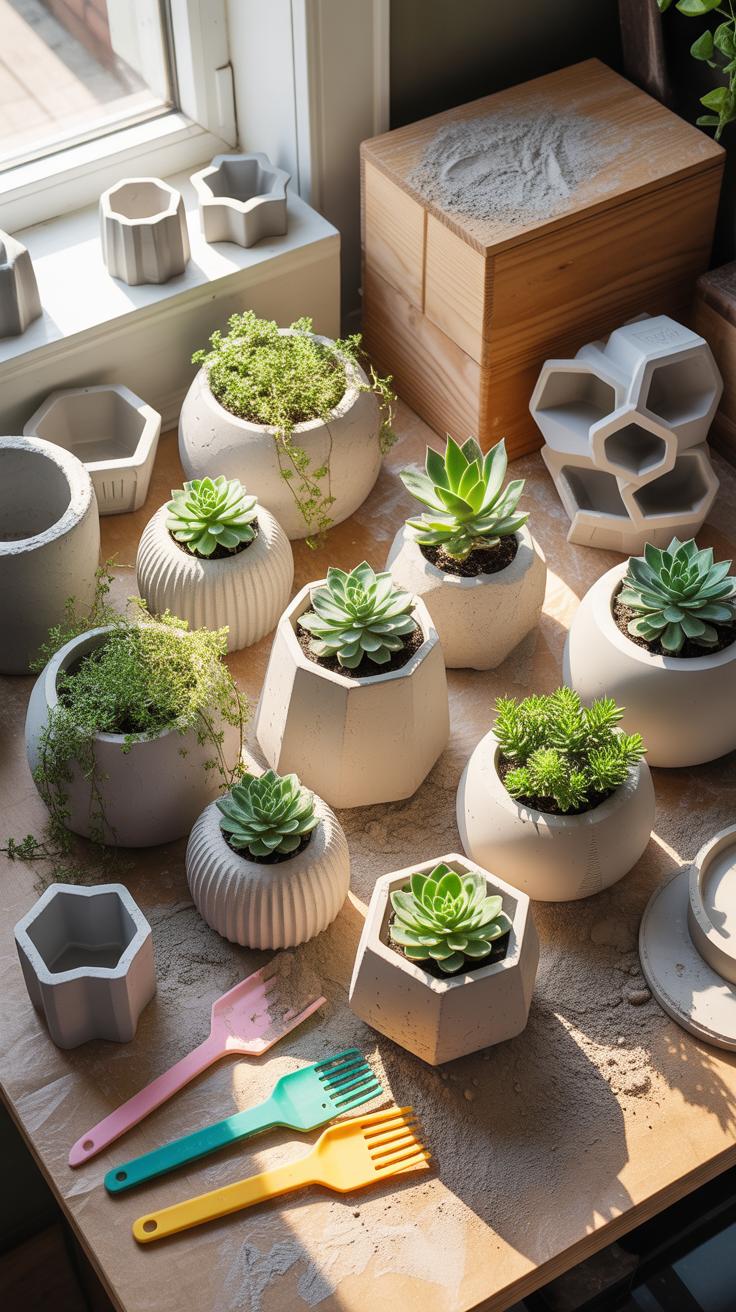
Using Everyday Household Items As Molds For Simple Concrete Shapes
Repurpose standard plastic containers to create industrial geometry. Yogurt cups, juice cartons, and food storage bins serve as ideal exterior molds due to their smooth inner surfaces. These nonporous materials prevent the wet concrete mixture from sticking during the hydration process. Select heavy-duty plastics that maintain their structural integrity under the weight of wet cement. Thin materials often bow and ruin the intended lines.
Create the planting cavity by nesting a smaller container inside the larger one. Use a secondary vessel like a plastic cup or a PVC pipe segment for this internal void. Secure the inner mold with weights or duct tape to prevent it from floating as the density of the concrete pushes upward. Proper spacing between the two walls ensures structural stability. Aim for at least one inch of thickness.
How To Properly Release And Finish Your Concrete Planter After Curing

Apply a thin layer of release agent to all mold surfaces before pouring. Use cooking spray or mineral oil to create a barrier between the plastic and the concrete. This step ensures clean removal once the material cures. Wait at least twenty-four to forty-eight hours before attempting to de-mold. Rushing this process leads to structural cracks or crumbled edges because the bond is still weak.
Remove the inner mold first to allow air circulation. Gently tap the exterior walls with a rubber mallet to break the suction. Once the planter is free, use sixty-grit sandpaper to remove rough flashing and refine the edges. Dip the sandpaper in water to keep dust down and achieve a smoother finish. Rinse the planter thoroughly to remove any residual oils before adding soil and plants.
Creative DIY Cement Planters You Can Make For Indoor Spaces
Miniature Concrete Bowl Planters Perfect For Succulents And Cacti
Miniature concrete bowls provide the ideal drainage and thermal mass for desert plants. To make these, use plastic kitchen bowls as primary molds and smaller cups as inner inserts. Apply a thin layer of vegetable oil to ensure a clean release. Use a fine-grit sand mix to achieve a smooth finish. This prevents the coarse texture from distracting the eye from your small plants.

Cacti and succulents thrive in these vessels due to the porous nature of cured concrete. The material draws excess moisture away from the root systems to prevent rot. Ensure the walls are at least half an inch thick to maintain structural integrity. Lightly sand the rim after twenty-four hours to remove sharp edges. These small pots fit easily on bookshelves or windowsills without taking up much space.
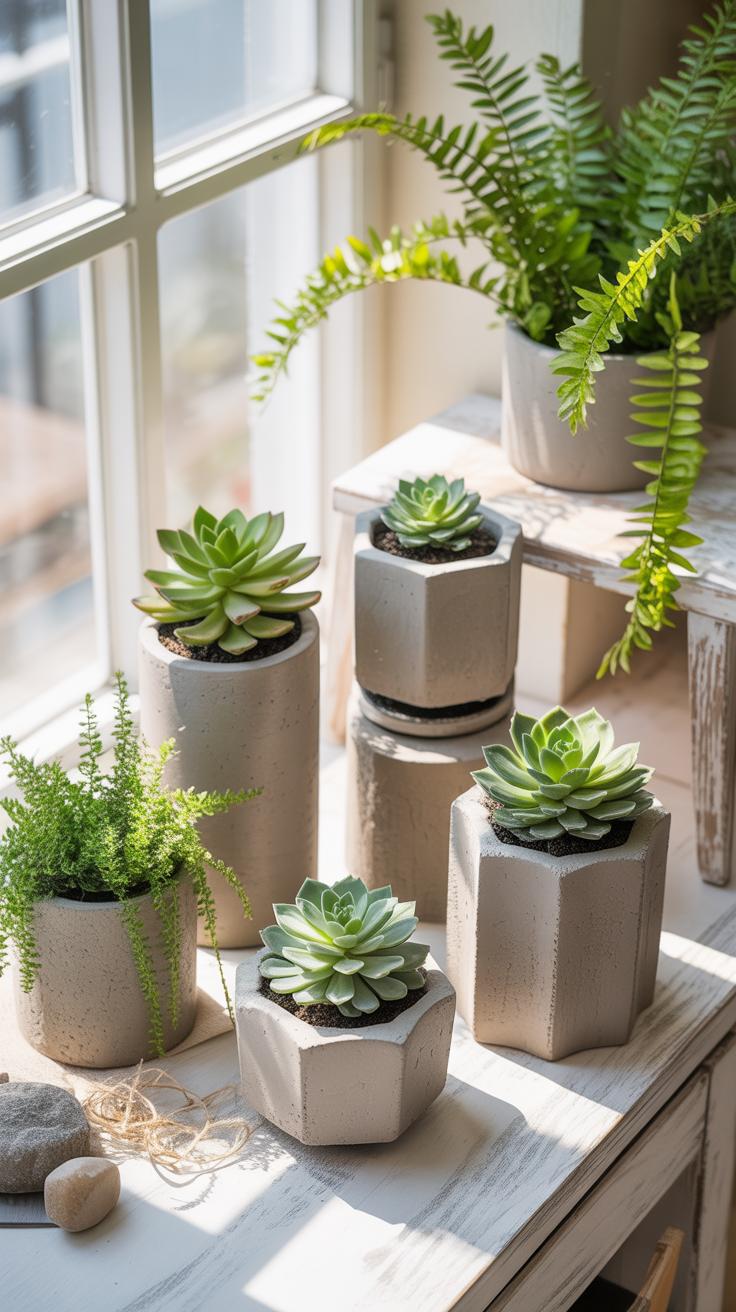
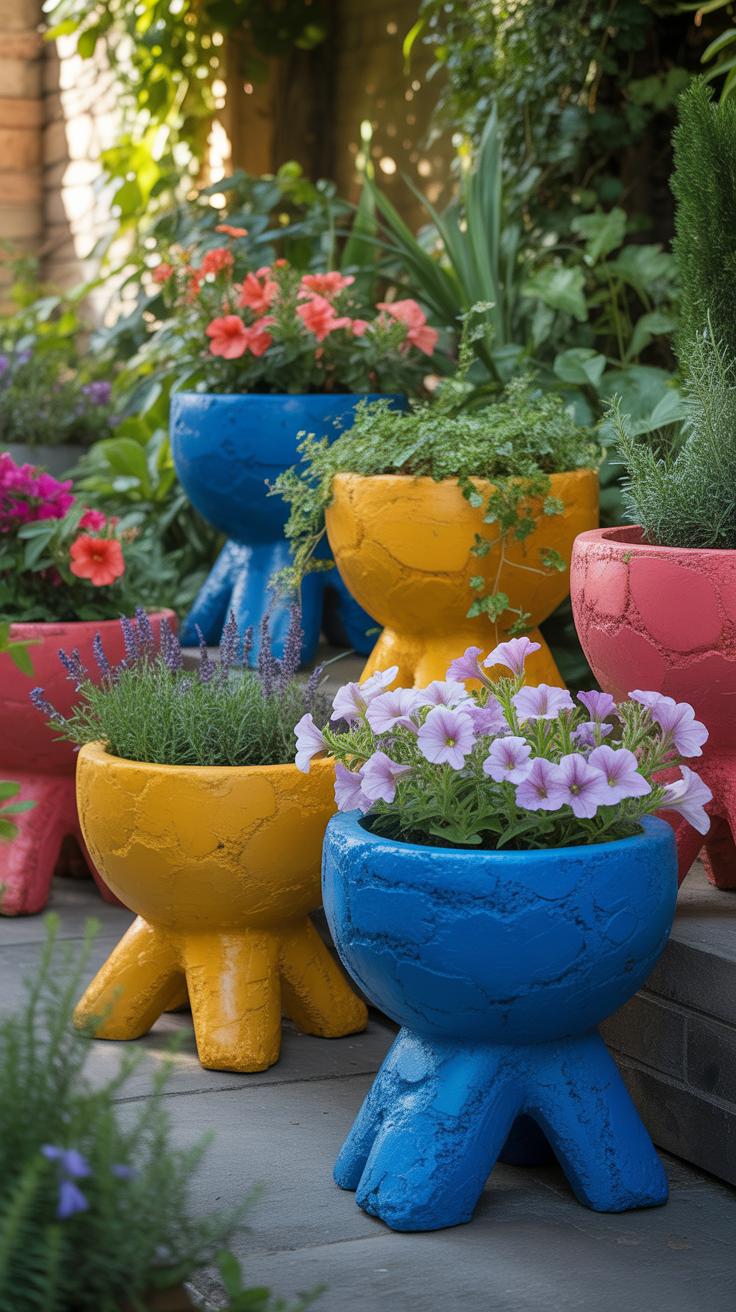
Geometric Concrete Planter Designs That Complement Modern Interior DéCor
Geometric designs draw inspiration from the Brutalist movement and Mid-Century Modern aesthetics. You can create sharp angles using cardboard templates or 3D-printed molds. Use painter’s tape to seal the edges of your forms to prevent liquid leakage during the curing process. High-strength cement mixes work best for these shapes because they hold fine edges and corners without crumbling during the demolding stage.
The finished product adds a structural element to soft interior environments. Sharp lines create a visual contrast with the organic shapes of indoor foliage. You can leave the grey surface raw or apply a matte sealer to protect the concrete from water stains. Strategic placement on desks or centerpieces highlights the architectural quality of the work. These pieces function as both plant containers and standalone sculptural art.
Outdoor Concrete Planters That Double As Unique Garden Decor
Large Scale Concrete Planter Ideas For Patios Pathways And Garden Beds

Large planters provide structural weight to outdoor spaces. Architects use oversized concrete vessels to define boundaries without building permanent walls. You should place these heavy units along pathways to direct foot traffic effectively. Use reinforced concrete for containers exceeding thirty inches to prevent structural failure. Position these planters before filling them with soil. Their massive weight makes relocation difficult after installation.
Focus on Brutalist design principles for a modern aesthetic. Clean lines and geometric shapes complement contemporary garden beds. Use these planters as focal points at the end of long garden paths. They anchor the visual landscape and balance tall plant species. Choose cast-in-place methods for custom integrated garden seating. This technique fuses the planter directly to the patio surface for maximum durability.
Weather Resistant Finishes And Sealants That Protect Outdoor Concrete Planters
Concrete is naturally porous and absorbs water through capillary action. Frozen moisture expands and creates internal pressure that cracks the material. Apply a high-quality silane-siloxane penetrating sealer to create a hydrophobic barrier. This chemical penetrates the surface without changing the appearance of the stone. Reapply every three years to maintain protection against de-icing salts and freeze-thaw cycles.
Choose film-forming acrylic sealers if you want a glossy finish or enhanced color depth. These coatings sit on top of the concrete to block UV rays and prevent fading. Ensure the concrete cures for at least twenty-eight days before applying any chemical sealer. Trapped moisture leads to delamination and white powdery efflorescence. Proper drainage holes prevent water from pooling at the base and degrading the concrete structure.
How To Customize And Decorate Your DIY Planters With Paint And Texture

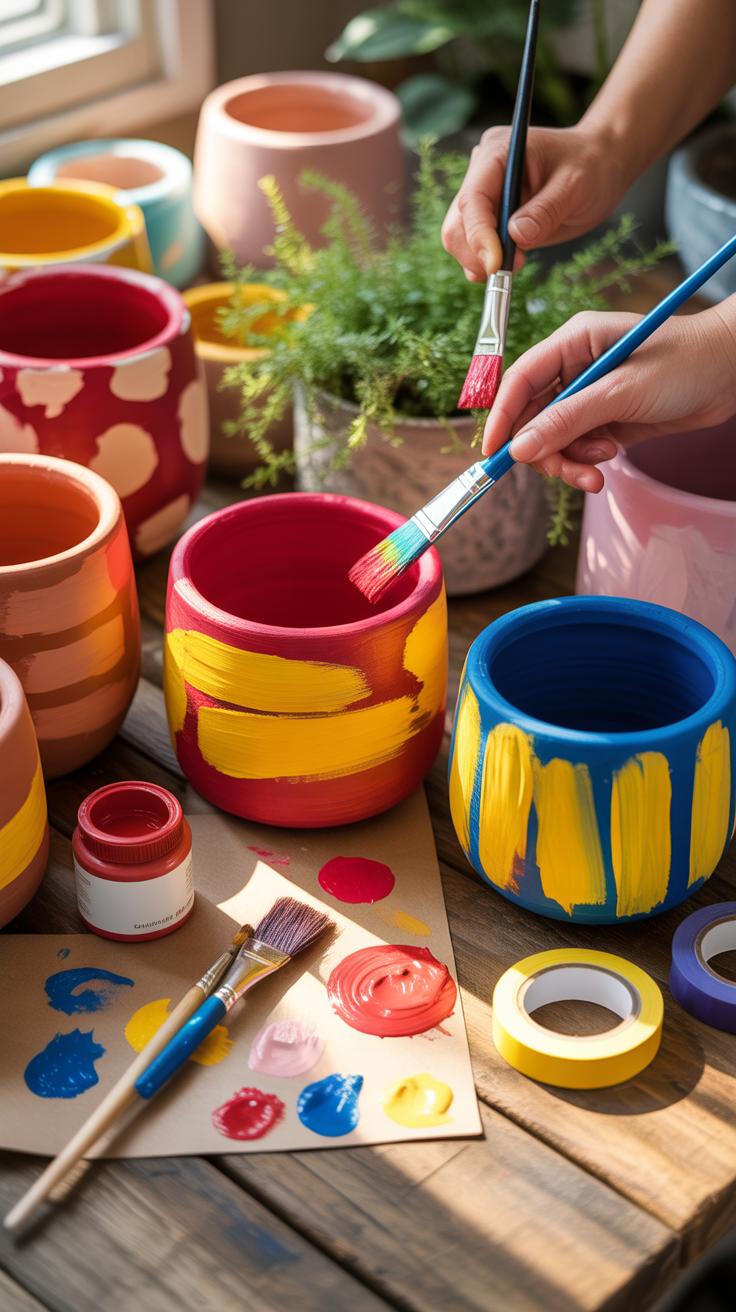
Safe Paint Types And Staining Techniques That Adhere Well To Cured Concrete
Concrete has a high pH level that destroys standard latex paints over time. You must wait twenty-eight days for the concrete to cure fully before applying any finish. Use masonry paint or elastomeric coatings for the best results. These products breathe and allow moisture to escape without peeling. Always clean the surface with a stiff brush to remove dust and loose particles before you start painting.
Acid stains offer a permanent color change by reacting chemically with the calcium hydroxide in the concrete. This method mimics the look of natural stone or aged marble. Water-based stains provide more predictable colors but sit on the surface like a dye. Apply a high-quality solvent-based sealer after the stain dries. This step protects the color from UV rays and prevents water from lifting the pigment.
To garden is to believe in tomorrow, and even the simplest block of stone can hold the promise of a blooming legacy.
— Audrey Hepburn
Adding Texture With Fabric, DIY Towels, And Imprinting Tools Before Concrete Sets
Wet concrete takes the shape and texture of any material pressed against it during the curing process. You can manipulate the exterior finish while the mixture is still pliable in the mold. Rigid stamps or found objects like leaves and stones create deep indentations. These textures provide visual depth and mimic professional architectural finishes. Control the moisture content to ensure the concrete holds the edge of your chosen design.
- Fabric Liners: Place burlap or textured cloth inside the outer mold before pouring. The concrete flows into the weave and creates a rugged industrial look once you remove the form.
- Draped Towel Method: Dip a thick cotton towel directly into a thin concrete slurry. Drape it over an upside-down bucket to dry. This creates a planter with flowing organic folds.
- Stunt Stamps: Press rubber mats or textured skins into the surface of the wet mix. This technique replicates wood grain or slate textures with high accuracy and minimal effort for the builder.
- Exposed Aggregate: Spray the surface with a chemical retarder after pouring into the mold. Wash away the top layer of paste after a few hours to reveal the decorative stones hidden inside.
- Sanding and Etching: Use coarse sandpaper on partially cured concrete to Create a weathered stone effect. This removes the smooth cream layer and gives the planter a gritty and tactile surface.
Timing determines the success of your texturing efforts. If you pull the mold too early, the concrete collapses and loses detail. If you wait too long, the material hardens and resists your tools. Check the mix every thirty minutes during the initial set. Use a trowel to test the resistance of the surface. Mastery of this window allows you to create professional-grade patterns consistently.
Common Mistakes To Avoid When Making DIY Cement Planters At Home

Why Drainage Holes Matter And How To Incorporate Them Into Your Mold Design
Plants die without oxygen at the root level. Standing water causes root rot and fungal infections in concrete vessels. You must design for drainage before pouring the mix. Small containers need at least one half-inch hole. Larger basins require multiple exit points to prevent water pooling. Professional makers use PVC pipe segments or greased wooden dowels to create these channels during the initial casting process.
Position your drainage inserts between the inner and outer molds. Secure them with hot glue or tape to prevent shifting during the pour. If you forget this step, you must drill the hardened concrete with a masonry bit. Drilling risks cracking the entire structure. Plan for elevation by adding feet to the bottom of the planter. This allows water to clear the hole and flow away freely.
Mixing Ratios, Curing Times, And Other Concrete DIY Errors Beginners Often Make
Standard concrete requires a ratio of one part cement to two parts sand and three parts gravel. Beginners often add too much water to make the pour easier. Excess water weakens the final structure and leads to shrinking or cracking. Aim for the consistency of thick peanut butter. Vibrate the mold vigorously after pouring to remove trapped air bubbles. These bubbles create structural weak points and unsightly surface voids.
Curing is a chemical process, not just drying. Concrete gains maximum strength over twenty-eight days. Removing the mold too early results in crumbled edges and structural failure. Keep the concrete damp and out of direct sunlight for the first forty-eight hours. This slow hydration prevents the material from becoming brittle. Rushing the process guarantees a shorter lifespan for your planter. Hardened concrete is durable only when chemically cured correctly.

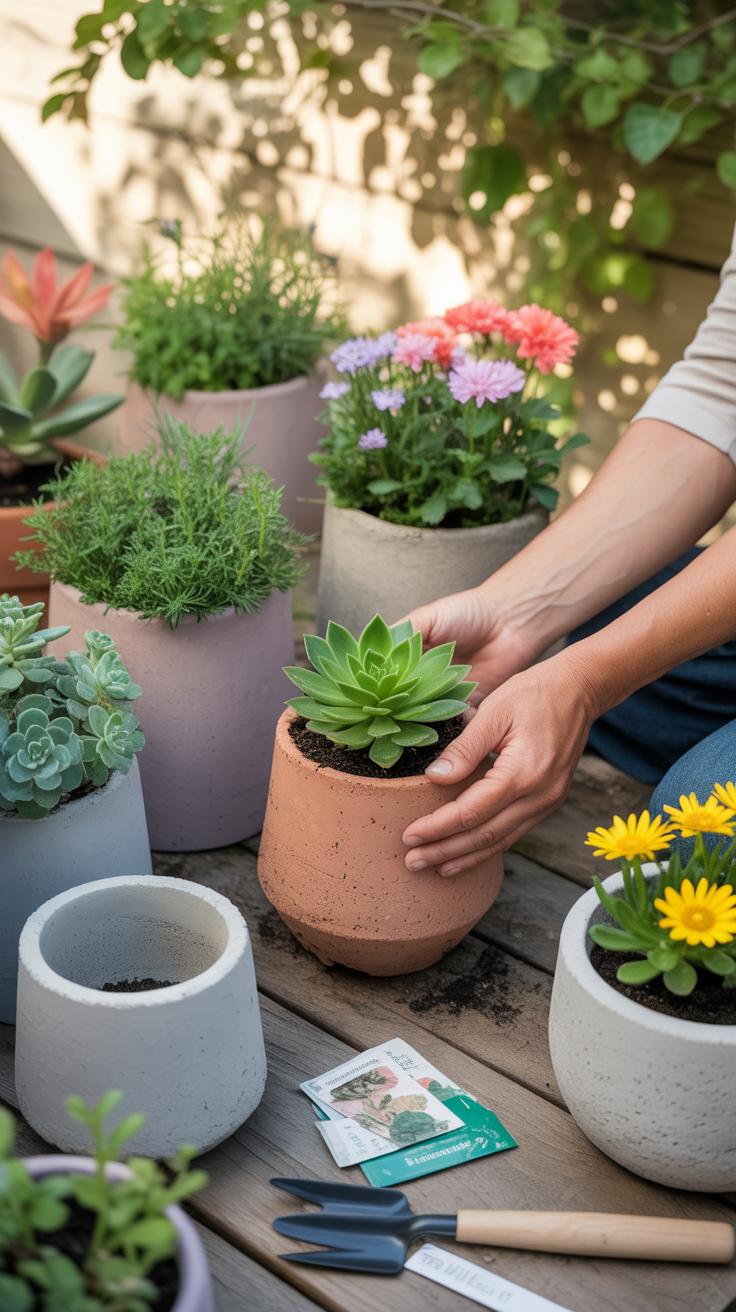
Best Plants To Pair With Your New Concrete Planters For Maximum Visual Impact
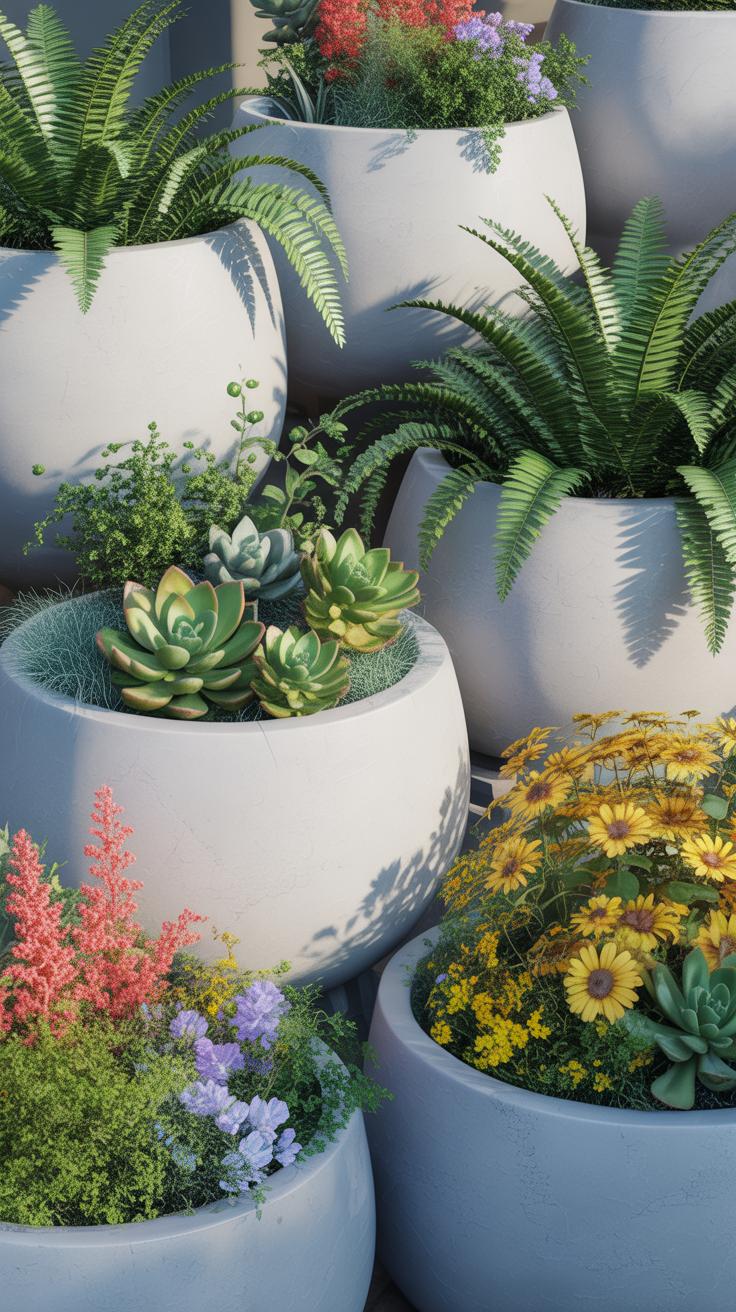
Low Maintenance Plants That Thrive In The Alkaline Environment Of Concrete Pots
Concrete naturally leaches lime over time. This process raises the pH level of the soil. Most plants prefer neutral or slightly acidic conditions. Use species that handle high alkalinity well to ensure long term survival. Succulents and cacti remain the best choices for these vessels. They tolerate the mineral runoff and the porous nature of the material which prevents root rot.
Select lavender or rosemary for larger outdoor concrete structures. These Mediterranean herbs flourish in rocky and alkaline substrates. They require excellent drainage which concrete provides through its natural breathability. Ensure you seal the interior if you want to grow acid loving plants like blueberries or azaleas. Otherwise stick to alkaline tolerant greenery to avoid nutrient lockout and yellowing leaves within the first growing season.
Styling Tips For Grouping Concrete Planters To Elevate Your Indoor Or Outdoor Space
Group planters in odd numbers to create visual balance. Use the rule of three to establish a focal point. Combine three different heights to draw the eye upward. Place the tallest vessel in the back and the shortest in the front. This arrangement mimics natural growth patterns. It prevents the display from looking flat or industrial. Use uniform colors for a cohesive brutalist aesthetic.
Vary the textures of the plants within the group. Pair a sharp agave with a soft trailing ivy. The industrial gray of the concrete highlights the vibrant greens of the foliage. Spacing matters for air circulation and growth. Leave at least four inches between pots to prevent moisture trap. This layout works in modern entryways and minimalist patios. Consistent geometry keeps the design looking intentional and professional.
Frequently Asked Questions

Is making your own concrete planter difficult for a first-timer?
Not at all! Creating a custom pot is one of the most approachable DIY projects for beginners. You don’t need expensive machinery or professional skills to explore creative concrete planter ideas. By using a simple pre-mixed bag and common household containers as molds, you can achieve a modern, industrial look. The process is forgiving, as small imperfections often add unique character to your finished garden decor.
How do you add drainage holes to a handmade concrete planter?
Ensuring proper drainage is essential for plant health. To do this, simply place a greased plastic straw or a small piece of PVC pipe into the wet mix before it sets. Once the material cures, you can pull the tube out or drill through it. This simple step ensures your favorite concrete planter ideas remain functional and prevents root rot by allowing excess water to escape efficiently.
Can I create stylish concrete planters using items I already have at home?
Absolutely! One of the best things about this hobby is its affordability. You can use recycled plastic food tubs, yogurt containers, or even cardboard milk cartons as molds. Since the primary material is basic construction cement, the total cost per pot is often just a few cents. This accessibility makes it easy for anyone to experiment with different shapes and sizes without spending a fortune at a garden center.


