The Rise Of Raised Garden Boxes Ideas That Blend Style And Function
How Modern Garden Design Is Embracing Raised Planter Aesthetics
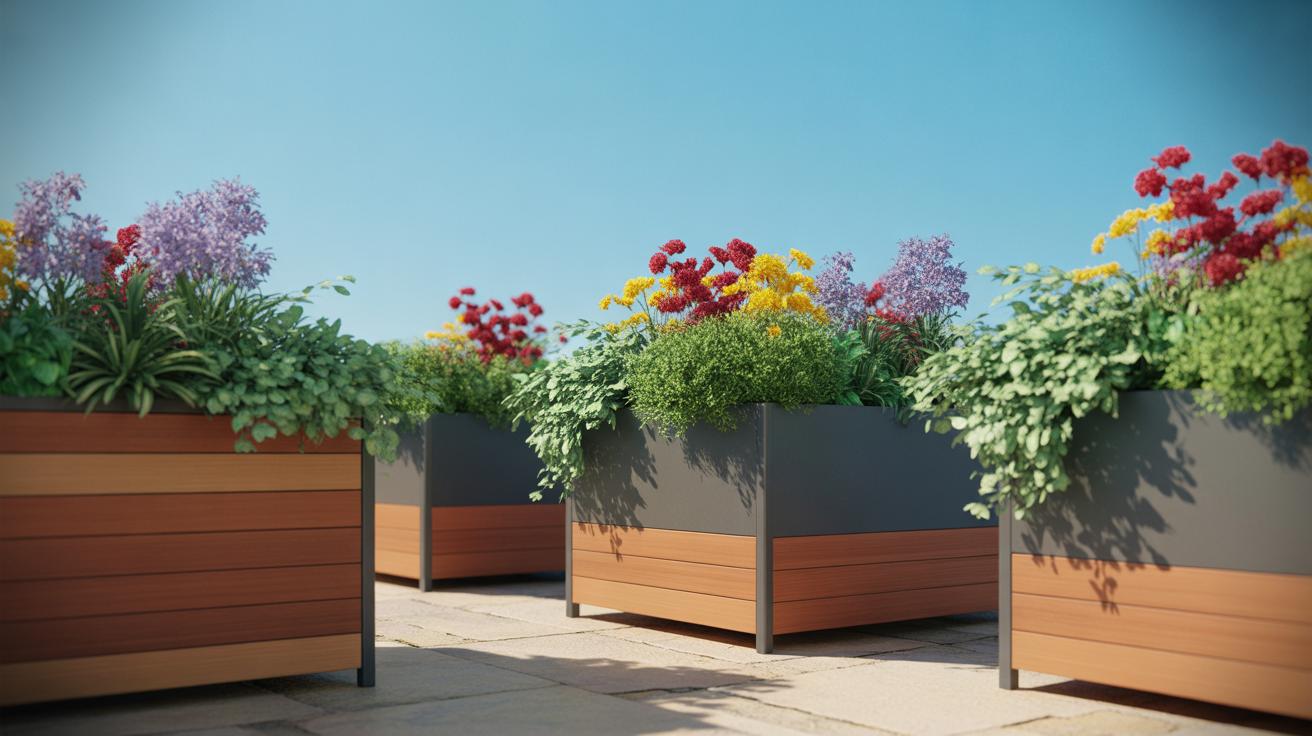
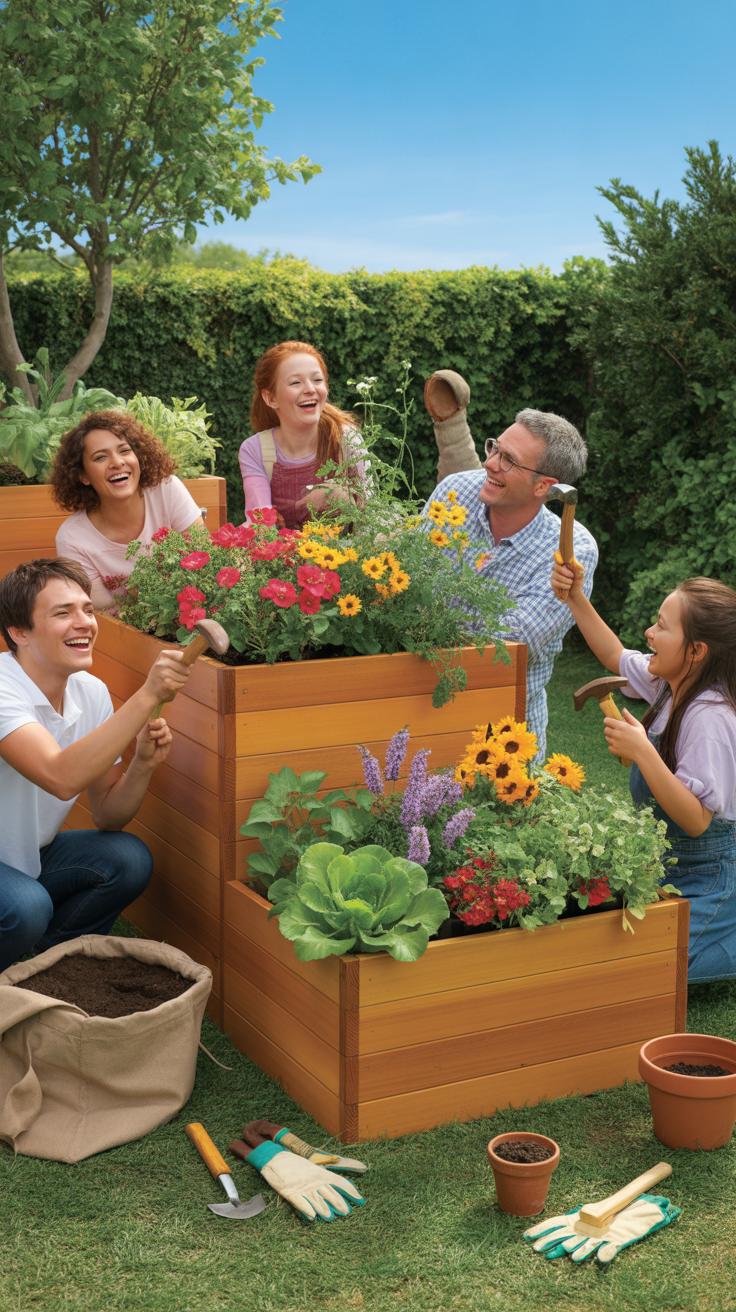
Modern landscape architecture uses Raised Planter Boxes to create clean lines and structural zones. Use these units to define boundaries and organize outdoor space without building permanent walls. Contemporary designs favor cold-rolled steel, cedar, and composite materials. These materials provide a sleek look that matches mid-century and minimalist home styles. Designers now treat garden beds as furniture pieces rather than just dirt containers.
Strategic placement of these boxes allows for vertical interest in flat yards. You can use varying heights to create a tiered effect. This adds depth to the landscape and hides unsightly foundations or equipment. Use black or charcoal finishes to make green foliage pop against the structure. Modern layouts often integrate seating directly into the planter edges. This maximizes utility in small urban footprints and narrow side yards.
Why Raised Planter Boxes Outperform Traditional In Ground Garden Beds
Raised Planter Boxes provide superior control over soil quality and drainage. Traditional in-ground beds often suffer from compaction and poor nutrient balance. You choose the exact soil mix for your specific plants when using a box. This high-quality environment leads to faster root growth and better yields. Wood or metal walls also act as a physical barrier. This keeps invasive grass and aggressive weeds from stealing nutrients.
Elevation changes the thermodynamics of the growing environment. Raised beds warm up faster in the spring than the ground does. This allows you to plant weeks earlier than your neighbors. Better drainage prevents root rot during heavy rain cycles. The height also reduces physical strain on your back and knees. You spend less time bending over and more time managing your garden efficiently. This leads to better long-term garden maintenance.
How To Use Free Raised Planter Box Plans To Start Your Build Today
Where To Find Reliable And Detailed Free Raised Planter Box Plans Online
University extension programs offer the most reliable blue prints for gardening infrastructure. These institutions base their designs on agricultural science and structural longevity. Search for PDF guides from land-grant universities like Oregon State or Cornell. These sources prioritize function over aesthetics. They provide exact dimensions and material lists. You get proven designs that handle soil weight and moisture without failing early.
Digital woodworking communities and open-source hardware sites also provide valuable technical drawings. Platforms like Ana White or specialty diy forums host user-vetted plans. These builders often include real-world feedback on construction flaws. Look for plans with high engagement and photos of finished units. Active communities verify that the measurements work in practice. Avoid generic social media images that lack specific cut lists and engineering details.
What To Look For In A Quality Planter Box Plan Before You Begin Building
A professional plan must include a comprehensive cut list and a material breakdown. You need to know the exact linear footage of lumber required. Good plans specify hardware types like galvanized or stainless steel screws. These materials resist rust when they touch wet soil. Ensure the design accounts for drainage and airflow. Without proper drainage, your wood will rot and your plants will die quickly.
The plan must address structural integrity through corner bracing and support posts. Wet soil is heavy and exerts extreme outward pressure on the side walls. Quality designs use 2 by 4 or 4 by 4 posts to anchor the corners. Check that the plan matches your skill level and available tools. Verify that the finished dimensions fit your specific site. Accurate plans prevent wasted wood and save you money during the build.

DIY Raised Planter Boxes The Most Popular Builds Trending Right Now
Top Materials Used In DIY Raised Planter Boxes And Why They Matter
Material selection dictates the lifespan and safety of your garden. Builders prioritize durability and rot resistance above all else. Untreated woods like cedar and redwood remain the industry standard because they contain natural oils that repel insects. Metal and composite options are gaining ground for their longevity and modern look. Always choose materials that do not leach harmful chemicals into your soil.
- Western Red Cedar: This wood is the top choice for outdoor builds. It naturally resists rot and decay without chemical treatments. It maintains structural integrity for over a decade in most climates. The material is lightweight and easy to cut with basic hand tools.
- Corrugated Galvanized Steel: Metal panels provide a modern industrial look. The zinc coating prevents rust and withstands extreme weather conditions. These structures are very thin, which maximizes the interior planting area. They do not warp or crack like traditional timber.
- Heat Treated Pallets: Reclaimed pallets are cost effective for DIY projects. You must look for the HT stamp to ensure the wood was heat treated rather than chemically sprayed. This makes the wood safe for growing edible crops. It is a sustainable way to upcycle industrial waste.
- Douglas Fir: This is a budget friendly alternative to cedar. It offers decent strength and stability for several growing seasons. While it rots faster than redwood, applying food safe sealants can extend its life. It is widely available at every local lumber yard.
- Composite Boards: Made from recycled plastic and wood fibers, these boards never rot. They require zero maintenance and come in many colors. While more expensive upfront, they last thirty years or more. This makes them a high value long term investment for permanent gardens.
Chemical safety is the primary concern when selecting lumber. Avoid old pressure treated wood manufactured before 2004 as it contains arsenic. Modern pressure treated wood uses copper based fungicides which are safer but still controversial for organic gardening. Many builders now use raw wood paired with plastic liners to prevent soil contact. This tactic extends the wood life while keeping your food clean.
Beginner Friendly DIY Raised Planter Box Designs That Deliver Great Results
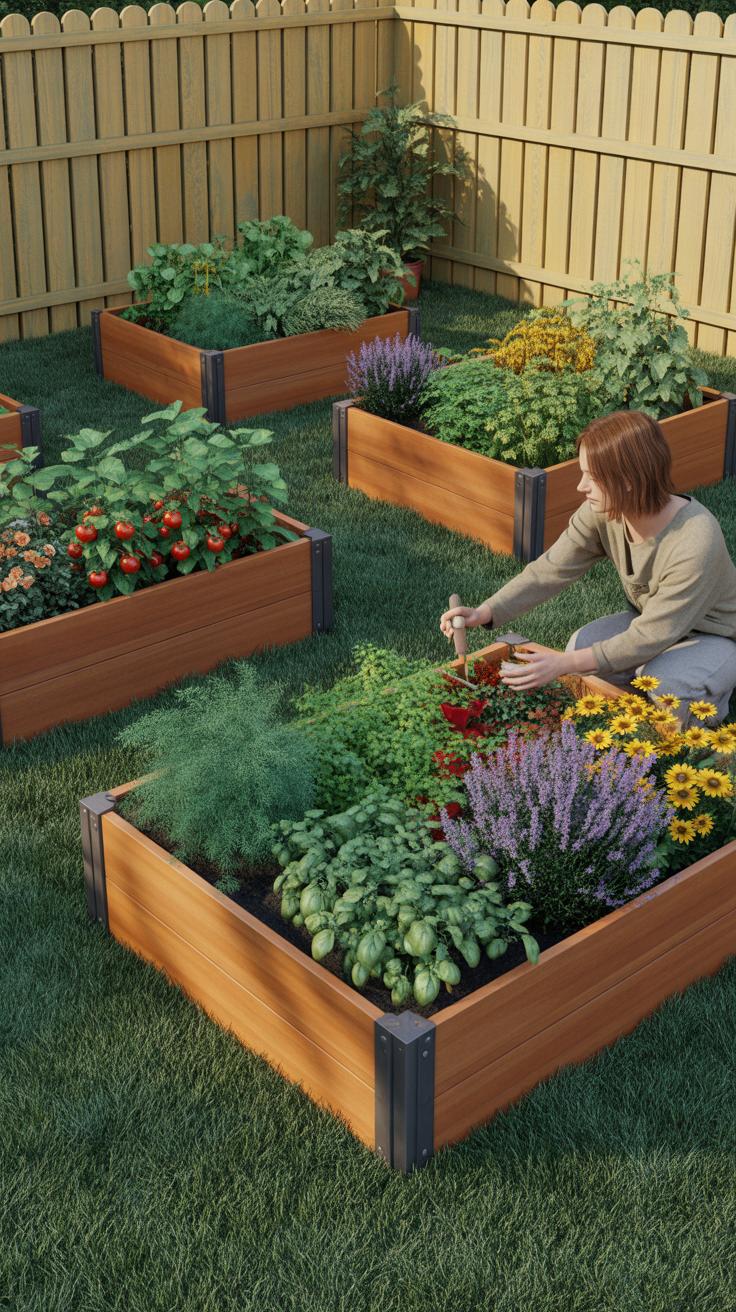
The simplest build uses a basic rectangular frame with butt joints. You screw four boards together and reinforce the corners with square posts. This design requires only a drill and a saw. It is highly effective because it handles soil pressure well. Most beginners start with a four by eight foot footprint. This size allows you to reach the center from any side.

Tiered designs are also popular for maximizing vertical space. You stack smaller frames on top of larger ones to create a staircase effect. This method works well for shallow rooted herbs and strawberries. It adds visual interest to a flat yard without complex joinery. Most builders use lag bolts or structural screws to keep the layers from shifting. This ensures the unit remains stable during heavy rains.
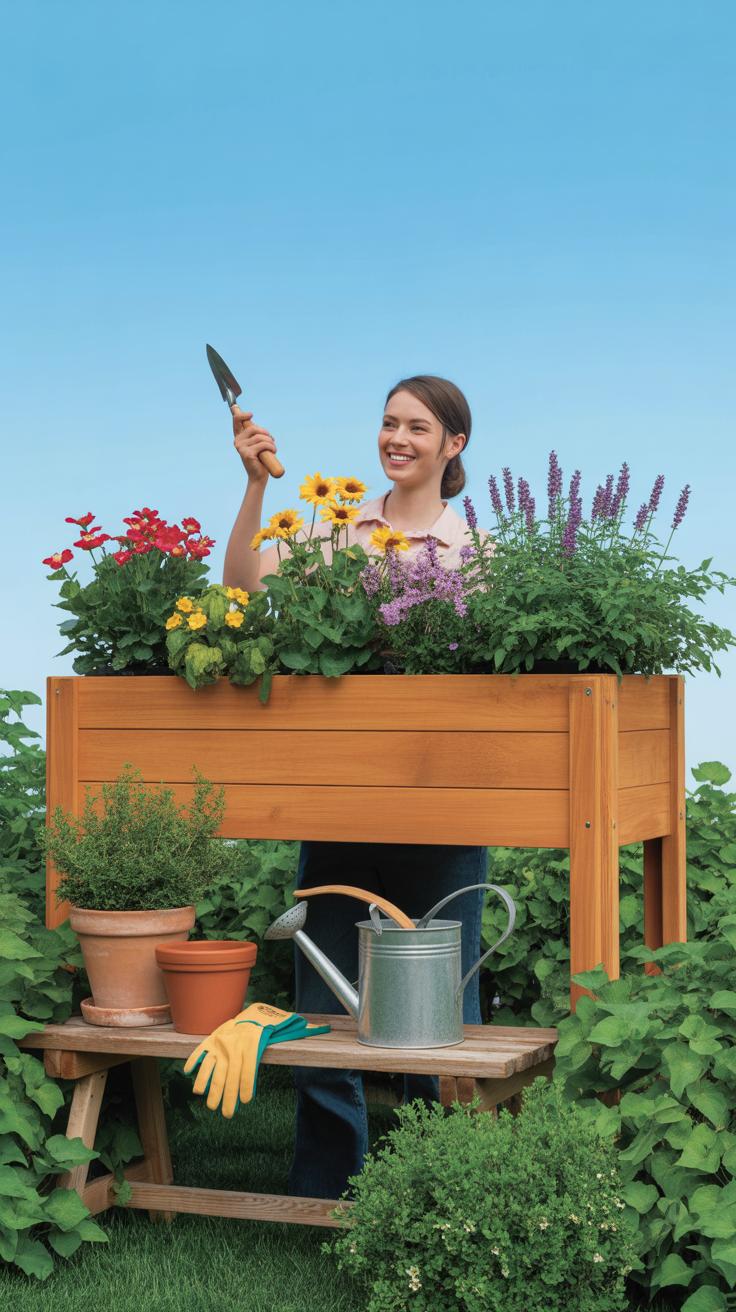
Raised Garden Beds Off The Ground Elevating Your Growing Space
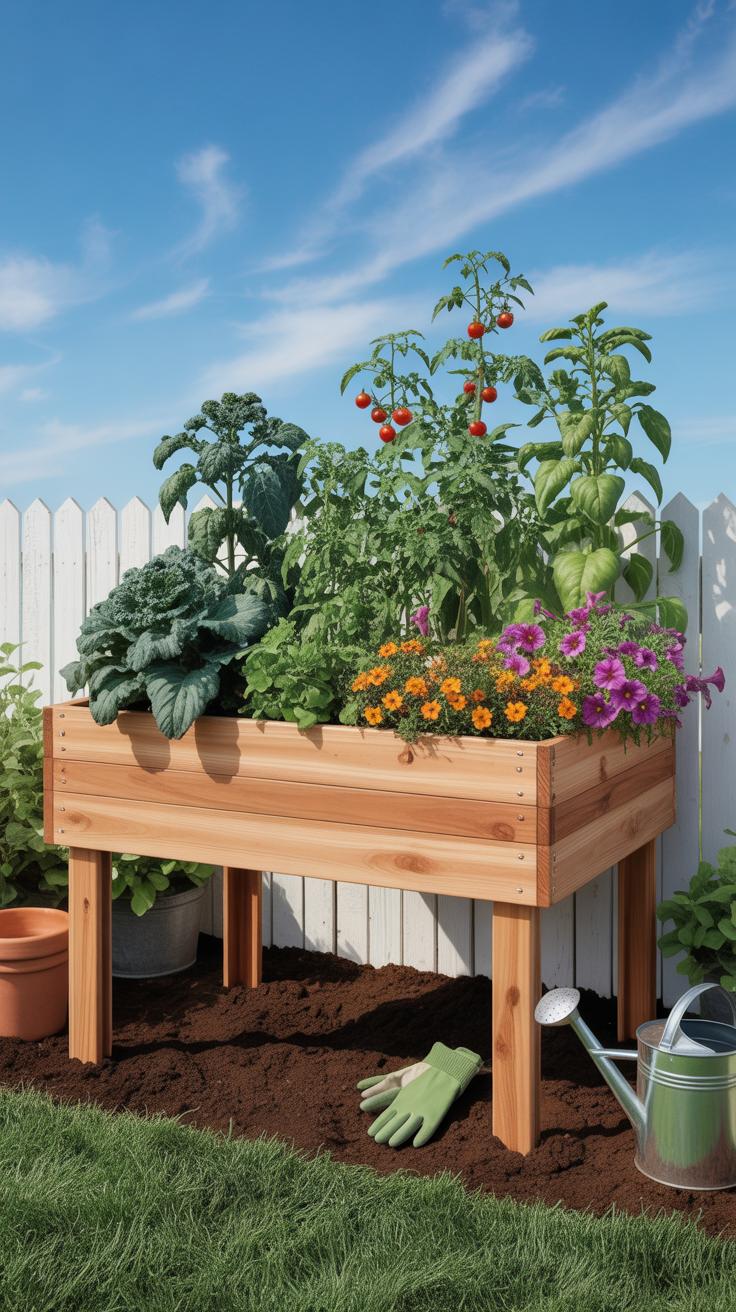
The Health And Accessibility Benefits Of Raised Garden Beds Off The Ground
Elevated beds eliminate the need for kneeling or bending. This design reduces strain on the lower back and knees during planting and harvesting. Traditional gardening causes repetitive stress injuries for many seniors. Raising the soil level to waist height allows users to work while standing or sitting. It makes gardening possible for people using wheelchairs or those with limited mobility.
Higher beds keep crops away from ground dwelling pests like rabbits and slugs. This physical barrier reduces the need for chemical pesticides and wire fencing. Better airflow around the elevated structure lowers the risk of fungal diseases in plants. Improved drainage prevents root rot during heavy rains. These technical advantages lead to higher yields and healthier plants without extra physical labor from the gardener.
To plant a garden is to believe in tomorrow. These modern elevated beds are simply a beautiful new way to lift our timeless hopes a little closer to the sun.
— Audrey Hepburn
Best Leg And Frame Designs For Lifting Your Garden Bed To The Ideal Height
Strength is the most important factor for elevated bed legs. Wet soil is heavy and creates immense downward pressure on the frame. Use four by four posts for maximum stability on wooden models. H-frame designs distribute weight more evenly than single vertical legs. Powder coated steel frames offer the longest lifespan in wet climates. Always verify that the hardware is rated for outdoor use.

The frame must include a reinforced floor to prevent sagging over time. Deep V-shaped designs work well for taproot vegetables like carrots. Flat bottomed beds need slats or pre-drilled holes for proper water drainage. Ensure the leg height matches the reaching capability of the primary user. Adding heavy duty casters allows you to move the bed to follow the sunlight. This mobility maximizes growing space on small patios.
Raised Garden Planters DIY Creative Trends Seen Across Home Gardens
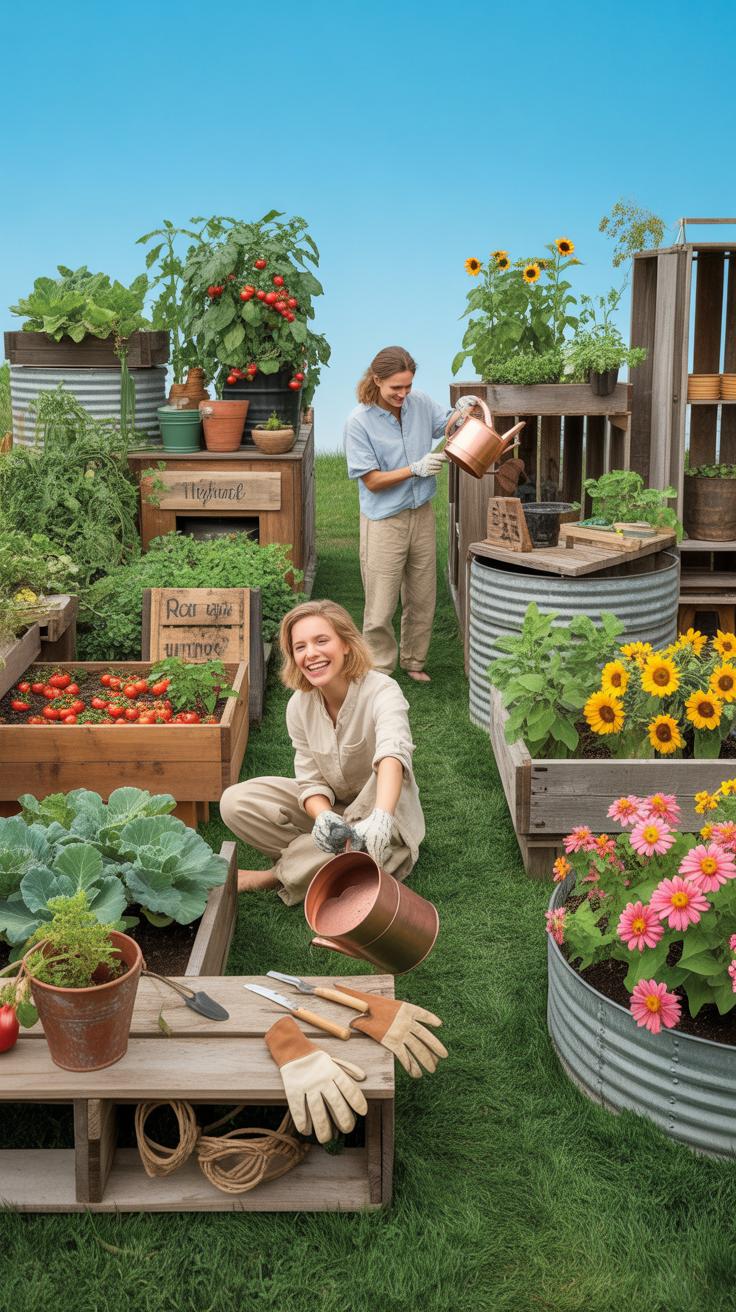
Upcycled And Reclaimed Material Trends In Raised Garden Planter DIY Projects
Gardeners now prioritize sustainability by using reclaimed industrial and building materials. This shift away from new lumber reduces costs and prevents waste. Common choices include old galvanised steel stock tanks and untreated hardwood pallets. These materials offer high durability and unique textures. Builders must ensure these sources never contained toxic chemicals. Clean materials keep the soil safe for edible plants and long term growth.
Modern DIY projects focus on the functional reuse of corrugated metal and cedar scraps. Metal provides excellent heat retention for soil in spring. Cedar resists rot naturally without the need for chemical treatments. Homeowners often combine these elements to create high contrast designs. This method balances industrial strength with natural aesthetics. Proper drainage remains the priority when using non porous upcycled containers for these specific gardening projects.
How Vertical Stacking And Tiered Raised Garden Planters Are Changing Small Spaces
Vertical stacking maximizes yield in tight urban environments. Gardeners build tiered structures to increase planting surface area without expanding the footprint. This design allows for better sun exposure on every level. It also improves airflow around the foliage to prevent fungal diseases. Stacking creates distinct microclimates within a single unit. You can grow root vegetables at the base and herbs on the top.
Successful tiered systems require stable foundations and precise weight distribution. Builders use heavy materials at the bottom to prevent tipping. Gravity fed irrigation works best in these setups to save water and time. Each level must have independent drainage to avoid overwatering the lower sections. This tactical approach turns concrete patios into high production zones. It provides a scalable solution for residents with limited ground access or poor soil.
Raised Planters DIY Customization Ideas That Make Your Garden Unique
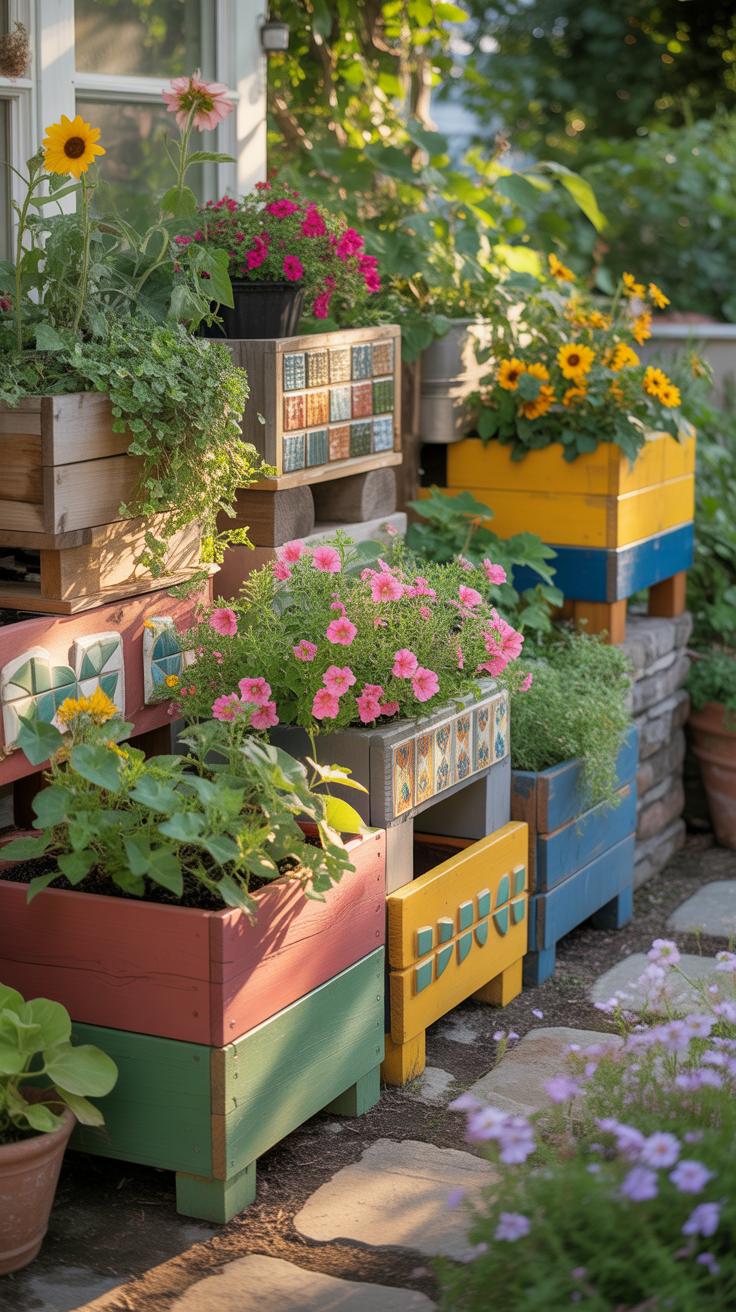
Personalizing Your Raised Planters With Paint, Stain, And Decorative Trim
Surface treatments serve functional and aesthetic purposes. Use exterior grade milk paint or low VOC stains to change the look of raw wood. These products protect the material from UV damage and moisture rot. Neutral tones mimic modern architectural styles while bright colors create focal points. Always apply sealants to the interior walls to prevent chemicals from leaching into the soil.

Decorative trim adds structural character to basic boxes. Apply mitered caps to the top edges for a finished look. This wide rim also provides a functional seat or tool ledge. Use rot resistant cedar or redwood for these visual upgrades. Attachment with stainless steel screws prevents rust streaks over time. Consistency in trim style aligns the garden with the home exterior design.
Modular Raised Planters DIY Systems That Grow With Your Garden Over Time
Modular designs use standardized dimensions for easy expansion. Build individual units that stack or link together using pin hinges or interlocking joints. This method allows you to increase height for deep rooted crops like carrots. It also lets you add horizontal sections as your budget or space grows. Use square foot measurements to ensure all new components fit previous builds perfectly.
Strategic site planning requires movable or scalable components. Castor wheels allow for sun tracking on hard surfaces like patios. Connectable corner brackets enable quick assembly without complex joinery. These systems facilitate crop rotation by moving entire units based on seasonal needs. High quality hardware ensures the structure remains stable under the weight of wet soil. Scalability reduces long term costs by preventing total garden rebuilds.
DIY Outdoor Raised Planter Trends Built For Weather And Longevity
Choosing The Right Wood Species For A Durable DIY Outdoor Raised Planter
Selecting the correct lumber determines the lifespan of your raised planter boxes. Western Red Cedar and Redwood are the industry standards for ground contact. These species contain natural oils and tannins that repel wood-boring insects and resist rot. While more expensive than pine, they eliminate the need for chemical treatments. Using untreated cedar ensures that no synthetic toxins leach into your soil.
Pressure-treated lumber is a common alternative but requires careful selection. Modern ACQ-treated wood is safer than older arsenic-based versions but still raises concerns for edible gardening. If you use treated wood, line the interior with food-grade plastic. Black Locust and White Oak offer extreme durability for those seeking maximum longevity. These hardwoods are dense and heavy. They resist decay for decades even in wet environments.
Weatherproofing Techniques That Extend The Life Of Your Outdoor Planter Box
Proper drainage prevents standing water from rotting the floor of your planter. Drill one-half inch holes every six inches along the bottom board. Line the interior walls with a heavy-duty dimpled membrane. This polyethylene barrier keeps moist soil away from the wood while allowing the structure to breathe. Air gaps between the liner and the wood prevent trapped moisture. This simple step doubles the wood life.
Apply a non-toxic food-safe sealer to the exterior surfaces every two years. Tung oil or linseed oil provides a water-repellent finish without harmful chemicals. Elevate the planter feet off the soil using bricks or gravel. This break prevents capillary action from drawing ground moisture into the wood grain. Use stainless steel or ceramic-coated screws for all joints. Standard nails will rust and weaken the structure over time.
Building Raised Planter Boxes Step By Step Approaches Gaining Popularity
Essential Tools And Hardware You Need Before Building Raised Planter Boxes

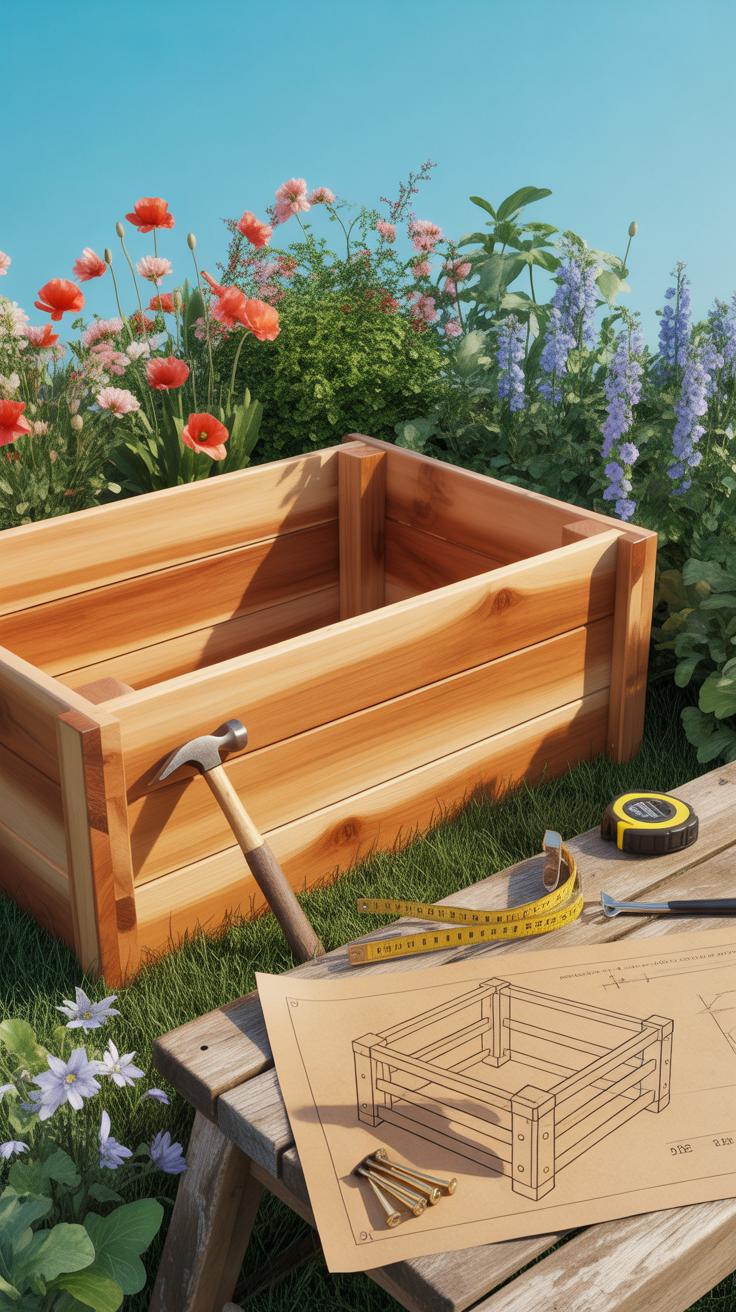
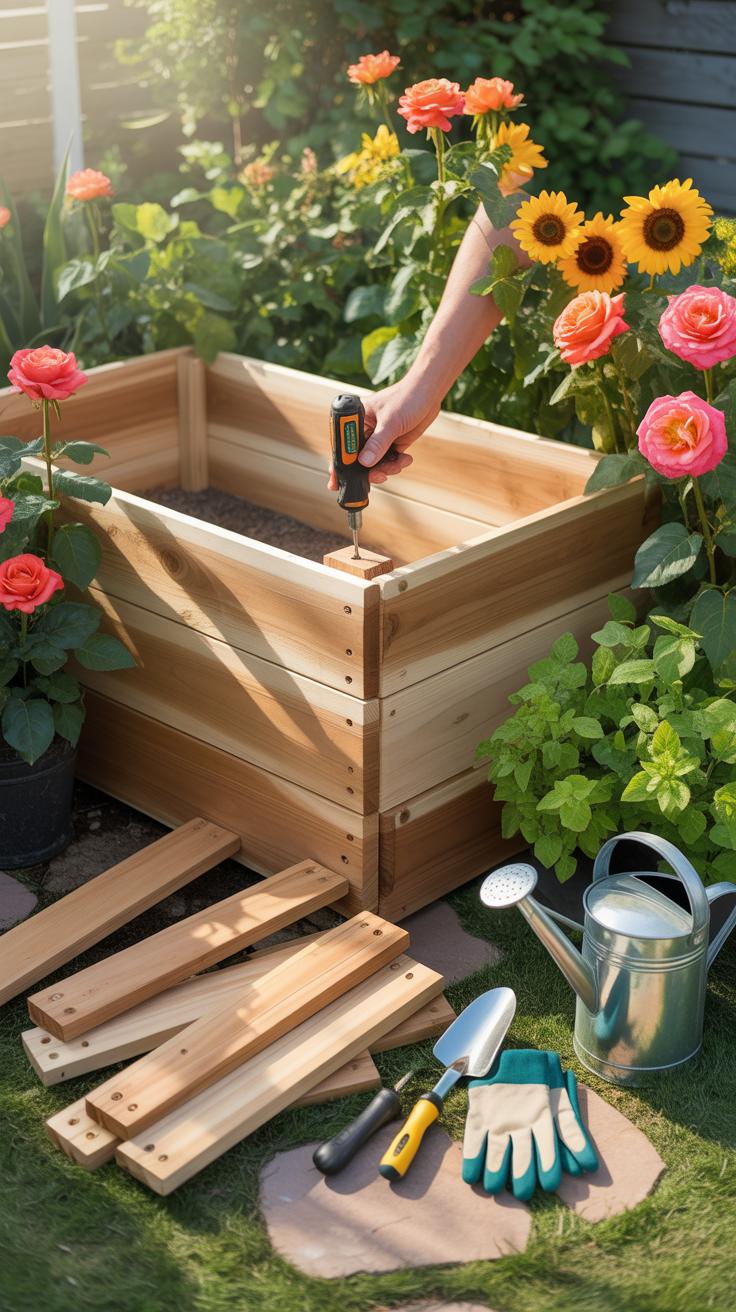
Building functional raised planter boxes requires a specific set of mechanical tools and assembly hardware. You cannot execute precise cuts or secure heavy timber without the right gear. Professional builders prioritize durability over price when selecting these items. High quality tools ensure straight lines and tight joints. This prevents soil leakage and prevents the structure from bowing under pressure later.
- Miter Saw: Use this tool to make fast and accurate crosscuts on your lumber. It ensures every corner meets at a perfect ninety degree angle. Precise cuts eliminate gaps where soil might wash out during heavy rain.
- Impact Driver: This tool provides the torque necessary to drive long structural screws into dense wood. It prevents stripping the screw heads while securing high pressure joints. Use this instead of a standard drill for maximum speed and grip.
- Galvanized Screws: Select exterior grade fasteners that resist rust and corrosion from moisture. These screws maintain their structural integrity even when buried in damp soil for years. Avoid standard interior screws because they will snap under the tension of wood movement.
- Speed Square: This small metal tool helps you mark lines and check corners for accuracy. It serves as a guide for your saw to ensure every board remains level. Without it your planter will look crooked and lose its stability.
- Staple Gun: Heavy duty staplers secure the internal liners to the wooden frame. This holds the fabric or plastic in place while you add the soil. Use stainless steel staples to prevent the metal from rusting through the liner material.
Hardware choice dictates the lifespan of the entire project. Modern builders now favor stainless steel or ceramic coated screws to match the lifespan of rot resistant wood. You must also select correct drill bits for pre-drilling holes. Pre-drilling prevents the wood from splitting at the ends. This step is critical when working with expensive hardwoods like cedar or redwood.
Common Building Mistakes To Avoid When Constructing Your Raised Planter Box
Many builders fail because they choose the wrong wood for the environment. Plain pine rots quickly when it touches wet soil. You must use cedar, redwood, or pressure treated wood rated for ground contact. Some people avoid treated wood due to old safety concerns. However, modern alkaline copper quaternary treatments are safe for food crops. Choose your materials based on local climate and intended use.
Structural failure often happens because the builder ignores the weight of wet soil. Soil expands and becomes extremely heavy after a rainstorm. You must install internal bracing or thick walls to stop the sides from bulging. Never build a box wider than four feet or you cannot reach the center. Large boxes without support will lean and eventually collapse. Proper bracing keeps the box square for years.
DIY Elevated Planter Boxes The Trend Making Gardening More Accessible
Why DIY Elevated Planter Boxes Are A Game Changer For Older And Mobility Limited Gardeners
Elevated beds bring the soil surface to waist height. This height eliminates the need for bending or kneeling. Older gardeners often face chronic back pain or joint stiffness. Traditional ground gardening worsens these physical issues. Raised designs allow users to sit in a chair while working. This position reduces strain on the spine and knees. Accessibility becomes the primary driver for these garden modifications.
Mobility-limited individuals use these boxes to maintain their independence. Standard designs often block wheelchair access. DIY builders customize the leg width and height for specific needs. This customization ensures the gardener can reach the center of the bed. It removes physical barriers that force people to stop gardening. Modern designs focus on ergonomics rather than just aesthetics. Tactical height adjustments keep gardening inclusive for every age group.
How To Reinforce DIY Elevated Planter Boxes For Soil Weight And Long Term Stability
Wet soil is extremely heavy. A standard elevated box can hold hundreds of pounds. You must use heavy-duty fasteners like galvanized lag bolts. Do not rely on simple nails or wood screws. These will pull out under pressure. Use pressure-treated lumber or naturally rot-resistant wood like cedar. Structural integrity depends on the thickness of the support legs. Use 4×4 posts to prevent the frame from buckling.
Add internal bracing to stop the side walls from bowing. Cross-beams under the floor boards prevent sagging. Line the box with hardware cloth or heavy plastic to protect the wood. Ensure you drill drainage holes to prevent water logging. Excess water adds unnecessary weight and rots the structure from the inside. Steel corner brackets provide extra lateral stability. Robust construction ensures the planter lasts for years without needing expensive structural repairs.
Soil Drainage And Planting Tips To Get The Most From Your Raised Planter Boxes
The Best Soil Mix Ratios For Raised Planter Boxes To Maximize Plant Growth
Standard garden soil is too heavy for contained environments. It compacts quickly and restricts oxygen to the roots. You must use a specialized medium to ensure success. The ideal ratio follows the Mel Bartholomew method of equal parts peat moss, vermiculite, and blended compost. This mixture stays light and retains moisture effectively. It provides the essential structure required for rapid root development in elevated systems.
High quality compost serves as the engine for your planter. Use at least three different sources of compost to provide a full spectrum of nutrients. Avoid cheap fillers or wood chips that steal nitrogen from your plants during decomposition. Test your soil pH annually to maintain a neutral range. Proper nutrient density eliminates the need for synthetic fertilizers. This tactical approach ensures your crops have constant access to food.
How Proper Drainage Design In Raised Planter Boxes Prevents Root Rot And Crop Loss
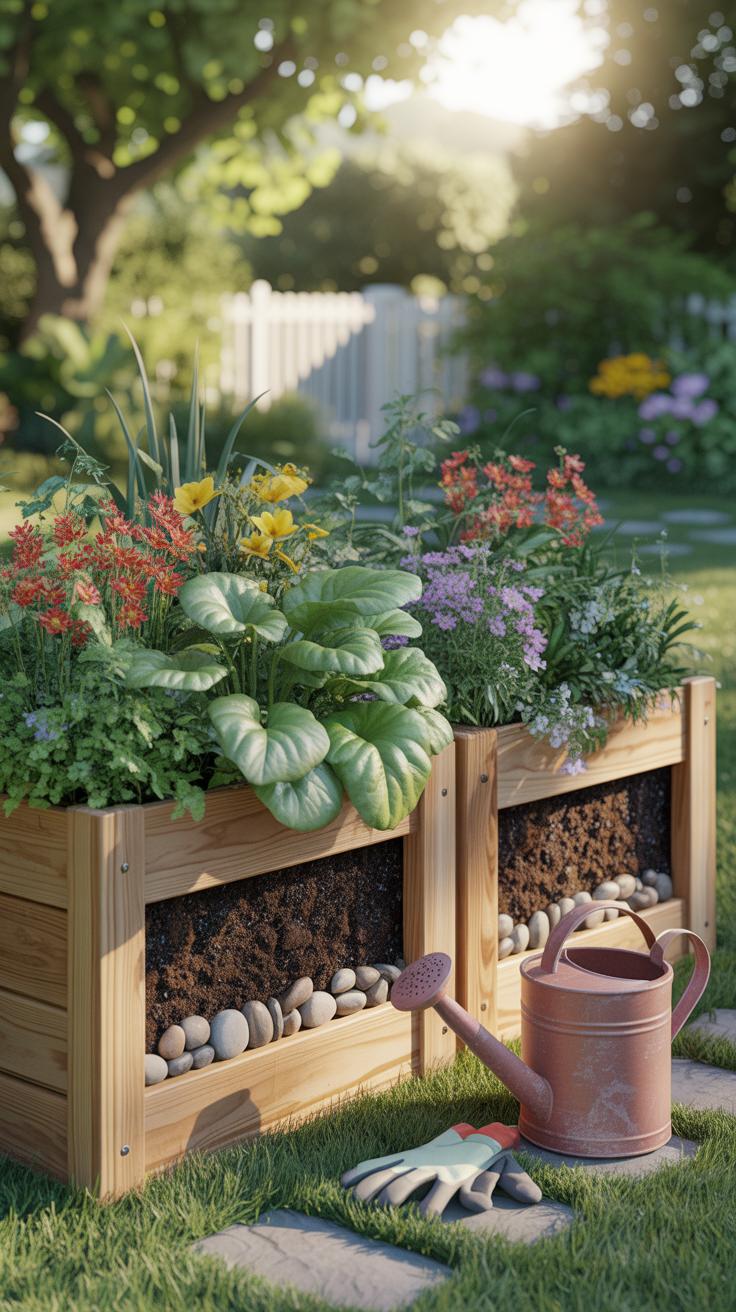
Standing water kills plants faster than drought. Without exit points, water displaces oxygen in the soil pores. This causes anaerobic conditions that lead to root rot. You must ensure your box design includes adequate drainage holes. Space these holes every six inches along the bottom surface. If you use a solid base, pitch the floor slightly toward the drainage exit.
Physical barriers prevent soil from clogging your drainage ports. Place a layer of landscape fabric over the holes before adding soil. Do not use gravel at the bottom of the box. Rocks create a perched water table that actually keeps moisture closer to the roots. Use high quality porous fabric liners for wooden boxes. These liners protect the structure from moisture damage while allowing air to reach the soil.
Frequently Asked Questions

What are the main benefits of using raised planter boxes for a home garden?
Raised planter boxes offer several advantages for both novice and experienced gardeners. By elevating your plants, you significantly reduce physical strain on your back and knees. Furthermore, these structures provide superior drainage and allow you to control the soil quality precisely, which is ideal if your native ground is rocky or clay-heavy. They also act as a natural barrier against certain pests and weeds, leading to a healthier and more productive growing season.
How do I properly set up and fill my new raised planter boxes for success?
To get started, place your raised planter boxes in a spot that receives at least six to eight hours of sunlight daily. Line the bottom with a weed barrier or hardware cloth to deter burrowing pests. Instead of using standard garden soil, fill the container with a high-quality mix of compost, peat moss, and vermiculite. This ensures the medium stays aerated and nutrient-rich, giving your vegetables and flowers the best possible environment to thrive.
Are there affordable ways to incorporate stylish planter boxes into a small budget?
Absolutely! You don’t need a massive budget to enjoy this trend. Many homeowners save money by upcycling untreated cedar pallets or using corrugated metal sheets for a modern industrial look. Another cost-effective tip is the “hugelkultur” method: fill the bottom half of deep containers with logs, sticks, and dried leaves before adding soil. This reduces the amount of expensive potting mix required while providing long-term nutrients as the organic material decomposes over time.


