What Is Pressed Flower Photography And Why Is It Worth Trying
The Simple Idea Behind Capturing Pressed Flower Art Through A Lens
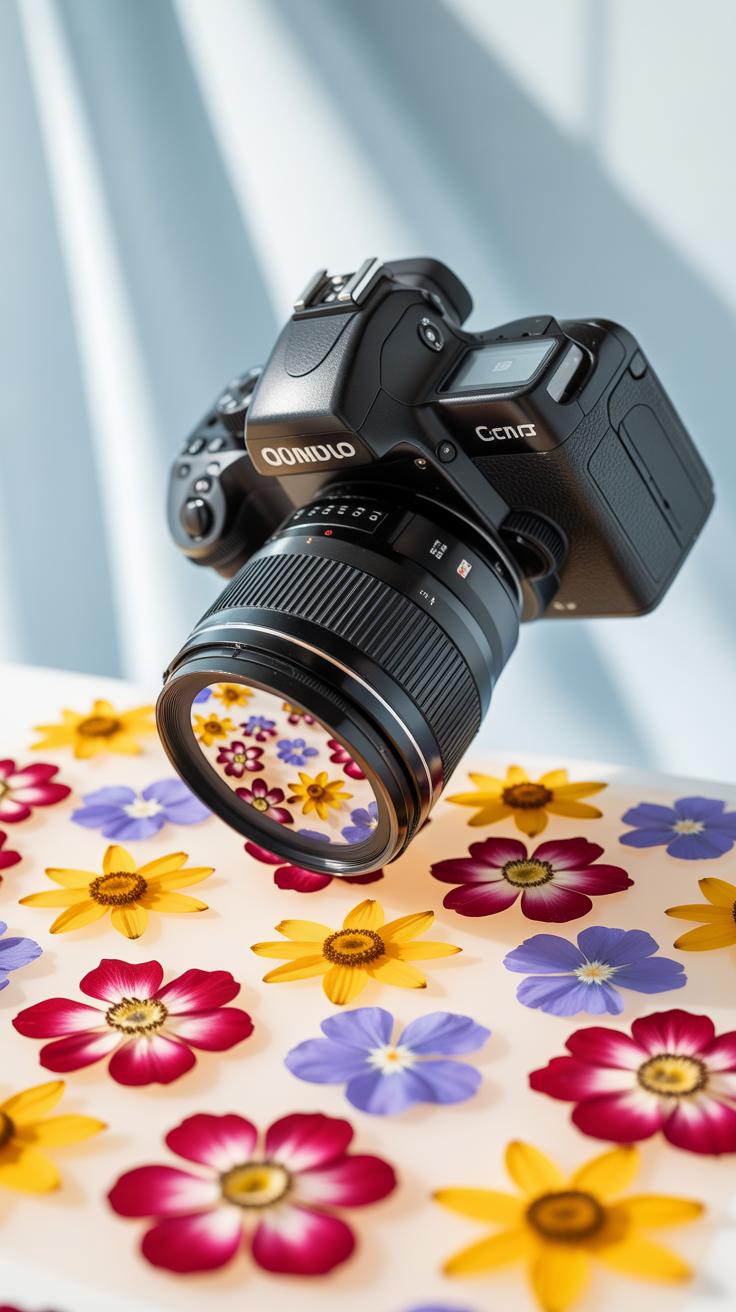
Pressed flower photography involves digitizing botanical specimens flattened through mechanical pressure. This technique transforms three dimensional biological matter into two dimensional graphic elements. You remove the height variable to focus entirely on shape and color. It allows photographers to document the intricate internal structures of plants that stay hidden in living blooms. You create a permanent digital record of organic decay.
High quality photography preserves the specimen better than physical storage. Pressed plants eventually brittle and fade due to oxygen exposure. Digital capture freezes the colors at their peak. You use a camera to bridge the gap between traditional herbarium collection and modern graphic design. This process turns a fragile physical object into a versatile digital asset. It is a calculated method for archiving botanical geometry.
Why Pressed Flowers Make Such Naturally Photogenic Subjects
Pressed flowers provide a unique level of translucency. When you flatten a petal, its cellular walls thin out. This allows light to pass through the specimen with minimal resistance. You gain access to internal vein patterns and reproductive organs that are usually opaque. This physical state creates a high contrast between the subject and its background. It simplifies the requirements for professional lighting setups.
Victorian era scientists favored this medium for its structural clarity. Modern photography enhances this historical practice by emphasizing color saturation. Botanicals offer naturally occuring mathematical patterns like the Fibonacci sequence. These patterns become more obvious in a two dimensional plane. You eliminate distractions like shadows and depth of field issues. This clarity makes the subject matter easy for any viewer to process and understand immediately.

A Brief History Of Pressed Flowers And Their Place In Art And Culture
How The Tradition Of Preserving Pressed Flowers Began Centuries Ago
Humanity started pressing plants for functional reasons rather than aesthetics. Early botanists needed to study specimens across different seasons and locations. They flattened plants to dry them quickly and prevent decay. This process allowed scientists to archive physical data in books called herbaria. These collections date back to the sixteenth century. Italian botanist Luca Ghini is often credited with pioneering this systematic preservation method.
By the Victorian era, the practice shifted from science to social expression. People began pressing flowers to commemorate life events or romantic gestures. Flowers acted as physical tokens of memory and emotion during this period. Crafters used heavy books and wooden presses to remove moisture from petals. This cultural movement turned botanical preservation into a mainstream hobby. It laid the groundwork for using dried plants as decorative elements in homes.
From Dried Flowers Art To Modern Photography: A Natural Evolution
Pressed flower art transitioned into the world of photography as technology improved. Early photographers captured botanical specimens to document nature with higher precision than hand drawings. These early images focused on form and structural detail. They used monochromatic film to highlight the textures of dried leaves and stems. This shift bridged the gap between physical craft and visual media. It allowed artists to share botanical beauty without shipping fragile samples.
Modern Pressed Flower Photography now uses high-resolution digital sensors to capture extreme detail. Digital cameras allow for backlighting and macro focus that physical displays cannot match. Photographers manipulate light to show the translucent quality of dried petals. This evolution turns a centuries-old craft into a digital asset. It maintains the original intent of preservation while adding a new layer of artistic control. Today, the practice combines historical techniques with powerful modern optics.
How To Press Flowers At Home Before You Start Shooting
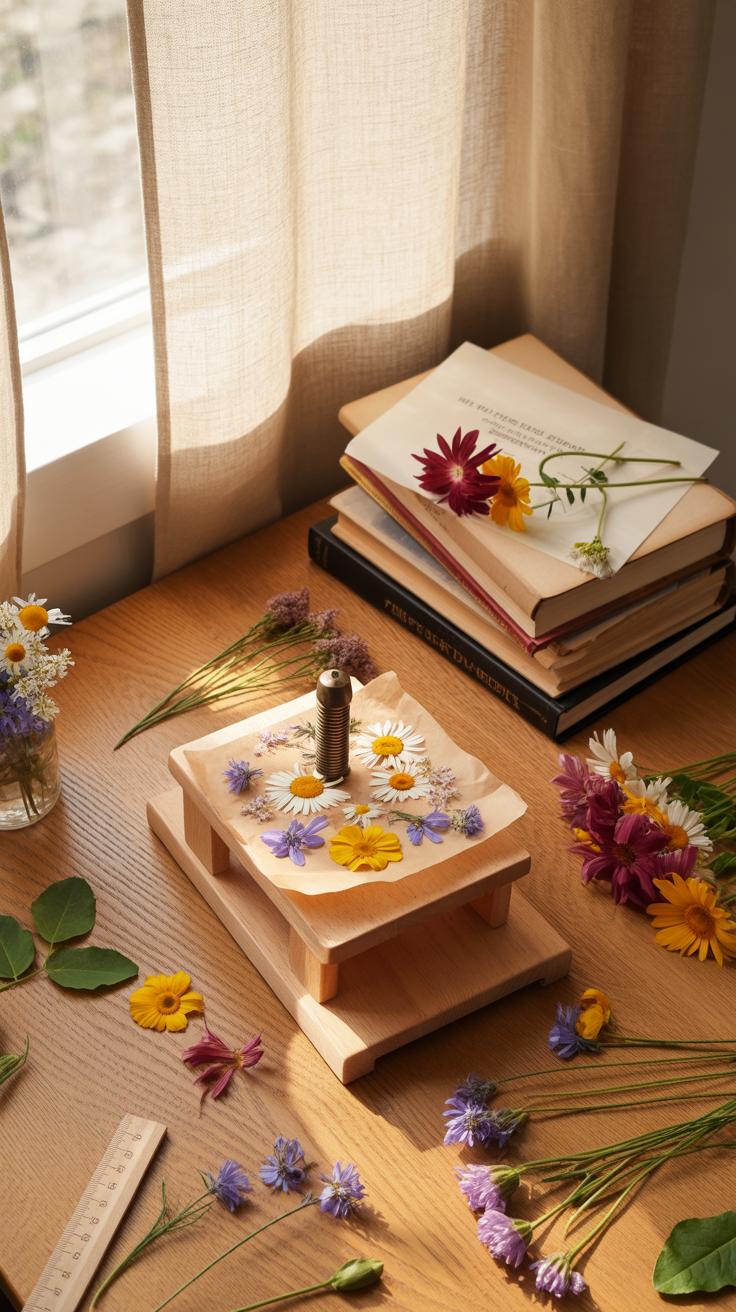
The Classic Method Of Drying Flowers In Books And What Makes It Work
The book pressing method relies on osmotic pressure and consistent weight to remove moisture from plant tissue. This technique dates back to the Victorian era when botanists created herbaria for scientific study. By sandwiching organic material between absorbent paper, you prevent light from degrading pigments while keeping the specimen flat. Physical weight compresses the cells to ensure the final product remains thin for photography.
Successful pressing requires even distribution of force across the entire surface of the flower. You must place specimens between pH neutral paper to avoid acid burns or discoloration over time. This process generally takes two to three weeks depending on the thickness of the bloom and the ambient humidity. Constant pressure prevents the petals from curling or wrinkling as the internal water content evaporates slowly.
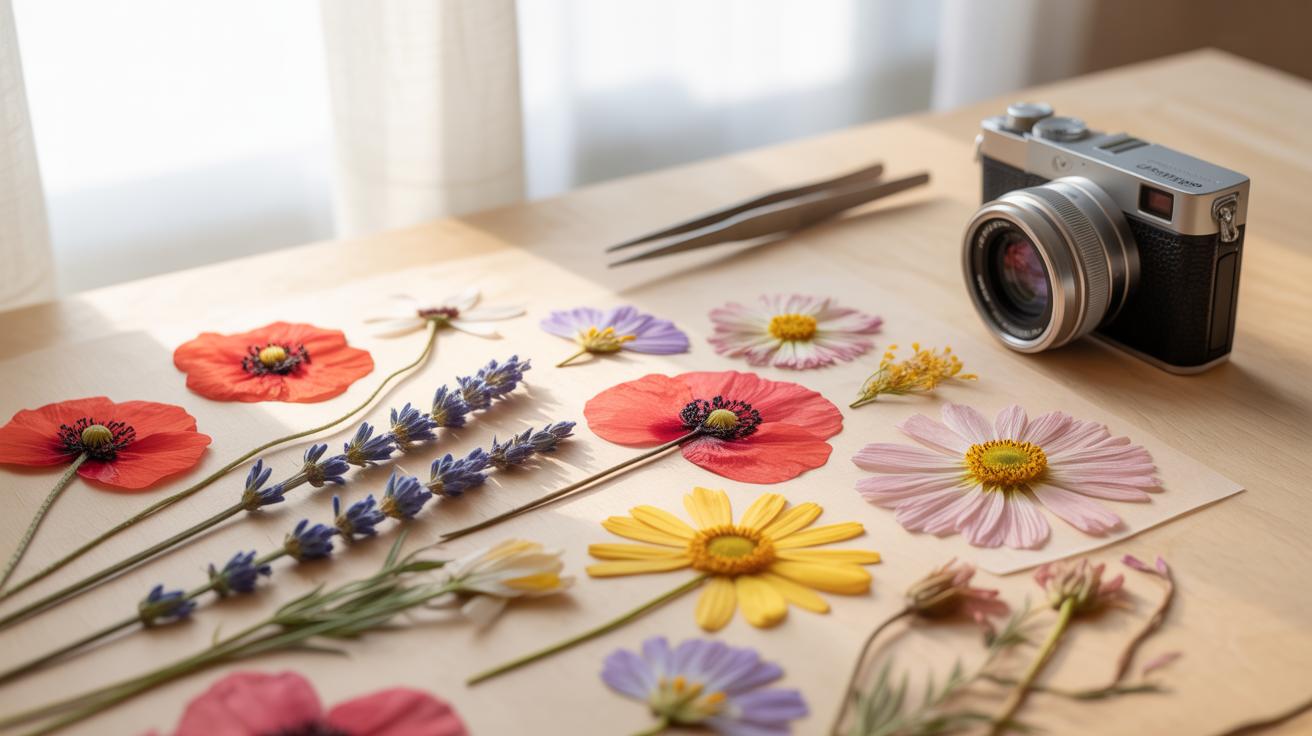
Essential Materials You Need To Press And Prepare Flowers For Photography
You need specific tools to ensure high quality results for digital imaging. Standard household items often fall short because they contain acids or textures that ruin the specimen. Invest in materials that prioritize moisture absorption and structural integrity. Proper preparation prevents mold growth and ensures the flower colors stay vibrant. Every tool in this kit serves to keep the plant flat and dry for the lens.
- Heavy Books: Use large volumes like encyclopedias or dictionaries to provide steady and even weight. These books create the necessary pressure to flatten the plant cells without requiring expensive mechanical presses.
- Blotting Paper: This specialized paper absorbs moisture quickly without sticking to the delicate petals. Avoid using paper towels because their embossed patterns will transfer onto the flower and ruin the smooth surface.
- Cardboard Dividers: Corrugated cardboard pieces allow air to circulate between layers of flowers. This airflow speeds up the drying process and prevents moisture from trapping heat, which causes browning or rot in specimens.
- Fine Tweezers: Use stainless steel tweezers to position small petals and stems accurately on the paper. Handling specimens with your fingers transfers oils and salts that can degrade the organic material before shooting.
- Acid Free Tissue: Protect the most fragile blooms by wrapping them in thin acid free tissue paper. This material prevents chemical reactions that shift the natural colors of the flower during the long drying cycle.
Organize these materials on a clean workspace before you begin the harvest. Speed is critical because flowers start to wilt the moment you cut them from the source. Arrange the layers carefully to avoid overlapping parts because they will fuse together once dry. Once the stack is complete, do not disturb it for at least fourteen days to ensure a successful flat finish.

Setting Up The Perfect Scene With Pressed Flower Crafts And Props
Using A Flower Collage Layout To Build A Visually Balanced Composition
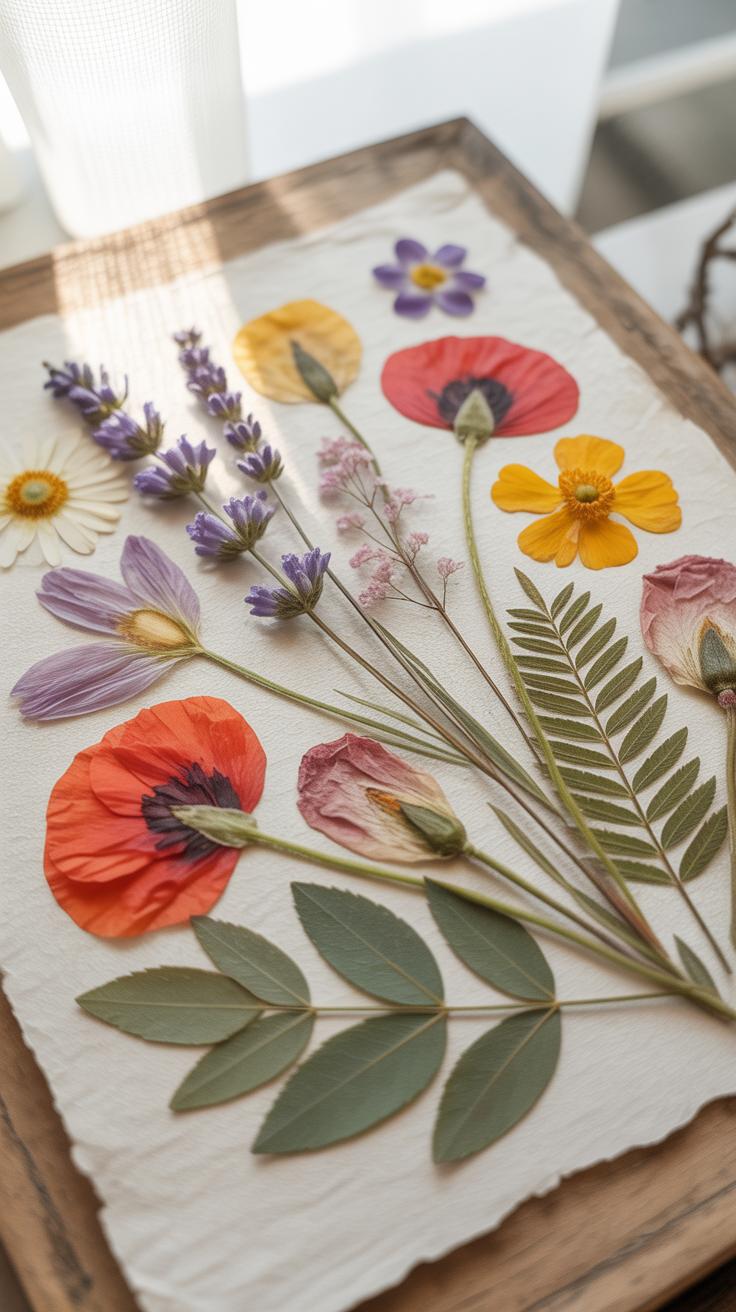
A successful flower collage layout relies on the Rule of Thirds and negative space. Do not crowd the frame. Place your largest pressed specimens at the natural focal points of the grid. Use smaller petals or leaves to bridge the gaps between these main elements. This strategy guides the eye across the image. Proper spacing prevents the composition from looking messy or cluttered.
Balance the visual weight by mixing different shapes and colors. Place heavy, dark botanical elements at the bottom of the frame to anchor the shot. Use lighter, translucent specimens at the top to create a sense of airiness. Move your pieces with tweezers to avoid skin oil damage. Fix the layout before you start your lighting setup. Stable compositions result in professional Pressed Flower Photography outcomes.
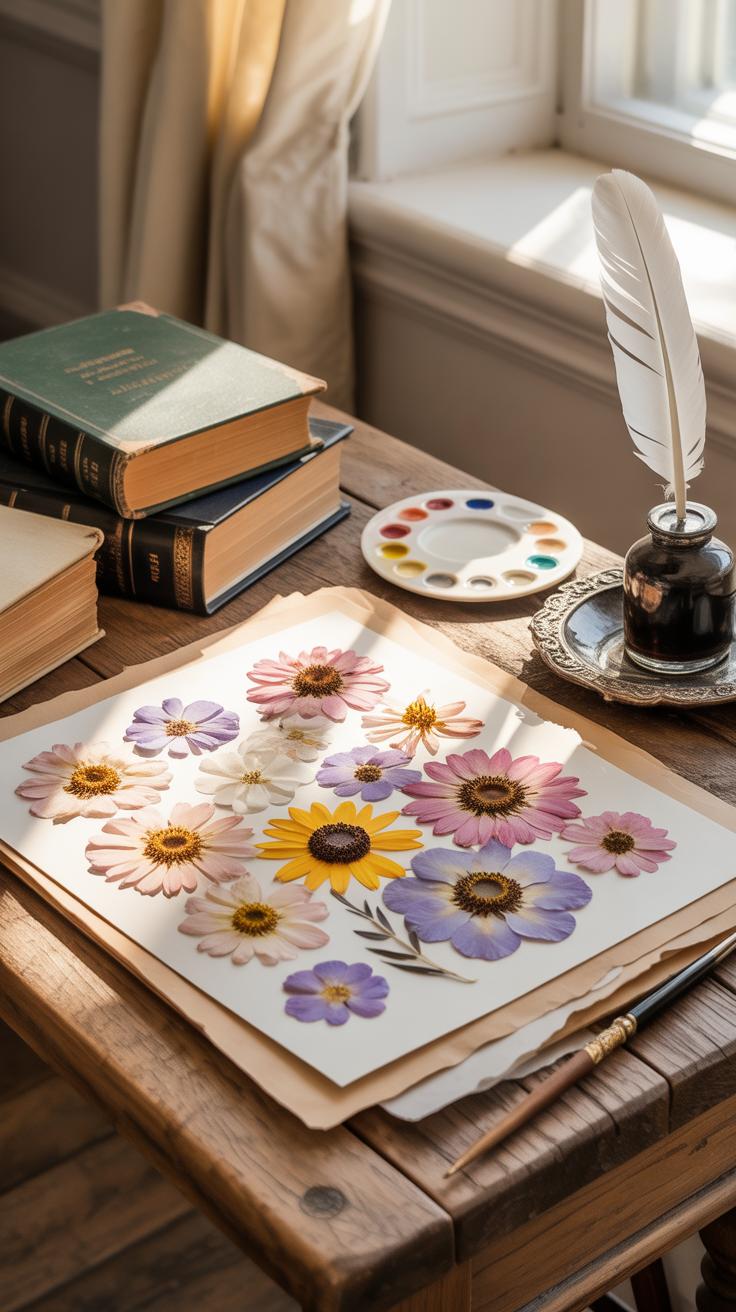
How Dried Flowers On A Vintage Book Create Effortless Styling Backdrops
Vintage books offer matte paper that eliminates harsh glare during shoots. Choose books from the Victorian era or early twentieth century for authentic yellowing and foxing. This texture adds historical depth to the background. Open the book to a page with typography or botanical illustrations to enhance the theme. Ensure the paper is sturdy enough to hold the specimens without curling.

Position your dried flowers along the gutter or the margins of the page. This placement mimics the look of traditional herbarium sheets used by nineteenth-century scientists. The flat surface keeps the thin petals in a single focal plane. This allows for a shallow depth of field while keeping the entire specimen sharp. Avoid glossy modern pages that reflect shop lights or camera flashes back into the lens.
Lighting Techniques That Bring Pressed Flower Photography To Life
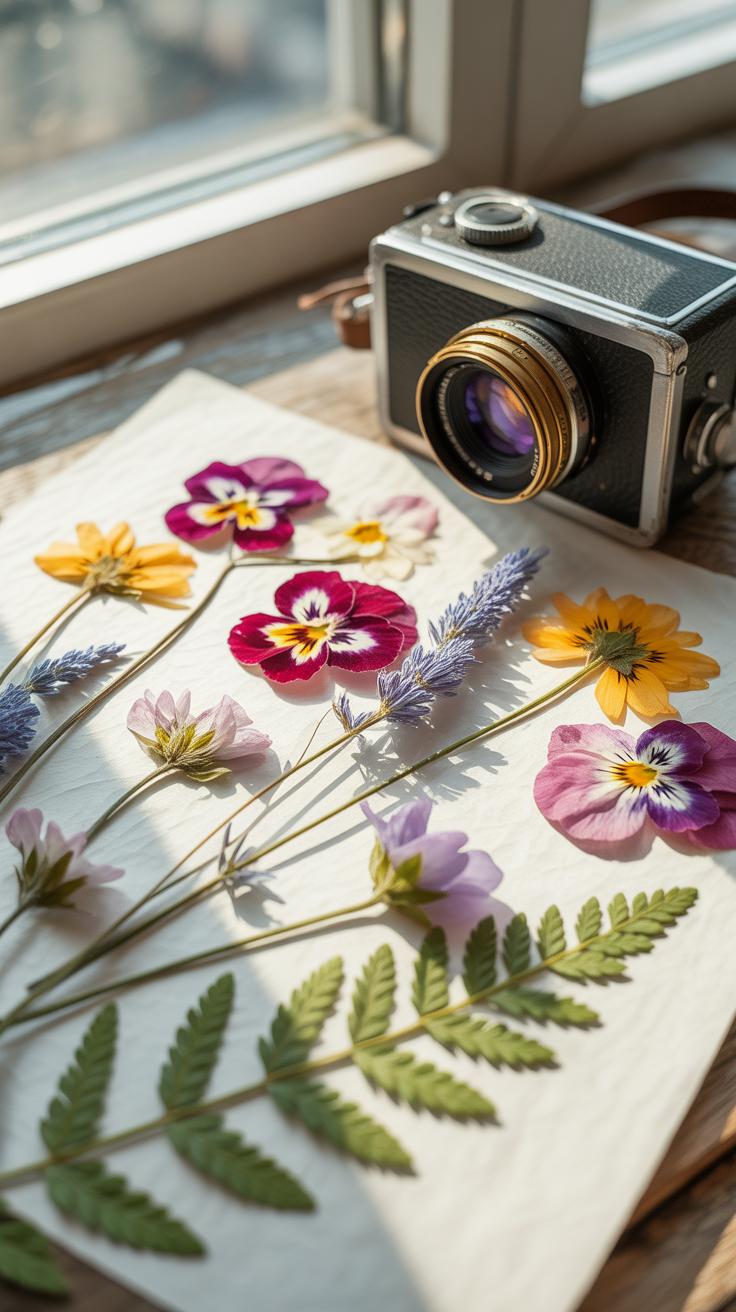
Why Natural Window Light Is The Best Starting Point For Beginners
North-facing windows provide the most consistent light for beginners. Direct sunlight creates harsh shadows and blow out the subtle colors of dried petals. Soft light preserves the anatomical details of the specimen without adding high contrast. Place your setup two feet away from the glass. This distance softens the light further and minimizes the reflection if you are shooting through glass frames.
Side lighting reveals the physical topography of the pressed plant. Even though the flower is flat, it still has microscopic ridges and veins. Positioning the light source at a forty-five degree angle makes these features pop. Use a white foam board opposite the window to bounce light back. This fill light removes deep shadows from the edges. Accurate color reproduction depends on this neutral, balanced illumination.
Somewhere between the pages of a book and a simple lens, a wildflower’s memory becomes timeless. There are always flowers for those who want to see them.
— Henri Matisse
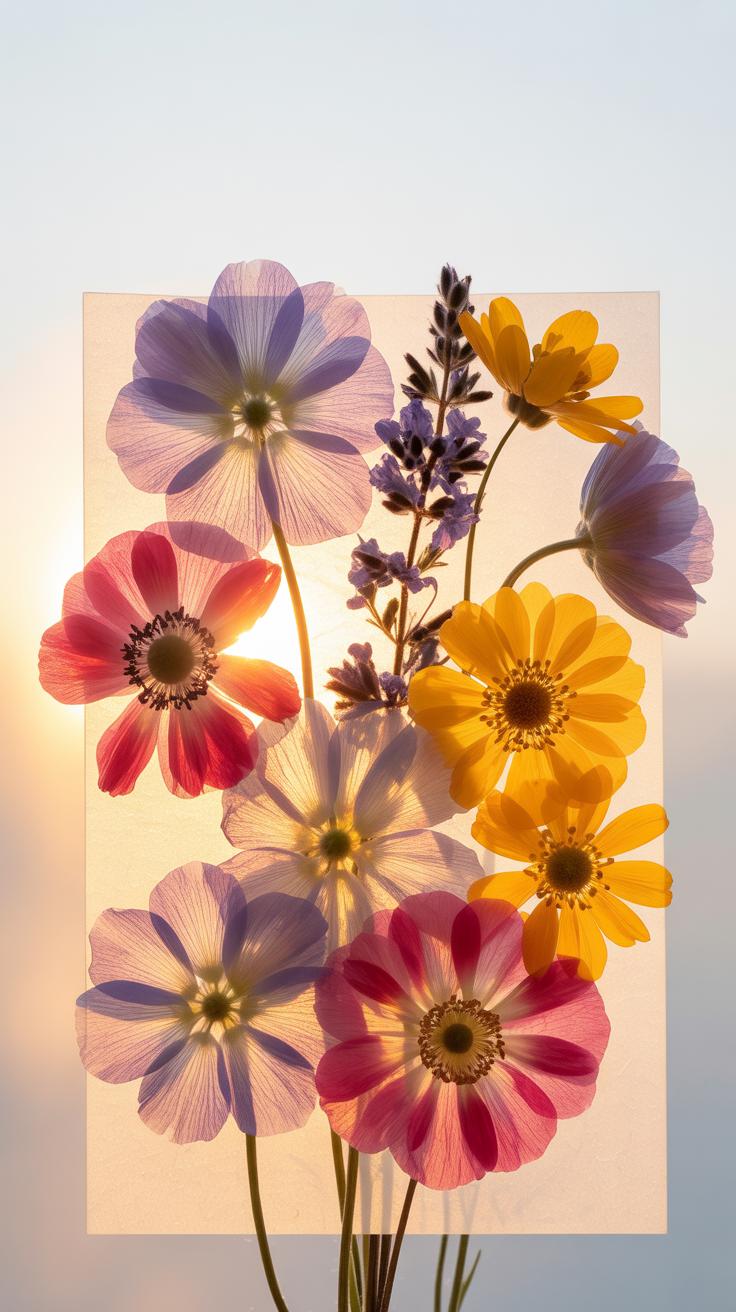
Using A Backlit Setup To Highlight The Delicate Texture Of Pressed Flowers
Backlighting involves placing the pressed flower on a light box or glass surface with a light source underneath. This technique reveals the internal cellular structure and vascular system of the plant. Botanists have used this method for centuries to study specimen morphology. The light passes through thin petals to show hidden patterns. It turns thick parts into silhouettes while making thin areas glow.
A clean light box provides even illumination across the entire subject. Avoid using standard lamps that create hot spots in the center of the frame. Manual exposure is required here to prevent the camera from underexposing the flower against the bright background. Increase your exposure compensation by one or two stops. This ensures the background stays white while the colors of the flower remain vibrant and true.
Camera Settings And Gear For Shooting Flower Press Art Up Close
Understanding Aperture And Focus When Photographing Flat Dried Flower Subjects
Pressed flowers are two dimensional subjects. You do not need a wide aperture to create background blur because the subject is thin. Set your aperture between f/8 and f/11 to ensure every petal edge remains sharp. This range hits the lens sweet spot. It prevents the diffraction that occurs at very small apertures. Focus on the most textured part of the botanical specimen.

A tripod is mandatory for this work. It keeps the camera sensor perfectly parallel to the floral arrangement. Any slight tilt creates focal planes that leave parts of the flower blurry. Use a remote shutter or a two second timer to stop camera shake. This ensures maximum clarity for fine details like stamen or leaf veins. Sharpness is the primary goal for high quality botanical documentation.
Smartphone Vs. DSLR: Which Works Better For Pressed Flower Photography
Modern smartphones handle pressed flower photography well due to their small sensors. These sensors naturally provide a deep depth of field. This keeps the entire flat subject in focus easily. Use the macro mode or the 2x lens to avoid edge distortion. Smartphones work best for social media sharing. They offer quick workflows but limit your ability to make large scale physical prints.
DSLR and mirrorless cameras provide superior raw data and color accuracy. Use a dedicated macro lens or a sharp prime lens for the best results. These cameras allow for manual control over white balance and exposure. This is crucial for capturing accurate pigment shades in dried petals. Choose a DSLR if you plan to sell professional prints. It offers the resolution needed for high quality archival reproduction.
Creative Composition Ideas Inspired By Pressed Flower Art Traditions
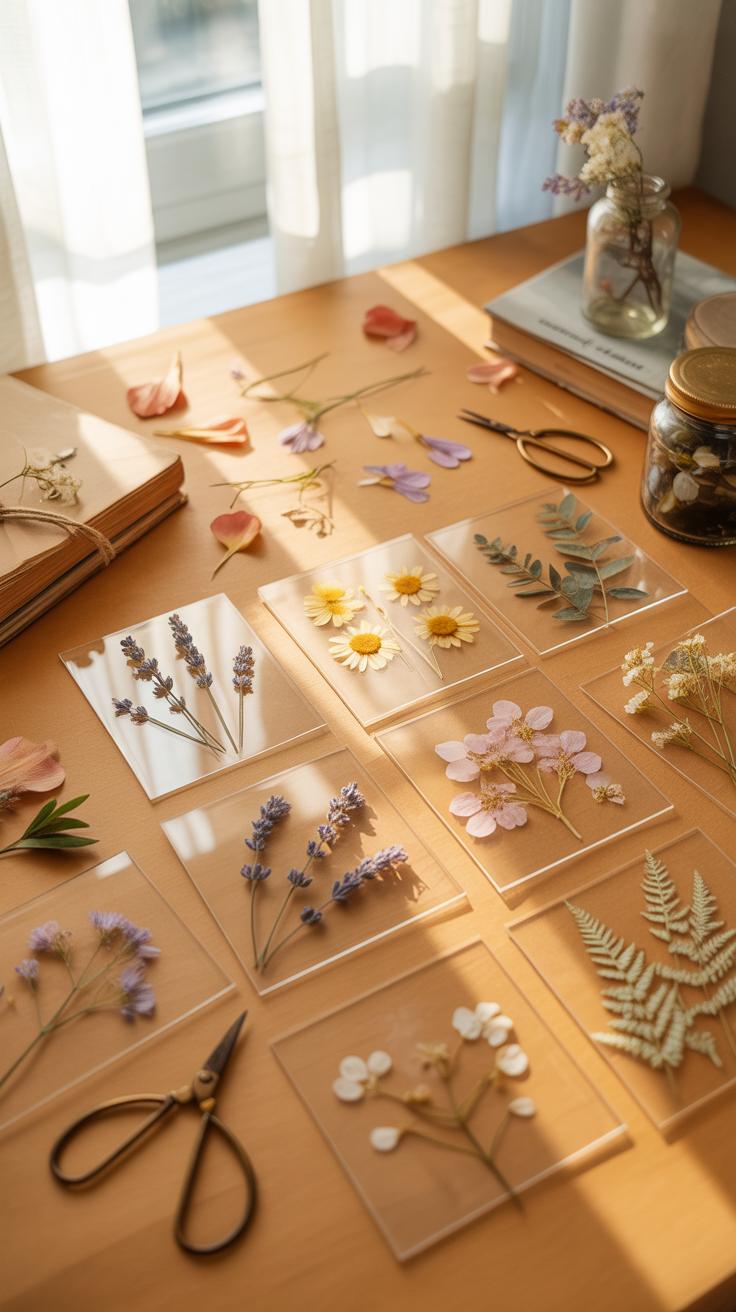
Arranging Pressed Flowers Into Flat Lay Compositions That Tell A Story
Pressed flower art follows a long history of botanical record keeping. You can mimic the Oshibana style from Japan by creating entire landscapes using only organic materials. Use stems to define horizon lines and small petals to suggest distant birds or trees. This method moves beyond simple patterns. It transforms flat specimens into a narrative scene that suggests a specific place or time.

Modern flat lay photography relies on the grid system to create visual balance. Place your main subjects along the intersections of a rule of thirds grid. Leave plenty of negative space to mimic the look of Victorian herbarium sheets. This historical approach highlights the unique shape of each specimen. You must ensure the background color provides enough contrast to reveal the thin veins and delicate edges of the petals.
Top Tips For Composing Pressed Flower Photography Shots With More Impact
Effective composition requires a firm understanding of visual weight and historical design principles. You must control how the viewer’s eye moves across the frame to highlight the fragile details of the dried plants. Use these specific tactics to increase the professional quality of your botanical shots.
- Geometric Symmetry: Align flowers in perfect geometric patterns to reflect the order found in Renaissance botanical illustrations. Centralized compositions create a sense of stability. This formal arrangement focuses the viewer on the mathematical beauty of the flower structure rather than environmental context.
- Layering and Depth: Place translucent petals over each other to create new colors and shapes. This technique mimics the depth found in traditional decoupage art. It adds a three-dimensional feel to a two-dimensional subject by using the varying opacity of the dried plant tissues.
- Visual Flow: Arrange stems in curved lines to lead the eye toward a primary focal point. This mimics the Art Nouveau movement which emphasized organic, flowing forms. Directional lines prevent the image from looking static and guide the viewer through the entire narrative of the piece.
- Color Blocking: Group specimens by hue to create bold blocks of color that draw immediate attention. This modern technique provides a high-contrast look that works well for digital displays. It simplifies complex botanical shapes into understandable color stories that feel organized and deliberate.
- Scale Contrast: Mix very large leaves with tiny delicate buds to show the diversity of the plant kingdom. This reflects the scientific curiosity of the Enlightenment era collectors. Using size differences creates a sense of drama and helps the viewer appreciate the intricacy of smaller botanical elements.
Lighting choice dictates the final mood of your composition more than the arrangement itself. Use side lighting to emphasize the thin, paper-like texture of the petals. Avoid harsh direct flash which flattens the specimen and hides the natural ridges. Backlighting is another strong option for pressed flowers because it reveals the internal cellular structure. Controlled lighting makes the difference between a simple craft project and professional botanical art.
Editing And Sharing Your Pressed Flowers Photography With Confidence
Simple Editing Adjustments That Enhance Color And Clarity Without Overdoing It
Digital sensors often mute the organic tones of dried botanical specimens. Use the levels tool to set a true black point and white point. This creates depth without distorting the natural colors of the petals. Adjust the white balance to remove yellow casts from indoor lighting. Aim for a neutral background that makes the herbarium style pop. Avoid high saturation sliders that create neon artifacts.

Sharpening should focus on the delicate veins and cellular structures of the plant. Use a masking tool to apply sharpness only to the flower and not the background. High contrast settings help mimic the look of Victorian botanical illustrations. If the paper has distracting dust, use a spot removal tool. Keep the final image looking like a tangible physical object rather than a digital creation.
How To Share Your Dried Flowers Art Online And Build A Creative Audience
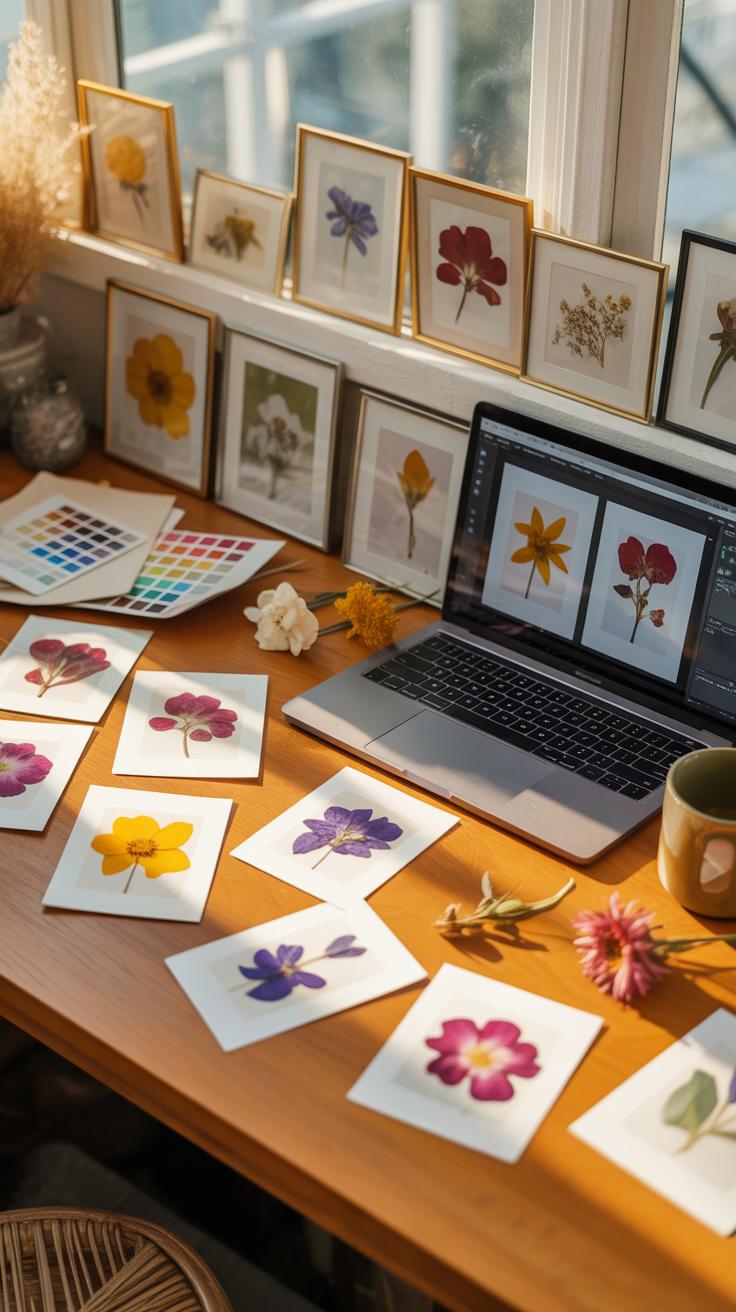
Consistency drives growth on visual platforms like Instagram or Pinterest. Post high resolution shots that show both the full composition and macro details. Use specific tags related to botanical art and herbarium collections. Document your process by photographing the pressing tools and raw specimens. This transparency builds trust with other collectors. Show the scale of the work by placing a common object nearby.
Niche communities value technical accuracy and species identification. Label your posts with the scientific names of the flowers you use. Engaging with botanical gardens and floral designers expands your reach quickly. Offer value by explaining your preservation methods or paper choices. A professional portfolio site serves as a permanent archive for your best work. Direct traffic from social media to this central hub to secure your digital presence.
Frequently Asked Questions

What are the best types of flowers for a beginner to use in photography?
If you are new to pressed flower photography, start with blooms that have a naturally flat profile. Pansies, violas, cosmos, and Queen Anne’s Lace are ideal because they retain their shape and color beautifully once dried. Thinner petals dry faster and lie flatter against your background, which helps prevent unwanted shadows and ensures every delicate detail remains sharp and in focus when you finally capture your image.
How do I prevent glare when photographing flowers behind glass?
Glare is a common challenge in pressed flower photography, especially when using framed specimens. To fix this, avoid using a direct flash and instead set up your shoot near a large window with soft, diffused natural light. Position your camera at a slight angle rather than perfectly parallel to the glass, or use a polarizing filter on your lens to cut through reflections and reveal the vibrant colors of the petals.
Can I try pressed flower photography without buying an expensive professional camera?
Absolutely! You do not need high-end gear to achieve stunning results. Most modern smartphones have incredible macro capabilities that are perfect for capturing the intricate textures of dried plants. By using a simple piece of white poster board as a backdrop and relying on steady, natural sunlight, anyone can produce professional-looking botanical art. Focus on clean compositions and soft editing to make your floral subjects truly stand out.


