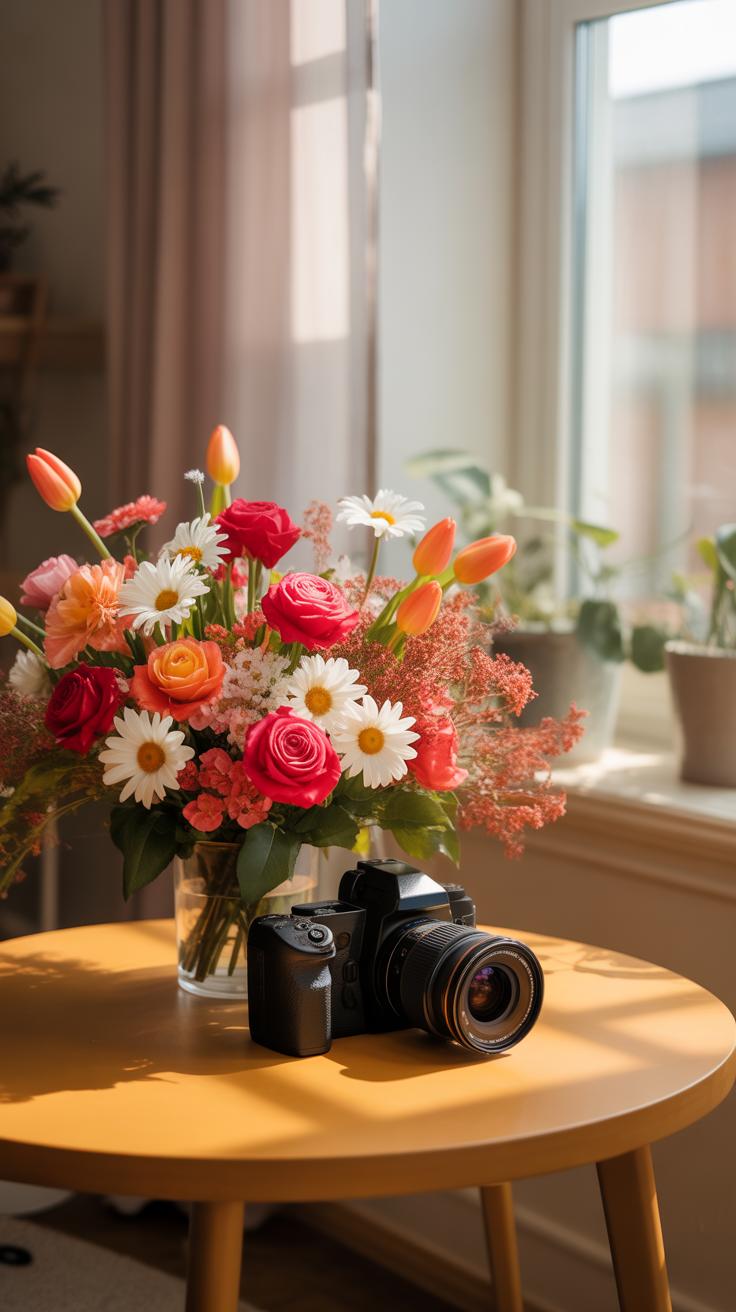
Understanding The Basics Of Styling Flowers For Photos At Home
Why Flower Styling Matters In Home Photography
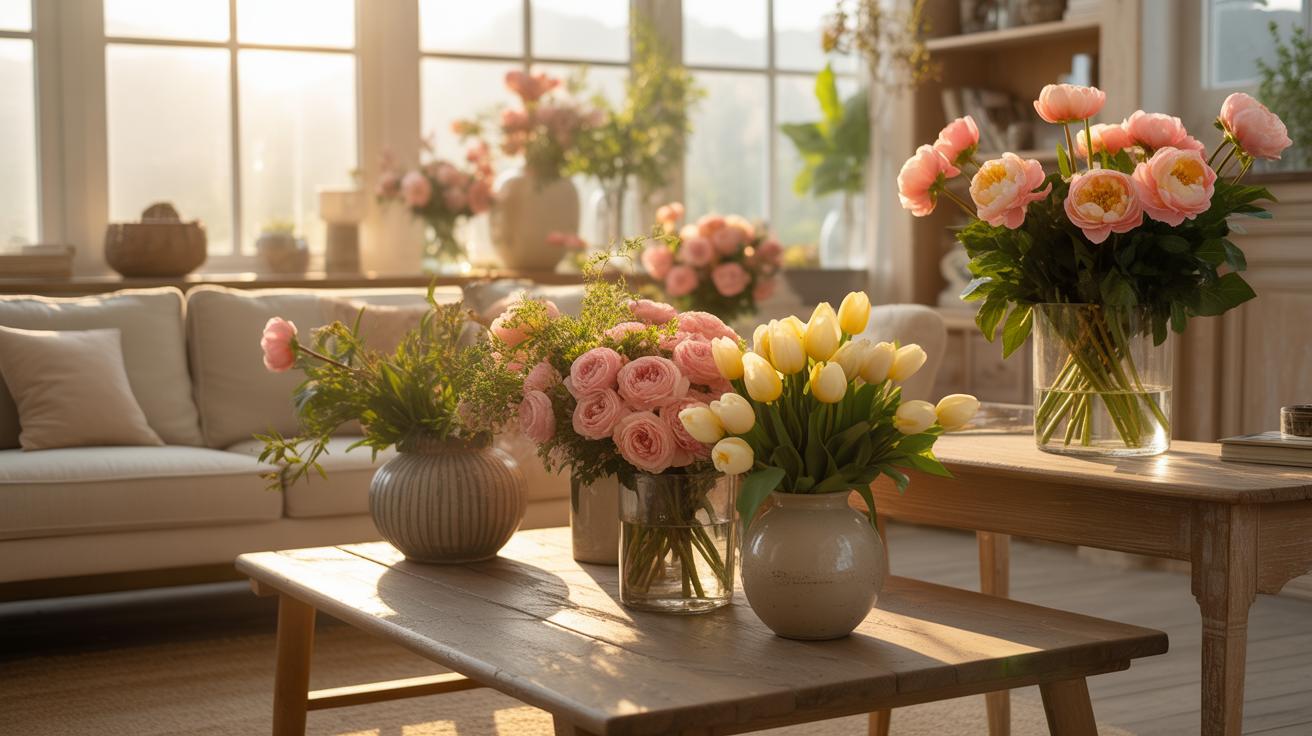
Styling flowers for photos transforms a static room into a dynamic visual narrative. Flowers serve as essential organic elements that break up rigid lines in modern home architecture. They provide a necessary focal point for the camera lens to track. Proper placement guides the eye through the frame and balances the weight of heavy furniture. You use stems to control depth and add texture.
Cameras flatten three-dimensional spaces into two-dimensional images. Expert floral arrangement restores that lost dimension through layering and color contrast. If you ignore floral styling, your interior shots appear sterile and unlived in. Professional photographers use these natural elements to manipulate light and shadow across surfaces. Intentional styling ensures the flowers support the room design rather than distracting from the primary subject matter.
Choosing The Right Flowers For Your Home Photo Setting
Select flowers based on the architectural style of your home. Modernist spaces require structural plants like Monstera leaves or Protea to match clean lines. Traditional interiors benefit from dense, rounded blooms like English roses or peonies. You must match the scale of the flower to the size of the room. Small blooms disappear in wide shots, while oversized tropicals crowd tight corners and create visual clutter.
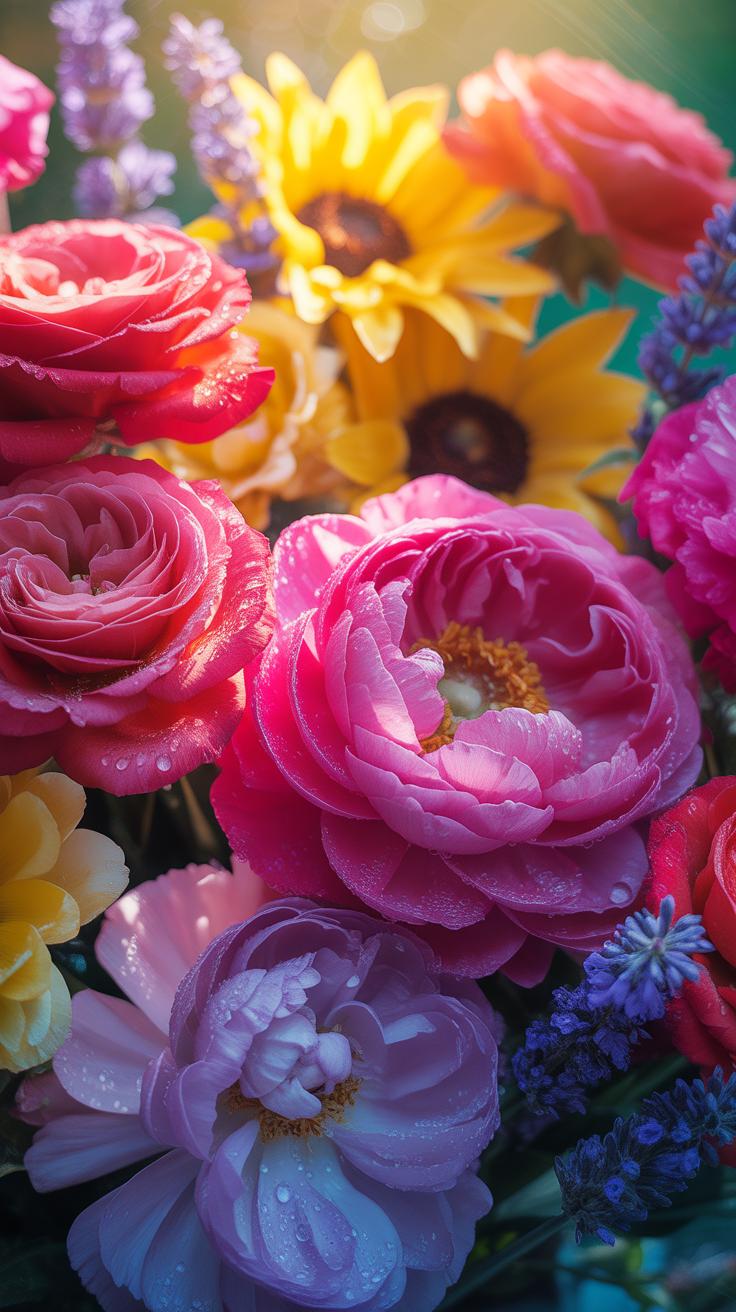
Consider the color wheel when picking stems for your shoot. Complementary colors create high energy and sharp contrast in digital sensors. Analogous colors offer a calm and cohesive look for lifestyle photography. Check the longevity of your chosen species under hot studio lights or direct sunlight. Hardier varieties like carnations or lilies maintain their shape longer during multi-hour shoots. Freshness determines the professional quality of the final high-resolution image.
How To Take Pictures With Flowers Using Natural Light
Finding The Best Natural Light Sources In Your Home
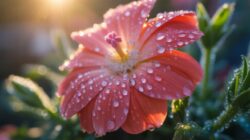
North facing windows provide the most consistent light for botanical photography. This light remains steady throughout the day and lacks harsh highlights. Avoid direct midday sun because it creates high contrast shadows that hide flower details. Position your floral arrangement three to five feet away from the window glass. This distance softens the light falloff and creates a professional look for your shots.
Use a white foam board to bounce light back into the shadowed side of the petals. High ceilings and light colored walls also help circulate light around the subject. If the sun is too bright you can use a sheer white curtain to diffuse the rays. This technique replicates the softbox effect used in professional studios. Proper placement ensures the camera captures the true texture and color of the blooms.
How Golden Hour Light Enhances Floral Photo Compositions
Golden hour occurs shortly after sunrise and before sunset. During these times the sun sits low on the horizon and travels through more atmosphere. This creates a warm color temperature that saturates the reds and yellows in flower petals. The long shadows add depth and dimension to your floral compositions. This lighting style creates a natural glow that digital editing cannot perfectly replicate.
Backlighting is a specific technique used during this period to highlight delicate flower structures. Position the flowers between the camera and the sun to illuminate the transparency of the petals. This makes the edges of the flora appear to glow. Keep your camera lens clean to prevent unwanted flare during these shots. Accurate timing is essential because this window of ideal light usually lasts less than sixty minutes.
How To Take Pics With Flowers Using Simple Household Props
Everyday Items That Double As Stunning Floral Photo Props
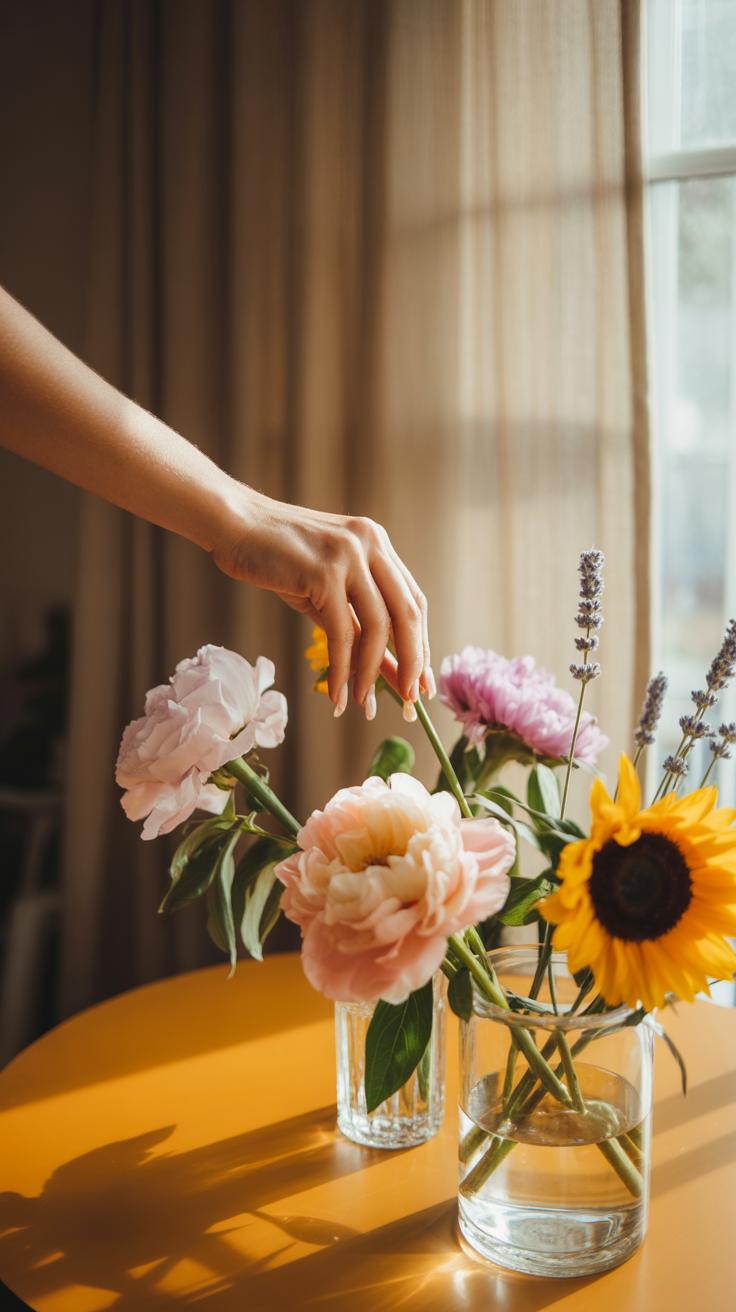
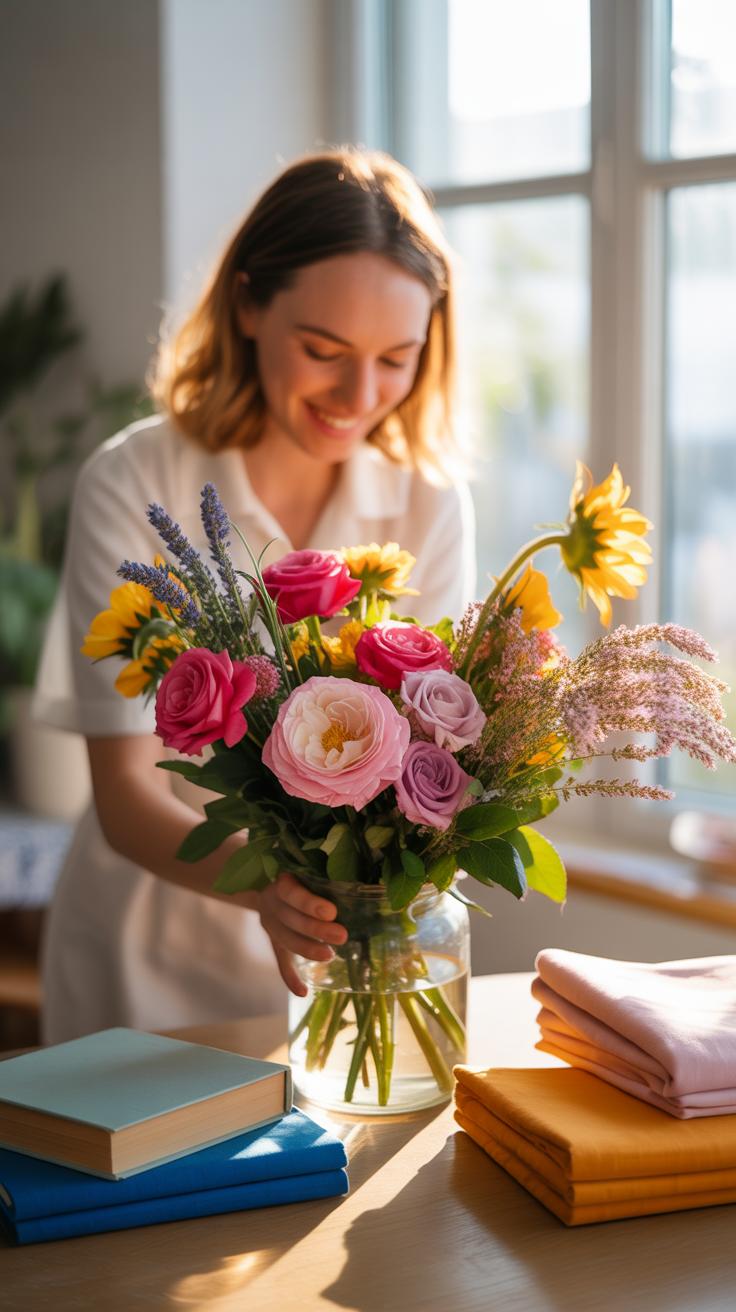
Common kitchen items provide effective focal points for floral photography. Ceramic pitchers and vintage tea tins offer structural contrast to soft petals. Clear glassware works well for showing stems and water clarity. Use heavy stoneware to ground delicate blooms like sweetpeas or ranunculus. These items add weight and narrative to the frame. They transform a simple bouquet into a composed still life scene without extra cost.
Open books and linen napkins serve as excellent secondary props. A weathered book spine adds a sense of history and scale. Drape a cotton cloth near the base of a vase to soften harsh edges. Use wooden cutting boards to introduce organic warmth and flat surfaces for overhead shots. These tools direct the eye toward the flowers. They create a believable environment that mimics a lived-in home setting for the camera.
How To Layer Textures And Surfaces For Depth In Flower Photos
Depth in photography requires distinct layers between the foreground and background. Start with a matte base like a reclaimed wood table or a slate tile. Avoid glossy surfaces that create distracting light reflections. Place a textured fabric runner under the vase to break up the solid plane. This layering technique separates the floral subject from the flat surface. It builds visual interest by using conflicting materials like cold stone and soft silk.
Use backdrops that reflect the Dutch Golden Age style of high contrast. A dark velvet cloth or a tattered canvas creates a moody atmosphere. Position your light source to hit the texture of the petals and the grain of the props. This highlights the physical dimensions of the arrangement. Sharp focus on the middle ground keeps the viewer locked on the flowers. Blur the background props slightly to ensure the floral subject remains the primary focus.
Tips For Taking Pictures Of Flowers With A Smartphone Or DSLR
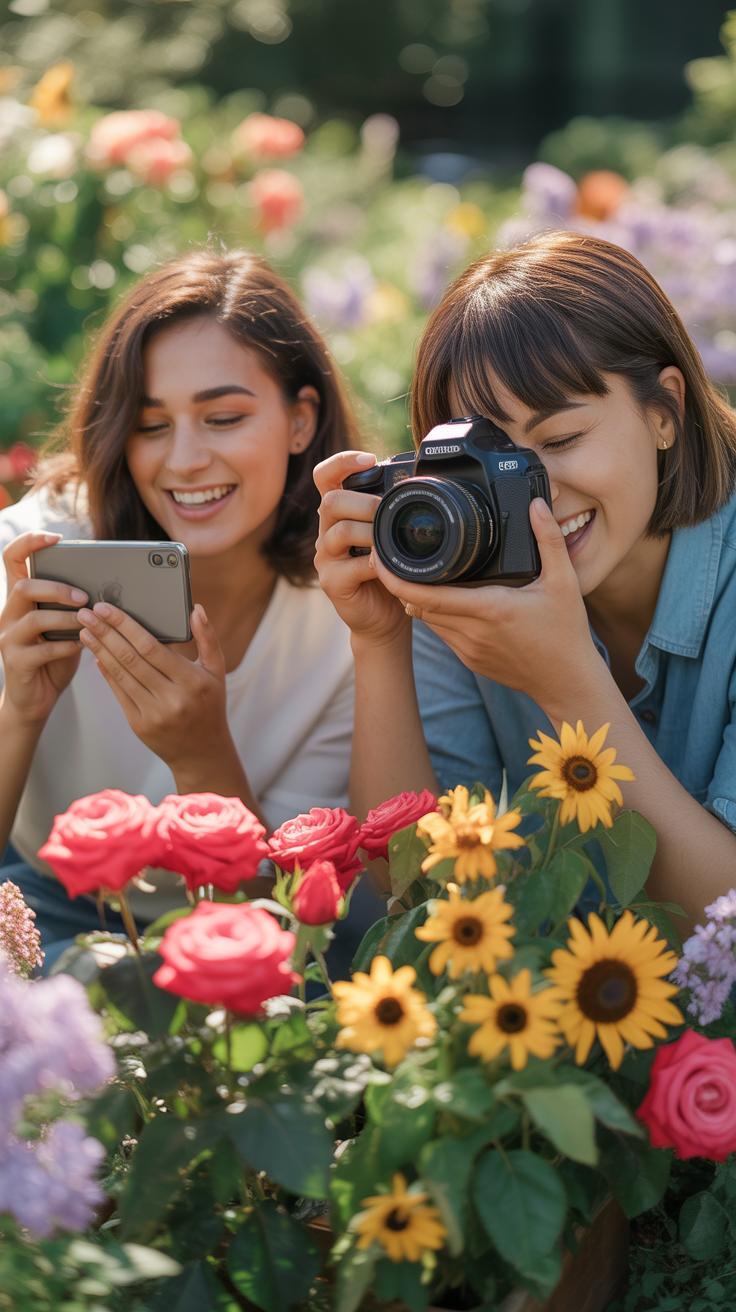
Essential Camera Settings For Sharp And Vibrant Flower Photography
Consistent flower photography requires precise control over light and depth. Use a wide aperture like f/2.8 to create a shallow depth of field. This blurs the background and focuses attention on the bloom. If using a smartphone, tap the screen to lock focus on the stamen. Lower your ISO to 100 to prevent digital noise from ruining the petal textures. Use a fast shutter speed to stop any movement from wind.
- Aperture Control: Set your DSLR to Aperture Priority mode. Use a low f-stop number to isolate the flower from its environment. This creates a professional look by softening distracting leaves or stems behind your main subject.
- ISO Management: Keep the ISO value as low as possible. High ISO settings introduce grain that destroys the delicate details of flower petals. Use a tripod if low light requires a slower shutter speed to maintain a low ISO.
- Shutter Speed: Flowers move with the slightest breeze. Use a shutter speed of at least 1/250 of a second to freeze motion. This ensures every edge of the flower remains crisp and sharp in your final image.
- Manual Focus: Switch your lens to manual focus for extreme close-ups. Autofocus often struggles with the fine textures of a flower. Turning the focus ring yourself ensures the sharpest point lands exactly on the center of the bloom.
- White Balance: Set white balance to Daylight or Cloudy instead of Auto. Auto white balance often misinterprets vibrant flower colors and applies a blue tint. Selecting a fixed preset keeps the reds, yellows, and purples looking natural and true to life.
Lighting dictates the color accuracy of your florals. Golden hour provides soft, directional light that enhances petal shape. Avoid midday sun because it creates harsh shadows and blown-out highlights. If shooting indoors, place your arrangement near a north-facing window for consistent illumination. Use a white foam board to reflect light into the shadowed side of the flower. This simple step balances the exposure across the entire bloom.
How Macro Mode Reveals Stunning Detail In Close Up Flower Shots

Macro mode changes how the lens perceives small surfaces. This setting allows the camera to focus at a much shorter distance than standard modes. It magnifies the intricate patterns found in pollen, veins, and dew drops. When you use macro, the camera sensor captures details invisible to the naked eye. This creates a technical view of the plant anatomy. You must hold the camera perfectly still to avoid blur.
Successful macro shots require physical stability. Use a tripod or a stable surface to eliminate hand shake at high magnification. On a smartphone, the macro lens activates automatically when you move closer to the object. Small movements change the focus plane significantly in this mode. Distance yourself exactly according to the minimum focus distance of your specific hardware. Proper execution results in a clinical and high-resolution look at the flower structure.
Unique Flower Photography Tips For Creative Home Compositions
Using The Rule Of Thirds To Frame Flowers Beautifully At Home
The Rule of Thirds is a fundamental grid system for styling flowers for photos. Imagine two horizontal and two vertical lines dividing your frame into nine equal parts. Place the focal point of the floral arrangement at one of the four intersection points. This technique creates a natural sense of balance and movement. It prevents the image from looking static or boring.
Positioning a single stem along a vertical line adds tension and visual interest. Use the empty space in the remaining two-thirds of the frame to highlight the texture of the petals. High-end interior photographers use this method to lead the eye through a room. Avoid placing the vase directly in the center of the frame. Off-center placement makes the home composition feel more intentional.
Experimenting With Angles And Perspectives For Striking Floral Images
Camera height changes the entire mood of a floral shot. A top-down bird’s-eye view emphasizes the geometric patterns of the blooms. This angle works best for flat-lay compositions on tables or floors. It hides the height of the stems and focuses purely on color and shape. Use a tripod to ensure the camera lens stays perfectly parallel to the floral surface for clarity.
Shooting from a low angle provides a powerful and dramatic perspective. This view elevates the flowers and makes them appear larger than life. It mimics the look of Dutch Still Life paintings where artists used scale to create impact. Get level with the vase to capture fine details like dew or pollen. Macro shots from this angle reveal textures that are invisible from a distance.
How To Improve Flower Photography With Color And Contrast
Understanding Color Theory To Complement Floral Tones In Photos
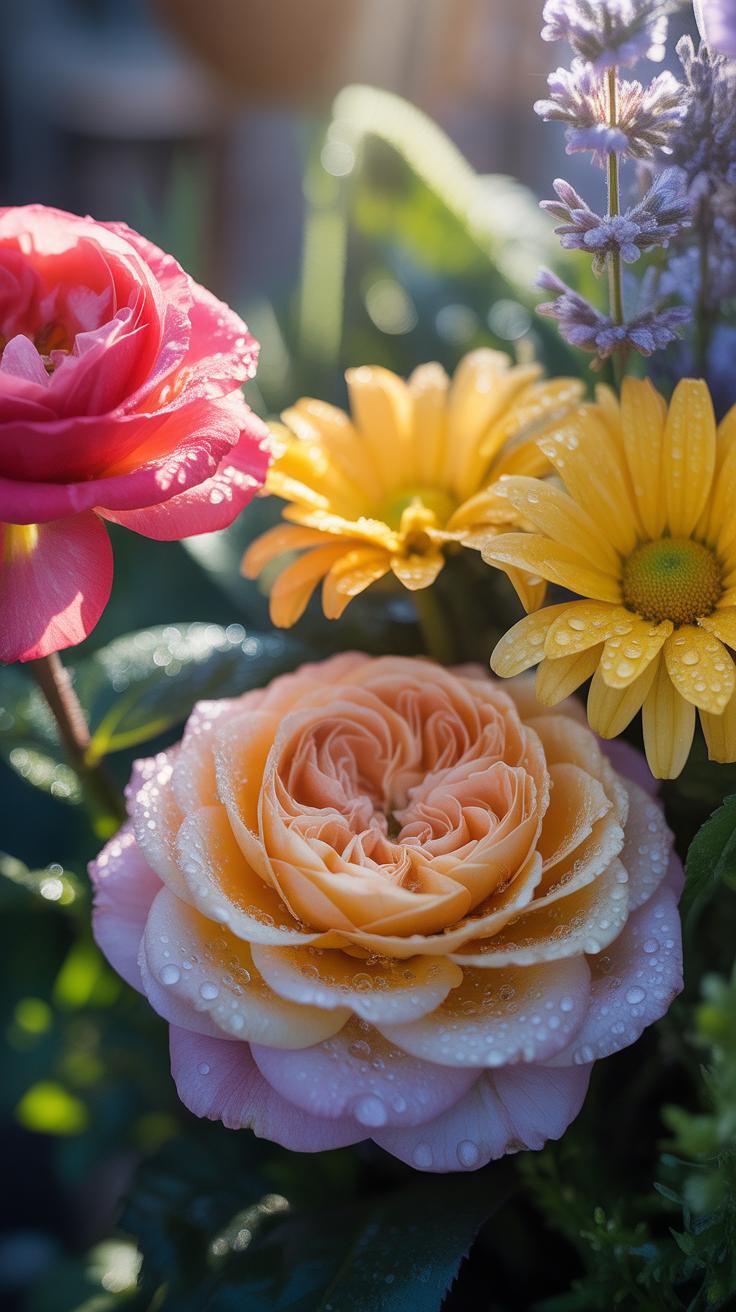
Color theory dictates how the human eye perceives floral arrangements. Use the color wheel to select your palette. Complementary colors sit opposite each other. Placing blue flowers against orange accents creates high visual tension. Use analogous colors for a soft look. These colors sit next to each other on the wheel. Combining pink, red, and violet produces a harmonious and calm image for the viewer.

Color temperature affects the mood of your shot. Warm tones like yellow and red advance toward the camera. Cool tones like blue and green recede into the distance. Use this fact to create depth in your floral compositions. Match the vase color to a secondary hue in the bloom. This technique ties the entire frame together. It prevents the container from distracting the eye from the main botanical subject.
How Background Colors And Negative Space Make Flowers Pop
Background choice determines the success of your floral shot. A dark background absorbs light and makes bright petals stand out. Professional photographers use matte black or deep charcoal surfaces to minimize reflections. This high contrast highlights the intricate texture of the flower. Avoid busy patterns behind the arrangement. Flat colors ensure the viewer stays focused on the primary subject without visual competition or confusion.
Negative space refers to the empty areas around the flowers. Large amounts of negative space draw the eye directly to the bloom. It provides room for the composition to breathe. Position your flowers off center to use this space effectively. This follows the rule of thirds. Proper use of empty space creates a clean look. It makes the colors appear more vibrant. Clear space is a powerful tool for visual impact.
How To Photograph Wildflowers And Bring That Look Into Your Home
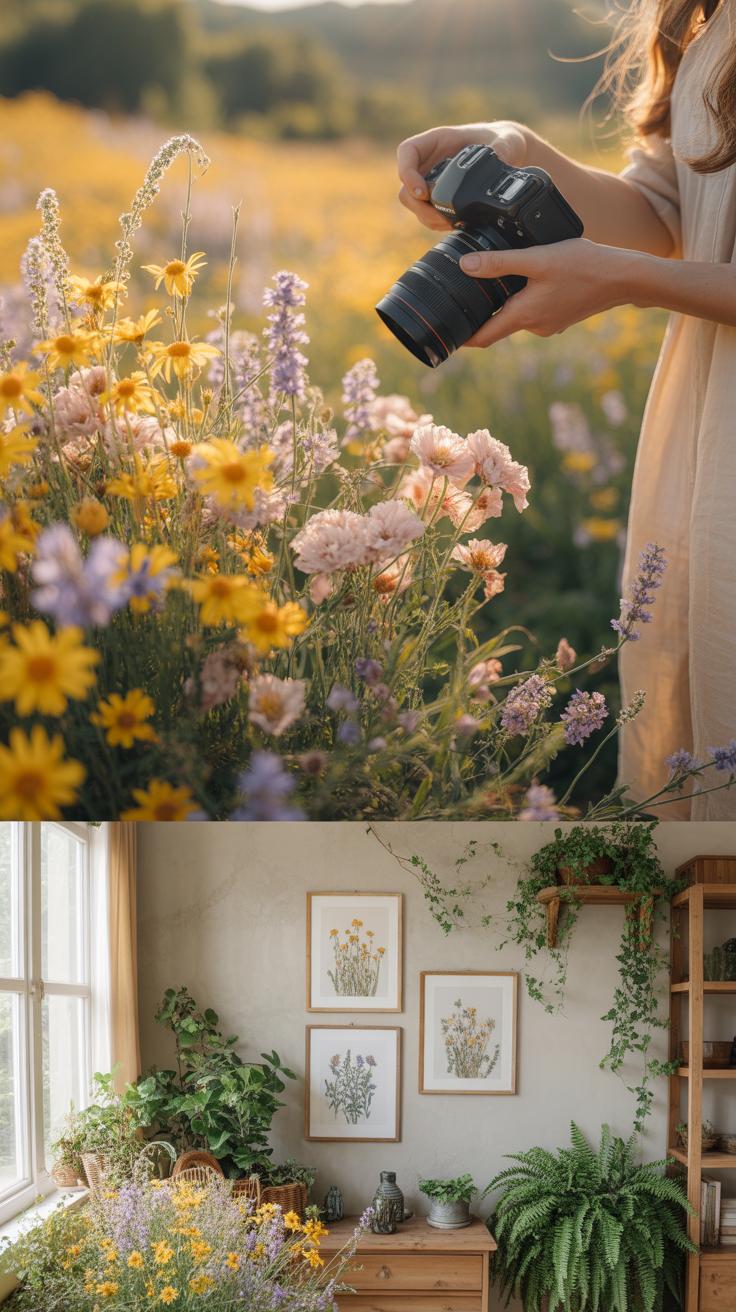
Recreating The Natural Wildflower Aesthetic With Indoor Arrangements

Stop using stiff floral foam or tight grids. Wildflowers belong in movements that mimic their natural growth patterns. Use a frog or chicken wire to hold stems at different heights and angles. This creates the negative space seen in a meadow. Ensure your stems have a slight curve. Straight lines look artificial. Place taller pieces off-center to break symmetry and achieve a raw, unrefined look for the camera.
Lighting is the most critical factor for this style. Avoid hard direct sunlight that washes out delicate petals. Position your arrangement near a north-facing window for soft, even light. This replicates the overcast conditions where wildflowers photograph best. Use a simple, textured backdrop like linen or raw wood. These materials complement the rustic nature of the plants. Keep the water clear and the glass clean to prevent visual distractions in the shot.
Best Wildflower Varieties That Photograph Well In Home Settings
Choose flowers with high contrast and distinct shapes to ensure they stand out on screen. Delicate textures require sharp focus and intentional layering. Select varieties that maintain their integrity after cutting. Some wild species wilt instantly, which ruins a photo shoot. Stick to hardy options that hold their form under indoor lights. Look for interesting seed heads or foliage to add structural variety to the floral composition.
- Queen Annes Lace: This plant provides a flat, lace-like canopy that acts as a perfect filler. Its intricate white patterns create a soft focus effect in the background of your photos. It adds height and structural airiness to any indoor arrangement.
- Cosmos: These flowers have thin, dancing stems and vibrant petals that catch the light well. They offer a simple, round shape that contrasts against jagged foliage. Their movement allows you to capture a sense of wind and life in a still image.
- Goldenrod: This variety adds a bold splash of yellow and a unique plume-like texture. It provides a heavy visual weight at the base or middle of an arrangement. The tiny individual buds create a granular detail that looks sharp in macro photography shots.
- Bachelor Button: These flowers offer a deep, saturated blue color that is rare in home gardens. Their ragged petal edges provide a rugged, natural look that feels authentic rather than staged. They remain upright and firm for long periods after being placed in water.
- Black Eyed Susan: These have a dark central disk that creates a focal point for the camera lens. The bright yellow petals create a high-contrast look against green stems. They are extremely durable and can withstand the heat of photography studio lights without drooping.
Focus on the silhouette of each stem when arranging these varieties. Every flower should have its own breathing room within the frame. Overcrowding hides the unique details of these specific plants. Use a shallow depth of field to make the specific textures of the petals pop against the background. This technique draws the eye exactly where you want it and communicates a professional, high-end editorial feel for your home photography.
Planning A Floral Photo Shoot Room By Room In Your Home

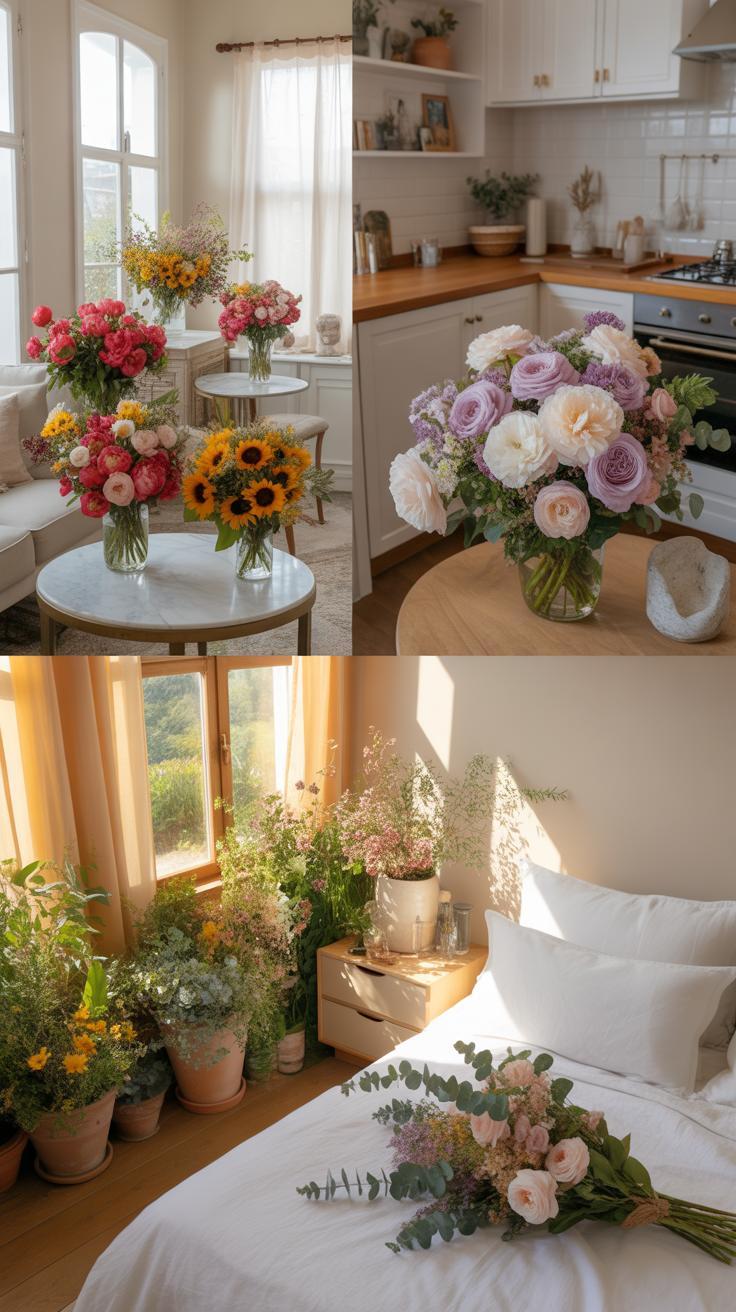
Styling Flowers For Photos In The Kitchen, Living Room, And Bedroom
Kitchen photography requires functional placement and clean lines. Use stone countertops as neutral backgrounds to make organic shapes pop. Avoid placing large arrangements near heavy appliances that create visual clutter. Focus on herbs or simple glass vessels near natural light sources like windows. Use the geometry of the space to frame your shot. Keep the composition tight to highlight texture and freshness.
Living rooms offer more space for Dutch Still Life inspired depth. Place large arrangements on low coffee tables to create a central focal point. Use backlighting to show the translucency of petals against darker furniture. In bedrooms, prioritize soft textures and muted tones. Use bedside tables for small, intimate clusters that do not overwhelm the frame. Ensure the floral colors complement the existing linens and wall paint.
A flower blossoms for its own joy, and capturing that bloom within your home preserves a fleeting summer memory forever.
— Alice Walker
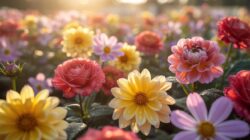
How Seasonal Blooms Can Refresh Your Home Photo Aesthetic Year Round
Seasonal availability dictates the color palette and mood of your photography. Spring offers tulips and peonies that fit a light, airy aesthetic. These blooms work best with high-key lighting and minimalist backgrounds. Summer allows for taller, structural plants like sunflowers or delphiniums. These require larger rooms with high ceilings to maintain proper scale in photos. Match the flower height to the architectural proportions of the room.
Autumn and winter demand a shift toward deeper tones and dried elements. Use branches and evergreens to add architectural lines during colder months. These materials endure longer studio sessions without wilting under hot lights. Select local species to ensure the most natural appearance in your images. Constant rotation of flora prevents your home portfolio from looking static. Use seasonal changes to vary your lighting techniques and composition styles.
Floral Business Photoshoot And Florist Branding Photoshoot Inspiration For Home Studios

How To Set Up A Professional Looking Floral Shoot Space At Home
Identify a north-facing window to secure stable and indirect light throughout the day. Direct sunlight creates harsh shadows and distorts natural flower colors. Clear a minimum four by four foot area to allow for tripod movement and light modifiers. Use matte white foam boards to bounce light into shadowed areas of the arrangement. Neutral backgrounds like gray or beige linen prevent color casting on the petals.
Invest in a dedicated heavy duty table that supports large ceramic vessels and water weight. Install a seamless paper backdrop system or use flat lay boards for vertical shots. Keep a spray bottle and floral shears within reach for real time adjustments. Ensure the floor surface is waterproof to handle inevitable spills during the styling process. Proper gear placement minimizes physical strain and speeds up the shooting workflow.
Building A Consistent Visual Brand Identity Through Floral Home Photography
Choose an intentional color palette that reflects your brand values across every image. Select specific flower varieties that align with your signature design style whether minimalist or maximalist. Consistency in editing techniques ensures your social media grid looks cohesive and professional. Use the same light source and time of day for every shoot to maintain a uniform temperature. This discipline builds immediate brand recognition for your audience.
Standardize your prop selection by using a specific set of vases and textiles. Avoid mixing too many textures that compete with the focal floral piece. Document your camera settings and lighting distances to replicate successful shots later. Tactical repetition creates a visual shortcut for customers to identify your work. Focus on high quality sharp images that highlight the technical skill of your floral mechanics. Consistent imagery establishes market authority.
Editing And Presenting Your Styled Flower Photos For Maximum Impact
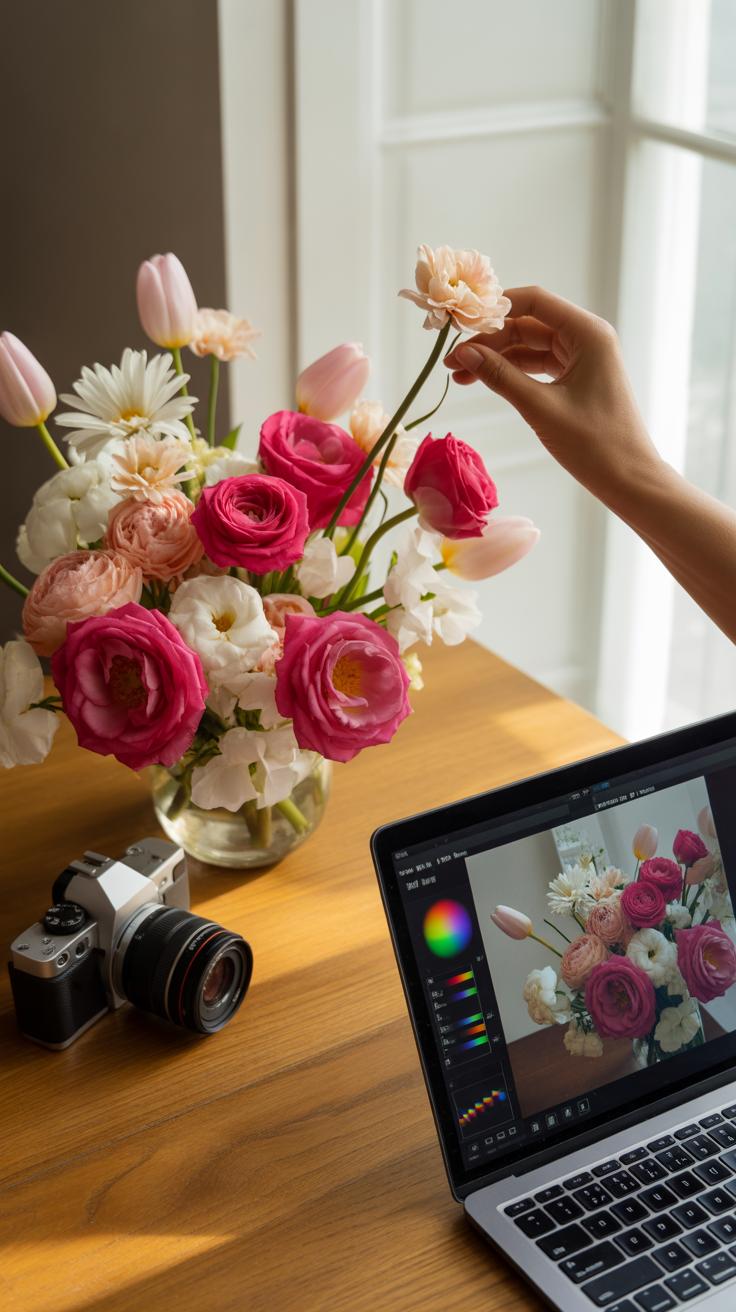
Simple Post Processing Techniques To Enhance Floral Colors And Clarity
Digital sensors often struggle with specific flower pigments. Red and purple blooms frequently lose detail in the raw file. Use global exposure adjustments to set a baseline. Lower the highlights to recover texture in bright petals. Increase the shadows slightly to show the depth of the inner stem and leaves. This creates a balanced image that looks professional and grounded in reality.
Avoid over-saturating the entire image. This makes the flowers look fake and cheap. Use selective color tools to target specific hues like green and magenta. Increase the luminance of the petals to make them glow. Use high-pass filtering or a local sharpness tool on the stamen and pollen. Sharp focus on these tiny details tells the viewer that the styling was intentional.
How To Curate And Share Your Home Floral Photography For Social Media
Successful floral photography requires a consistent visual grid. Do not post every photo you take. Select one hero shot that shows the full arrangement. Balance it with a tight macro shot of a single bloom. This variety keeps the viewer engaged. Use a consistent white balance across all photos. This makes your feed look like a professional portfolio instead of a random gallery.
Platform algorithms favor high-contrast thumbnails. Use a vertical crop to take up more screen space. This increases the time people spend looking at your styling work. Pair your images with technical data about the flower species. This adds educational value to the visual content. Accurate labeling builds your reputation as a knowledgeable stylist. Clear and direct presentation always beats experimental layouts for professional growth.
Frequently Asked Questions

What are the best types of flowers for beginners to use in home photography?
If you are new to styling flowers for photos, start with hardy blooms that hold their shape well under indoor lighting. Roses, tulips, and carnations are excellent choices because they are forgiving and easy to arrange. Peonies are also a favorite for their lush, romantic aesthetic. Focus on selecting a cohesive color palette that complements your room’s decor to ensure your floral arrangements look professional and intentional in every shot.
How do I arrange a bouquet so it looks balanced and professional in a picture?
To achieve a balanced look when styling flowers for photos, use the “rule of threes” by grouping different textures and heights. Start with a sturdy foliage base, then add your primary “hero” flowers, and finish with delicate filler stems like baby’s breath. Always trim stems at an angle and remove any leaves below the water line. For the best camera angle, slightly tilt the most beautiful blooms toward the lens.
Can I create beautiful floral photography setups on a strict budget?
Absolutely! You do not need expensive designer bouquets to create stunning visuals. Consider foraging greenery from your backyard or purchasing inexpensive supermarket bundles and elevating them with a stylish ceramic vase. Using a single architectural stem, like a monstera leaf or a sunflower, can create a minimalist and modern look. Focus on natural light and interesting shadows to make affordable grocery store flowers look like high-end editorial arrangements in your home.


