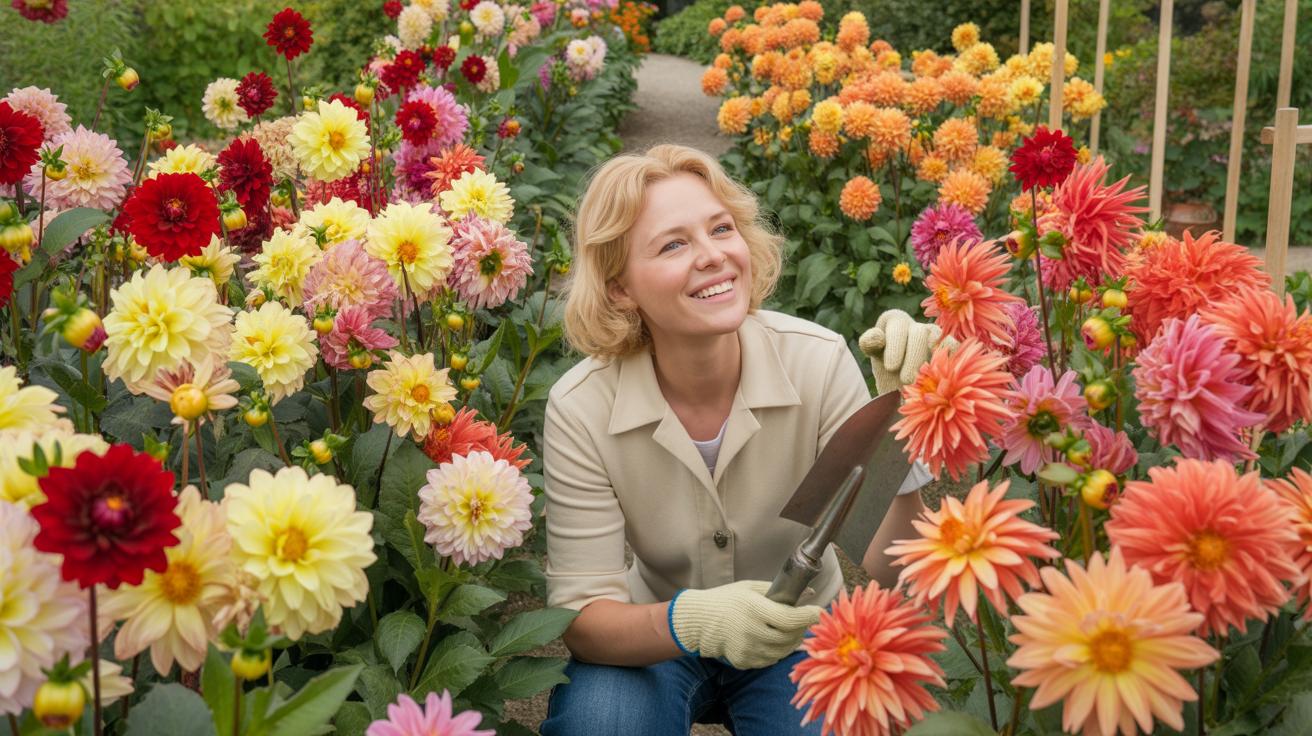
What Makes The Dahlia Flower So Special And Worth Growing
A Brief And Fascinating History Of The Dahlia Flower
Dahlias originated in the high mountain plateaus of Mexico and Central America. The Aztecs initially grew them for food and medicinal purposes. European botanists first identified these plants in the late eighteenth century. They sent seeds to the Royal Botanical Garden in Madrid in 1789. This period marked the beginning of intensive breeding programs that changed the plant from a single flower into complex forms.
The flower gained massive popularity in Europe during the nineteenth century. Experts named the genus after Swedish botanist Anders Dahl. Breeders quickly realized the plant possessed a high degree of genetic plasticity. This trait allowed for rapid hybridizing and the creation of thousands of new cultivars. Today the dahlia remains the national flower of Mexico and serves as a primary interest for global horticultural societies.
The Incredible Range Of Dahlia Varieties And Bloom Forms Available Today
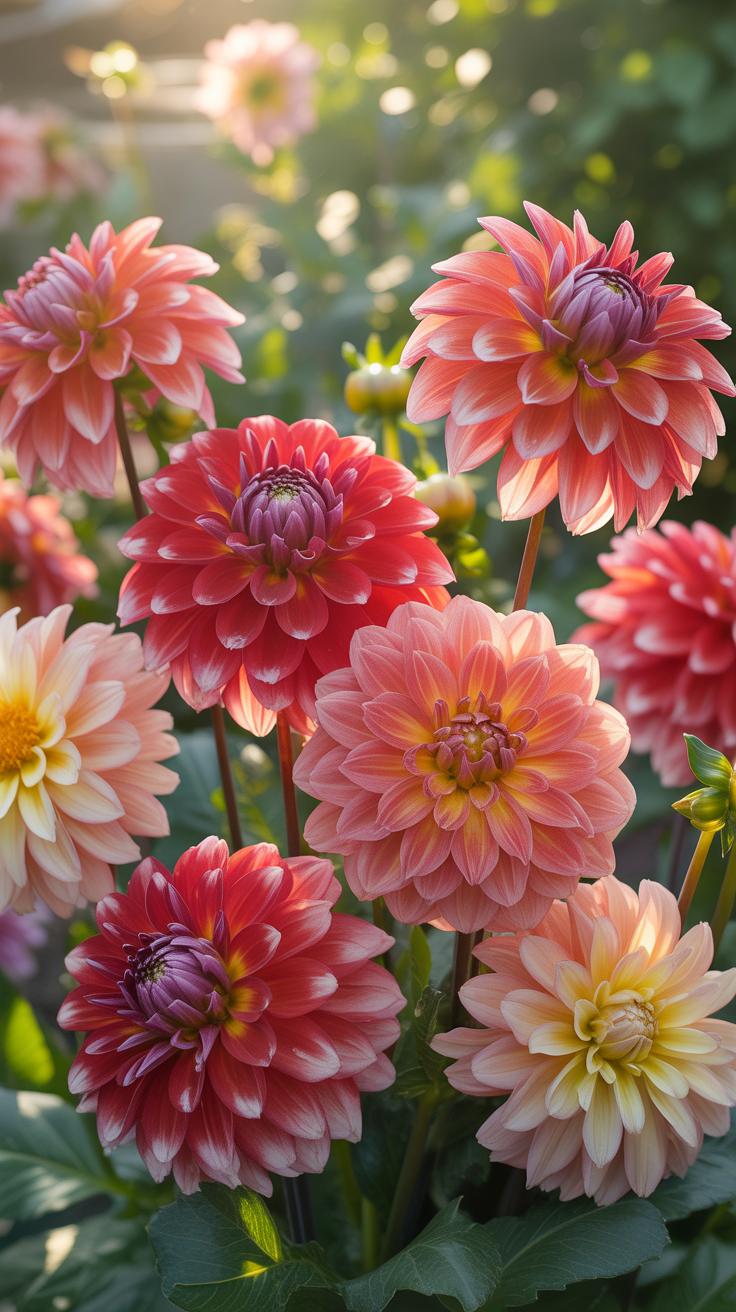
Modern dahlias offer more diversity than almost any other garden plant. Classification depends on petal shape and bloom size. You will find miniature varieties measuring two inches and giant types reaching twelve inches in diameter. Breeders categorize these into distinct groups like formal decorative, cactus, and pompon types. This variety allows growers to select specific shapes for borders, containers, or professional floral arrangements.
This genetic range means dahlias fit into many landscaping strategies. You can choose tall varieties for back rows or low growing types for ground cover. Their bloom cycle starts in midsummer and continues until the first frost. This long production period makes them highly efficient for cut flower production. No other plant provides this level of architectural variety and color range within a single growing season.

Understanding Dahlia Growing Tips Before You Plant A Single Tuber
How Dahlia Tubers Work And Why Starting Right Matters
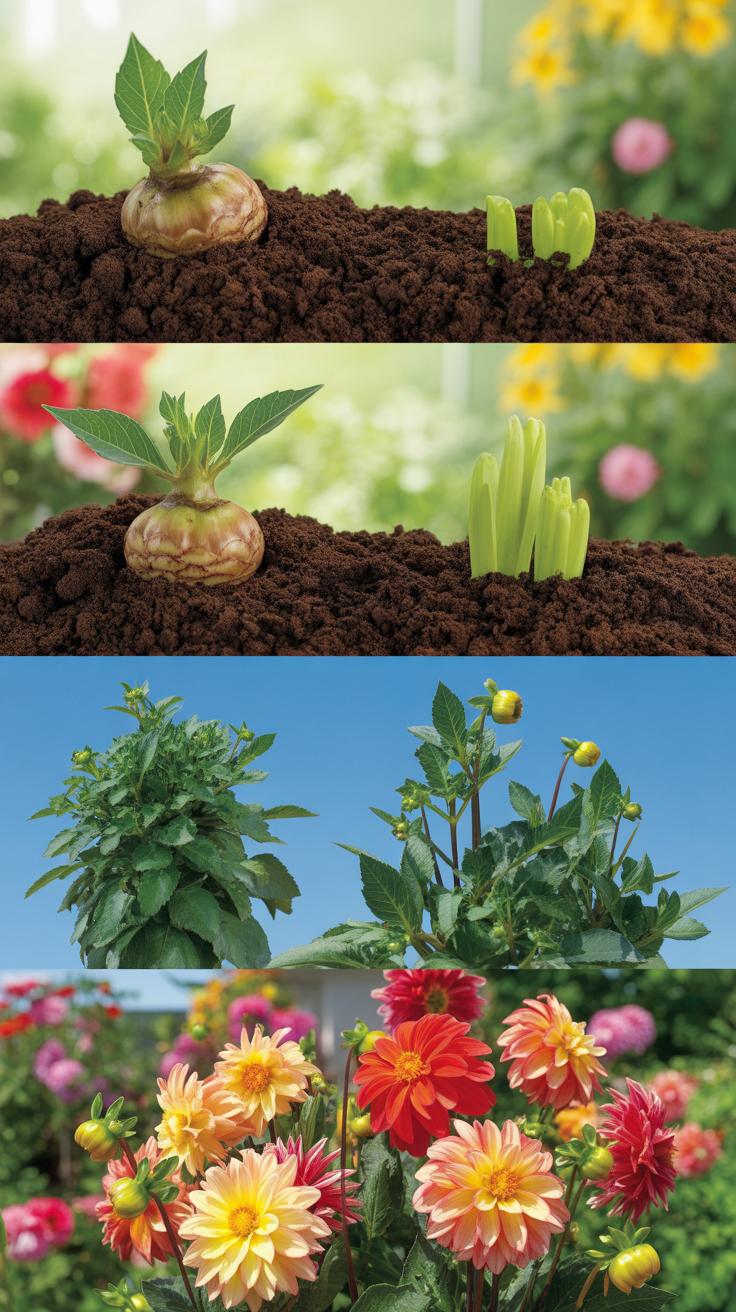
Dahlia tubers function as subterranean storage organs for the plant. These structures hold the energy and water required for the first stages of growth. Each tuber connects to the previous year stem through a specific area called the crown. You must understand that growth only emerges from this crown area. A tuber without a piece of the crown will never produce a plant.
Starting with high quality stock reduces the risk of rot and disease. Tubers remain dormant during the winter months and activate when soil temperatures rise. If you plant into cold or wet soil, the tuber will likely decay before it sprouts. You must time your planting to match local frost cycles. Proper preparation ensures the plant has enough stored fuel to establish a strong root system quickly.
Choosing Healthy Dahlia Tubers That Are Set Up For Success
Selecting a viable tuber requires close physical inspection of the material. Identify the three essential parts: the body, the neck, and the crown. The body should feel firm like a fresh potato. Avoid any tubers that feel soft, mushy, or shriveled. A healthy neck must be intact and strong. If the neck is broken or snapped, the body cannot send energy to the growing eye.
Look for a visible eye on the crown to guarantee a sprout. The eye looks like a small bump or a tiny green shoot. Do not buy tubers that show signs of mold or deep pits. These issues often indicate fungal infections or pests. Large tubers do not always produce better flowers than small ones. Focus on the structural integrity of the crown and the firmness of the tuber body instead.

Picking The Perfect Spot For Your Dahlia Garden
Sunlight And Soil Requirements Every Dahlia Garden Needs
Dahlias require full sun to produce strong stems and consistent blooms. You must provide at least six to eight hours of direct sunlight daily. Morning sun is most effective because it dries dew quickly and prevents fungal diseases. Shaded areas lead to weak, leggy plants and fewer flowers. Plan your garden layout to avoid tall structures or trees that cast shadows during peak daylight hours.
Soil serves as the foundation for tuber health and nutrient uptake. These plants thrive in loose, friable soil that allows roots to spread without resistance. Heavily compacted clay restricts growth and retains too much moisture. Sandy loam is the ideal texture for these heavy feeders. You should incorporate organic matter like compost before planting. This improves soil structure and provides the necessary energy for the growing season.
Just as my grandmother taught me, you only need a little sunshine and a bit of patience to watch a dahlia bloom into a masterpiece. Anyone can touch the earth and coax such vibrant beauty from a simple tuber.
— Martha Stewart
How Drainage And Soil PH Directly Affect Dahlia Health
Proper drainage is the most critical factor for tuber survival. Dahlia tubers rot quickly if they sit in stagnant water. You should avoid low-lying areas where water collects after rain. If your ground holds water, use raised beds to control moisture levels. Good drainage ensures oxygen reaches the root system. This prevents anaerobic conditions that kill the plant. Constant moisture monitoring protects your investment from underground decay.

Soil chemistry dictates how well your dahlias absorb nutrients. These plants prefer a slightly acidic environment with a pH between 6.5 and 7.0. If the soil is too acidic or alkaline, the plant cannot access minerals even if they are present. You should test your soil months before planting. Use lime to raise pH or sulfur to lower it. Maintaining this balance ensures vigorous growth and vibrant floral colors all summer long.
How To Grow Dahlias From Tuber To Bloom Step By Step
When And How To Plant Dahlia Tubers For The Best Results
Wait for the soil temperature to reach sixty degrees Fahrenheit before planting. Cold, wet soil will rot your tubers before they can sprout. Most growers plant after the final frost date in spring. Ensure your selected location receives at least six to eight hours of direct sunlight. Full sun exposure prevents weak, leggy stems and encourages maximum flower production throughout the season.
Proper soil preparation determines your success. Use well-draining soil rich in organic matter to support heavy feeding. Dig a hole six inches deep and avoid adding water immediately after planting unless you live in a desert climate. The tuber contains enough moisture to start growth. Wait until you see green sprouts above the ground to begin your regular watering schedule to prevent fungal issues.
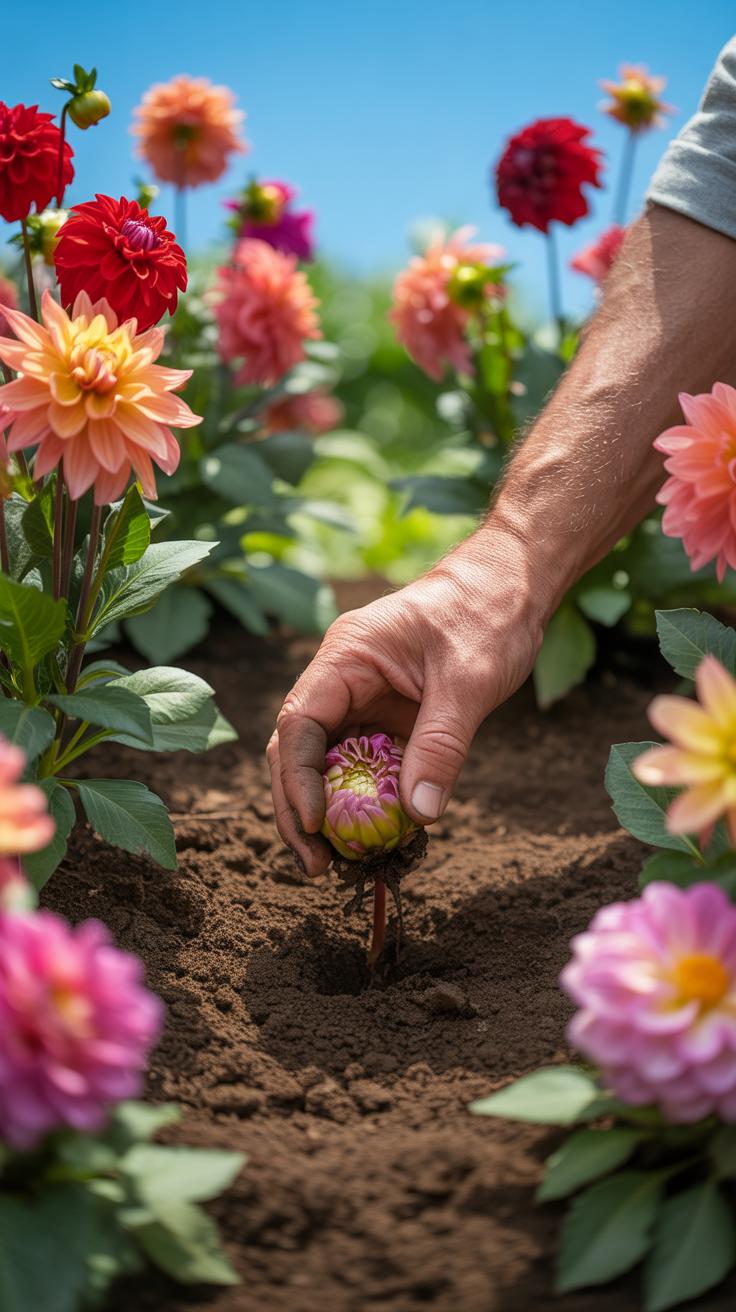
Planting Depth Spacing And Orientation Explained Simply

Place the tuber horizontally in the ground with the eye facing up. The eye is the small bump at the top where growth begins. Bury the tuber four to six inches deep to provide a stable base for the heavy plant. Proper depth protects the root system from high summer temperatures and provides physical support. Laying the tuber flat ensures the most efficient nutrient transport.
Spacing depends on the variety of dahlia you choose. Space large decorative dahlias eighteen to twenty-four inches apart to ensure proper air circulation. Crowded plants invite powdery mildew and pests. Install your support stakes at the time of planting to avoid puncturing the tubers later. Drive the stake into the ground before you cover the tuber with soil to keep the root system safe.
Essential Dahlia Care Practices That Keep Your Plants Thriving
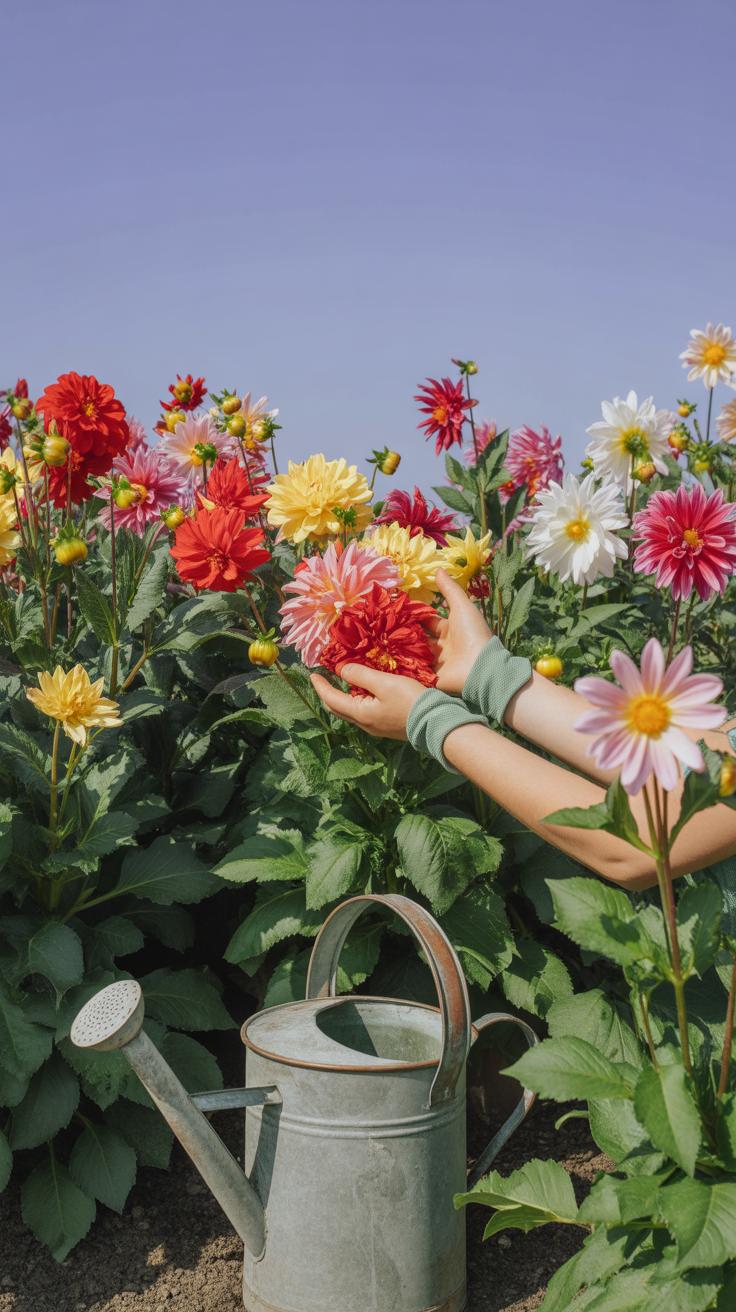
Watering Schedules And Fertilizing Routines For Healthy Dahlias
Dahlias require consistent soil moisture to produce heavy blooms. Do not water tubers immediately after planting. Wait until the first green shoots emerge above the soil line. Deep soaking twice a week usually suffices in moderate climates. Increase frequency during extreme heat or drought conditions. Check soil moisture levels four inches deep before adding water. Avoid overhead watering to prevent powdery mildew and fungal issues.

Fertilization begins after the plant reaches one foot in height. Use a low nitrogen fertilizer to prioritize flower production over leaf growth. High nitrogen feeds create weak stems and fewer blossoms. Apply a 5-10-10 or 10-20-20 blend every three or four weeks throughout the growing season. Stop all fertilizing by late summer. This allows the plant to focus energy on tuber development for winter storage.
Staking And Supporting Tall Dahlia Varieties To Prevent Damage
Large dahlia varieties grow fast and become top heavy. Solid support prevents wind damage and stem breakage. Drive a wood or metal stake into the ground at planting time. Placing the stake early protects the tuber from accidental puncture later. Use a stake at least five feet tall for decorative varieties. Secure the main stem to the support using soft twine or plastic garden tape.
Tie the plant every twelve inches as it grows upward. Do not pull the ties too tight against the stem. Leave room for the stalk to thicken as it matures. Use a horizontal netting system for large commercial patches. This method supports multiple plants simultaneously. Check ties weekly during the peak blooming phase. Heavy rain adds significant weight to open flowers and increases the risk of collapse.
Gardening Tips For Managing Pests And Disease In Your Dahlia Garden
Common Pests That Target Dahlias And How To Handle Them Naturally

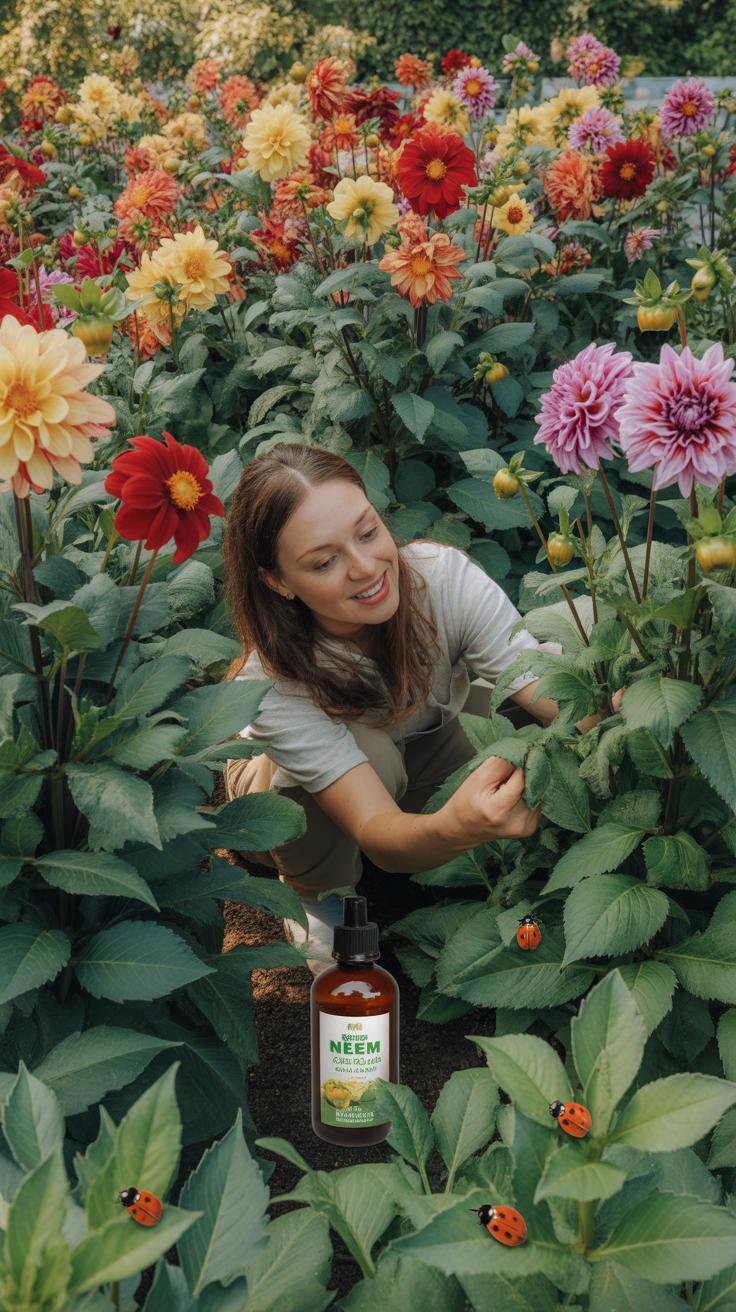
Dahlia plants attract several destructive insects that can ruin a blooming season. You must monitor your plants daily to catch infestations early. Integrated Pest Management focuses on physical removal and biological controls first. This approach keeps your garden safe for pollinators while killing the pests that eat your foliage. Strategic intervention prevents small bug problems from becoming total crop failures.
- Slugs and Snails: These mollusks consume tender young shoots and leave large holes in leaves during the night. Use copper tape around pots or iron phosphate pellets to stop them. You can also handpick them during evening hours to reduce the population without using harsh chemical sprays.
- Aphids: These small insects cluster on new growth and suck sap from the stems. They cause twisted leaves and can spread deadly plant viruses. Lean on strong water blasts to knock them off the plant. Introduce ladybugs or lacewings to act as natural predators in your garden beds.
- Spider Mites: These tiny pests thrive in hot and dry conditions often found in mid-summer. Look for fine webbing on the undersides of leaves and yellow stippling. Increase local humidity by misting plants or use neem oil applications to suffocate the mites before they kill the entire dahlia plant.
- Earwigs: These insects hide in the tightly packed petals of dahlia blooms and chew the edges. They make flowers look ragged and unmarketable. Set traps using small containers filled with soy sauce and vegetable oil. Place these traps near the base of the plants to catch them at night.
- Japanese Beetles: Large metallic beetles can defoliate a dahlia plant in just a few days. They eat the tissue between leaf veins and destroy open flowers. Handpick them and drop them into soapy water for the most effective control. Avoid pheromone traps because they often attract more beetles to your yard.
Organic control methods require consistency to work effectively against persistent pests. Check the underside of every leaf for eggs and larvae. Apply horticultural soaps only during the cool parts of the day to avoid leaf burn. A healthy garden ecosystem usually balances itself if you provide habitat for beneficial insects. Always prioritize mechanical removal before resorting to organic sprays to protect the local environment.
Recognizing And Preventing Fungal Diseases In Dahlia Plants
Powdery mildew and botrytis blight represent the biggest fungal threats to your dahlia garden. Powdery mildew appears as a white dust on leaves when air circulation is poor and humidity is high. Botrytis causes gray mold on flower buds during wet weather. You must provide wide spacing between plants to maximize airflow. Good drainage and sunlight are your best tools for preventing these common fungal outbreaks.
Remove any infected foliage immediately and dispose of it in the trash. Never compost diseased plant material because fungal spores survive the heat of most compost piles. Water your dahlias at the soil level rather than over the leaves. Keep the garden floor clean of fallen petals and dead leaves. Tactical pruning of the lower leaves improves ventilation and reduces the risk of soil-borne pathogens reaching the upper plant.
Pinching And Deadheading Techniques That Maximize Your Dahlia Blooms
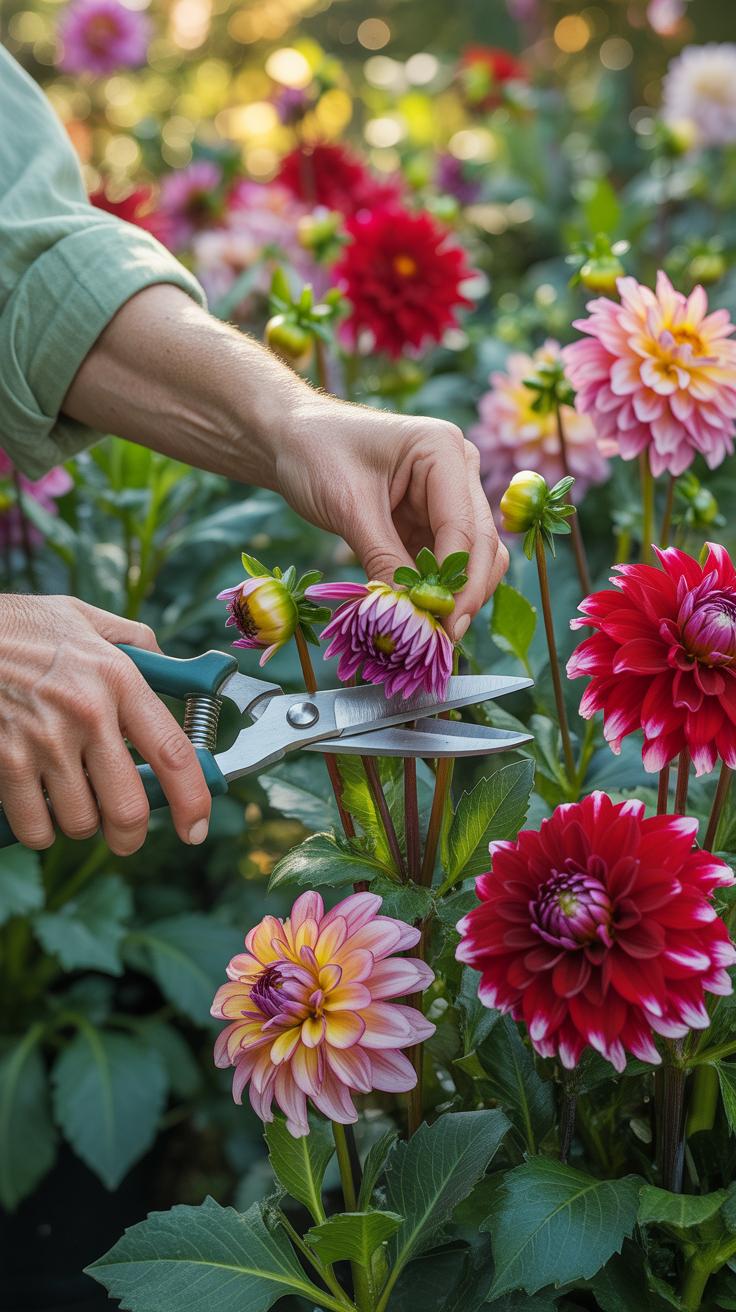
Why Pinching Young Dahlia Plants Leads To More Flowers
Pinching is the removal of the main center stem on a young plant. You must do this when the dahlia reaches twelve to eighteen inches in height and has at least four sets of leaves. Removing the terminal bud stops upward growth and forces the plant to redirect its energy. This process stimulates dormant buds located at the leaf axils to grow into branches.
A pinched dahlia produces a stronger and more compact structure. Without this step, the plant grows one tall stalk with few flowers. Branching creates a bushier plant that supports more flower buds simultaneously. You get a higher yield of blooms and a sturdier base that resists wind damage. Use sharp snips or your fingers to snap the center stem just above the top set of leaves.
How And When To Deadhead Dahlias To Extend The Blooming Season
Deadheading is the removal of spent flowers before they produce seeds. Once a dahlia bloom fades, the plant shifts its energy toward seed production. This signal tells the plant to stop making new buds. Consistent deadheading tricks the plant into staying in its reproductive phase. You must remove the entire flower stem back to the first set of leaves to encourage new growth points.
Distinguishing between a new bud and a spent flower is critical for success. New buds are round and firm like a ball. Spent flowers are pointed, soft, and often feel slimy. If you leave old flowers on the stalk, the plant becomes leggy and stops blooming early. Check your plants every three days to remove wilted heads. This practice keeps the plant producing flowers until the first frost kills the foliage.

Growing Dahlias As Part Of A Thriving Cut Flower Garden

Why Dahlias Are One Of The Best Choices For A Cut Flower Garden
Dahlias provide the highest return on investment for any cutting garden. Unlike lilies or tulips, these plants produce more flowers the more you cut them. This biological response ensures a continuous supply of blooms from midsummer until the first frost. They offer unmatched variety in shape and size. You can grow small pompons or massive dinner plate varieties to meet different design needs.
Professional growers choose dahlias for their structural integrity and color range. They fill the seasonal gap when spring bulbs fade and before autumn frost hits. Their stiff stems make them ideal for tall arrangements and wedding work. You do not need a greenhouse to produce high quality yields. A small sunny plot provides enough stems for multiple weekly bouquets. This efficiency makes them a primary crop.
How To Harvest And Condition Dahlia Stems For Longer Vase Life
Harvesting at the correct time dictates the longevity of the flower. Unlike roses, dahlias do not continue to open significantly after you cut them. You must wait until the bloom is nearly fully open but before the back petals start to brown or curl. Use sharp, sanitized snips to prevent crushing the hollow stems. Crushed stems block water intake and cause the flower to wilt within hours.
- Timing the Cut: Harvest in the early morning or late evening when temperatures are cool. Plants are fully hydrated during these windows. Cutting in the midday heat causes immediate moisture loss and leads to limp stems that rarely recover their turgidity in the vase.
- Stem Selection: Choose stems that are firm and show no signs of drooping. Look at the back of the flower head to ensure the bracts are green and fresh. If the back petals feel papery or look dry, the bloom is past its prime for cutting.
- Immediate Hydration: Place stems into a bucket of clean, room temperature water immediately after cutting. Do not leave harvested blooms in the sun while you finish chores. Field heat is the enemy of vase life. Move the bucket to a cool, dark location for at least one hour.
- Leaf Removal: Strip all foliage from the bottom half of the stem before placing it in the final vase. Leaves submerged in water decay quickly and create bacterial growth. Bacteria plug the vascular system of the dahlia. Clean water is the most important factor for extending life.
- Water Polish: Change the vase water every single day to keep it clear. Dahlias are heavy drinkers and can empty a small container quickly. You can add a drop of bleach or commercial flower food to the water to suppress bacterial blooms and maintain a steady nutrient flow.
Conditioning the stems properly can extend vase life to seven days. Some growers use a searing technique by placing the bottom inch of the stems into boiling water for thirty seconds. This removes air bubbles and opens the pathways for hydration. Always keep the finished arrangements away from direct sunlight or ripening fruit. Ethylene gas from fruit will cause the petals to drop prematurely and ruin the display.
Creative Dahlia Garden Ideas To Inspire Your Outdoor Space
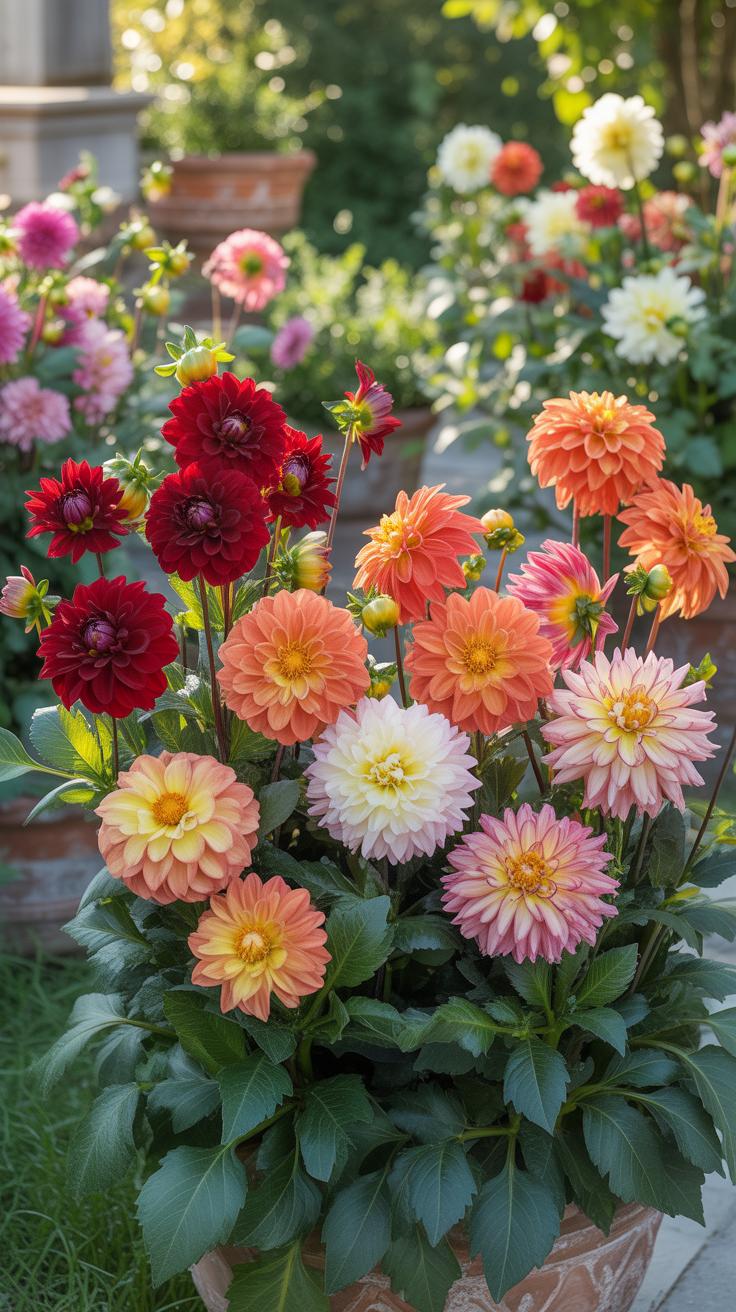
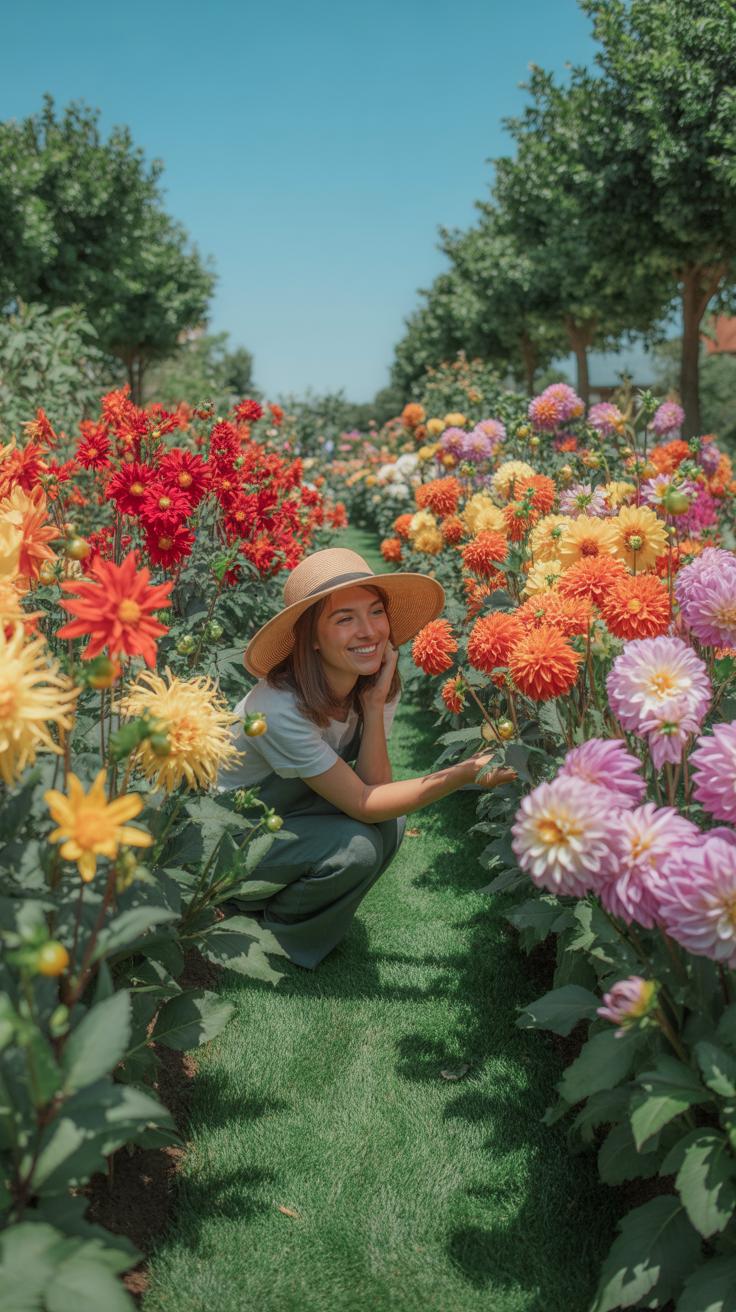
Designing Beautiful Dahlia Garden Beds Using Color And Height
Effective garden design requires strict attention to vertical layering. Place tall Dinnerplate varieties at the rear of the bed to provide a structural backdrop. Use medium Cactus or Ball types in the center. Position low-growing Mignon or Topmix varieties at the front edges. This staggered approach ensures every flower remains visible. Proper spacing prevents stagnant air and reduces fungal disease risks.
Strategic color planning enhances visual impact and garden cohesion. Monochromatic schemes using various shades of one color create a sophisticated Look. Complementary pairings like purple and yellow offer high contrast. High-saturation shades draw the eye to specific focal points. Consider the bloom time of each variety to ensure consistent color throughout the season. Healthy plants with vibrant colors require balanced soil nutrients and full sunlight.
Growing Dahlias In Containers And Smaller Garden Spaces
Dahlias thrive in containers when you select the right size. Use pots with at least a twelve-inch diameter for smaller varieties. Ensure the container has large drainage holes to prevent tuber rot. Use high-quality potting soil rather than heavy garden earth. Potted plants dry out faster than those in the ground. Monitor moisture levels daily during peak summer heat to maintain consistent growth.
Small spaces benefit from vertical gardening techniques and dwarf cultivars. Gallery series dahlias remain compact and do not require heavy staking. Use tomato cages or bamboo stakes to support larger blooms in confined areas. Position containers on casters to follow the sun across patios or balconies. Regular deadheading encourages more blooms in limited footprints. Proper nutrition through liquid fertilizers keeps container-grown dahlias productive all season long.
How To Store Dahlia Tubers Over Winter And Prepare For Next Season
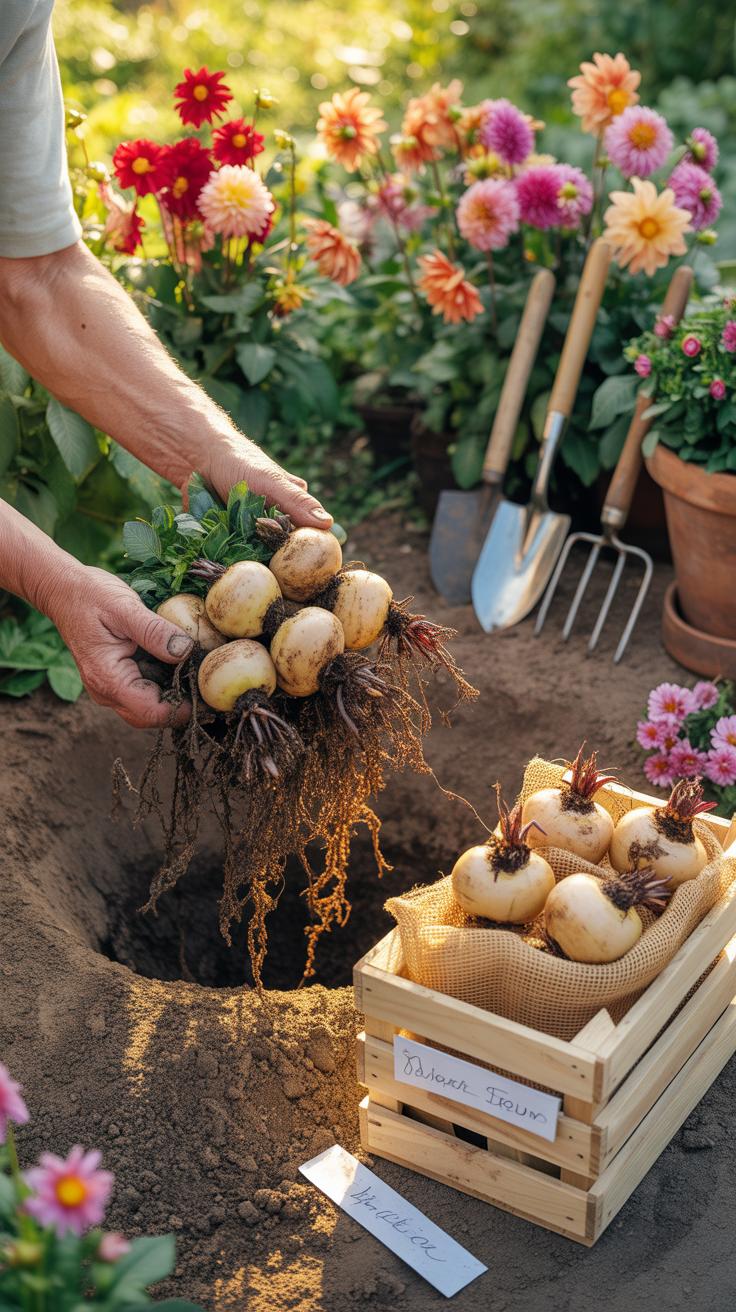
When And How To Dig Up Dahlia Tubers Before The First Hard Frost
Wait for a killing frost to turn the foliage black. This signal tells the plant to shift energy into the tubers for dormancy. Cut the stalks down to four inches above the soil line. Wait one week before digging. This short rest period allows the tuber skins to toughen. Harder skins resist rot and mechanical damage during the winter storage months.
Use a pitchfork to lift the root mass carefully. Start digging at least one foot away from the main stem to avoid slicing the tubers. Lift the entire clump from underneath. Gently shake off the loose soil but do not force it. Label every clump immediately with a waterproof marker. Identification is impossible once the tubers are dry. Move the clumps to a frost-free area.
Proper Curing, Dividing, And Storing Tubers To Ensure Next Year’S Success
Wash the tubers with a garden hose to remove all remaining soil. This step reveals the eyes and any hidden rot. Air dry the clumps in a cool spot for two days. Do not expose them to direct sunlight or freezing temperatures. Curing thickens the skin further. You can divide the clumps now or in the spring. Each division must contain a visible eye.
Pack the dry tubers in breathable containers. Use peat moss, vermiculite, or wood shavings to regulate moisture. Do not use airtight plastic bags because they trap gases and cause rot. Store the containers in a dark space between forty and fifty degrees Fahrenheit. Check the stock monthly for signs of shriveling or mold. Lightly mist the packing material if the tubers look dry.
Frequently Asked Questions

Are dahlias difficult for beginners to grow at home?
Not at all! While these stunning blooms look high-maintenance, they are actually quite resilient. One of the best beginner dahlia growing tips is to start with high-quality tubers and plant them in a sunny spot with well-draining soil. As long as you wait until the threat of frost has passed before planting, you’ll find that these flowers are incredibly rewarding and surprisingly easy to manage throughout the summer season.
How do I get my dahlias to produce more flowers?
To maximize your floral display, the most effective dahlia growing tips involve a technique called “pinching.” When your plant is about twelve inches tall, snip off the main center stem just above a set of leaves. This encourages the plant to branch out, resulting in a bushier shape and significantly more blooms. Additionally, remember to deadhead spent flowers regularly to signal the plant to keep producing new buds all autumn long.
Can I grow dahlias on a budget without expensive equipment?
Absolutely! You don’t need a fancy greenhouse or professional tools to enjoy these flowers. You can save money by purchasing tubers from local garden swaps or starting them in recycled food containers like yogurt pots. Since they grow beautifully in large, inexpensive plastic buckets with drainage holes, you can create a vibrant garden on a patio or balcony. Focus on simple care and natural sunlight rather than investing in costly fertilizers or gadgets.


