What Is A Freesia Flower And Why Every Gardener Loves It
The Origins And Botanical Background Of The Freesia Flower
Freesias belong to the Iridaceae family. They originate from southern Africa, specifically eastern parts of South Africa. Dr. Christian P. Ecklon discovered the genus in the nineteenth century. He named the plant after Friedrich Freese, a German physician. This genus contains roughly twenty distinct species. Most modern garden varieties come from intensive breeding of Freesia refracta and Freesia leichtlinii stocks.
Botanically, these plants grow from corms rather than true bulbs. The stems form a unique right-angle bend called a zygomorphic growth habit. This structure results in flowers facing upward on a horizontal plane. The foliage consists of narrow green leaves that resemble small swords. They thrive in Mediterranean climates with cool winters and dry summers. Professional growers treat them as perennials in warm zones and annuals elsewhere.
Why Freesias Are Celebrated For Their Fragrance And Elegance
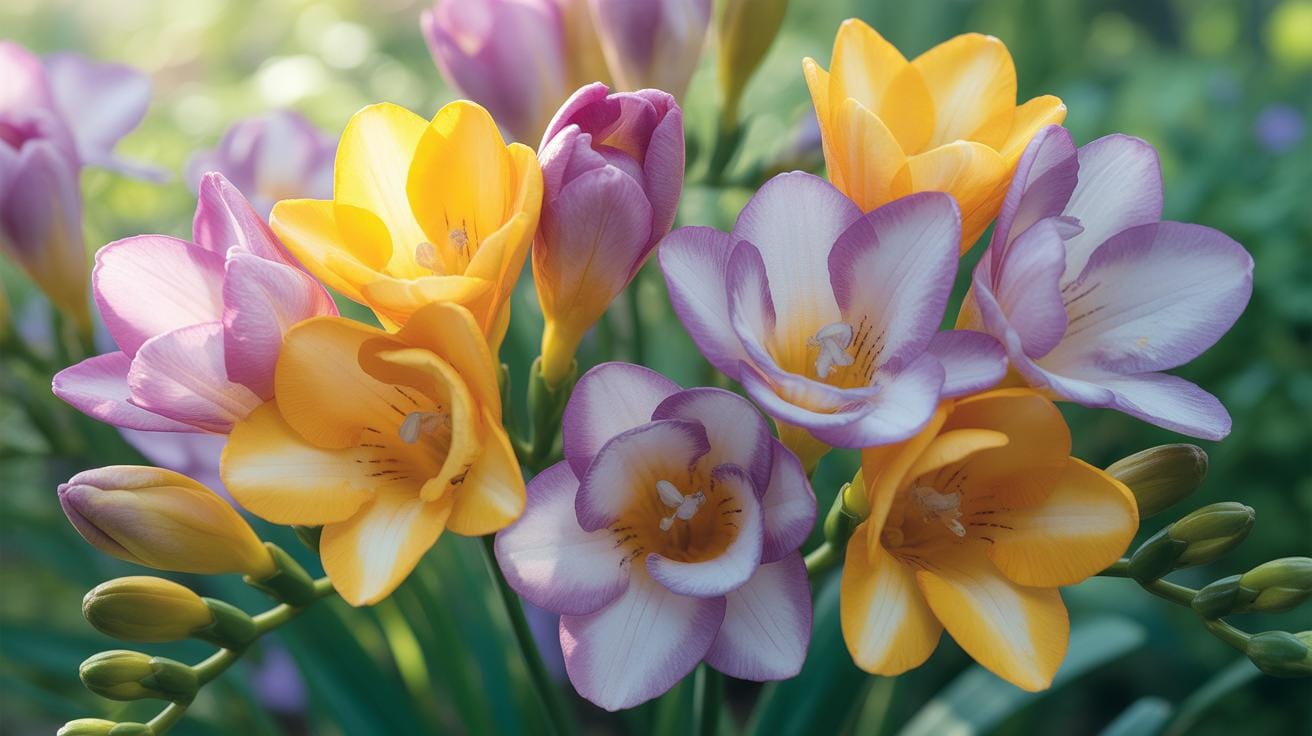
Fragrance is the primary reason for the commercial success of these flowers. They emit a powerful scent that combines peppery notes with floral sweetness. The perfume industry extracts these oils for high-end scents. Yellow and white varieties usually produce the strongest aroma. This scent profile remains consistent even after the flowers are cut. Gardeners value this trait for creating sensory-focused outdoor spaces.
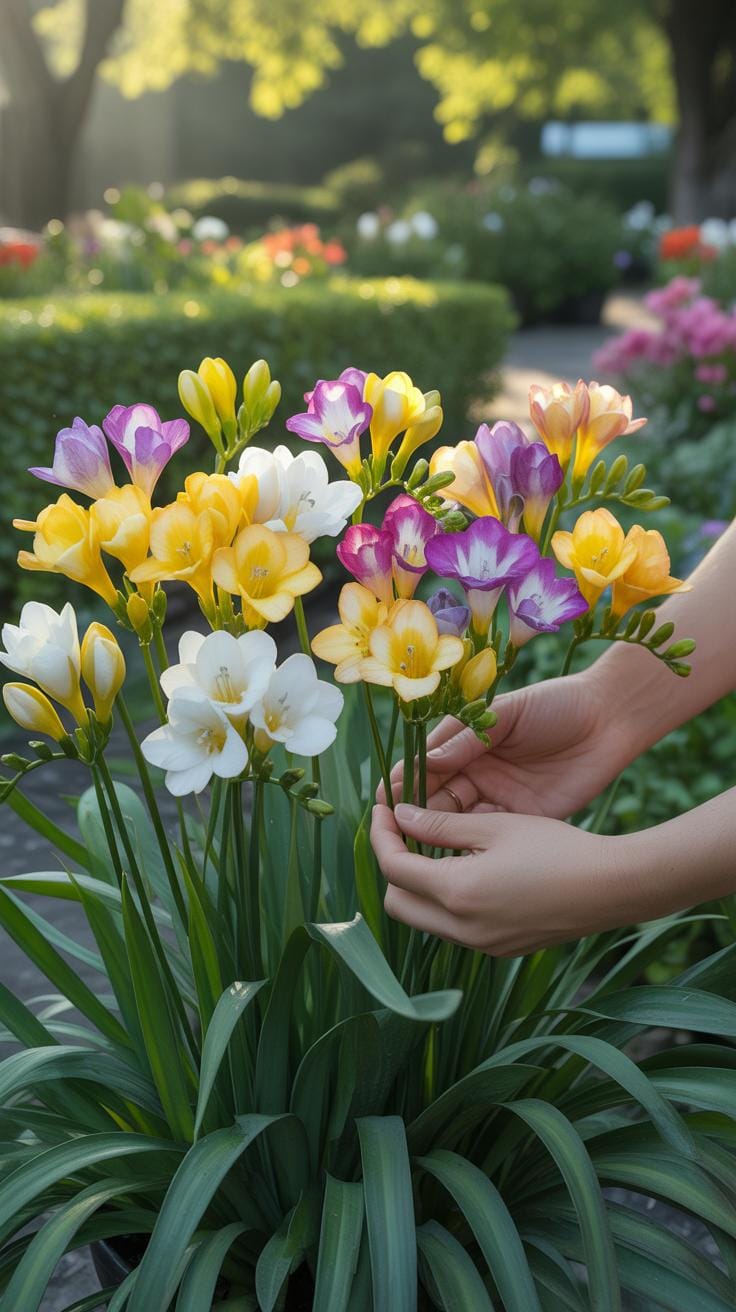
Physical elegance makes these flowers a staple in professional floral design. The trumpet-shaped blooms appear sequentially along one side of the stem. This creates a balanced visual line that works well in wedding bouquets. They have an exceptional vase life of up to ten days. Their color range covers almost every shade except true blue. This versatility allows them to fit into any modern or traditional landscape design.
Understanding The Different Varieties Of Freesia Flowers
Single Vs. Double Flowered Freesia Varieties Explained
Single-flowered freesias represent the standard biological form of the plant. These varieties feature a single row of six petals arranged in a neat funnel shape. This flat petal structure allows easy access for pollinators and showcases the distinctive dark markings in the throat of the bloom. Growers choose single varieties for their classic appearance and their ability to remain upright without heavy mechanical support.
Double-flowered freesias are the result of selective breeding focused on petal count. These varieties contain extra layers of petals that fill the center of the bloom. This creates a much denser and more robust appearance compared to single types. Cultivators select double varieties for high-end floral arrangements because the blooms provide more visual bulk. Note that the additional weight can cause stems to bend under pressure.
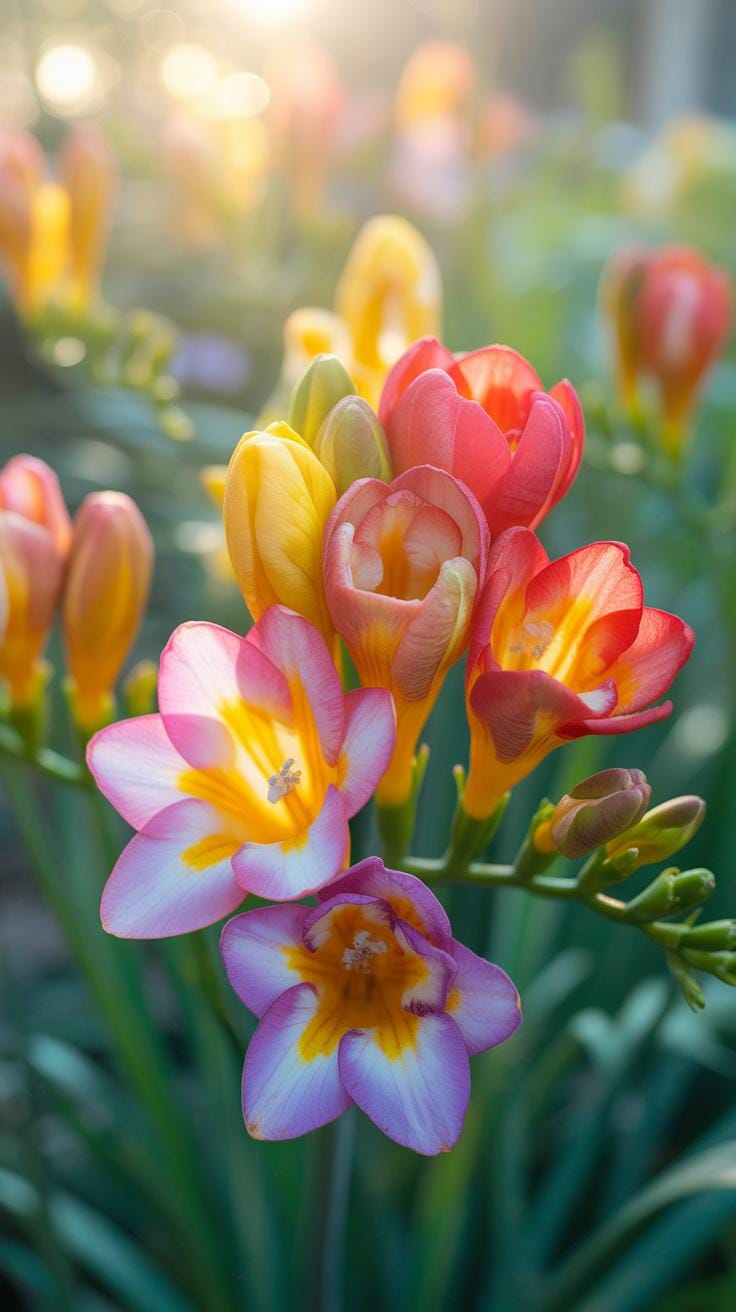
Exploring The Color Spectrum Found Across Freesias Flower Varieties
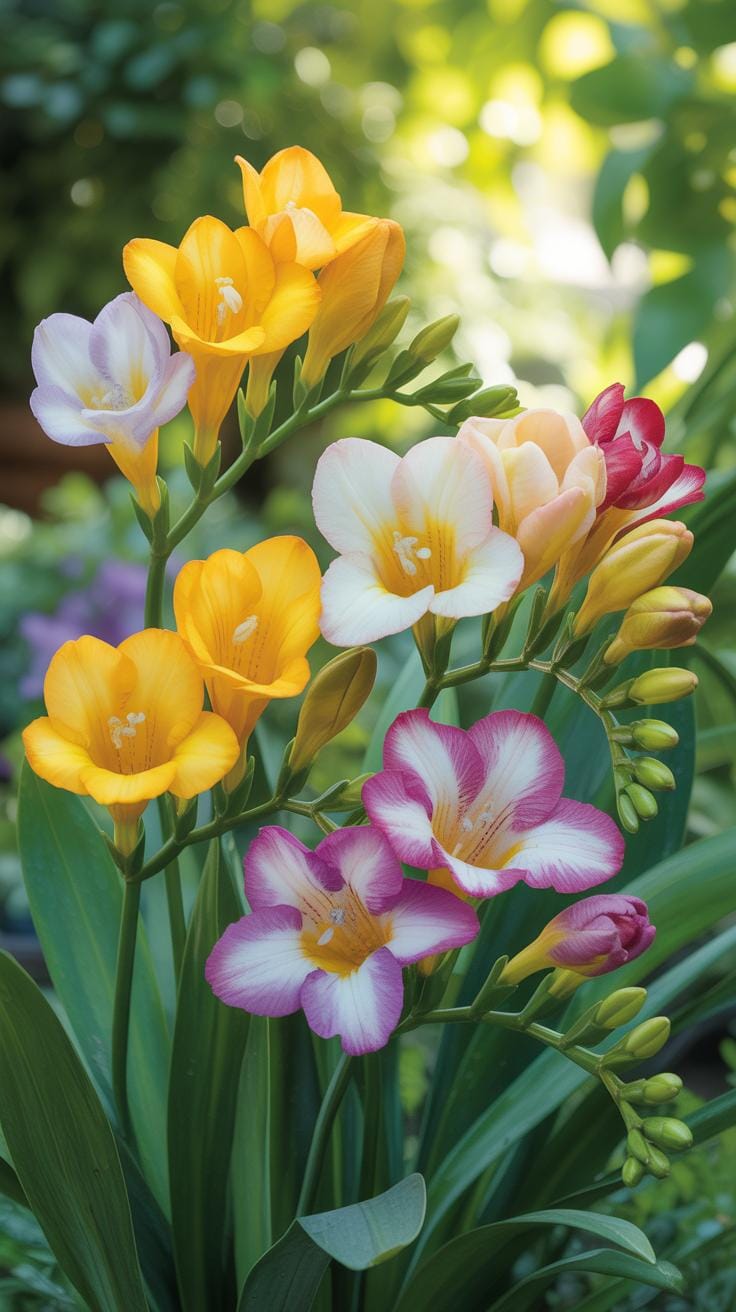
Freesia flower colors correlate directly with their chemical pigment levels and scent intensity. White and yellow varieties typically offer the strongest fragrance because they contain higher concentrations of volatile compounds. Breeding programs have expanded the palette to include deep reds, purples, and blues. These darker hues often lack the heavy scent of their lighter counterparts but provide necessary contrast for modern garden design and professional floral work.
Commercial growers use specific color patterns to identify hybrid vigor and health. Bicolor varieties feature two distinct tones on a single petal or a contrasting throat color. These patterns emerged through decades of hybridization in Europe and are now global standards. Designers use the diverse color spectrum to match specific seasonal themes. You must select your variety based on whether you prioritize visual impact or the traditional citrus scent.

How To Select And Store Freesia Bulbs Before Planting
What To Look For When Choosing Healthy Freesia Bulbs
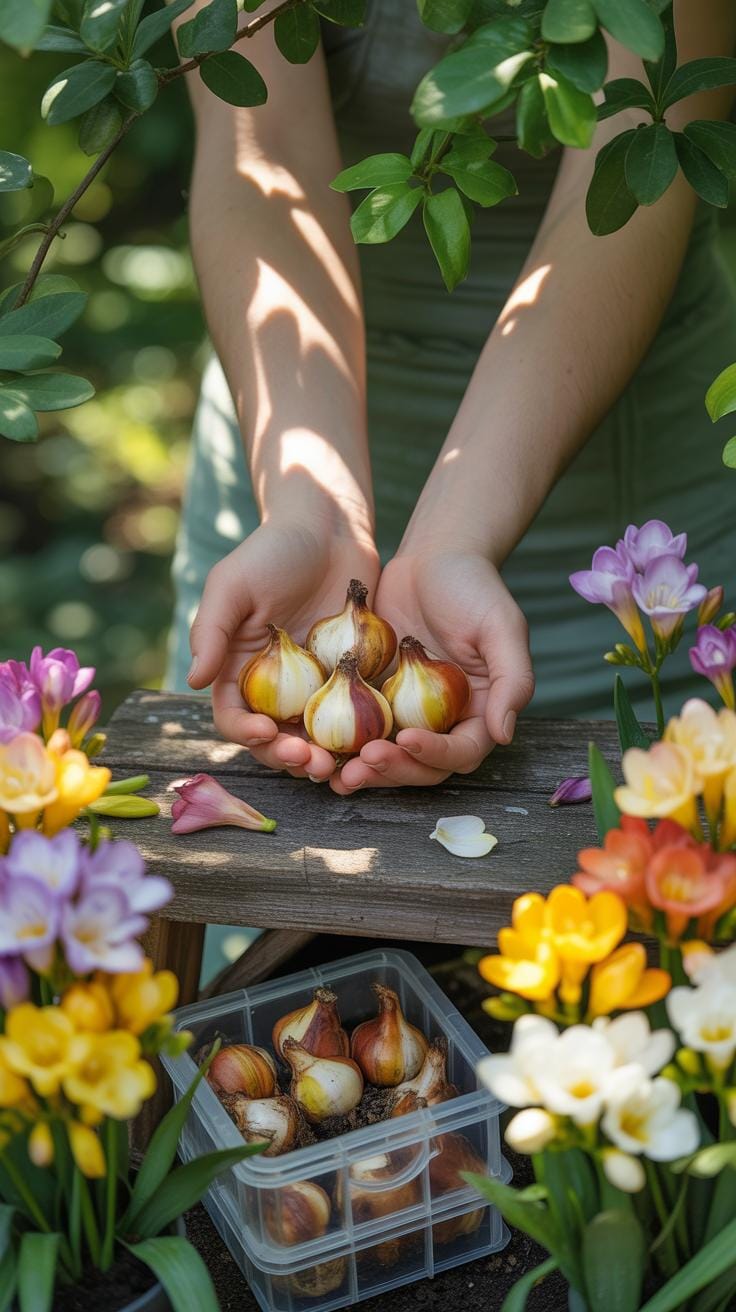
Select corms that feel heavy and firm to the touch. Size matters because larger corms contain more stored energy for flower production. Avoid any bulbs that feel light or hollow. These likely dried out during transit or storage. Check the exterior for a crisp tan tunic. This outer layer protects the internal tissue from pathogens and physical damage during the initial planting stages.
Ensure the basal plate at the bottom of the corm is intact and free from dark spots. Softness or visible mold indicates fungal rot which will kill the plant before it sprouts. Check for any green growth or premature sprouts. While a small tip is acceptable, long white sprouts suggest the bulb is exhausted. Buy from reputable suppliers to ensure the stock remains true to named cultivars.
Best Practices For Storing Freesia Bulbs Before The Growing Season
Store your freesia corms in a cool and dry environment until you are ready to plant. High humidity triggers premature root growth or invites mold. Keep the temperature between fifty five and sixty five degrees Fahrenheit. Avoid freezing temperatures as they destroy the internal cellular structure of the bulb. Proper ventilation prevents the buildup of ethylene gas which can stunt future flower development.
- Mesh Bags: Use breathable mesh or burlap sacks rather than plastic. Plastic traps moisture and creates a breeding ground for rot and fungus. Adequate airflow keeps the outer tunic dry and the core dormant.
- Dry Peat Moss: Place corms in a box filled with dry peat moss or vermiculite. This medium acts as a buffer against temperature swings. It also absorbs any excess moisture that might lead to crown rot during storage.
- Dark Locations: Keep bulbs in total darkness to prevent early sprouting. Light exposure signals the corm to exit dormancy before you place it in the soil. Closets or basements work well if they remain dry year round.
- Ethylene Avoidance: Store bulbs away from ripening fruits like apples or pears. These fruits release ethylene gas which causes internal physiological damage to flower embryos. This damage results in blind bulbs that produce leaves but no blossoms.
- Regular Inspection: Check the inventory every two weeks for signs of decay. Remove any soft or discolored corms immediately to prevent the spread of infection to healthy stock. One rotting bulb can ruin an entire batch.
Prepare the corms for planting by moving them to a warmer area forty eight hours before they go into the ground. This thermal shift wakes the bulb from dormancy. Ensure the storage area remains free from rodents. Mice and squirrels often eat freesia corms during winter months. Secure your containers with wire mesh if pests are a known issue in your facility.
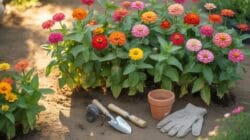
Step By Step Guide To Planting Freesia Bulbs Successfully

Choosing The Right Soil, Depth And Spacing For Freesia Bulbs
Freesia bulbs require well-draining soil to prevent rot. Use a sandy loam or a potting mix high in perlite. These plants originate from South Africa and cannot tolerate standing water. If your soil is heavy clay, amend it with grit or organic matter. Test drainage by digging a hole and filling it with water. It must drain within one hour for success.
Correct depth and spacing ensure strong stem support and air circulation. Plant each corm two inches deep with the pointed end facing upward. Space bulbs at least three inches apart to prevent overcrowding. Crowded plants compete for nutrients and suffer from fungal diseases. Dense planting looks better in pots, but you must maintain consistent feeding to offset the limited soil volume available.
When And How To Plant Freesia Bulbs For Maximum Bloom
Timing depends on your local climate and desired bloom window. In frost-free areas, plant in autumn for spring flowers. In colder regions, plant in spring after the last frost for summer color. Freesias take about twelve weeks to go from planting to flowering. You can stagger planting every two weeks to extend the blooming season throughout the warmer months of the year.
- Light Exposure: Position your planting site in full sun. Freesias need at least six hours of direct light daily to produce stiff stems. Insufficient light causes the stalks to become floppy and prevents the flowers from opening fully during the day.
- Watering Technique: Water the soil immediately after planting to settle the bulbs. Keep the soil moist but never soaked until you see green shoots. Once growth appears, maintain a regular watering schedule. Reduce water levels once the foliage begins to yellow after the blooming cycle.
- Pot Selection: Choose containers with multiple drainage holes if planting indoors or on patios. Freesias grow well in pots at least six inches deep. Use a high-quality peat-free compost. Ensure the pot sits in a sunny spot to mimic the natural Mediterranean climate they prefer.
- Temperature Control: Maintain a cool environment during the initial rooting phase. These bulbs prefer temperatures between fifty and sixty degrees Fahrenheit to establish roots. Excessive heat during the early stages will stunt growth. Move pots to a warmer area once the foliage is five inches tall.
- Staking Support: Install small bamboo stakes or circular supports at the time of planting. Freesia stems are thin and often lean under the weight of heavy flower spikes. Adding supports early prevents root damage that occurs when you push stakes into established root systems later on.

Feed the plants with a high-potash liquid fertilizer every two weeks once buds appear. This nutrient boost increases flower size and scent intensity. Stop fertilizing once the flowers fade. Allow the foliage to die back naturally to send energy back into the corm for next year. Cut any spent flower spikes to prevent the plant from wasting energy on seed production.
Essential Growing Conditions For Summer Blooming Freesias
Sunlight, Temperature And Watering Needs Of Summer Blooming Freesias
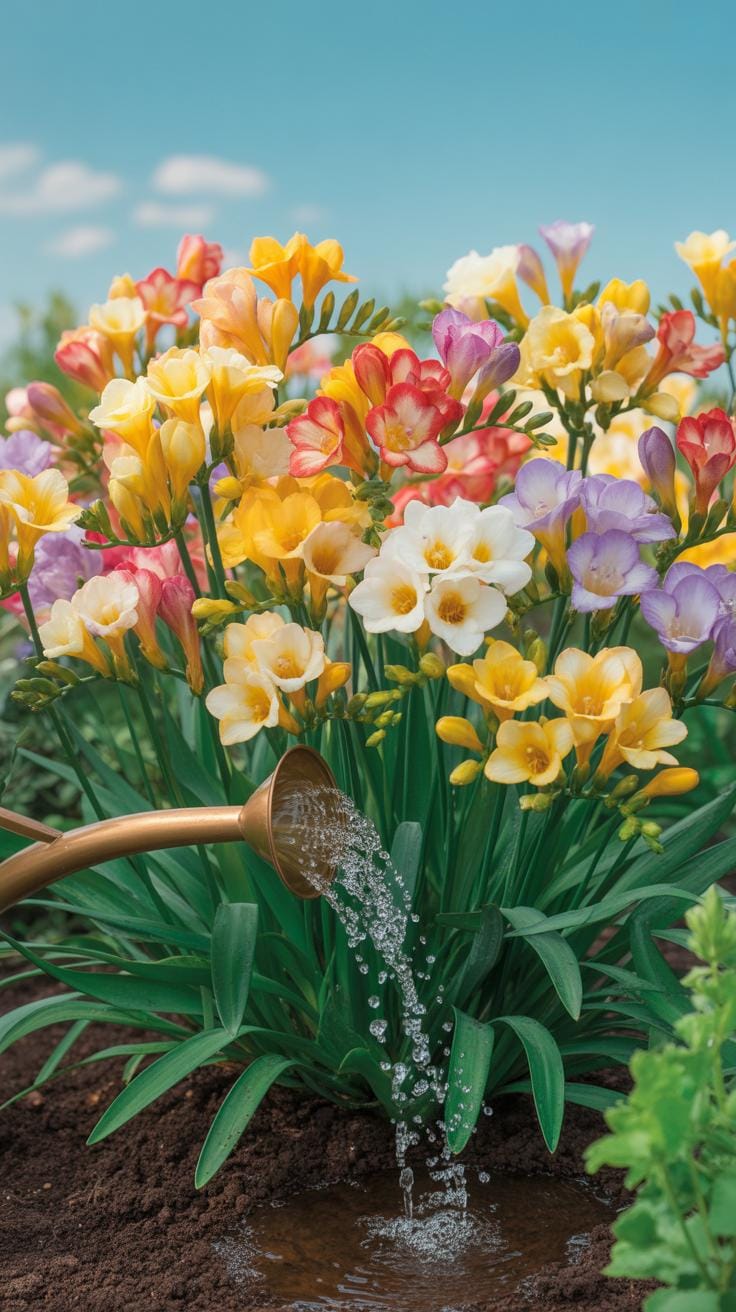
Freesia flowers require full sun to develop strong stems and vibrant colors. Direct light ensures the plant produces enough energy for its heavy blooms. While they need light, these plants fail in extreme heat. Ideal daytime temperatures should stay below 80 degrees Fahrenheit. If the air gets too hot, the corm stops growing. Keep the soil cool to prevent early dormancy.
Watering must remain consistent but controlled to avoid rot. Keep the soil moist during the active growth phase once sprouts appear. Do not saturate the ground or let the bulbs sit in puddles. Reduce water once the foliage begins to yellow after blooming. Proper drainage is the most critical factor for success. Soggy soil kills the root system and prevents future growth.
How To Support Freesia Stems As They Grow Tall And Arching
Freesia stems are inherently weak and thin. They naturally arch and heavy flower heads often pull them toward the dirt. You must provide physical support early in the growing cycle. Insert thin bamboo stakes or plastic supports when the plants reach six inches high. Waiting longer risks damaging the delicate root system or breaking the brittle stems during the staking process.
Professional growers often use horizontal netting or grids to manage large clusters. This technique keeps the stems upright without restrictive ties. Use soft twine if you prefer individual staking to prevent bruising the plant tissue. Proper support ensures the flowers remain clean and visible. It also makes harvesting for floral arrangements much easier. Support the entire length to maintain the signature curve.
How To Care For And Maintain Thriving Freesia Flowers
Fertilizing And Mulching Tips To Keep Your Freesia Flowers Healthy
Freesias require specific nutrients to produce strong stems and vibrant blooms. Apply a balanced liquid fertilizer every two weeks once the first tiny sprouts appear above the soil line. Use a formula high in potassium to support flower development rather than just green leaf growth. Stop all feeding immediately once the flowers begin to fade. This prevents the plant from wasting energy on late season growth.
Proper mulching protects the shallow bulb system from temperature spikes. Apply a two inch layer of organic compost or aged bark around the base of the plants. This layer keeps the soil cool and retains consistent moisture levels. Avoid placing mulch directly against the stems to prevent rot. Good mulch also suppresses weeds that compete with your flowers for essential water and soil minerals.
Common Pests And Diseases That Affect Freesias And How To Manage Them
Aphids and thrips are the primary pests that target these plants. These insects suck sap from the leaves and distort the flower buds. Inspect the undersides of leaves regularly for signs of infestation. Use a sharp stream of water to knock them off or apply insecticidal soap. Fast action prevents these pests from spreading viruses that can kill your entire flower crop.
Fungal issues like fusarium wilt and gray mold thrive in wet conditions. Ensure your soil drains rapidly to prevent root rot from taking hold. Space your plants properly to allow maximum airflow between the stems. If you see spots on the leaves or fuzzy growth, remove the infected parts immediately. Destroy all diseased plant material instead of composting it to stop the pathogen cycle.
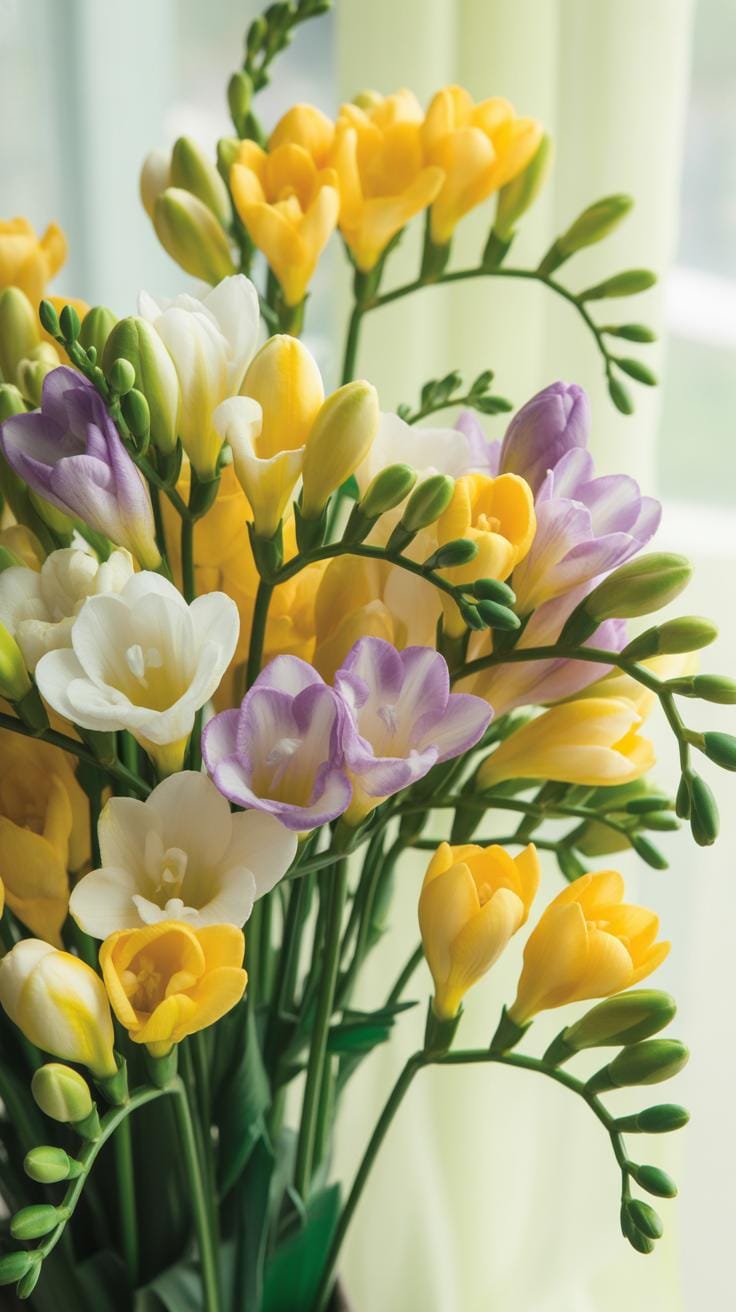
The Timeless Beauty Of White Freesias In Garden Design
Why The White Freesia Flower Remains A Classic Choice For Gardens
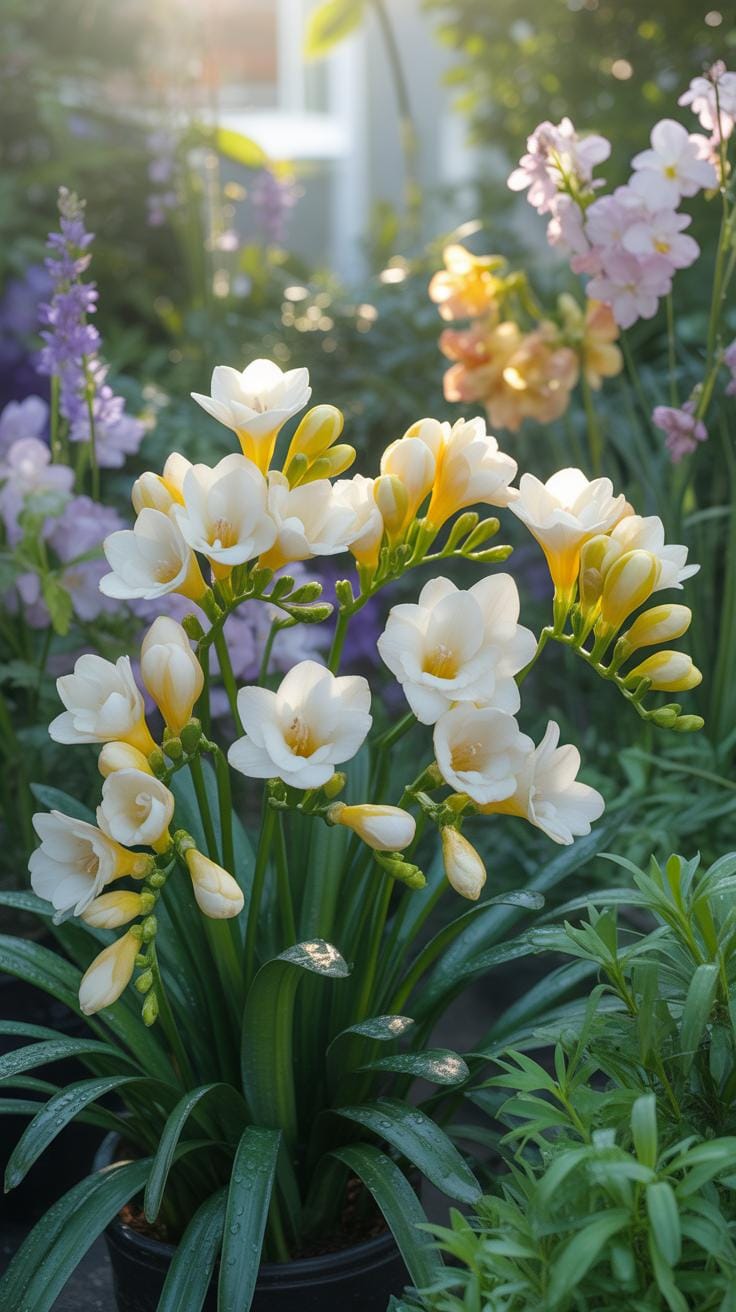
White freesias represent the purest form of this species. Designers select them for their high reflectance in low light. This makes them ideal for moon gardens or evening landscapes. Their scent is more potent than most colored varieties. They offer a heavy peppery aroma that carries across large distances. Gardeners use them to anchor sensory zones without clashing with existing color palettes.
History shows white freesias as staples in Victorian conservatories. Their symmetrical shape and upright growth patterns define structured garden layouts. They provide a clean visual break in dense flower beds. The white petals highlight the green foliage of surrounding plants. Professional growers prioritize white cultivars for their consistent stem strength and uniform bloom times. You get predictable results every season with these specific bulbs.
How To Pair White Freesias With Other Plants For A Stunning Display
Effective pairing requires a focus on texture and height. Plant white freesias behind low-growing silver foliage like Dusty Miller. The silver leaves enhance the cool tones of the white petals. Use dark green ferns to create a backdrop that makes the blooms pop. This contrast draws the eye directly to the flower spikes. Strategic positioning ensures the small blooms do not get lost.
Combine white freesias with blue or purple perennials for a high-contrast look. Lavender or Salvia work well because they share similar drainage requirements. Avoid planting them near aggressive spreaders that choke out the bulbs. Stick to plants with non-invasive root systems. Proper spacing allows air to circulate around the freesia stems. This prevents fungal issues while maintaining a dense and professional aesthetic.
Freesia Flower Photography Tips For Capturing Their True Beauty
Best Camera Settings And Lighting For Freesia Flower Photography
Set your camera to a wide aperture like f/2.8 or f/4.0. This creates a shallow depth of field. It makes the delicate petals stand out against a soft background. Use a fast shutter speed to prevent motion blur from wind. Keep your ISO low to avoid digital noise. High image quality is vital for showing the smooth texture of the Freesia petals.
Avoid direct sunlight because it creates harsh shadows. Shoot during the golden hour for warm tones. Use a diffuser if you must shoot at midday. This softens the light across the tubular blooms. Artificial light should be off-camera and diffused. Side lighting reveals the three-dimensional form of the flower spike. Clear light ensures the vibrant yellows and purples remain accurate in the final frame.
How To Use Composition And Background To Elevate Your Freesia Flower Images
Position the camera to follow the natural curve of the Freesia stem. These flowers grow in a distinct horizontal line called a zygomorphic shape. Use the rule of thirds to place the lead bloom off-center. This creates a more dynamic image. Get close to capture the intricate details of the inner throat. Focus specifically on the pollen-bearing anthers for a sharp focal point.
Select a neutral background to make the flower colors pop. Dark greens or muted earth tones work best. Remove any distracting sticks or dead leaves from the frame. If shooting indoors, use a matte cloth to prevent reflections. A clean background keeps the viewer focused on the unique structure of the plant. High contrast helps define the edges of each petal clearly.
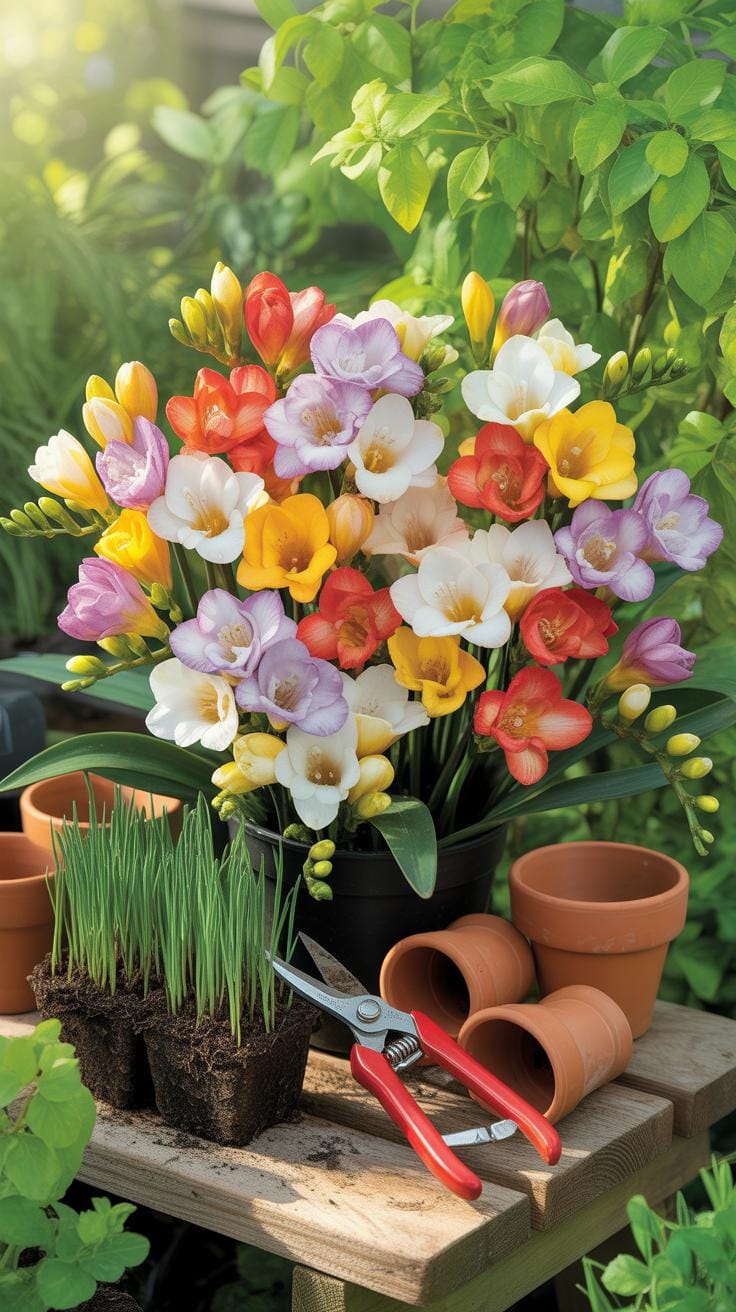
Using Cut Freesia Flowers In Arrangements And Bouquets
When And How To Cut Freesia Flowers For The Longest Vase Life
Cut Freesia Flowers when the first bud on the spike shows color and begins to open. This stage ensures the remaining buds develop fully in the vase. Use clean, sharp shears to prevent crushing the vascular system. Make the cut at a forty five degree angle early in the morning. This timing captures the highest moisture levels within the plant tissue for better longevity.
Immediately place the stems in lukewarm water mixed with floral preservative. Remove any foliage that sits below the water line to prevent bacterial growth. Bacteria block water uptake and kill the bloom quickly. Change the water every two days and trim one inch off the stems. Keep the arrangement away from direct sunlight and ripening fruit. Ethylene gas from fruit causes the flowers to drop prematurely.
The scent of freesias is like a gentle hand pulling at my heartstrings, reminding us that with patience, every bulb carries the promise of a spring morning.
— Elizabeth Lawrence
Creative Floral Arrangement Ideas Featuring Freesia Flowers
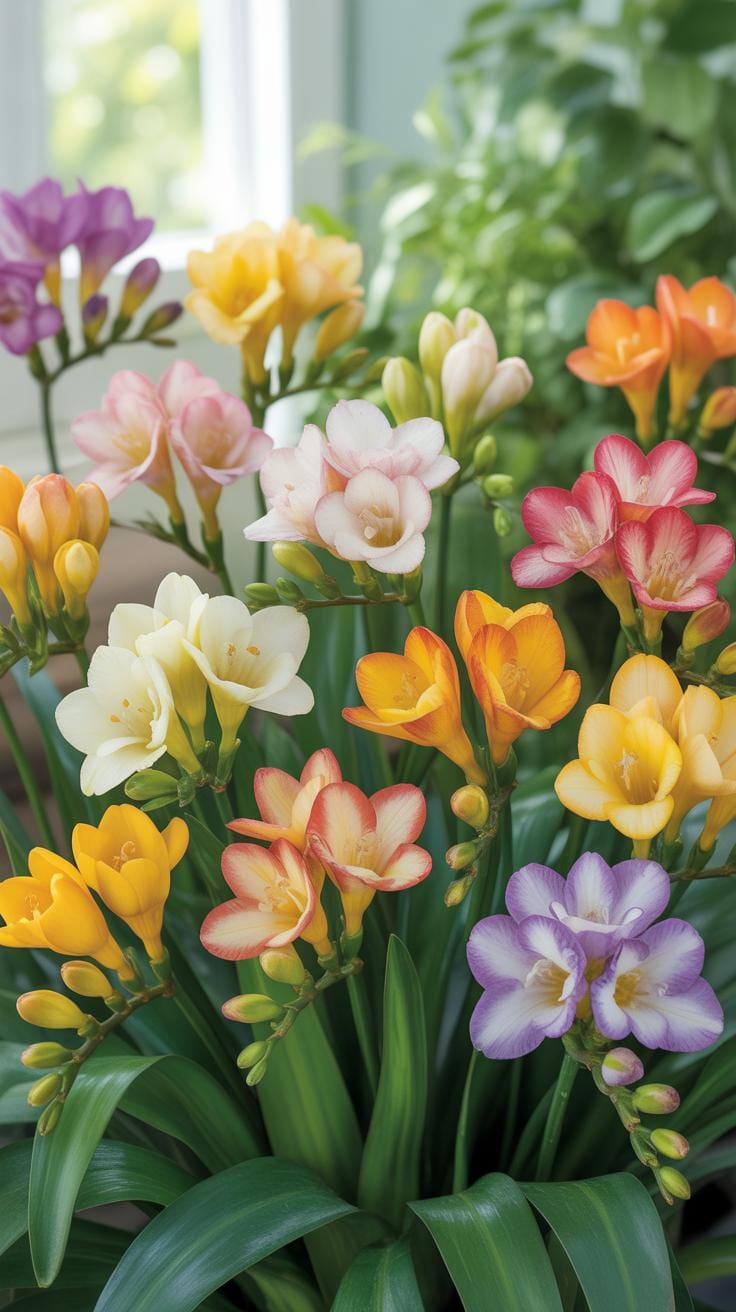
Modern floral design uses Freesia Flowers to add structural lines and scent. Their distinctive zygomorphic shape works well in contemporary glass vases. Use them alone for a minimalist look or group them by color for impact. Designers often pair them with heavy blooms like roses to provide contrast. The arching stems create natural movement without the need for additional wiring or support frames.
Incorporate historical Victorian style by using freesia in small handheld posies or tussie mussies. These arrangements rely on the strong fragrance of the flower to create a sensory experience. Use monochromatic palettes to emphasize the texture of the petals. Ensure the stems reach the bottom of the container. Freesia has a high transpiration rate and requires constant access to water to maintain its upright posture.
How To Propagate And Multiply Your Freesia Flowers Season After Season
How Freesia Corms Naturally Multiply And How To Harvest Them
Freesia plants grow from corms which serve as underground storage organs. During the active growing season the parent corm produces small offsets known as cormels. These secondary growths develop around the base of the original structure. You must wait for the foliage to turn completely yellow and dry before extraction. This dormancy period ensures the plant transfers all remaining energy to the new corms for the next cycle.
Lift the corms carefully using a hand fork to avoid bruising the tissue. Shake off excess soil and inspect each piece for rot or damage. Detach the small cormels from the mother corm using your fingers. Store the harvested material in a cool dry place with good airflow. Proper ventilation prevents fungal growth during the resting months. Keep the temperature steady to maintain the viability of the embryonic flower buds.
Replanting Saved Freesia Corms To Ensure Beautiful Blooms Year After Year
Successful replanting requires precise timing based on your local climate. In warm regions plant the corms in autumn for early spring displays. In colder zones wait until the last frost passes before placing them in the ground. Select a site with well draining soil to prevent moisture from rotting the base. Dig holes two inches deep and space the corms three inches apart. Always position the pointed end facing upward.
Consistency in soil moisture levels determines the quality of the primary flower spike. Water the area immediately after planting to settle the earth around the roots. Apply a balanced fertilizer high in potassium when the first green shoots appear. This nutrient support helps the small cormels grow large enough to produce their own flowers. Stagger your planting every two weeks if you want a continuous supply of fresh blooms throughout the season.
Frequently Asked Questions

What makes freesia flowers a good choice for beginner gardeners?
Freesia flowers are incredibly rewarding for novices because they provide both vibrant color and an unmistakable, peppery fragrance. These elegant blooms grow from corms and are relatively resilient if planted in well-draining soil with plenty of sunlight. Their slender stems and funnel-shaped petals add a sophisticated touch to garden beds or indoor pots, making it easy for anyone to achieve professional-looking floral results with minimal maintenance throughout the growing season.
How do I ensure my freesia flowers produce the best possible blooms?
To create stunning displays, plant your bulbs in the fall or spring depending on your local climate. Ensure they receive at least six hours of bright light daily and keep the soil consistently moist but never waterlogged. Once the stems begin to grow, providing a small stake can prevent the heavy blossoms from drooping. For the most vibrant Freesia flowers, apply a high-potash liquid fertilizer every two weeks once the first buds appear.
Is it expensive to start a collection of freesias for home decor?
Not at all! Growing your own blossoms is far more cost-effective than buying premium bouquets from a florist. Corms are typically very affordable when purchased in bulk from garden centers or online nurseries. Since these plants multiply over time, a small initial investment can provide you with a lifetime of beauty. You can easily repurpose simple glass jars or thrifted vases to showcase your homegrown Freesia flowers without spending a fortune.


