
What Is A Studio Flower Photography Setup And Why It Matters
Understanding The Basics Of A Controlled Flower Shooting Environment
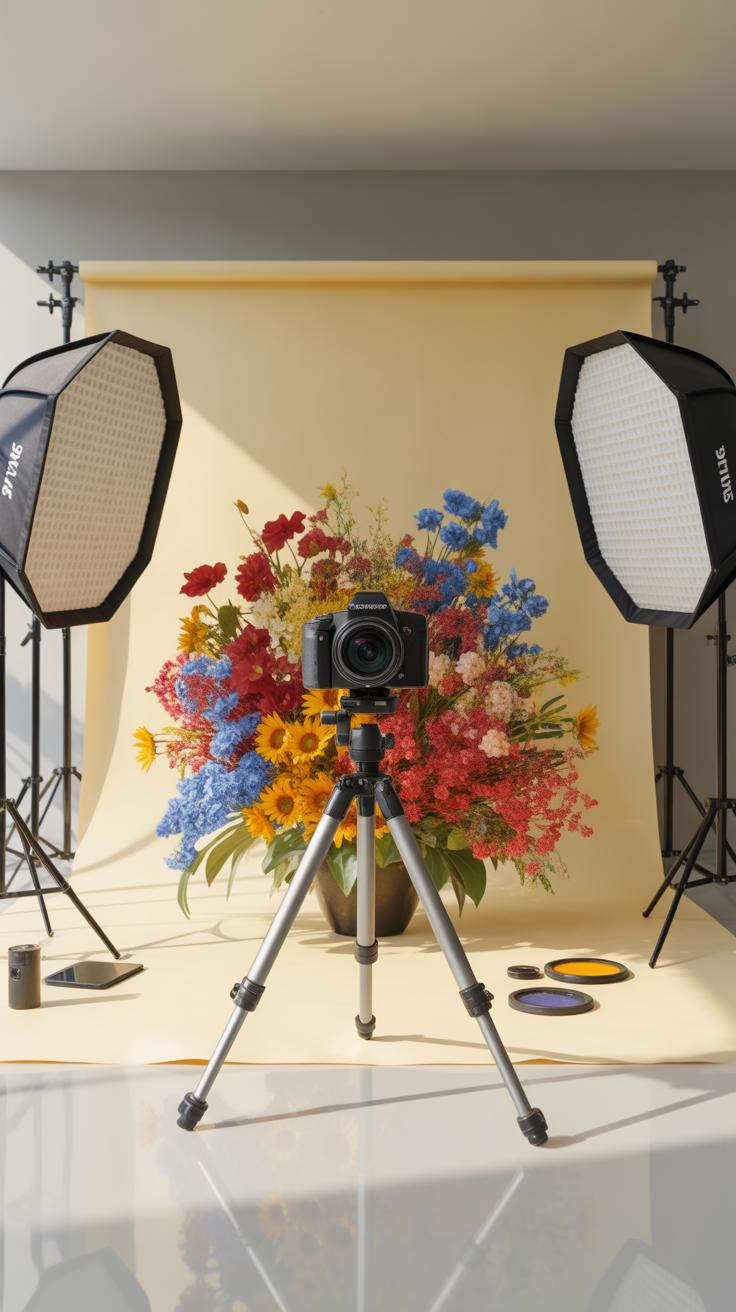
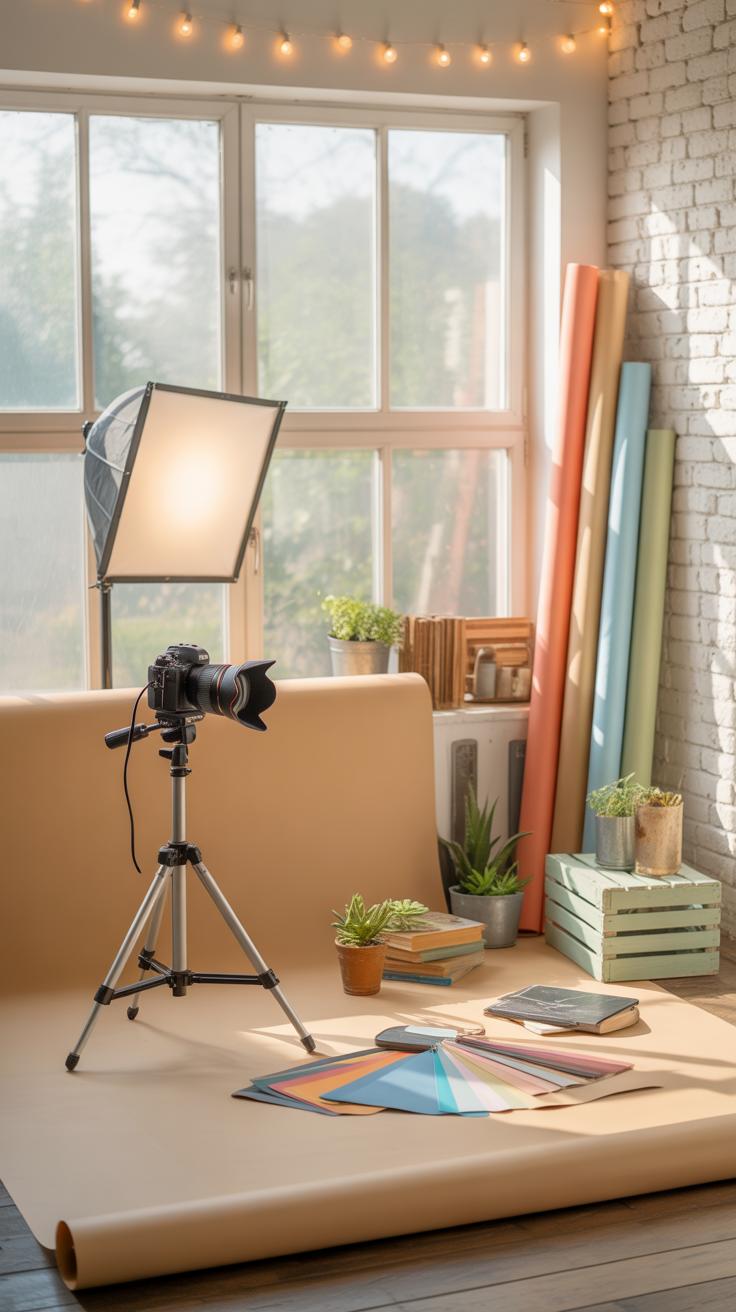
A studio flower photography setup relies on environmental control. You remove unpredictable variables found in nature. This space requires a solid surface, a background system, and artificial light sources. Sturdy tripods keep the camera still for long exposures. You use diffusers to soften light and reflectors to fill shadows. This baseline setup ensures every shot remains consistent and repeatable throughout your session.
Isolation is the primary goal of this environment. You eliminate wind that causes motion blur in delicate petals. You block ambient light to dictate exactly where highlights and shadows fall. Physical backdrops allow you to separate the subject from the background. This control lets you focus on the geometry of the plant. You manage the scene rather than reacting to external conditions you cannot change.
Why Flowers Respond So Well To Studio Conditions Compared To Outdoor Shoots
Outdoor photography subjects plants to harsh sunlight and wind. High noon sun creates deep shadows and blown out highlights on thin petals. Wind makes macro photography nearly impossible because the focal plane is narrow. In a studio, you utilize steady led or strobe lights. These tools mimic natural light without the heat or movement. You preserve the turgor pressure in the stems longer by avoiding direct sun.
Studio settings allow for precise light placement. You can use backlighting to reveal the translucent veins in a leaf. Side lighting emphasizes the texture of the pollen and stamen. You control the color temperature to match the natural hue of the bloom. This technical accuracy produces professional results that outdoor settings rarely offer. You dictate the mood and the clarity of the image through intentional gear placement.
Choosing The Right Photography Backdrop Ideas For Flower Subjects
Solid Color Vs. Textured Backdrops: Which Works Best For Floral Detail
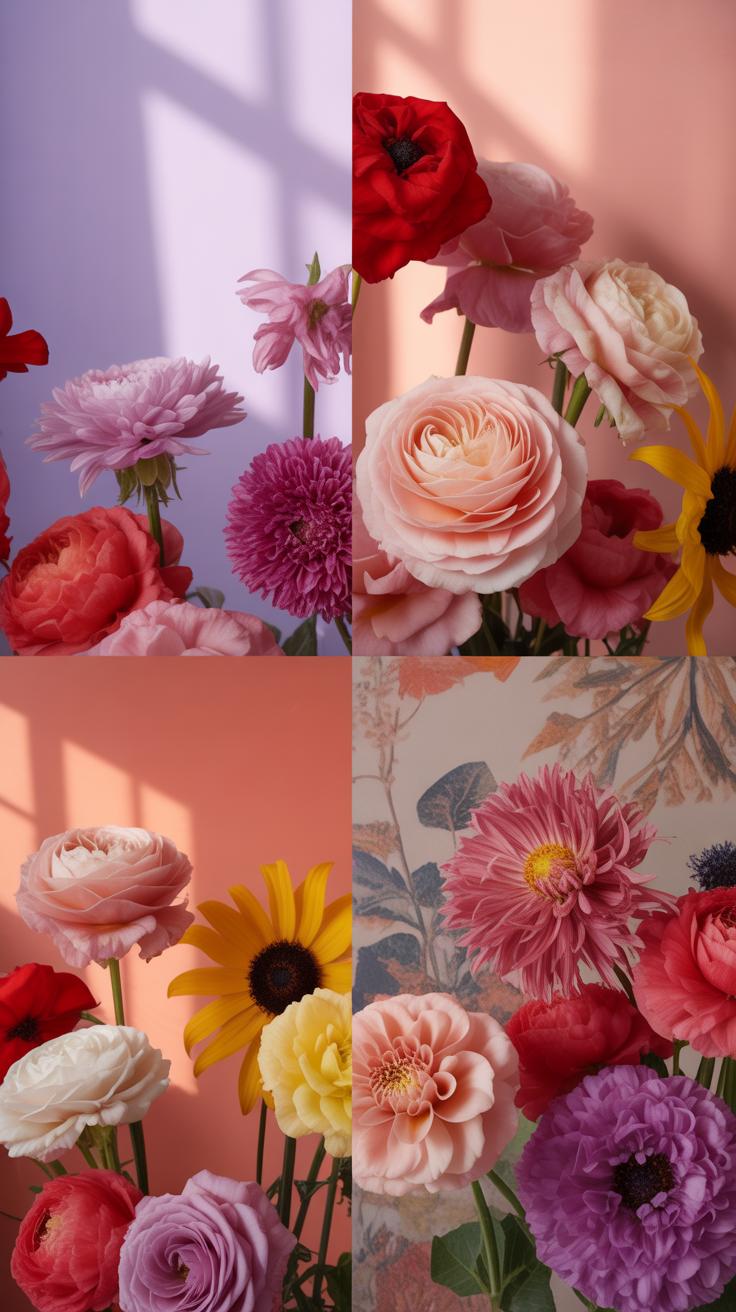
Solid backdrops focus all attention on the flower. Use matte black to hide shadows and create high contrast. This technique highlights intricate petal edges and pollen grains. White backdrops create a clean look often seen in botanical catalogs. Solid colors keep the viewer from getting distracted. They ensure the sensor captures color accurately without interference from reflected background tints.
Textured backdrops add depth and mood to the image. These surfaces work well for fine art photography styles. Avoid busy patterns that compete with the organic shapes of the plant. A subtle stone or canvas texture adds tactile quality to the frame. Use texture when you want to suggest an environment rather than a clinical study. It helps anchor the subject in a three dimensional space.
How To Build A Simple Photoshoot Backdrop At Home Using Everyday Materials
Professional results do not require expensive equipment. Use a heavy piece of cardstock or foam board for a small setup. Tape the board to a wall or prop it against a sturdy object. Ensure the material has a matte finish to prevent harsh glares. Non reflective surfaces under 10 dollars provide the same visual quality as high end studio gear for close up work.
Inexpensive fabric also serves as an effective background. Iron a cotton sheet or a piece of velvet to remove all wrinkles. Use clips to hang the cloth from a horizontal bar or a door frame. Dark velvet absorbs light exceptionally well. It creates a deep void that makes colors pop. Position the flower at least two feet from the cloth to avoid casting visible shadows on the material.
Exploring Studio Background Ideas That Complement Flower Colors
Using Neutral And Complementary Tones As Your Studio Background Ideas
Neutral backgrounds like slate grey or matte black provide the most versatility for floral subjects. These colors do not compete with the natural hues of the petals. A dark background absorbs light and creates a high-contrast look common in Dutch Golden Age still life paintings. This technique isolates the specimen and forces the viewer to focus on the fine textures and structural details.
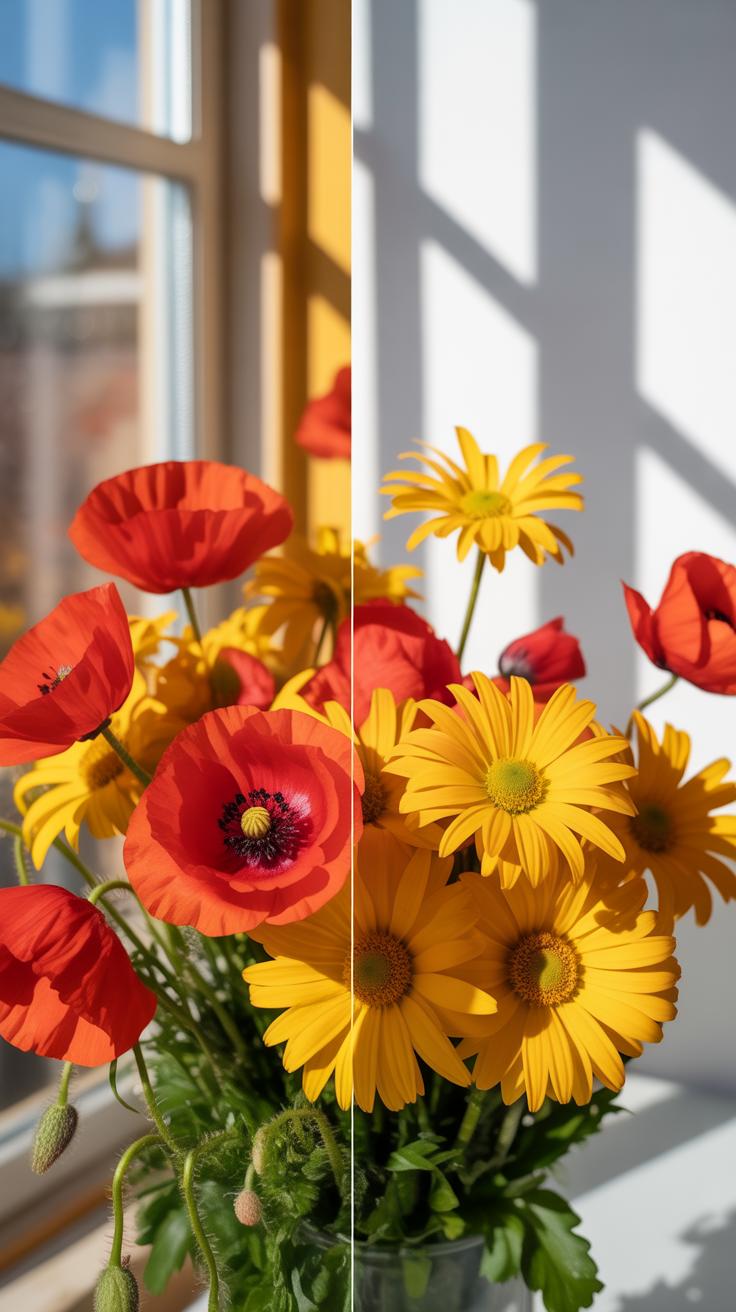
Complementary colors use the opposite side of the color wheel to create visual tension. A blue background makes orange lilies appear more vibrant through simultaneous contrast. Choose matte materials like heavy cardstock or felt to prevent unwanted glare. Avoid high-gloss surfaces that create distracting highlights. Correct color selection ensures the background supports the flower rather than drawing the eye away from it.
How Background Distance And Depth Of Field Affect The Final Floral Image
Distance between the flower and the background dictates the level of detail visible behind the subject. Placing the flower three feet from the backdrop allows light to fall off naturally. This separation prevents the flower from casting harsh shadows on the material. Proximity matters because it determines if the background texture remains sharp or becomes a smooth wash of solid color.

A wide aperture like f/2.8 creates a shallow depth of field. This optic choice blurs the background into a soft bokeh effect. This blur eliminates distractions from imperfections in the backdrop fabric or paper. A smaller aperture like f/11 keeps the entire scene sharp. Use this for botanical studies where the environment is as important as the plant. Adjusting these settings changes the mood and focus.
Setting Up Your Photoshoot Background Studio Space On A Small Budget
Defining Your Shooting Space: How Much Room You Actually Need
Flower photography requires less space than most professional setups. You only need a four-foot by four-foot area to work effectively. A standard dining table or a dedicated desk provides enough surface for your subject and gear. Clear your workspace of all clutter to prevent unwanted reflections. Position your table near a wall to stabilize your background support system.
Space management determines your lighting options. Small rooms limit your ability to use massive softboxes or large flags. Choose a room with high ceilings if you plan to use overhead hair lights. Ensure you have enough floor space to move your tripod three feet back from the subject. This distance allows for macro lens focusing and framing without hitting walls or furniture.
Essential Items To Create A Functional Photoshoot Background Studio At Home
Building a budget studio requires items that control light and provide clean textures. You do not need expensive commercial rigs for small botanical subjects. Heavyweight paper and fabric remain the industry standards for still life work. These materials create the seamless look seen in classic botanical illustrations. Focus on matte finishes to eliminate harsh hot spots in your final frames.
- V-Flats: Use black and white foam boards to bounce or block light. White sides fill shadows while black sides add contrast and depth to petals. These boards stand independently and cost very little at craft stores.
- Seamless Paper: Purchase heavy rolls of cardstock or dedicated photography paper. This material creates a curved transition between the floor and wall. It removes the horizon line from your image to keep focus on the flower.
- Spring Clamps: Secure your backdrops to chairs or stands using nylon clamps. These tools prevent the background from slipping during long exposures. They are essential for holding diffusers or makeshift reflectors in precise positions around the plant.
- C-Stands or Tripods: Stable supports keep your camera and lights from moving. Even a cheap tripod allows for the slow shutter speeds needed for high f-stop flower shots. Sharpness depends entirely on the rigidity of your gear setup.
- Diffusion Material: Use a white bedsheet or professional scrim to soften light sources. Hard light creates distracting shadows on delicate organic shapes. Placing diffusion between the light and the flower mimics the soft glow of a greenhouse.
Organize these tools to favor workflow efficiency and physical safety. Tape down power cords to prevent tripping in dark studio conditions. Keep your water spray bottles away from electronic flash units and camera bodies. A clean setup allows you to focus on the technical details of the plant. Proper equipment placement ensures repeatable results for every single flower species you photograph.
Flower Photography Lighting Setup Natural Vs Artificial Light Explained
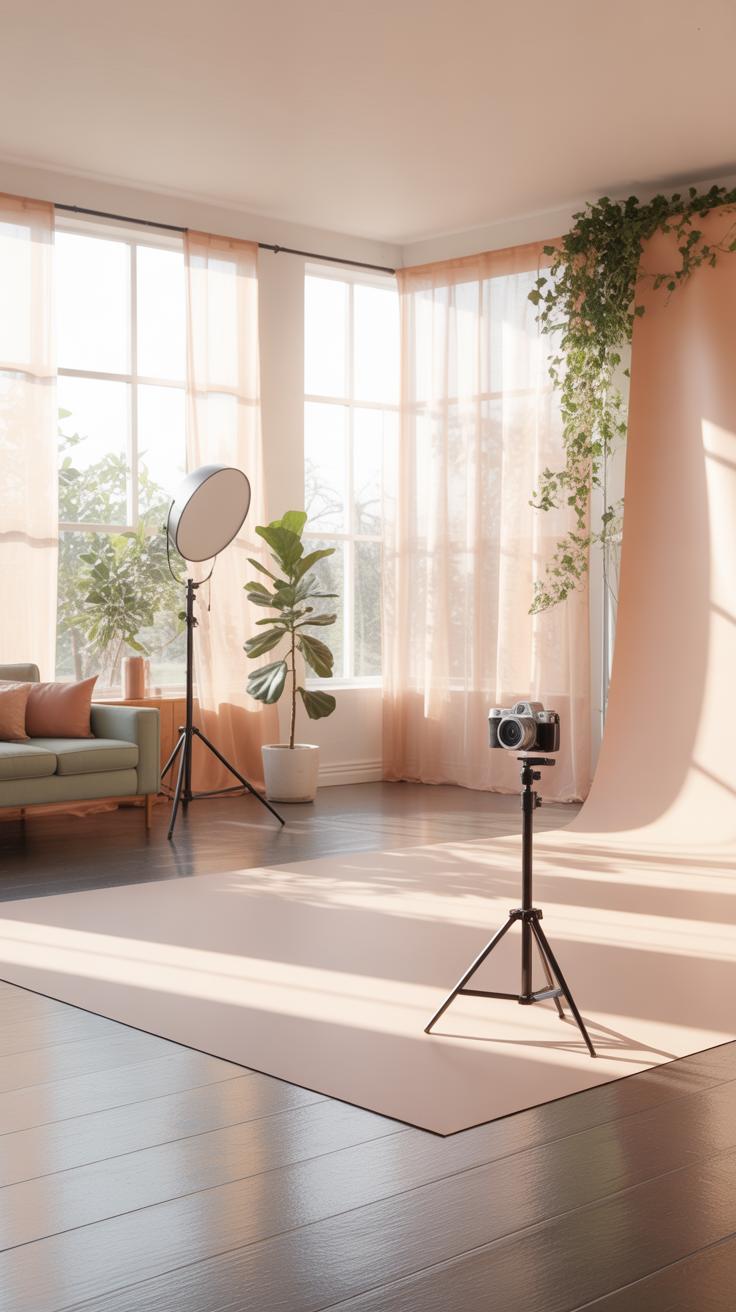
How To Use Window Light Effectively In A Flower Photography Lighting Setup
North facing windows provide the most consistent light for floral subjects. Direct sunlight creates harsh shadows and blown out highlights that ruin delicate petal textures. Position your table ninety degrees to the glass to create side lighting. This angle emphasizes the three-dimensional form of the bloom. Choose a bright day with thin cloud cover for the best natural diffusion available.
Control the intensity of the light by moving the subject closer or further from the glass. Use a white foam board on the side opposite the window to fill in deep shadows. Fasten a sheer white curtain over the window if the sun hits the glass directly. This simple modification turns a window into a massive light box. Natural light remains the most cost-effective solution for high-quality results.
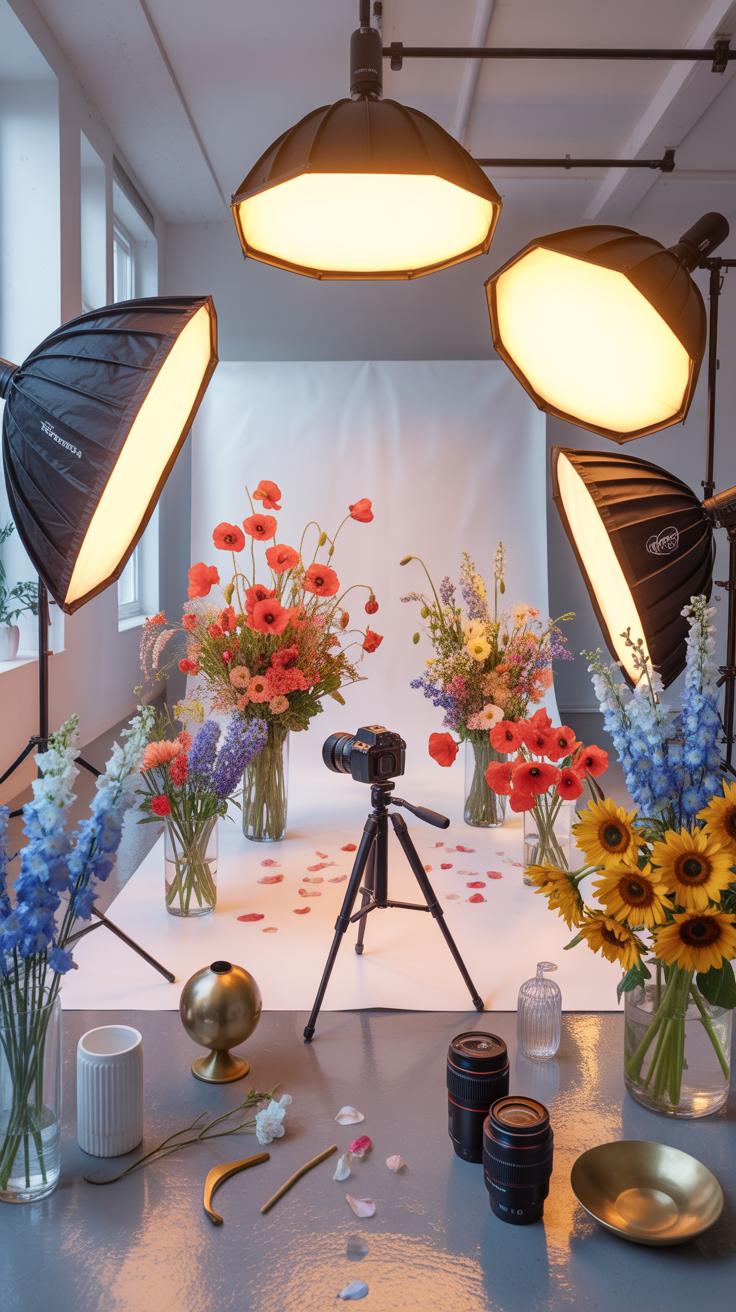
Softboxes, Reflectors, And Diffusers: Affordable Artificial Lighting For Flowers

Continuous LED panels offer a predictable way to light flowers in a controlled studio. These lights allow you to see exactly where shadows fall before you press the shutter. A small softbox is essential for mimicking the soft quality of window light. It spreads the light over a larger surface area to eliminate hot spots on waxy petals. Avoid using bare bulbs or direct flash.
Reflectors redirect light back into the shadowed areas of the flower. Silver reflectors provide a crisp punch while white reflectors offer a more subtle fill. Use a circular diffuser between the light source and the plant to soften the transition from light to dark. This setup works well for macro photography where details matter. Proper placement of these tools ensures the flower looks natural and professional.
Decor For Photoshoot Styling Props And Arrangements Around Your Flowers
Choosing Props That Enhance Without Overpowering Your Floral Subject
Effective prop selection follows the principle of subordination. The flower is the primary subject. Every secondary object must support its form, color, or texture. Avoid items with complex patterns or high-gloss finishes. These distract the viewer and create unwanted specular highlights. Choose props with neutral tones and matte surfaces. These materials absorb light and keep the focus on the organic details of the flower.
Select props based on the botanical history or natural habitat of the plant. A desert flower pairs well with dry, textured stones. A moisture-loving lily works better with smooth glass. Match the scale of the prop to the bloom. Heavy objects crush the visual delicacy of thin petals. Fine-stemmed flowers require lightweight or slender accompaniments. Maintain balance by placing props in the background or off-center to ground the composition.
You don’t need a fancy studio to capture the soul of a flower; a simple window and a piece of cardboard can create a masterpiece. All you need is the light that is already there and a heart willing to see the beauty in the quiet corners of your home.
— Imogen Cunningham
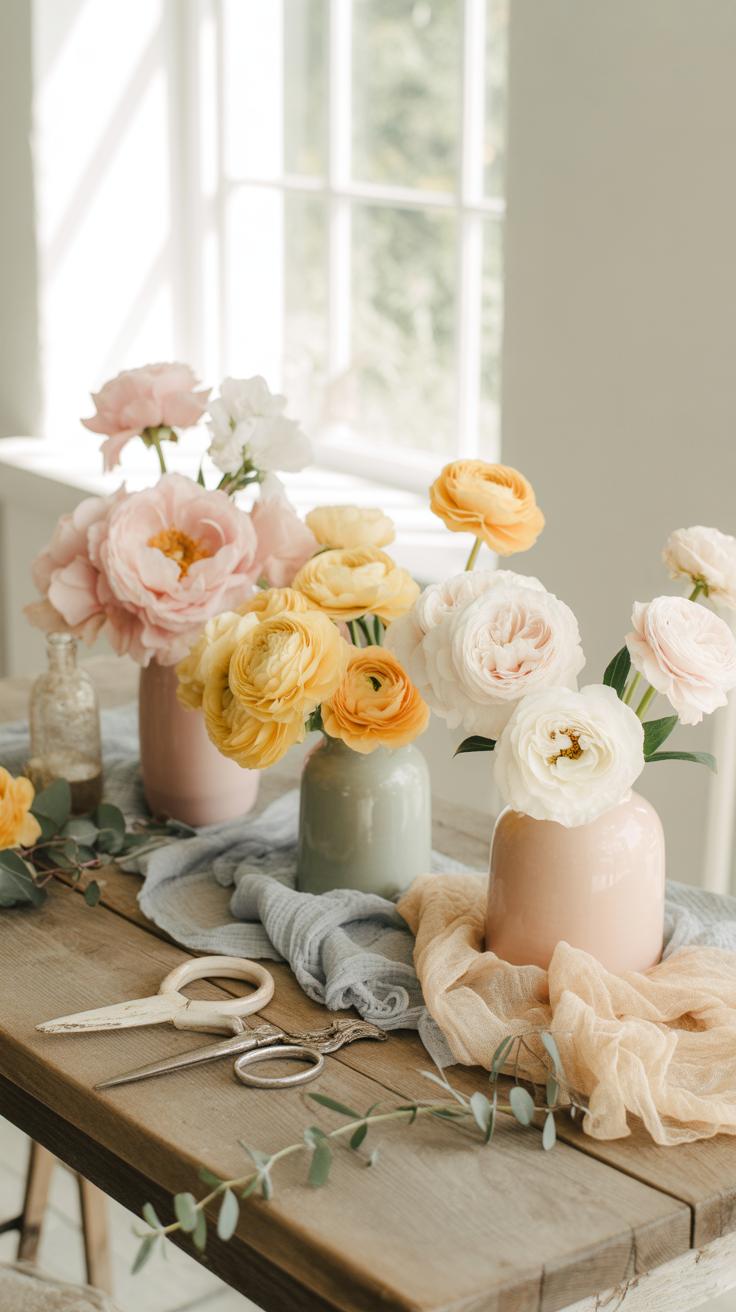
How Decor For Photoshoot Choices Like Vases, Linen, And Wood Boards Add Depth
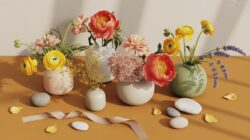
Vases and containers define the structural lines of your image. Clear glass reveals stem architecture and water physics. Opaque ceramic provides a solid base that anchors the frame. Use linen fabrics to introduce soft shadows and organic folds. These layers create a sense of three-dimensional space. Textured wood boards offer a rustic foundation. They reference the Dutch Golden Age still life style by providing a dark, grounded horizontal plane.
Materials affect how light moves through the scene. Dark wood absorbs light to emphasize the bright colors of the petals. Light-colored stone reflects secondary light into the shadows of the flower. Use weathered surfaces to contrast with the fresh vitality of the plant. This juxtaposition highlights the fleeting nature of the bloom. Arrange these elements at varying distances from the lens. This technique creates a shallow depth of field that isolates the subject.
Creating A Dreamy Photography Studio Feel With Minimal Equipment
Tips For Achieving A Soft, Ethereal Mood In Your Dreamy Photography Studio
Soft lighting defines the ethereal aesthetic in flower photography. You must eliminate harsh shadows to create a low-contrast look. Use large light sources close to the bloom to wrap light around the petals. Reflectors fill in dark areas and keep the tonal range narrow. This technique mimics the soft light found in Victorian botanical illustrations and early Pictorialism photography styles.
- Large Softbox Use: Positioning a large light source very close to the flower creates a wrap-around effect. This reduces the transition between light and shadow. It mimics the natural light of an overcast day which minimizes texture for a smoother appearance.
- Vellum Diffusion Layers: Placing vellum or tracing paper between the light and the flower adds a second layer of diffusion. This scatters light particles even further than a standard softbox. It eliminates hot spots on waxy or wet petals for a matte finish.
- High Key Technical Exposure: Increasing exposure by one or two stops over the meter reading brightens the midtones. This pushes the background toward white without losing essential detail in the flower crown. It creates a clean and airy feeling in the final image.
- White Foam Core Reflectors: Placing white boards opposite the primary light source bounces light back into the shadows. This reduces the lighting ratio to nearly one-to-one. Constant illumination across the entire subject removes the visual weight of dark areas and highlights delicate structures.
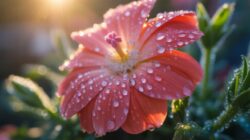
- Backlighting For Transparency: Shifting the light source behind the flower illuminates the internal petal structure. This makes the flower appear to glow from within. It highlights the fine veins and delicate edges of the petals which adds a layer of visual depth.

Background choice determines the overall mood. Use neutral tones like cream, light gray, or pale blue to maintain a soft palette. Dark backgrounds create too much contrast for a dreamy look. Keep the distance between the flower and the backdrop at least three feet. This ensures the background remains out of focus and does not distract from the main floral subject.
How Sheer Fabrics, Bokeh, And Overexposure Techniques Create A Dream Like Look
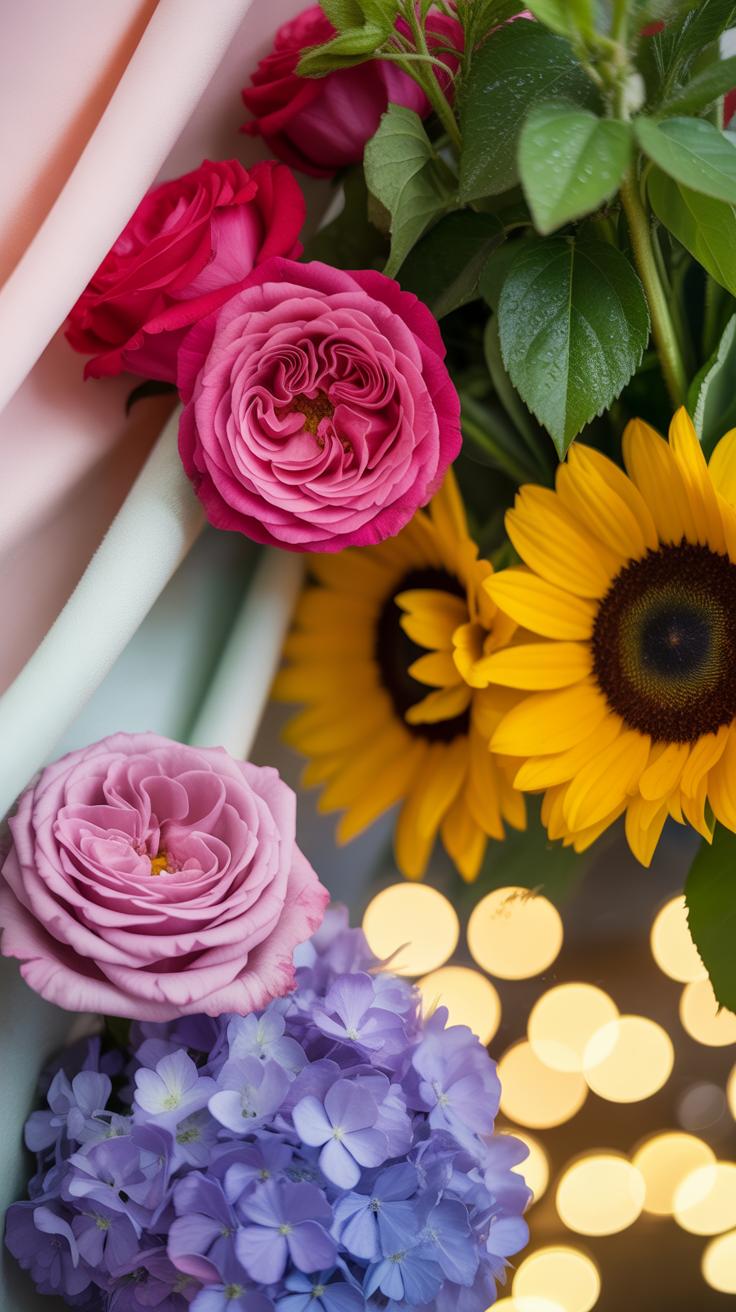
Sheer fabrics act as versatile tools for light manipulation. Drape white organza or chiffon over the flower to create a physical haze. This softens edges and lowers color saturation naturally. You can also place fabric behind the subject to create a textured yet soft background. These materials reflect the light softly and prevent the viewer from seeing sharp lines or distracting details.
Large apertures create the shallow depth of field necessary for heavy bokeh. Shooting at f/2.8 or wider blurs the foreground and background into smooth gradients. Intentional overexposure shifts the histogram to the right. This flattens the image and reduces the intensity of colors. The combination of blur and brightness mimics early 20th-century soft-focus lenses. It creates a professional look without requiring expensive vintage glassware.
Photo Studio Set Up Ideas To Evolve Your Flower Photography Over Time
Upgrading Your Photoshoot Set Gradually: What To Add As Your Skills Grow

Master your current gear before buying more. Start with a single light and a bounce card to learn shadow control. Once you understand light falloff, add a dedicated macro lens. This glass provides a one-to-one magnification ratio. It captures details that standard lenses miss. Proper stabilization is next. A heavy tripod prevents blur during long exposures. Sharpness depends on physical stability.
Transition to multi-light setups for better depth. Add a rim light to separate the flower from the background. Switch from foam boards to professional softboxes to control light spill. Invest in a rail system for focus stacking. This technique merges multiple shots for total sharpness. Higher quality modifiers produce softer gradients on petals. Each addition should solve a specific problem in your current workflow.
Keeping A Consistent Photoshoot Set Style To Build A Recognizable Floral Portfolio
Visual consistency creates a professional brand. Use the same background materials for every series. Stick to a specific lighting ratio to define your look. Some photographers prefer the high-contrast chiaroscuro style inspired by Dutch Golden Age painters. Others use high-key lighting for a clean modern feel. Standardize your color temperature settings. Random changes in white balance will ruin the portfolio flow.
Document every light position and power setting. Accurate records allow you to replicate a look months later. Consistency attracts commercial clients who need predictable results. Choose a signature focal length and stick to it. This creates a uniform perspective across all images. Uniformity shows technical mastery and artistic intent. Your portfolio must look like a cohesive body of work rather than a collection of random shots.
Frequently Asked Questions

What is the most important element for a beginner’s studio flower photography setup?
The most critical element is mastering your light source to highlight delicate petals and textures. For a beginner, a simple studio flower photography setup usually starts near a large window for soft, natural light. Adding a cheap white foam board opposite the window helps bounce light back into the shadows, ensuring your floral subject looks multidimensional and vibrant without requiring expensive professional strobes or complex electronic equipment.
How do I create a clean, professional background for my floral shots at home?
To achieve a professional look, position a piece of matte colored cardstock or a fabric remnant behind your bloom. When refining your studio flower photography setup, ensure the backdrop is far enough behind the flower to fall out of focus, which creates a beautiful bokeh effect. Using a tripod is also essential here, as it allows you to precisely align your composition and use slower shutter speeds for sharper details.
Can I create high-quality botanical images without buying expensive studio gear?
Absolutely! You can build an effective DIY studio for floral portraits using household items. Instead of professional softboxes, use a sheer white curtain to diffuse sunlight or a desk lamp with a parchment paper shield. By repurposing a dining table and basic poster board, you can create a minimalist environment that rivals a pro studio, proving that a thoughtful arrangement matters more than a high price tag.


