Why Proper Homegrown Herb Storage Makes All The Difference
How Poor Storage Destroys Flavor, Aroma, And Potency
Improper storage ruins your harvest fast. Exposure to open air causes essential oils to evaporate. These oils contain the flavor and medicinal properties of the plant. When they vanish, the herb becomes tasteless and useless. Light also breaks down chemical compounds through a process called photodegradation. This turns vibrant green leaves into brown, dusty waste. You lose the return on your gardening effort.
Oxygen is a silent killer for dried herbs. It triggers oxidation which turns fats and oils rancid. Moisture is even worse as it leads to mold and bacterial growth. One damp leaf can ruin an entire jar of harvest. You must control these environmental factors to keep your herbs potent. High quality storage is not about looks. It is about protecting your biological investment from total decay.
The Science Behind Herb Freshness: What You Need To Know
Herb preservation relies on managing water activity and gas exchange. Fresh herbs continue to breathe after harvest. This respiration uses up stored sugars and releases heat. If you do not stop this process, the herb wilts and rots. Drying slows down enzymes that break down plant tissue. For dried herbs, the goal is reaching a moisture content below ten percent. This level prevents harmful fungal growth.
Temperature plays a major role in chemical stability. Heat speeds up molecular movement and chemical reactions. Storing herbs near a stove or in sunlight increases the rate of flavor loss. Terpenes are the volatile organic compounds responsible for smell. These molecules have low boiling points. Stable, cool, and dark environments keep these molecules trapped inside the plant cell walls. Science proves that environment dictates the shelf life.

Getting Started With Drying Herbs Methods That Actually Work
Air Drying Vs. Oven Drying: Which Method Preserves The Most Flavor
Air drying remains the gold standard for preserving essential oils in homegrown herb storage. This passive method uses ambient air to remove moisture without heat. Heat is the enemy of volatile compounds. High temperatures destroy the delicate chemical structures that give herbs their taste and scent. By avoiding thermal stress you ensure your dried harvest retains its original potency and medicinal properties.
Oven drying offers speed but risks ruining your harvest. Most home ovens cannot maintain the low temperatures required for herb preservation. Settings above ninety degrees Fahrenheit cook the leaves rather than drying them. This process results in a hay-like flavor and brown discoloration. Professional strategists only use ovens as a last resort for high moisture plants like basil or mint during humid weather cycles.
How To Know When Your Herbs Are Fully Dry And Ready For Storage
Precision timing prevents mold growth in your homegrown herb storage containers. You must test the physical structural integrity of the leaves before sealing them. Dry herbs feel like tissue paper and crumble under slight pressure. They should never feel soft or bendable. Stems should snap cleanly like a dry twig. If the stem bends without breaking it still contains water that will cause rot.
Execute a condensation test to verify your results. Place the dried herbs in a glass jar and seal the lid. Monitor the glass for twenty-four hours. If moisture appears on the inside of the jar the herbs are not ready. Remove them and continue the drying process immediately. Consistent dryness ensures your herbs remain shelf stable for up to one year without losing their chemical integrity or flavor profile.

Creative Herb Drying Rack Ideas For Every Home And Budget
DIY Herb Drying Rack Ideas Using Everyday Household Materials
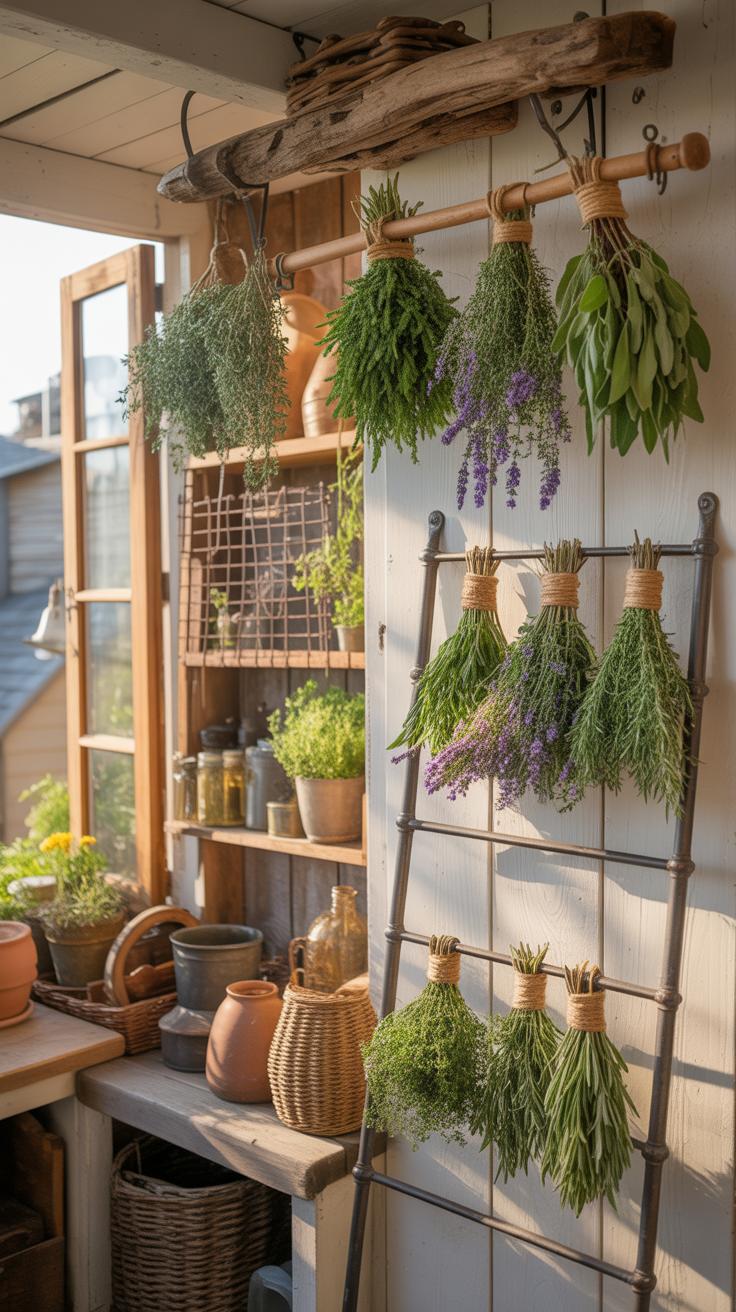
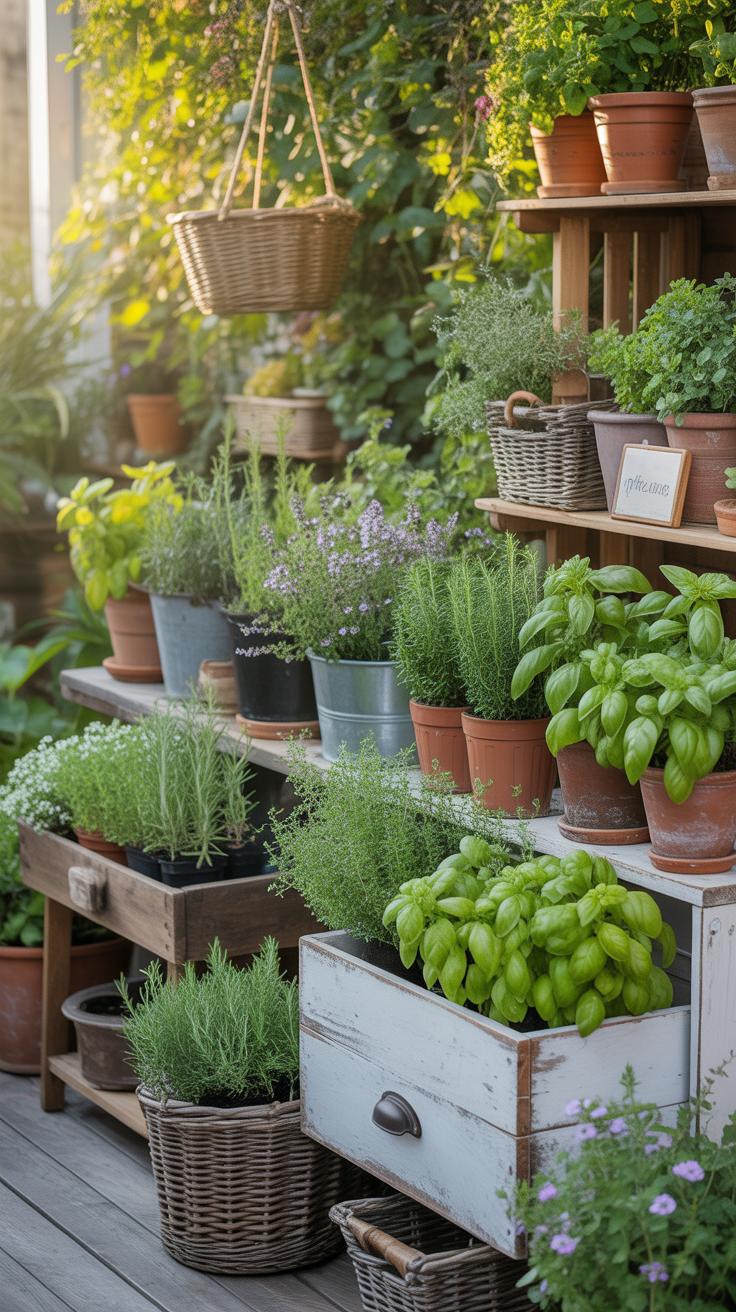
Efficient homegrown herb storage starts with the drying process. You do not need expensive equipment to build a functional rack. Standard household items provide the structural support needed to keep herbs off flat surfaces. This prevents moisture buildup and mold growth. Successful DIY racks use gravity and tension to hold stems securely while maximizing the surface area exposed to moving air.
- Wooden Clothing Hangers: Use standard wooden hangers as a mobile drying base. Secure small herb bundles to the bottom bar using twine or rubber bands. This method utilizes vertical space in closets or kitchens and allows you to move the herbs easily if light or humidity levels change.
- Stainless Steel Cooling Racks: Place wire baking racks over deep trays or between two supports. This creates a flat screen for drying individual leaves or short sprigs. The grid pattern allows air to reach the underside of the plant material, which speeds up the dehydration process significantly.
- Picture Frames and Mesh: Remove the glass and backing from an old wooden picture frame. Staple clean window screening or cheesecloth across the back of the frame. This creates a professional-grade drying screen that you can stack or lean against a wall to save room in small apartments.
- Clothespins and Twine: String heavy jute or cotton twine between two fixed points like a laundry line. Clip herb bundles directly to the line using spring-loaded clothespins. This traditional method handles large harvests efficiently and keeps different herb varieties separated to prevent horizontal flavor contamination during the drying phase.
- Embroidery Hoops: Tension a piece of breathable lace or mesh inside a large circular embroidery hoop. Suspend the hoop from the ceiling using a thin chain or decorative cord. This creates a multi-tiered drying system that relies on natural rising heat to pull moisture from the herbs quickly.
Repurposing these materials saves money and reduces waste. Always clean your DIY components before use to ensure no dust or chemical residues touch your herbs. Select materials like untreated wood, stainless steel, or natural fibers. Avoid plastic coatings that might off-gas when exposed to warm air. These scrap-based systems provide the same utility as retail racks without the unnecessary overhead costs.
How To Position And Use Your Drying Rack For Optimal Air Circulation
Airflow is the most critical factor in homegrown herb storage. You must place your rack in a spot with consistent cross-ventilation. Avoid damp basements or small, unvented pantries. High humidity traps moisture in the plant cells and encourages fungal growth. A room with a steady breeze or a low-speed fan works best. Moving air carries water vapor away from the leaves and stems.

Keep your drying rack out of direct sunlight to preserve essential oils and color. Ultraviolet rays break down the chemical compounds that give herbs their flavor and medicinal properties. Choose a dark, dry area with temperatures between sixty and seventy degrees Fahrenheit. Do not crowd the rack. Leaving space between bundles or leaves ensures that every part of the plant dries at the same rate for long-term safety.
Dry Herb Storage Ideas Containers Labels And Organization
Choosing The Right Containers: Glass, Tin, And Ceramic Options Compared
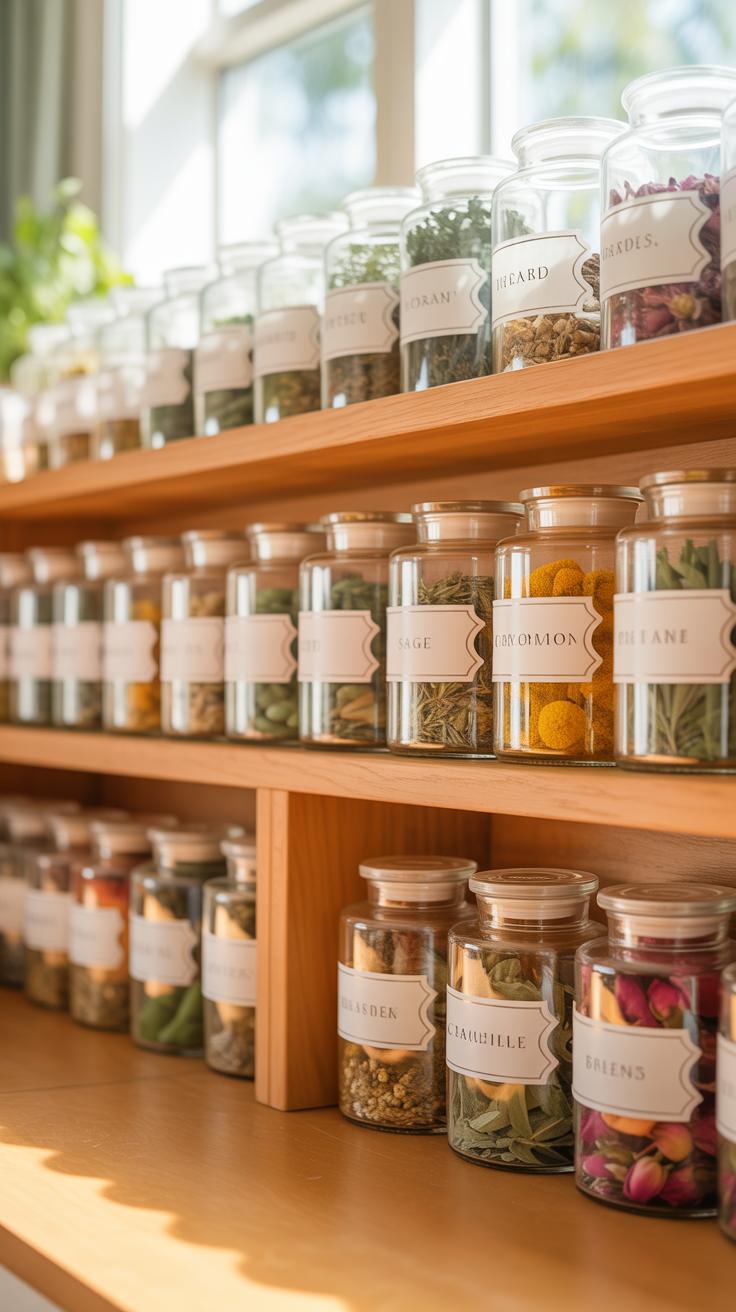
Container choice dictates the speed of herb degradation. Airtight glass jars offer the best seal and allow for visual inspection of the contents. Use amber or cobalt glass to block ultraviolet light which destroys essential oils. Clear glass requires storage in a dark pantry to prevent bleaching. Glass is non-porous and will not leach chemicals or odors into your dried harvest over long periods.
Metal tins and ceramic crocks provide total light protection but have specific drawbacks. Food-grade stainless steel resists corrosion and maintains a cool internal temperature. Avoid cheap aluminum which can react with acidic plant compounds. Ensure ceramic vessels have a rubber gasket for an airtight seal. Porous stoneware without a glaze can absorb moisture and ruin your herbs. Select heavy materials to stabilize internal storage temperatures.
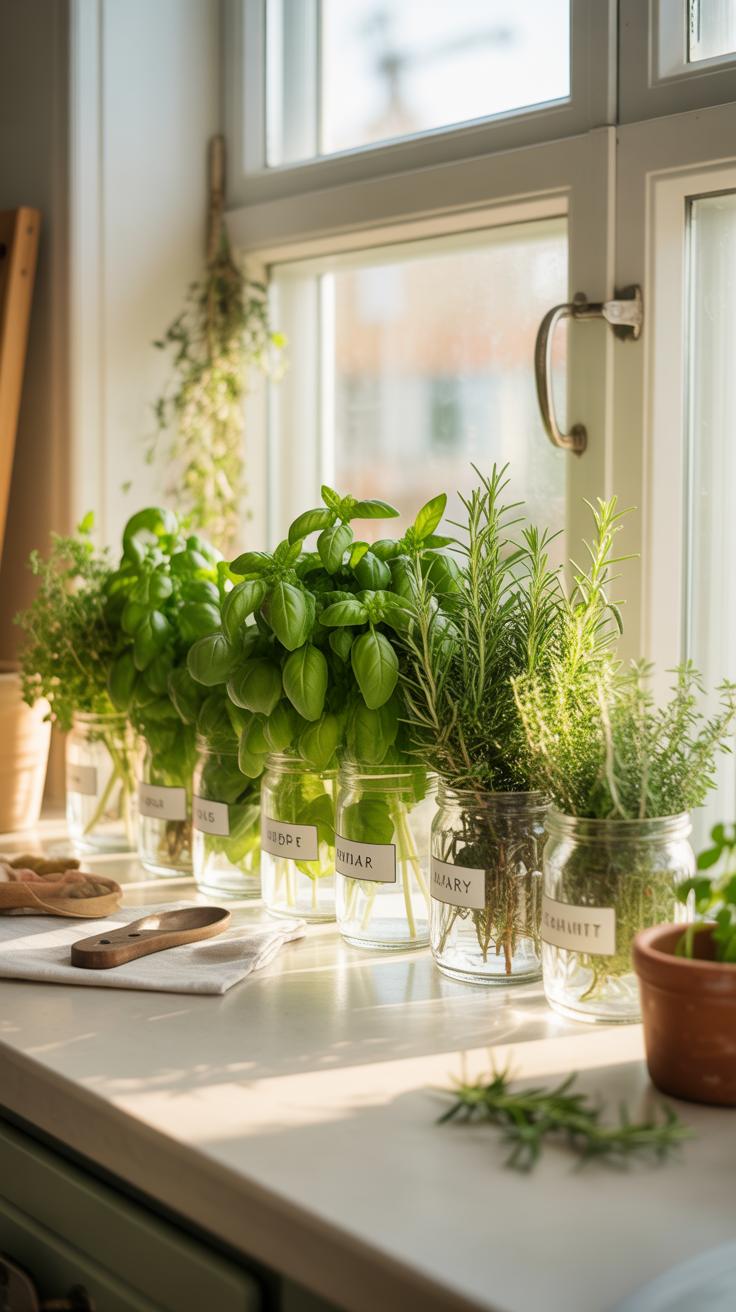
Labeling And Dating Your Dried Herbs To Maximize Shelf Life
Accurate labeling prevents waste and ensures culinary safety. Every jar must display the common name of the herb and the date of harvest. Herbs lose potency within twelve months of drying. Tracking the age allows you to rotate stock and use oldest items first. Handwritten labels on masking tape work for fast turnover. Use permanent markers to prevent ink fading from moisture or heat exposure.

Strategic organization improves workflow and inventory management. Group your herbs by flavor profile or frequency of use to save time. Store jars away from the stove or dishwasher to avoid heat and humidity spikes. High temperatures pull volatile oils out of the leaves and kill the flavor. Check the seals every few months to ensure no moisture has entered the container. Discard any herbs that show signs of mold or faded color.
Stunning Herb Display Ideas That Are Both Practical And Beautiful
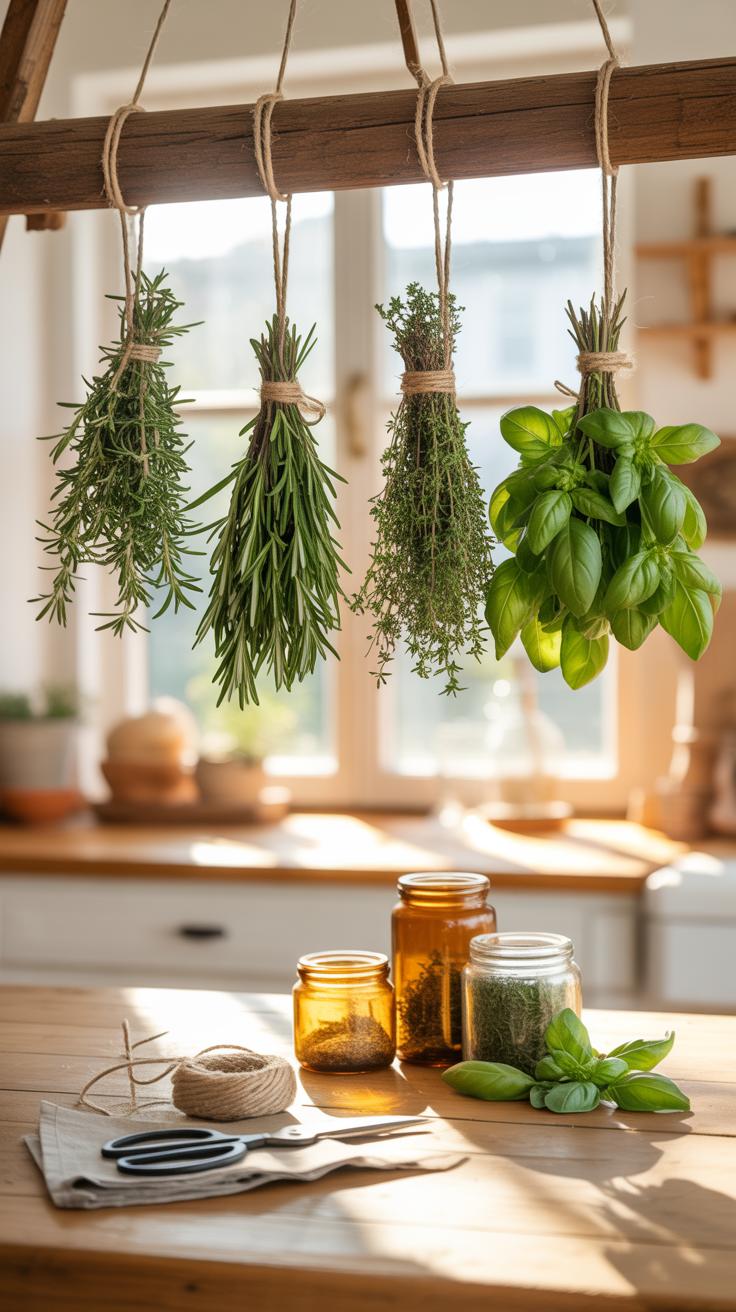
Hanging Bundles And Open Shelving: Merging Aesthetics With Function
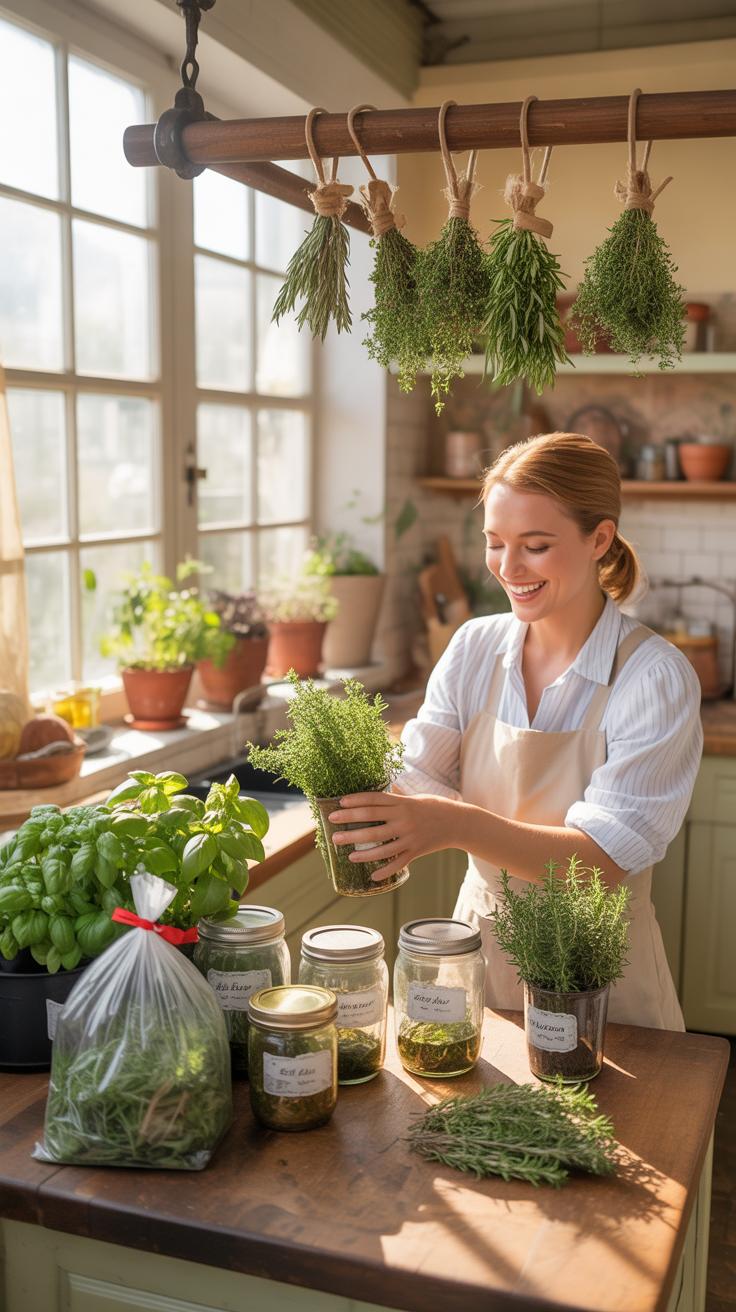
Hanging herb bundles utilize vertical space and improve air circulation. This method is the oldest form of preservation. Secure stems with twine and hang them upside down in a cool area. This position keeps essential oils in the leaves rather than the stems. Avoid direct sunlight during this process. Sun exposure bleaches the chlorophyll and destroys the flavor profile of your harvest.
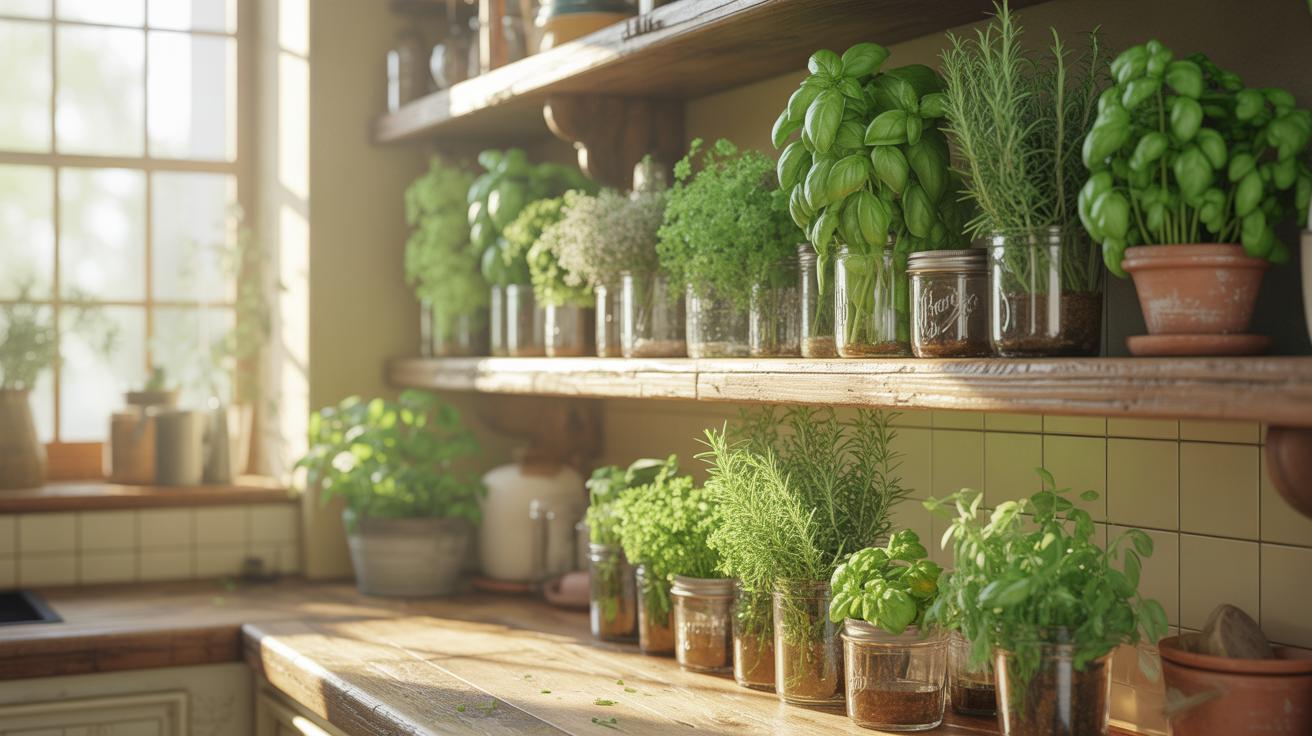
Open shelving offers immediate access to dried herbs stored in glass jars. Use amber or cobalt glass to block ultraviolet light. Clear glass looks good but degrades herb quality quickly. Position shelves away from the stove or dishwasher. Heat and steam are the primary enemies of long term storage. Proper placement ensures your homegrown inventory remains potent for six to twelve months.
How To Style Your Herb Display To Complement Your Kitchen Decor

Match your storage containers to existing kitchen hardware for a cohesive look. Use stainless steel lids for modern industrial spaces. Choose ceramic crocks for traditional or farmhouse styles. Uniform labeling creates visual order and speeds up identification. Select a font that matches your home architecture. High contrast labels improve legibility in low light. This tactical approach turns a functional pantry into a design feature.
Incorporate natural materials like wood and stone to ground the display. Use reclaimed wood crates for a rustic feel. Slate labels allow you to change herb names with chalk as your inventory rotates. Consistency in jar size prevents visual clutter on your counters. Group herbs by usage frequency rather than alphabetization. Put daily staples at eye level. This layout optimizes your workflow during high pressure cooking sessions.
Building A Vertical Herb Garden For Fresh And Stored Herb Access
What Is A Vertical Herb Garden And Why It Works For Small Spaces
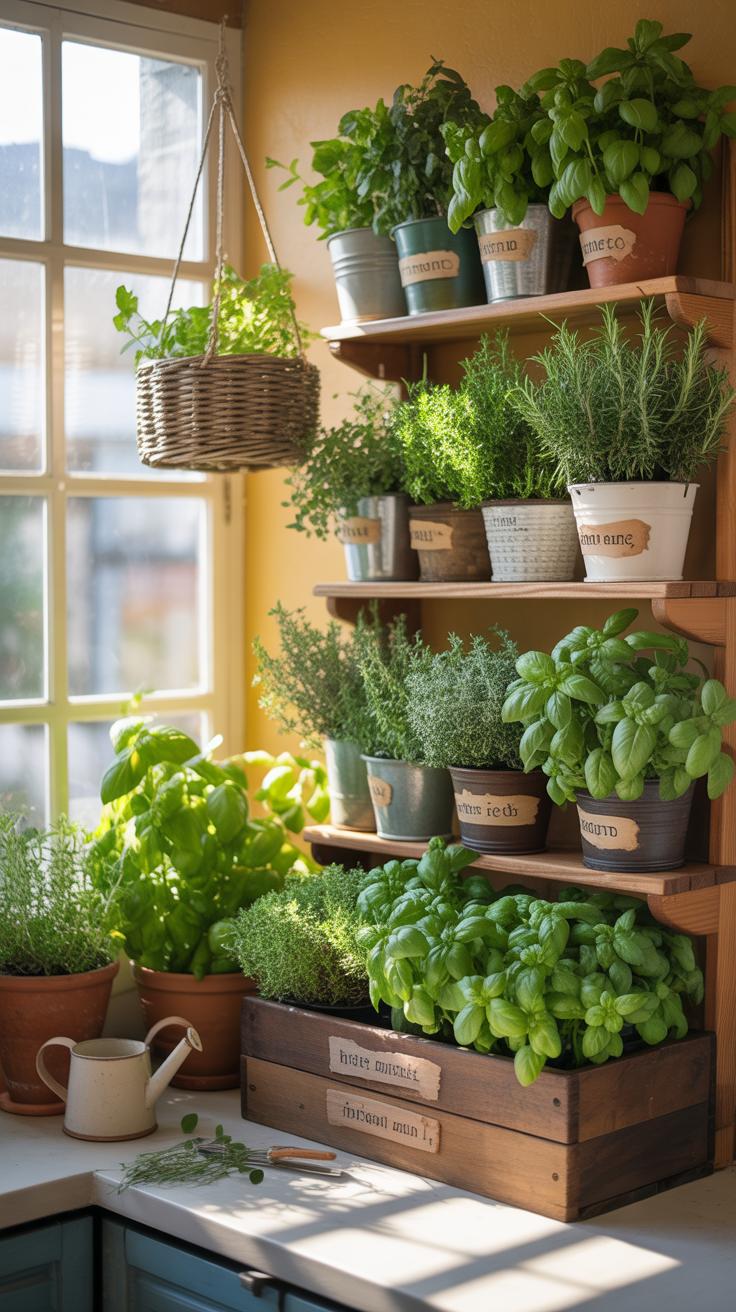
A vertical herb garden utilizes upright structures to grow plants in layers. This system maximizes yield per square foot. It moves cultivation from horizontal floor space to underused wall areas. Modern vertical gardening finds its roots in the hydroponic research of the mid-twentieth century. Urban growers use these systems to maintain a constant supply of fresh raw materials for drying and storage.

This method improves air circulation around individual plants. Better airflow prevents fungal growth and pests common in crowded garden beds. Vertical setups allow you to control soil drainage and light exposure with precision. You save time by organizing herbs by their water needs. This efficiency ensures high-quality harvests. High-quality harvests lead to better-tasting dried herbs. You get more production from less square footage every time.
Step By Step: Setting Up A Wall Mounted Vertical Herb Garden Indoors
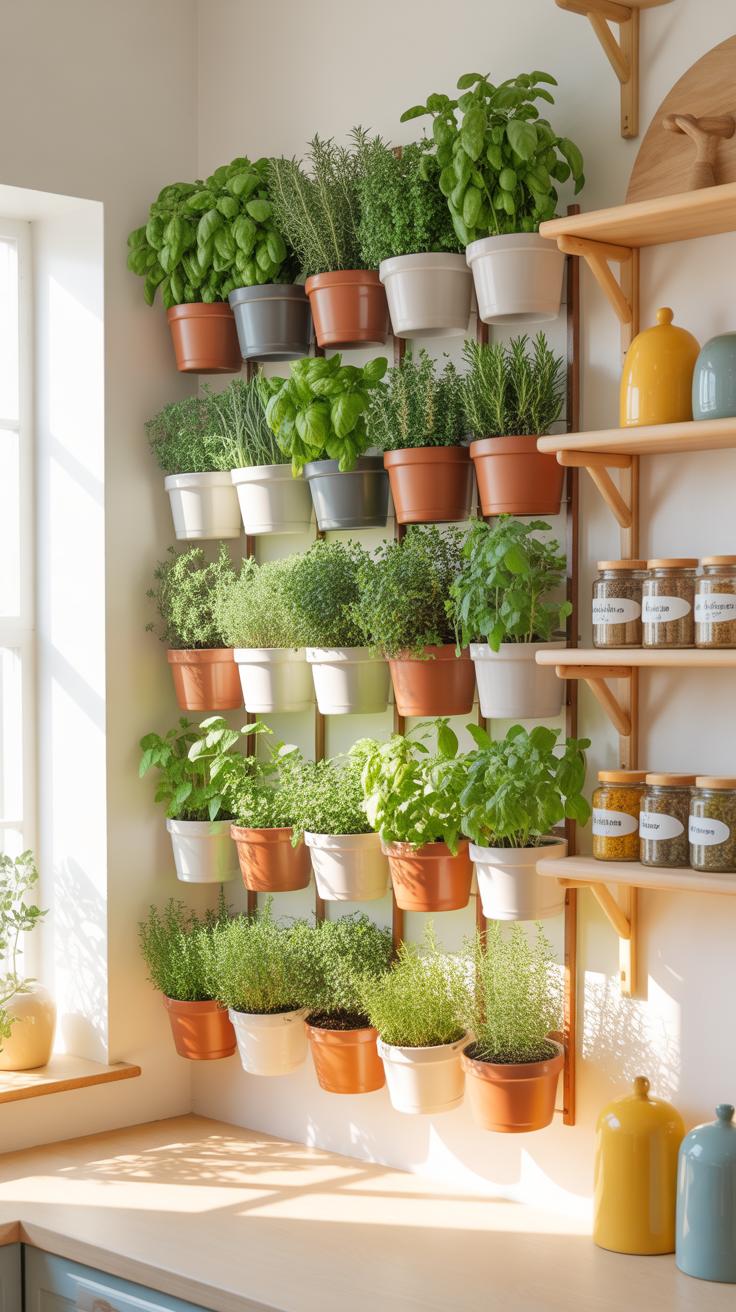
Begin by selecting a wall that receives at least six hours of direct sunlight. You must install a moisture barrier to protect your interior drywall from rot. Secure a heavy-duty frame or railing system directly into the wall studs for maximum stability. Choose containers with drainage holes to prevent root rot. Ensure your mounting hardware can support the weight of wet soil and mature plants safely.
- Mount the Support Frame: Use a level to mark your drill points on the wall. Secure timber or metal rails into studs using wood screws. This frame serves as the foundation for your hanging pots.
- Install Moisture Protection: Attach a plastic or rubber backing to the wall behind the frame. This layer prevents humidity and water runoff from damaging your paint or structural wood. It is a critical step.
- Select Proper Containers: Use pots made from food-grade plastic or ceramic for longevity. Each container must have a clear drainage path. Ensure the pots clip securely onto the frame to avoid any accidental falls.
- Prepare the Soil Mix: Use a high-quality potting soil designed for indoor use. Avoid heavy garden soil which compacts and prevents drainage. Add perlite or vermiculite to the mix to improve aeration for the herb roots.
- Organize by Water Needs: Place moisture-loving herbs like mint at the bottom where water settles. Put drought-tolerant herbs like rosemary at the top. This strategic placement simplifies your watering routine and keeps all your plants healthy.
Add your herb starts once the structure is secure and the soil is ready. Water each container individually until you see moisture exiting the drainage holes. Monitor the plants daily for signs of stress or dry soil. Prune your herbs frequently to encourage bushier growth and prevent them from becoming leggy. Frequent pruning provides a steady stream of leaves for your homegrown herb storage containers.
Designing A Dedicated Herb Closet For Serious Home Growers
Guidance What To Include In A Functional Herb Closet Setup

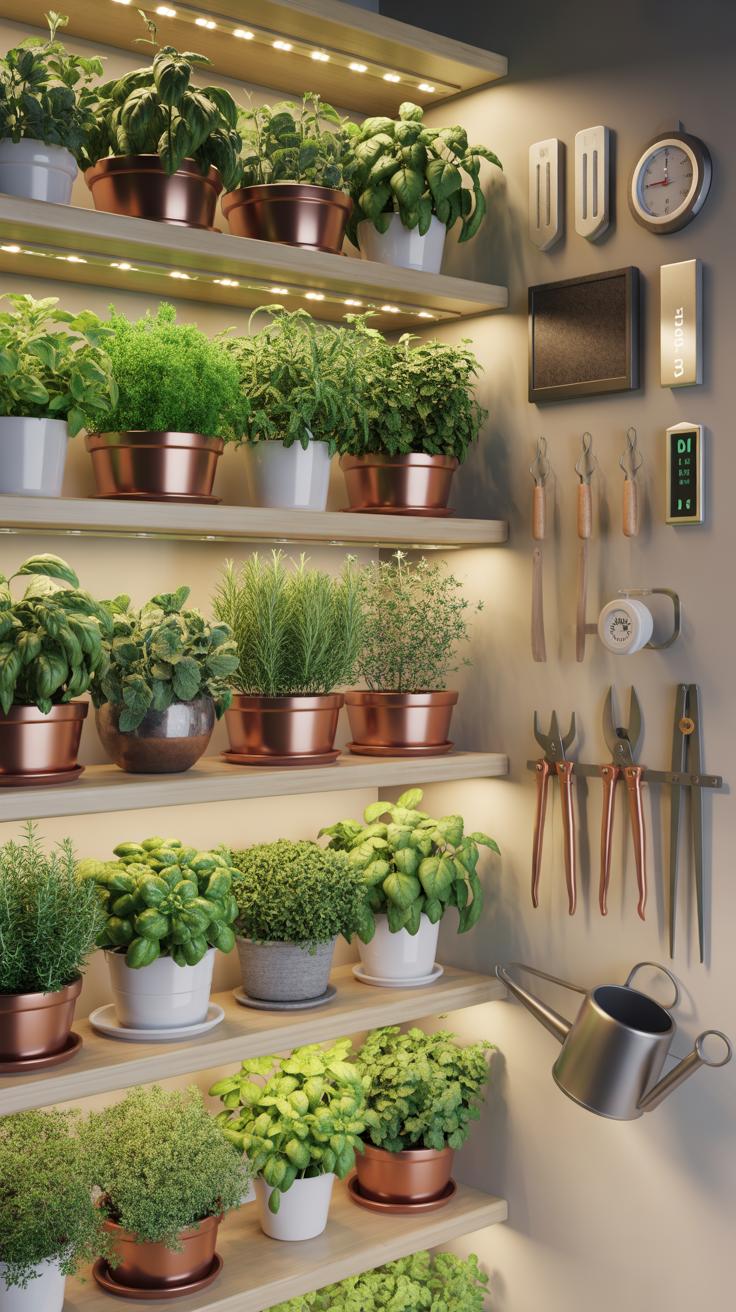
Serious growers use dedicated closets to isolate crops from kitchen grease and fluctuating house temperatures. Your setup requires adjustable wire shelving to promote airflow around storage containers. Install a solid core door to block light leaks. Use non-porous wall surfaces like semi-gloss paint or FRP panels. These materials prevent mold growth and handle frequent cleaning. Tactical organization ensures you do not ruin high-value harvests.
Professional setups incorporate digital inventory systems and precise weighing stations. You need a dedicated workspace inside or adjacent to the closet for processing. Use amber glass jars or opaque stainless steel canisters to prevent photo-degradation. Label every container with the harvest date and herb variety. Clear zones for different stages of preservation prevent cross-contamination. This structured approach mirrors historical apothecary standards for long-term botanical potency.
Guidance Controlling Light Temperature And Humidity Inside Your Herb Closet
Environmental control determines the shelf life of your Homegrown Herb Storage. Keep the closet temperature between sixty and seventy degrees Fahrenheit. High heat evaporates essential oils and destroys flavor profiles. Install a weather strip on the door to seal the internal climate. Use a standalone dehumidifier to maintain relative humidity at forty to forty-five percent. This prevents moisture from re-entering dried plant tissues.
Darkness is a requirement for herb preservation. Ultraviolet rays break down chemical compounds and bleach organic material. Use motion-activated LED lighting to ensure the space stays dark when not in use. Avoid windows or gaps that allow sunlight to enter. Install a remote hygrometer to monitor conditions from your phone. Constant data allows you to fix spikes before they ruin your entire inventory. Consistent conditions ensure professional results.
Greenhouse Shelving Ideas To Extend Your Herb Growing And Storage Season

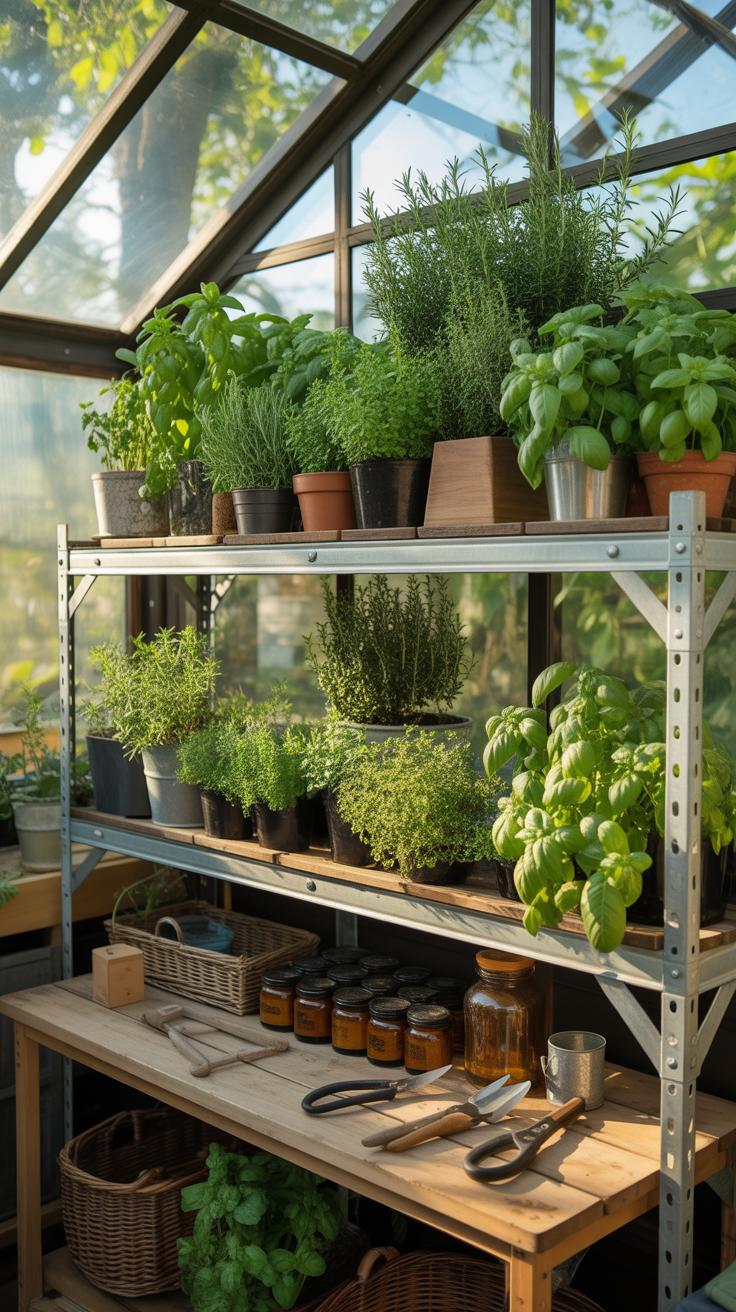
How To Use Tiered Greenhouse Shelving For Herb Drying And Organization
Tiered shelving maximizes the vertical cubic feet in your greenhouse. Position taller shelves against the back wall to capture rising heat. This heat accelerates the drying process for harvested bunches. Place fresh pots on lower tiers to keep them cool. Place cut herbs on higher tiers where air stays warm and dry. This setup creates a functional cycle of growth and preservation in one small footprint.
Organization requires a strict workflow to prevent rot and mold. Assign specific levels for different stages of the herb lifecycle. Use the top wire racks for flat drying mint and oregano. These herbs need high airflow and consistent warmth. Keep heavy ceramic pots on the bottom to stabilize the unit. Clear labeling on each tier prevents cross contamination. Dedicated zones ensure you process every harvest before the next growth cycle begins.
Best Shelving Materials For A Greenhouse Herb Storage Environment
Steel wire shelving provides the best performance for herb storage. Zinc plating or powder coating prevents rust in high humidity. Wire grids allow air to circulate around all sides of the plant. This airflow is critical to prevent fungal growth on stored bundles. Metal also absorbs and radiates solar heat during the day. This keeps the immediate environment stable when external temperatures drop at night.
Cedar and redwood are the only viable wood options for greenhouse use. These woods contain natural oils that resist rot and pests without chemical treatments. Avoid pressure treated lumber because it can off gas toxins into your herbs. Wood shelves offer more surface area than wire but require more cleaning. Use slat designs to ensure water drains away from your storage containers. Choose materials that survive constant moisture and intense sun exposure.
Herb Garden Idea Growing With Storage In Mind From The Very Start
Planning Your Herb Garden Layout To Simplify Harvesting And Storage
Design your garden layout based on harvest frequency. Plant perennial herbs like rosemary and sage in permanent borders. Place annuals such as basil and cilantro in central rows for quick access. This organization prevents unnecessary soil compaction during high volume harvests. Proper spacing ensures adequate airflow which reduces moisture on the leaves. Lower moisture at harvest time speeds up the drying process and prevents mold growth.
Group your herbs by water requirements to control tissue hydration. Herbs with high water content like parsley require more time to dehydrate correctly. Drier Mediterranean species prefer sandy soil and less water which prepares them for immediate storage. Use dedicated paths to keep harvest baskets clean and off the dirt. Modern kitchen gardens use these geometric patterns to increase efficiency. Smart planning reduces the time between cutting and curing.
There is no sensory magic quite like the sight of summer herbs dried and gathered in your own pantry, preserving the soul of the garden for the winter table.
— Alice Waters
The Best Herbs To Grow At Home For Long Term Drying And Storage
Focus on robust woody herbs for the best long term storage results. Rosemary, thyme, and oregano contain high oil concentrations that survive the drying process well. These species maintain their chemical potency and flavor profile for over a year when stored in airtight glass. Their sturdy leaves resist crumbling compared to delicate leafy greens. Choose these varieties if you want a reliable pantry stock of homegrown seasonings.
Avoid soft herbs if your primary goal is dry storage. Basil and chives often turn brown and lose flavor during air drying. Use heat based dehydration or freezing for these specific types to retain quality. Sage and bay laurel offer some of the longest shelf lives in the herb world. These plants thrive in temperate climates and require minimal processing. Stick to these proven varieties to ensure your storage efforts actually yield usable ingredients.
Common Homegrown Herb Storage Mistakes And How To Avoid Them
Why Heat, Light, And Moisture Are The Enemies Of Stored Herbs
Temperature and light destroy the chemical compounds in herbs. Volatile oils give herbs their flavor and scent. High heat causes these oils to evaporate quickly. Direct sunlight triggers ultraviolet degradation. This process breaks down chlorophyll and organic pigments. Your herbs will turn gray or brown and lose their potency. Keep storage containers away from ovens, windowsills, and stovetops to prevent this rapid decay.
Moisture creates a breeding ground for biological growth. Damp herbs will develop mold or mildew within days. Even slight humidity inside a jar can ruin an entire harvest. You must dry herbs until they are brittle before sealing them. Water also triggers enzymatic reactions that rot the plant matter. Use airtight glass containers to block ambient humidity. Dry, dark, and cool environments ensure your herbs last for one year.
How To Tell If Your Stored Herbs Have Lost Their Quality And What To Do
Color and scent are your primary quality indicators. Freshly dried herbs should retain a muted version of their original color. If the leaves look dusty or bleached, they are dead. Rub a small amount between your fingers to test the potency. A strong aroma should release immediately. If you smell nothing or detect a musty odor, discard the batch. Stale herbs add mass but zero flavor to your cooking.
You can repurpose some low-quality herbs if they are not moldy. Herbs that lost their scent for cooking might still work for simmering pots. Infuse them in boiling water to freshen room air. However, if you see white fuzz or dark spots, throw them out. Mold can produce toxins that survive high cooking heat. Start a new drying cycle with fresh plants. Follow strict temperature controls to avoid repeating these common storage failures.
Frequently Asked Questions

What is the best way to start organizing my first herb harvest?
The key to successful homegrown herb storage for beginners is ensuring your harvest is completely moisture-free before packing it away. Start by gently air-drying your herbs or using a low-temperature oven setting. Once crisp, strip the leaves from the stems and place them in airtight glass jars. Labeling each jar with the date and variety ensures your pantry stays organized and your seasonings remain potent for months.
How can I display my dried herbs beautifully while keeping them fresh?
To create stunning homegrown herb storage that doubles as decor, utilize uniform amber or clear glass jars with bamboo lids. Mount a series of minimalist floating shelves in a cool, shaded area of your kitchen to protect the oils from sunlight. Grouping your herbs by color or usage creates a sophisticated culinary gallery. This method keeps your flavorful ingredients within arm’s reach while adding a natural, organic aesthetic to your home.
Can I create an effective herb storage system using repurposed household items?
Absolutely! You don’t need a large budget to achieve a high-end look. Upcycle small jam or baby food jars by cleaning them thoroughly and painting the lids a cohesive metallic or matte shade. Use chalkboard paint or a simple label maker to identify each herb. This eco-friendly approach to storage is both sustainable and chic, proving that beautiful organization can be achieved with items you already have at home.


