What Is Ranunculus And Why It Belongs In Your Home Garden
Understanding The Ranunculus Plant: Origins, Varieties, And Characteristics
Ranunculus asiaticus naturally inhabits the Eastern Mediterranean region. This tuberous perennial belongs to the Ranunculaceae family. It features claw-like structures called corms that store necessary nutrients and water. The plant grows best in cool weather and well-drained soil environments. Growers primarily recognize the Persian Buttercup variety for its dense layers of thin petals. These plants produce multiple blooms on sturdy stems.
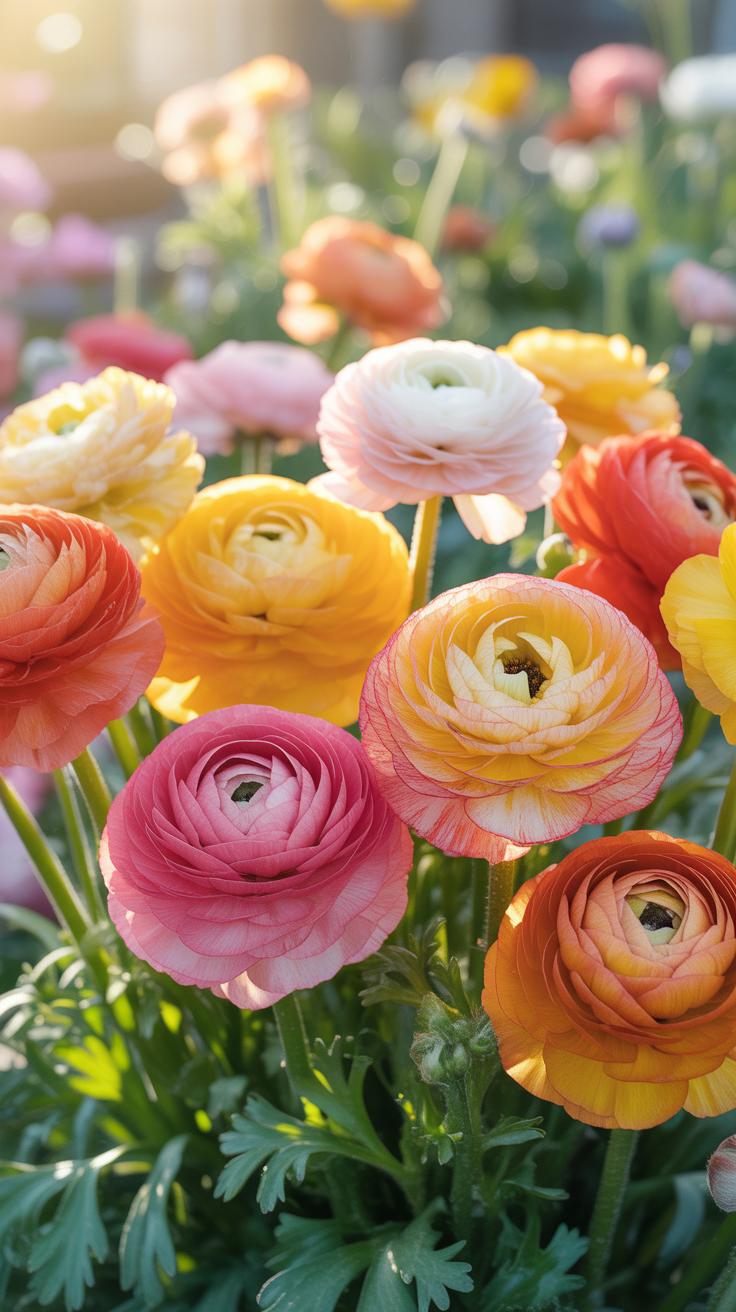
Modern breeding efforts have produced specialized series like Tecolote and Elegance. These varieties offer specific improvements in stem length and bloom size. The flowers display a wide spectrum of colors including white, yellow, orange, and deep red. Foliage remains low to the ground in a rosette pattern. The plant remains dormant during hot summer months. Proper identification of these physical traits ensures successful selection for your garden site.
Why Ranunculus Flowers Are A Favorite Among Home Gardeners And Florists
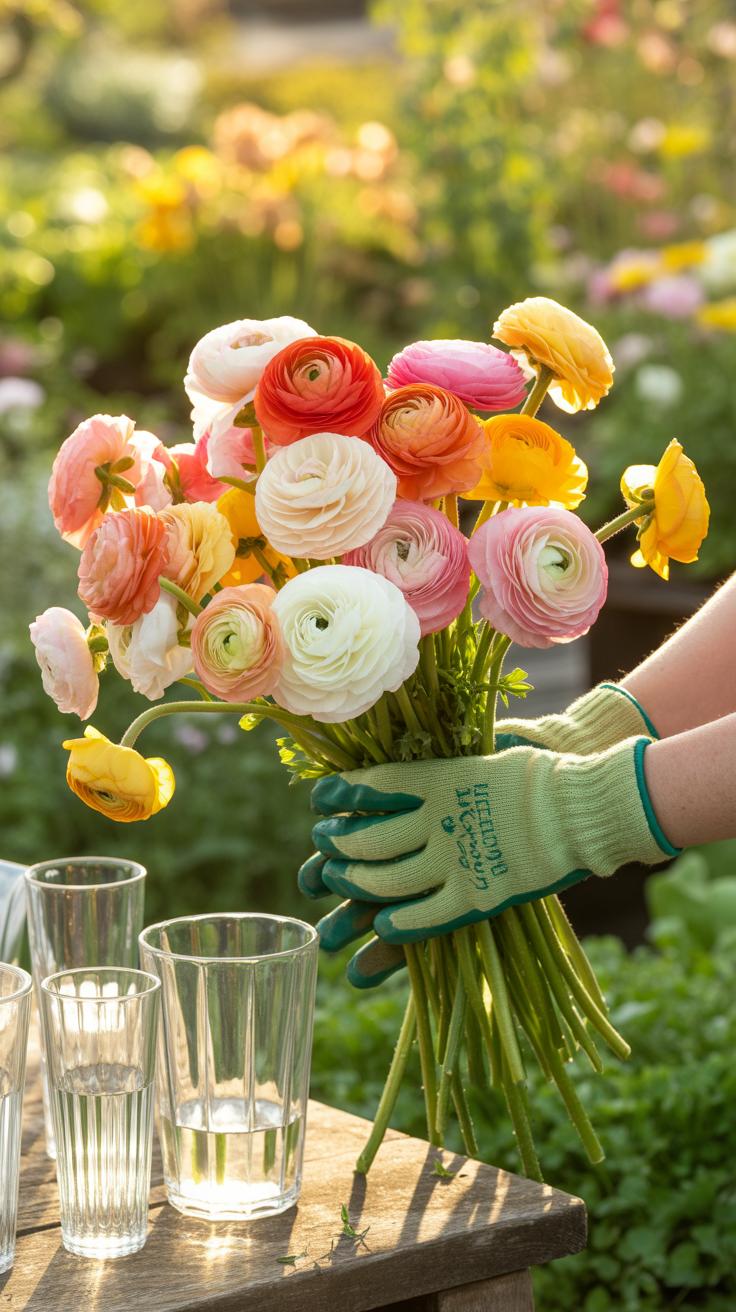
Florists value ranunculus for its exceptional vase life and structural integrity. The blooms often last up to twelve days after cutting. This longevity makes them a core component in high-end floral arrangements. The paper-thin petals create a dense visual texture that mimics peonies but at a lower cost. Professional designers use them to provide focal points in bridal bouquets and spring installations.
Home gardeners choose this species to maximize limited garden space. The compact growth habit allows for high-density planting in raised beds or containers. These plants bloom in early spring when most other perennials remain dormant. This timing provides critical color during the transitional season. The high yield per square foot makes it a strategic choice for small-scale growers. Successful cultivation results in a professional-grade harvest from a residential plot.

Choosing Ranunculus For Garden How To Pick The Right Variety
Popular Ranunculus Species And Cultivars Best Suited For Home Gardens
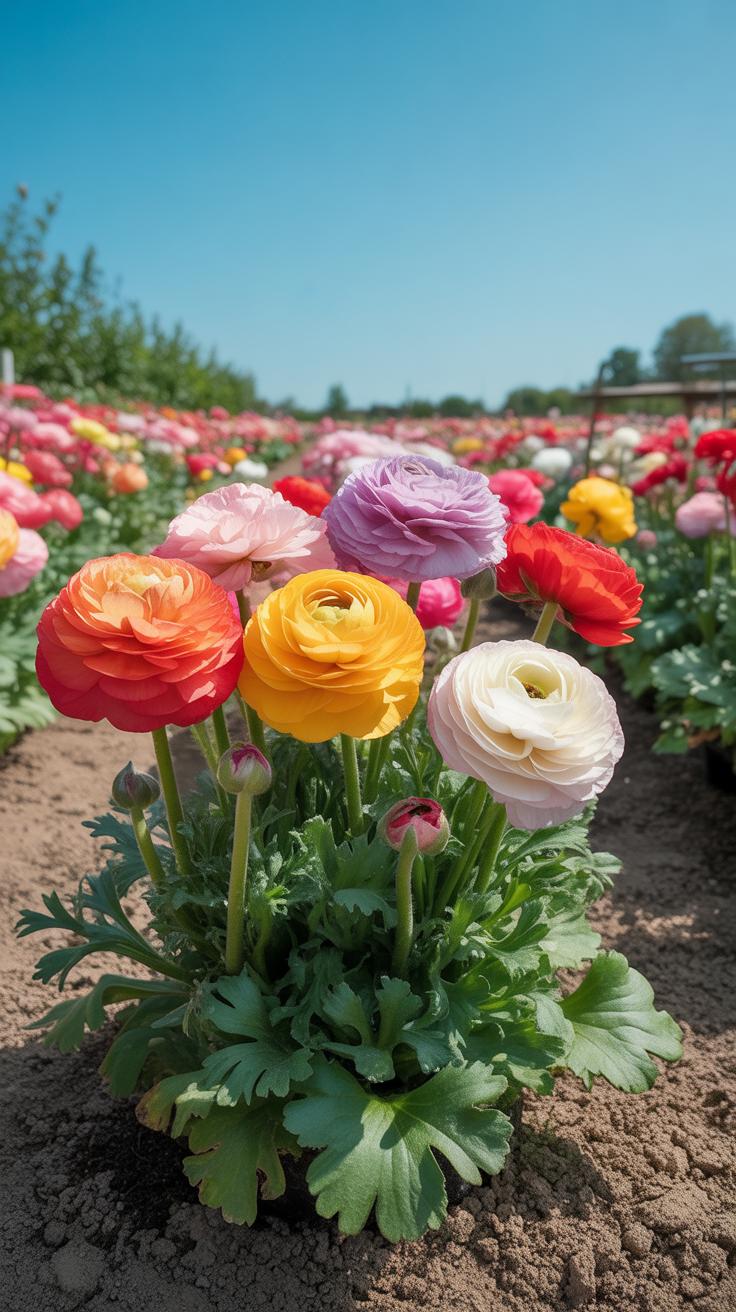
Ranunculus asiaticus is the standard species for home cultivation. Most gardeners choose the Tecolote strain developed in California. These plants produce large flowers with high petal counts. They offer strong stems capable of supporting heavy blooms. Another top choice is the Italian Elegance series. These flowers have a delicate appearance but resist common diseases well. Success depends on selecting these improved genetic lines.
Modern home gardens benefit most from clones and hybrid mixes. The La Belle series provides high flower yields per corm. These plants grow uniformly and reach consistent heights. If you want unique textures, look for the Butterfly series. These varieties have single petals and a wax-like coating. They last longer in vases than traditional layers. Pick varieties based on your specific climate and desired bloom count.
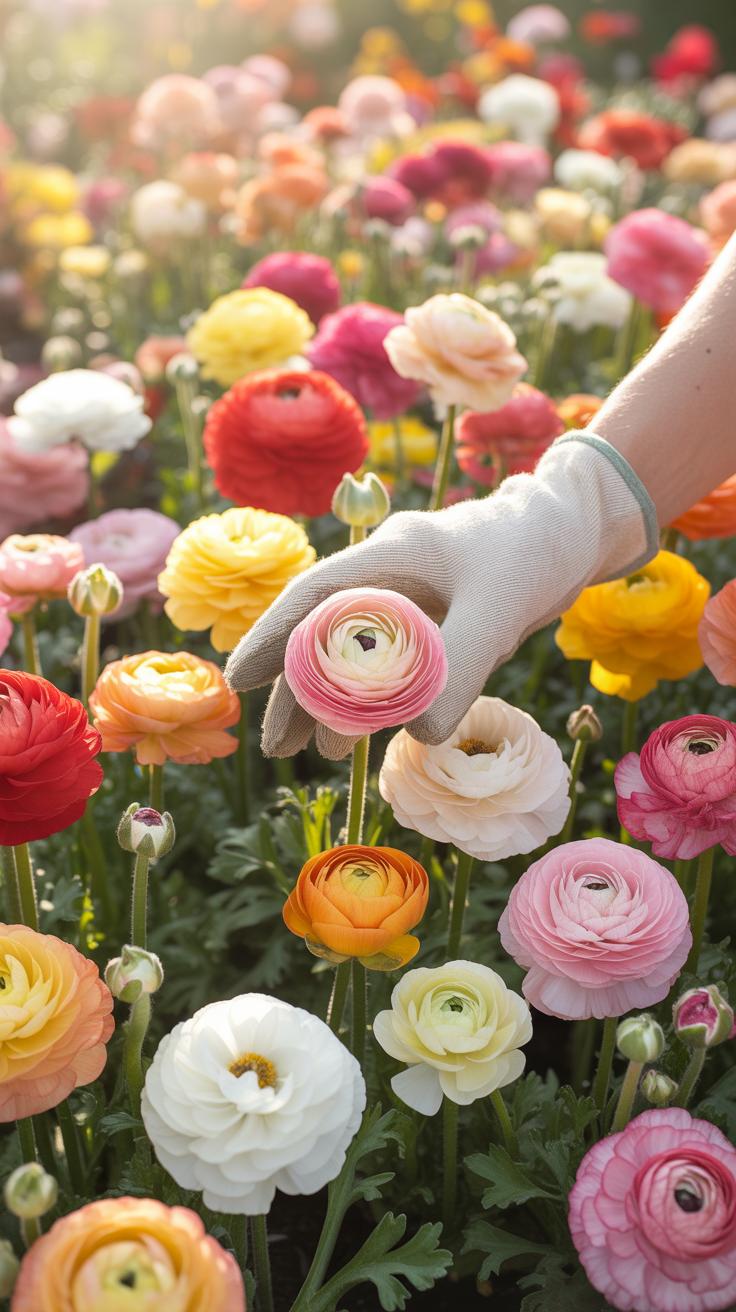
How To Evaluate Corm Quality And Color Selection Before Buying
Corm size dictates the total number of flowers. Size is measured in centimeters around the circumference. Large corms, sized seven centimeters or more, produce the most stems. Smaller corms often produce only one or two flowers. Inspect the corms for physical damage or soft spots. Healthy corms feel firm and dry. Avoid any that show signs of mold or crumbling. This ensures a strong start.
Color selection impacts the visual architecture of your garden. Monochromatic batches provide a clean and modern look. Mixed bags offer variety but lack design control. Identify the bloom season of each color. Some darker shades absorb more heat and may wilt faster in direct sun. Choose lighter colors for warmer spots to keep the petals crisp. Match the color palette to your existing home exterior or interior design goals.

How To Grow Most Showy Hybrids Ranunculus For Maximum Visual Impact

Top Hybrid Ranunculus Varieties Known For Spectacular Blooms And Bold Colors
Professional growers prioritize the Tecolote series for high impact. This strain comes from decades of selective breeding in Carlsbad, California. It produces large, rose-like flowers on thick stems. These plants offer a wide color range from deep purple to neon orange. Use these hybrids if you want the largest diameter blooms. They provide a structural density that standard varieties cannot match in a floral display.
The Amandine and Success series represent the peak of modern Italian breeding. These hybrids offer superior heat resistance and high flower counts per corm. The Amandine variety features pastel tones often used in high-end bridal design. Its ruffled petals create a soft texture that contrasts with the architectural form of the Success line. Choose these varieties to extend your bloom season into the early weeks of warmer spring weather.
Special Growing Considerations For Hybrid Ranunculus In Home And Garden Settings
Hybrid ranunculus demand precise moisture control during their initial growth phase. Overwatering leads to tuber rot before the plant establishes its root system. Use a well-draining potting mix with perlite or coarse sand. If you grow them in containers, ensure multiple drainage holes exist. These plants require a cool environment to initiate flower buds. Maintain soil temperatures between forty-five and fifty-five degrees Fahrenheit for the best results.

Light intensity determines the strength of the flower stems. Hybrid varieties produce heavy heads that will flop without enough sun. Provide at least six hours of direct light daily. Use a balanced liquid fertilizer every two weeks once foliage appears. Avoid high nitrogen levels late in the cycle to prevent excessive leaf growth over bloom production. Stake taller hybrid varieties early to protect the brittle stems from wind damage or heavy rain.
How To Grow Ranunculus Flowers Soil Sunlight And Climate Essentials
Ideal Soil Composition, Drainage Requirements, And PH Levels For Ranunculus
Ranunculus thrive in light and sandy loam. Heavy clay kills these plants by trapping water around the tubers. You must ensure the soil drains rapidly to prevent rot. Use organic compost to improve soil structure without making it too heavy. Proper drainage is the most critical factor for success. If your garden soil stays wet, plant them in raised beds instead.
The ideal soil pH for ranunculus stays between 6.0 and 7.0. This slightly acidic to neutral range allows the roots to absorb nutrients efficiently. Test your soil before planting to confirm levels. Use lime to raise the pH or sulfur to lower it if necessary. Professional growers prioritize soil balance to achieve larger blooms and stronger stems during the active growing season.
Sunlight Exposure And Climate Zones That Help Ranunculus Flowers Thrive
These plants require full sun for at least six to eight hours daily. High light levels produce strong stems and vibrant colors. Direct sunlight keeps the foliage dry and reduces the risk of fungal diseases. Position your planting site away from tall structures or dense trees. If the plants do not receive enough light, they will become leggy and produce fewer flowers.

Ranunculus grow best in USDA hardiness zones 8 through 10 as perennials. In these regions, you plant them in the fall for spring blooms. In colder zones, you must treat them as annuals. Plant them in the spring after the danger of hard frost passes. They prefer cool night temperatures between 45 and 50 degrees Fahrenheit. Excessive heat will force the plant into early dormancy.
Growing Ranunculus Flowers Planting Corms Step By Step
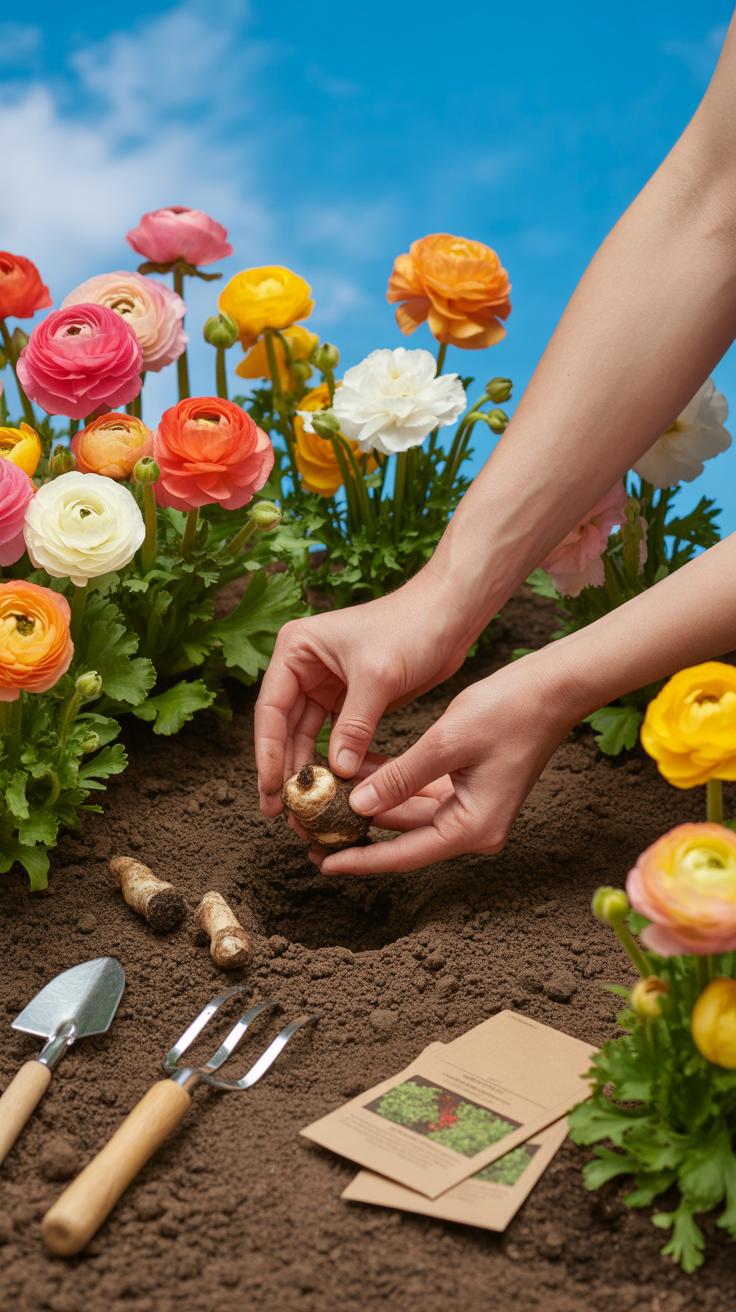
When And How To Pre Soak Ranunculus Corms Before Planting For Best Results
Pre-soaking hydrates dry corms and speeds up the growth cycle. Place the claw-like corms in a container of room temperature water for three to four hours. Do not exceed four hours or the tissue will rot from oxygen deprivation. Use a slow drip from a faucet to keep the water moving. Constant aeration prevents fungal pathogens from attacking the plant material during this vulnerable stage.
The corms will double in size and appear plump after soaking. This process triggers the metabolic shift from dormancy to active growth. You must plant the corms immediately after soaking while they are moist. Delaying the planting process leads to dehydration and reduces the overall vigor of the root system. Proper hydration ensures the plant establishes quickly in the soil and produces more flowers later.
To plant a seed is to believe in tomorrow, especially when those paper-thin petals unfurl to grace a home with elegance.
— Audrey Hepburn
Step By Step Instructions For Planting Ranunculus Corms At The Right Depth And Spacing

Site selection and physical placement determine the final yield of your ranunculus crop. You must prepare a bed with loose soil that allows for rapid drainage. Compacted earth stunts root development and traps moisture against the corm. This causes the plant to fail before it clears the soil surface. Follow these specific mechanical steps to ensure the corms survive the initial establishment phase.
- Orient the Claws: Position the corm so the pointed tentacles face downward into the soil. The flat top contains the growth eyes where the stems emerge. Incorrect orientation forces the plant to waste energy turning itself over.
- Determine Planting Depth: Bury the corms exactly two inches deep from the top of the crown. Planting too deep prevents the sun from warming the soil quickly enough. Shallow planting exposes the bulb to temperature swings and drying winds.
- Set Proper Spacing: Leave four to six inches of space between each individual corm. High-density planting creates poor airflow and increases the risk of foliar diseases like powdery mildew. Proper spacing allows the root systems to expand without competing for nutrients.
- Apply Initial Water: Saturate the soil immediately after covering the corms to eliminate large air pockets. Firm the soil lightly with your hands but avoid heavy tamping. This first watering settles the earth around the hydrated tissue to maintain moisture levels.
- Monitor Soil Temperature: Ensure the soil temperature remains between forty-five and fifty-five degrees Fahrenheit for optimal root growth. Ranunculus prefer cool environments to establish their foundation. Excessive heat during the planting phase will trigger premature dormancy and stop growth.
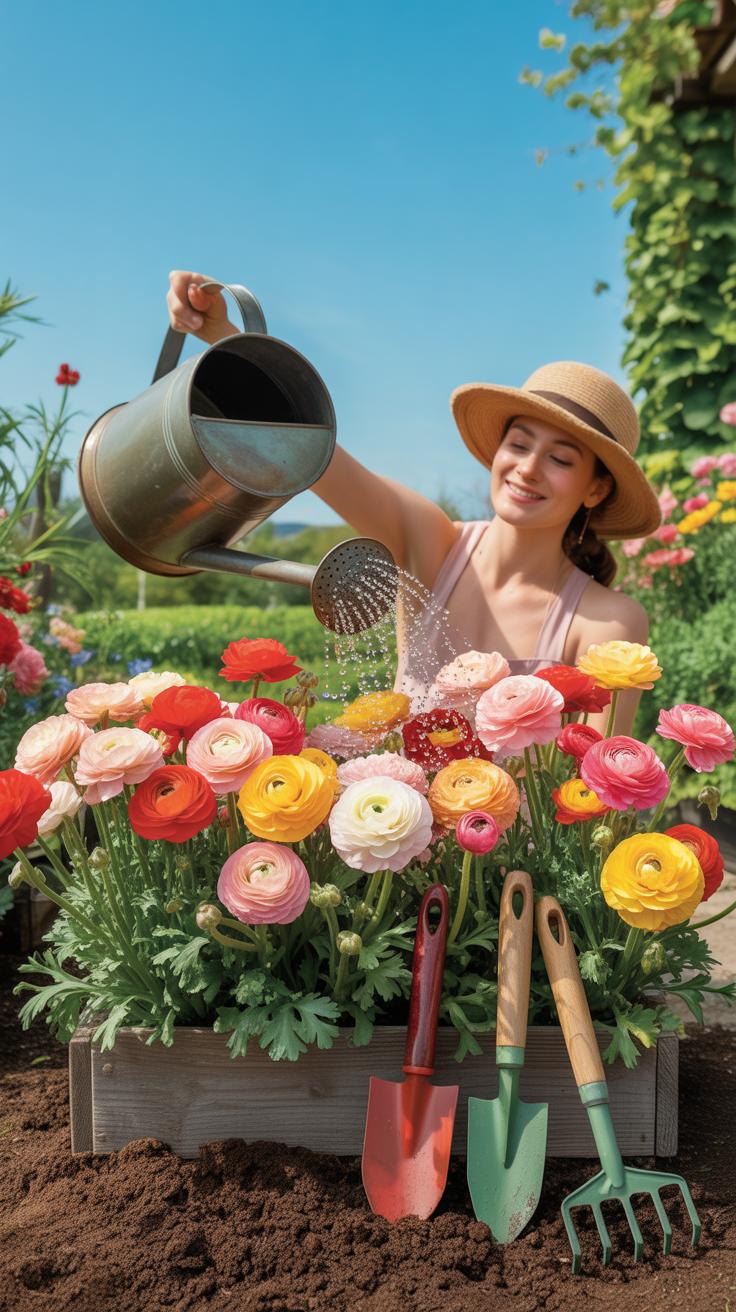
Press the soil firmly to ensure good contact between the corm and the earth. Avoid overwatering the area until you see the first green shoots emerge from the surface. Excessively wet soil during the first two weeks leads to crown rot. Once the sprouts appear, establish a consistent watering schedule based on your local climate. Monitoring the soil moisture daily ensures the young plants remain hydrated during early development.
Ranunculus Flower Care Guide Watering Feeding And Seasonal Maintenance
How To Water Ranunculus Correctly To Prevent Root Rot And Overwatering Damage
Initial watering occurs right after planting the corms. Soak the soil thoroughly to settle the roots. Stop watering immediately after this first session. Do not add more water until you see green sprouts emerge from the soil. Adding water to dormant corms causes them to turn into mush and rot quickly. Dry soil at this stage prevents fungal growth and ensures survival.

Once leaves appear, maintain consistent soil moisture. Water at the base of the plant to keep foliage dry. Wet leaves invite powdery mildew and other pests. Feel the top inch of soil before adding water. If the soil feels dry, apply enough water to dampen the root zone. Avoid creating puddles or saturated mud. Good drainage is the only way to prevent fatal root rot.
Fertilizing Schedules And Nutrient Needs To Sustain Healthy Ranunculus Blooms
Ranunculus plants require heavy feeding to produce large flowers. Apply a balanced liquid fertilizer every two weeks once the first leaves unfold. Look for a formula with equal parts nitrogen, phosphorus, and potassium. High nitrogen levels support leaf growth. High phosphorus levels ensure the plant develops strong stems and vibrant petals. Stop feeding once the plant finishes its primary blooming cycle in the late spring.
Incorporate compost or aged manure into the soil before planting. This provides a slow release of nutrients throughout the growing season. If you use synthetic granules, choose a low concentration to avoid burning the sensitive roots. Proper nutrition prevents stunted growth and pale foliage. Monitor the plant for yellowing leaves, which often indicates a lack of minerals. Healthy feeding schedules result in a longer harvest for cut flowers.
Ranunculus Care Tips Managing Pests Disease And Common Growing Problems
Identifying And Treating The Most Common Pests That Affect Ranunculus Plants
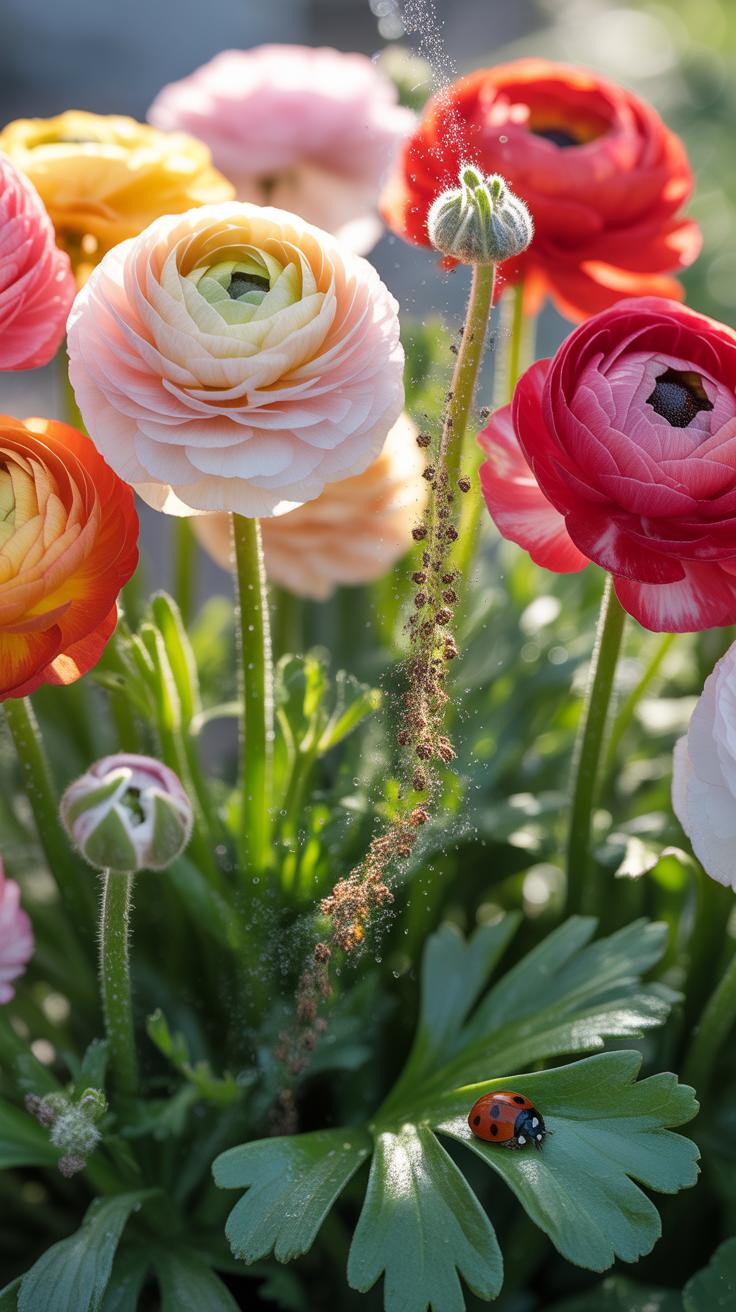
Aphids and spider mites present the primary threat to ranunculus health. These insects congregate on the undersides of leaves and suck out essential sap. This action causes yellowing and stunted growth cycles. Look for sticky residue or fine webbing as clear diagnostic signs. Act immediately to prevent a full infestation. Use a strong stream of water or insecticidal soap to clear the foliage.

Slugs and snails target tender young shoots and buds during the night. These pests can destroy a crop before it reaches the blooming stage. Check your garden beds at dusk or dawn to find them manually. Apply iron phosphate pellets or create physical barriers with copper tape. Maintain a clean area by removing debris where pests hide. Constant monitoring ensures your plants survive the critical early growth phases.
Proven Solutions For Fungal Diseases And Environmental Stress In Ranunculus
Fungal issues thrive in damp and stagnant conditions. Powdery mildew and root rot represent the biggest risks to your ranunculus investment. You must control moisture levels and ensure adequate spacing between plants. High humidity or poor drainage will kill the corms quickly. Use preventative strategies to keep the root zone healthy. Implement specific cultural controls to mitigate these common environmental and biological stresses.
- Improve Air Circulation: Space your plants at least four to six inches apart. Good airflow prevents moisture from sitting on the leaves. This simple step reduces the risk of powdery mildew and foliage blight significantly.
- Manage Soil Drainage: Plant corms in well-draining soil or raised beds. Standing water leads to anaerobic conditions and root rot. Ensure containers have large drainage holes to allow excess water to escape the root zone.
- Apply Neem Oil: Use organic neem oil sprays at the first sign of fungal spots. This natural treatment coats the spores and prevents them from spreading. Apply during the early morning or evening to avoid burning foliage.
- Monitor Temperature Spikes: Ranunculus plants fail when temperatures rise above seventy degrees Fahrenheit. Provide light shade if the weather turns hot unexpectedly. Mulch the soil surface to keep the root systems cool and moist during sudden heat.
- Sterilize Garden Tools: Clean your pruning shears with isopropyl alcohol after every use. Pathogens often spread through contaminated equipment. Keeping tools sterile prevents the transmission of viruses and fungal spores from one plant to another.
Environmental stress often originates from improper watering schedules. Overwatering causes the corms to turn to mush. Underwatering leads to limp stems and aborted flower buds. Check the soil moisture daily by sticking your finger one inch deep. Only water when the surface feels dry to the touch. Consistent care routines prevent the physiological shocks that stop flower production and ruin plant aesthetics.
Growing Ranunculus Indoors Tips For Pots Containers And Indoor Displays
Choosing The Right Container Size And Potting Mix For Indoor Ranunculus Growth
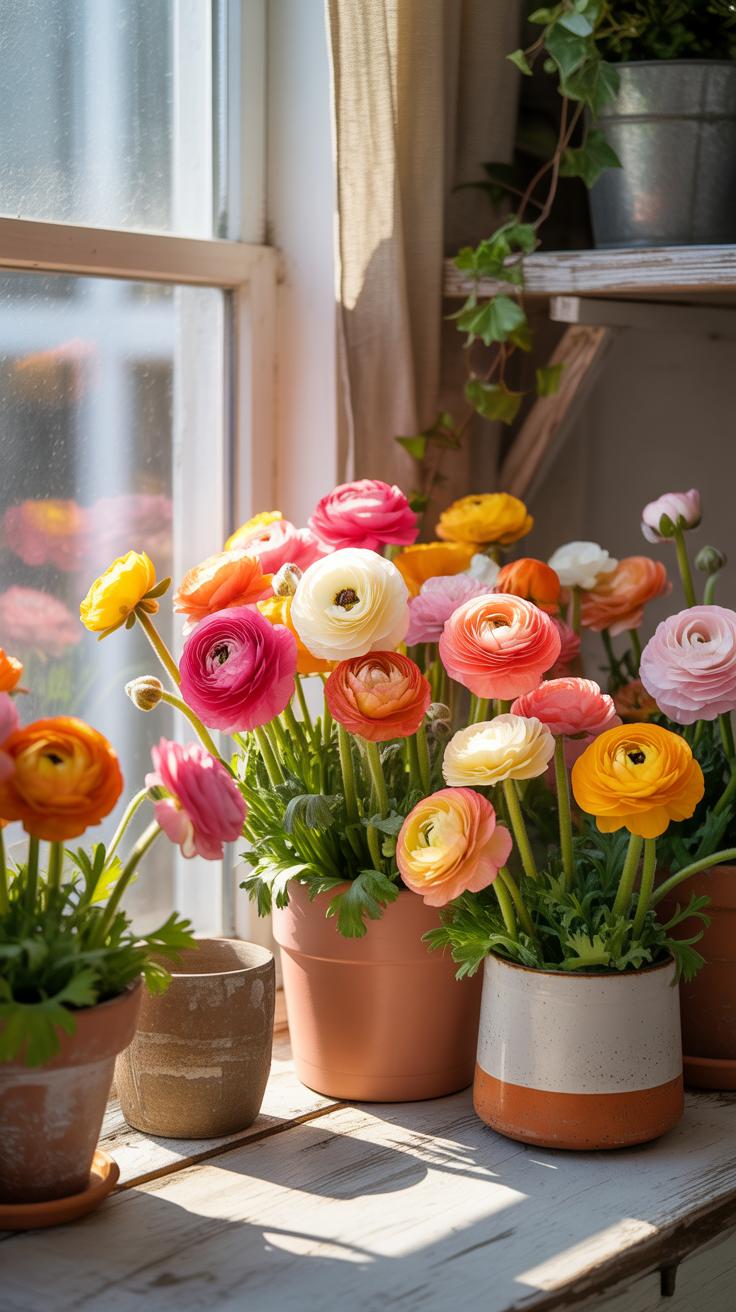
Select a container with a minimum depth of eight inches. Proper drainage is mandatory for these tubers. Use pots made of porous materials like terracotta to prevent moisture buildup. Cramped roots lead to stunted stems and fewer blooms. Give each claw three to four inches of space. Crowded plants compete for nutrients and succumb to fungal diseases faster than isolated plants.

Standard garden soil is too heavy for indoor containers. It compacts and suffocates the delicate root system. Use a high quality peat or coco coir based potting mix. This ensures the medium stays light and airy. Add perlite or coarse sand to increase drainage efficiency further. The mix must hold enough moisture to hydrate the plant but shed excess water immediately to avoid rot.
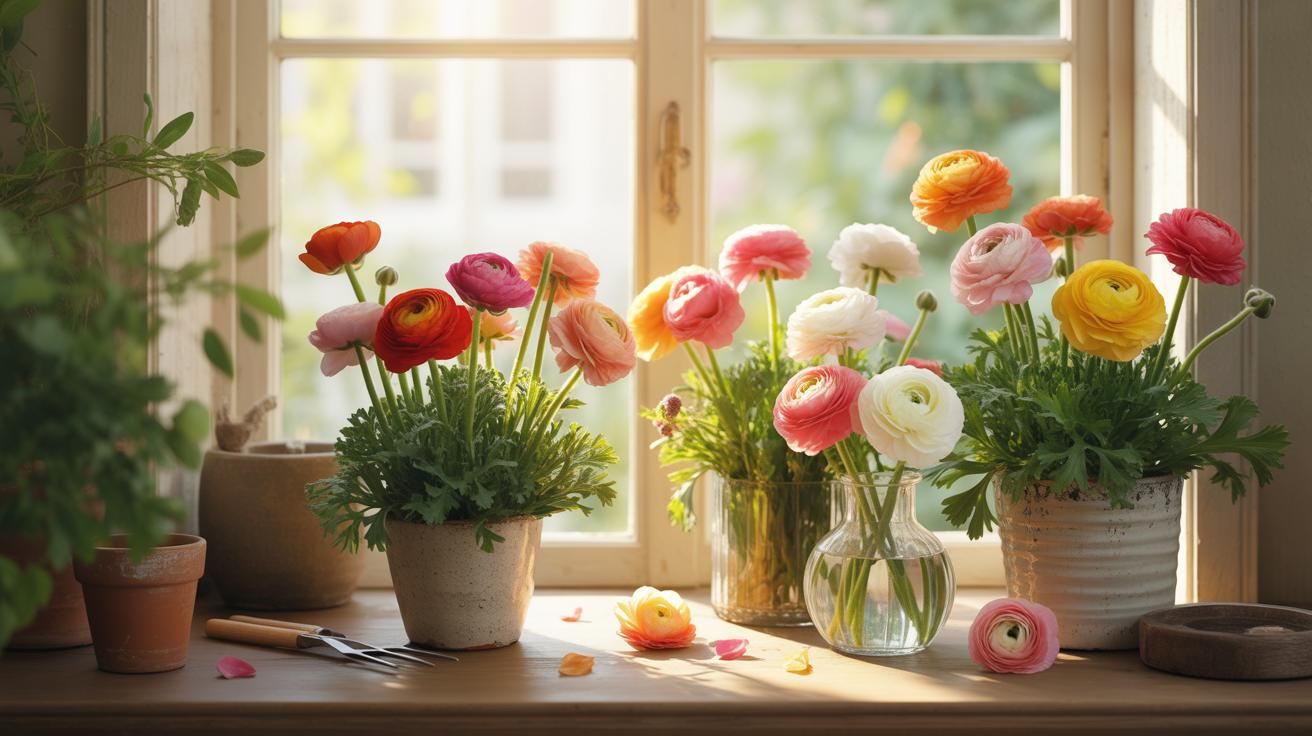
How To Position And Display Potted Ranunculus Flowers To Elevate Your Home Decor
Position your pots in the brightest spot available. Ranunculus requires at least six hours of direct sunlight daily to prevent leggy growth. South facing windows offer the best light intensity during winter months. Rotate the containers every two days. Constant rotation ensures the stems grow straight. Uneven light causes the flowers to lean and weakens the overall structure of the display.
Match your containers to historical design aesthetics for a better look. Terracotta pots fit Mediterranean styles well. Glazed ceramic fits mid century modern themes. Place pots at varying heights using pedestals. This mimics natural growth patterns found in high end floral arrangements. Keep the room temperature below sixty five degrees fahrenheit if possible. Cooler air mimics their natural spring environment and extends the bloom life.
Harvesting And Storing Ranunculus Flowers To Extend Their Beauty
When And How To Cut Ranunculus Flowers For Long Lasting Arrangements Indoors
Harvest timing determines the vase life of your ranunculus. Cut the stems when the buds feel like marshmallows. The petals should be soft but not fully open. If you wait until the flower opens completely, it will drop its petals within three days. Cutting at the marshmallow stage gives you ten days of beauty. Use sharp shears to avoid crushing the water intake vessels.
Cut the stems early in the morning when the plant is fully hydrated. Avoid the heat of the afternoon. Remove all foliage that will sit below the water line in your vase. Submerged leaves rot and breed bacteria that kill the blooms. Change the water every two days and trim the stem ends. This keeps the vascular system open for maximum water uptake.
How To Properly Dig Up, Dry, And Store Ranunculus Corms After The Blooming Season
Stop watering your ranunculus once the foliage turns completely yellow. The plant must enter dormancy naturally to store energy for next year. Cutting green leaves weakens the corm. Allow the soil to dry out before you lift the clumps. Carefully dig under the root system with a garden fork. Shake off the excess dirt but do not wash them with water.
Move the lifted corms to a cool and dry location with good airflow. Let them cure for several days until they feel hard and dry. Store the corms in a mesh bag or a box filled with dry peat moss. Keep them in a dark spot between fifty and sixty degrees Fahrenheit. Check them monthly for mold. Toss any soft or rotting corms to protect the healthy stock.
Frequently Asked Questions

What are the most important things for a beginner to know before planting ranunculus?
Starting your gardening journey with these rose-like blooms is incredibly rewarding. The most essential ranunculus growing tips for beginners involve understanding their love for cool weather and sunshine. These plants thrive in temperatures between 40°F and 60°F. Ensure you plant them in well-draining soil to prevent the delicate corms from rotting, and always choose a spot in your garden or home that receives at least six hours of full sun.
How do I properly soak and plant ranunculus corms for the best blooms?
Before planting, soak your dry corms in room temperature water for three to four hours to “wake them up.” Once they look plump, plant them with the “claws” facing downward about two inches deep. Following these ranunculus growing tips ensures a stronger root system. Space them about four to six inches apart in containers or garden beds, providing enough room for their lush, green foliage to expand and support those stunning multi-petaled flowers.
Is it possible to grow high-quality ranunculus on a tight budget?
Absolutely! You don’t need an expensive greenhouse to enjoy these elegant flowers. To save money, purchase corms in bulk from wholesalers or end-of-season sales. You can also repurpose household containers like old buckets or wooden crates as long as you drill drainage holes. Starting your plants from corms rather than buying mature potted flowers from a florist is the most cost-effective way to fill your home with dozens of professional-looking stems.


