What Is A Flower Garland And Why Is It A Timeless Decoration
The History and Cultural Significance of Flower Garlands
Flower garlands are decorative ropes made from blossoms, leaves, and greenery. This tradition spans thousands of years across various global civilizations. Ancient Egyptians used them for funerary rites and ceremonies. Ancient Greeks and Romans wore them as crowns or draped them on statues during festivals. These items served as symbols of status, victory, and religious devotion in many early societies.
In India, the marigold garland remains a staple of religious and social life. Devotees offer them to deities in temples to show respect. In Hawaii, the lei represents a specific type of garland used to welcome guests. These traditions prove that floral assembly is a fundamental human practice. The craft relies on local materials and basic binding techniques that have changed very little over time.
Why Flower Garlands Remain a Versatile Modern Decor Choice
Flower garlands remain popular because they offer a high visual impact for a low cost. They provide a natural texture that synthetic decorations cannot replicate. Modern wedding designers use them to frame altars and line tables. Homeowners use them to add life to mantels and doorways. This versatility makes them a top choice for both professional events and casual home staging projects.
Modern Garland construction utilizes simple tools like floral wire, twine, and tape. These materials allow anyone to create professional results with minimal training. Natural garlands are biodegradable and eco-friendly. This aligns with current shifts toward sustainable event planning. You can use fresh flowers for temporary elegance or dried materials for long-term use. The utility of the garland ensures its place in modern design.
Essential Materials You Need To Start Your DIY Flower Garland

A Beginner’S Supply List: Everything You Need To Craft A DIY Flower Garland At Home
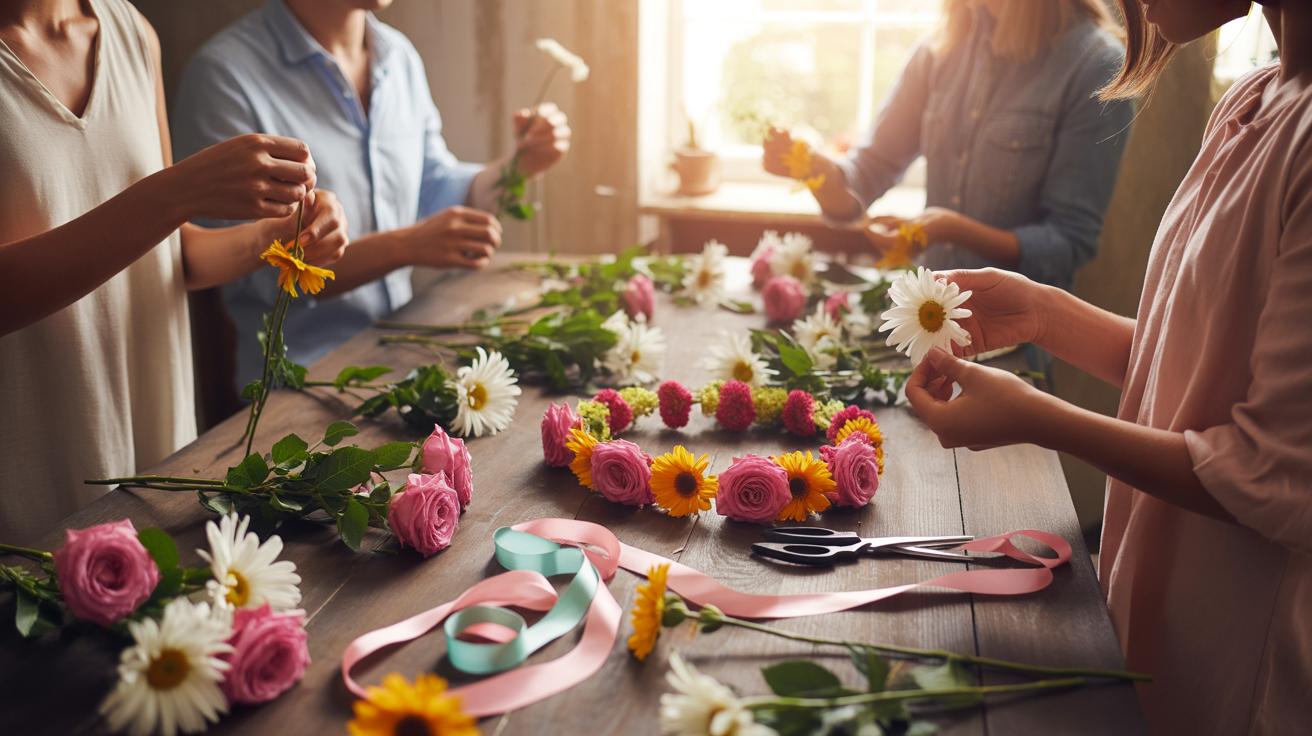
Building a durable flower garland requires specific structural components. You must select a base that supports the weight of your chosen blooms without sagging. Professional florists use wire or heavy twine to maintain the shape of the strand. Success depends on having the right cutting tools and binding agents ready before you begin the assembly process. Preparation prevents damage to delicate stems.
- Floral Wire: Use 22-gauge or 26-gauge paddle wire to secure stems to your base. This thin green wire blends with foliage and provides a tight grip. It allows you to wrap continuously without cutting the line until the project ends.
- Floral Tape: This wax-coated paper tape becomes sticky when stretched. Use it to bundle small groups of flowers together or to cover sharp wire ends. It creates a cohesive look by mimicking the color of natural stems and leaves.
- Shears or Snips: Sharp bypass pruners or floral snips are necessary for clean cuts. Dull blades crush the vascular system of the flower and shorten its lifespan. Always use dedicated floral tools rather than standard kitchen scissors to ensure a professional finish.
- Twine or Rope: A thick jute or hemp rope serves as the primary structural spine for heavy garlands. This material provides the necessary tensile strength for long hangs. It grips the floral wire better than plastic or slick synthetic cords during the wrapping phase.
- Water Tubes: Small plastic vials help keep moisture-sensitive flowers hydrated in a garland. Use these for focal blooms like roses or lilies that wilt quickly without a direct water source. They tuck easily into dense greenery to remain hidden from the viewer.
Proper organization of these materials ensures a fluid workflow. Sort your flowers by size and stem thickness before you start. Grouping your hardware allows you to reach for wire or tape without letting go of the tension on the garland. Consistent tension is the only way to avoid gaps. Expert makers keep their workspace clear to prevent tangling the long base cord.
Budget Friendly Material Swaps That Still Deliver Stunning Garland Results
You do not need expensive boutique supplies to create a high-quality garland. Use common household items to replace specialized floral hardware. Garden twine or cotton string works effectively as a base for lightweight greenery. Standard wire hangers can be disassembled and straightened to provide rigid support for short, structured segments. These substitutions lower your initial investment while you learn basic construction techniques.
Foraging offers the most significant cost savings for beginners. Many invasive species or common yard shrubs provide excellent greenery bases at no cost. Use evergreen branches or sturdy vines like ivy to build bulk without purchasing premium eucalyptus. Always test the wilting rate of foraged plants by leaving a sample out for twenty-four hours. This step ensures your garland remains fresh throughout your event without requiring expensive chemical preservatives.

How To Choose And Use A Paper Flower Garland Template Like A Pro
Where to Find High-Quality Flower Templates for Paper Crafting
Professional designers find the best templates on specialized vector graphic platforms or craft manufacturer websites. High-quality sources provide scalable files that maintain edge clarity at various sizes. Beginners should look for PDF files for manual cutting or SVG files for digital machines. These formats ensure the proportions remain historically accurate to real botanical structures. Avoid generic image searches to prevent low-resolution results.
Reliable templates often come from established craft education sites that focus on paper engineering. These sites provide schematics based on mid-century floral design principles. Evaluate the complexity of the petal shapes before downloading. Simple rounded edges suit heavy cardstock better than intricate serrated patterns. Choosing the right template determines the structural integrity of your final garland. Expert crafters prioritize templates with clear registration marks.
Tracing, Cutting, and Assembling Your Paper Flowers
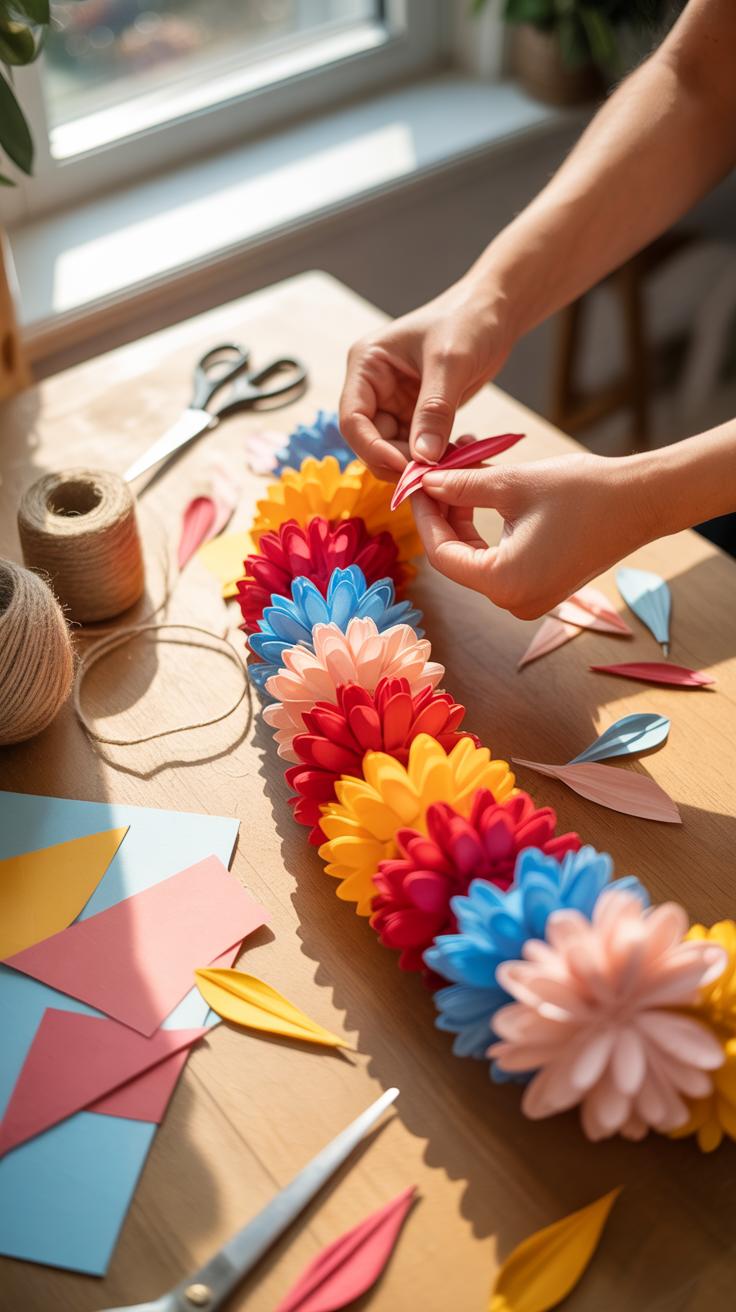
Precise tracing requires a hard lead pencil or a metal stylus to prevent line bleed. Place the template on the reverse side of the paper to hide marks. Use a sharp craft knife or precision scissors for clean edges. Dull blades tear the fibers and ruin the professional look. Follow the grain of the paper to minimize resistance while cutting. This technique ensures every petal looks uniform.

Assemble the flowers by layering petals from largest to smallest. Apply a small amount of quick-dry adhesive to the center of each layer. Use a bone folder to curl the edges for a three-dimensional effect. Secure the completed flowers to a heavy twine or floral wire using a dead-knot or hot glue. Proper spacing preserves the visual balance of the garland. Consistency in assembly creates a high-end result.
Step By Step Beginner Tutorial For Making Beautiful Paper Flower Garlands
Choosing The Right Paper Type And Color Palette For Your Paper Flower Garlands
Successful paper flower garlands require specific paper weights. Crepe paper is the industry standard for realistic textures. It stretches easily to create organic petal curves. Cardstock provides better structural integrity for geometric designs. Avoid standard printer paper because it tears too easily. Thin tissue paper works well for fluffy pom-pom styles but lacks durability for long-term outdoor use. Select the material based on the desired final shape.
Color selection dictates the mood of the garland. Use a monochromatic palette for modern aesthetics. This approach uses different shades of one single color. Analogous colors create a harmonious look by using colors next to each other on the color wheel. Complementary colors provide high contrast for festive events. Determine your color scheme before purchasing materials to ensure visual consistency. Stick to three main colors to keep the design clean.
Folding Shaping And Stringing Your Paper Flowers Into A Finished Garland
Folding determines the flower species you replicate. Use accordion folds to create round carnation shapes. Use a fringe cut on rolled strips to create centers for daisies or sunflowers. Cup the petals by rubbing the paper between your thumb and a blunt edge. This mechanical action breaks the fibers and adds realistic depth. Secure each layer with a small dot of hot glue to prevent the flower from collapsing.

The final assembly requires a strong foundation string. Use hemp twine or clear nylon fishing line for maximum strength. Pierce the center of each flower with a thick needle to thread them onto the line. Distribute the weight evenly to prevent the garland from sagging. Space the flowers at regular intervals of four inches for a full look. Tie knots at the base of each flower to keep them from sliding.
Creative DIY Garland Ideas To Suit Every Occasion And Style
DIY Garland Themes For Weddings Birthdays Festivals And Everyday Home Decor
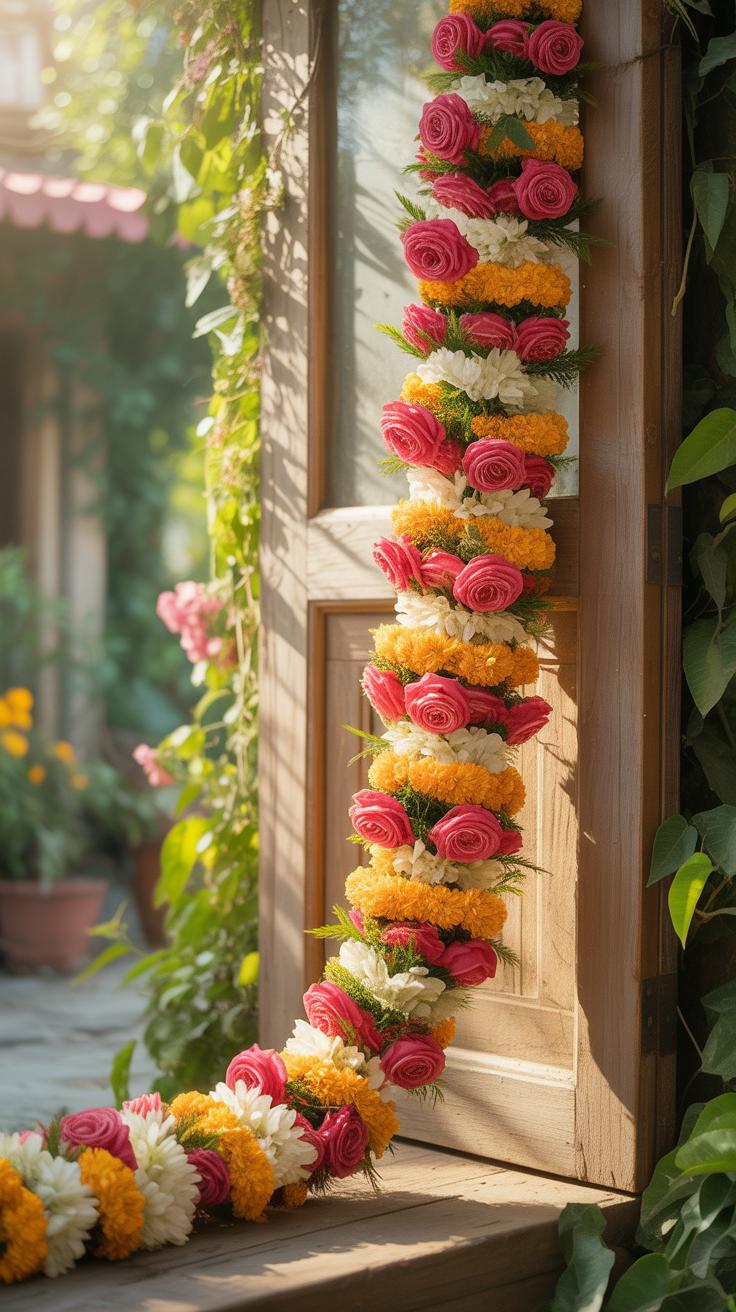
Select your theme based on the event lifespan and environmental conditions. Wedding garlands require high-impact florals like roses or hydrangeas that can withstand several hours without water. Use cool-toned palettes for a formal aesthetic. Birthday garlands allow for bright, high-contrast colors. Use seasonal blooms like marigolds for traditional autumn festivals to ensure cultural accuracy. Home decor garlands require hardy evergreens or dried botanicals for longevity.
The construction method must match the theme. Formal events utilize the binding technique on heavy rope for a thick look. Festivals often use the needle and thread method for a lighter drape. Casual home decor benefits from a loose, organic feel. Always consider the weight of your materials. Heavy blooms need a reinforced wire core. Match your thread strength to the total weight of the finished garland.
How To Customize Your DIY Garland With Ribbons Greenery And Mixed Textures

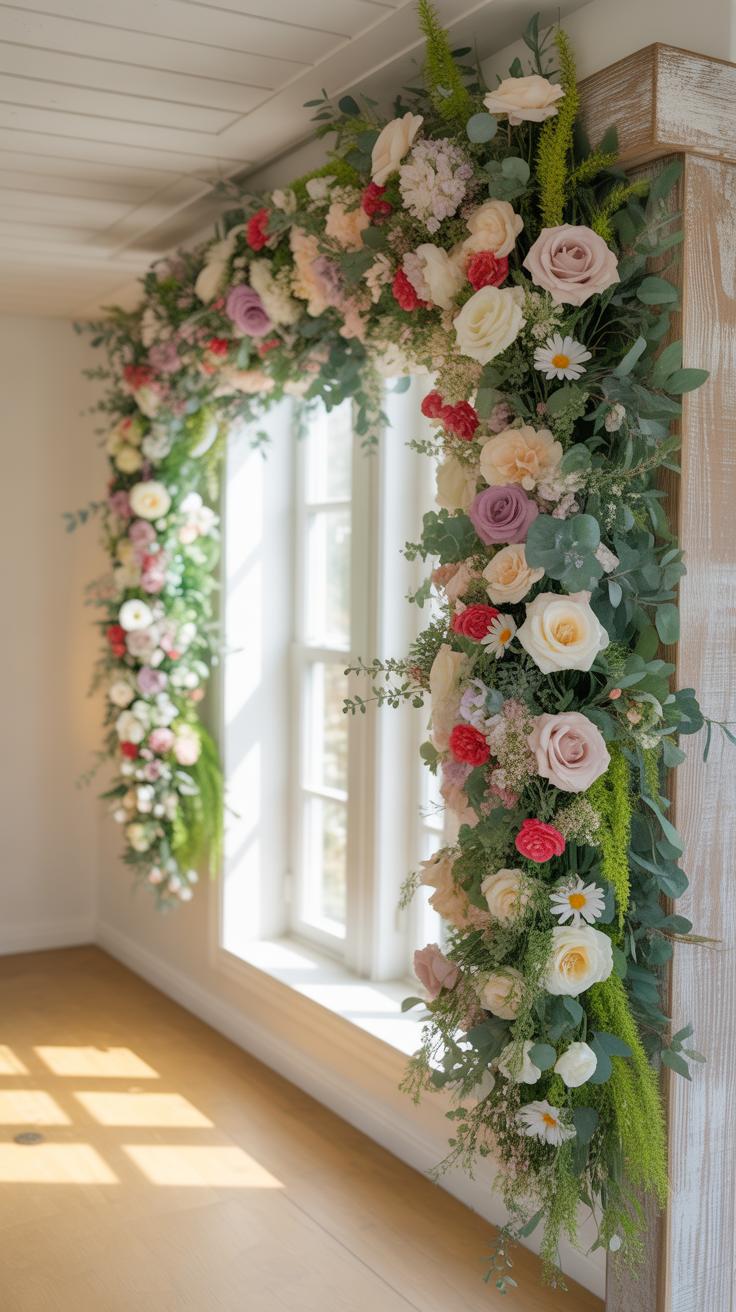
Incorporate secondary materials to build visual depth and hide structural wires. Use eucalyptus, ruscus, or ivy as base greenery to create a backdrop for focal flowers. Fine silk or velvet ribbons add movement and cover exposed stems. Mixing textures prevents a flat appearance. Place smooth petals against rugged foliage. This contrast draws the eye to specific focal points. Ensure all additions are securely wired or glued.
Balance is the priority when mixing textures. Distribute heavy elements evenly to prevent sagging in the center. Use lightweight fillers like baby’s breath to bridge gaps between large blooms. For a modern look, integrate unconventional items like dried seed pods or berries. These materials add structural interest without adding significant weight. Always test the drape of your garland before final hanging. Adjust the tension of your ties to maintain a professional finish.
Spring Floral Garland Craft Projects Perfect For Beginners
Seasonal Flowers And Colors To Incorporate Into Your Spring Floral Garland Craft
Spring garlands rely on high moisture blooms that signify the transition from winter. Utilize tulips, daffodils, and hyacinths for traditional seasonal accuracy. These species possess soft stems that require careful handling during the assembly process. Focus on a palette of pale yellows, lavender, and soft pinks. These colors reflect the natural light levels of the equinox. Use green foliage like eucalyptus to provide a neutral base.
Select hardy greenery to ensure the structure lasts through the event. Boxwood and leatherleaf fern provide necessary density and support for heavier spring bulbs. Avoid delicate blossoms that wilt without a constant water source unless you use floral water tubes. Strategic placement of filler flowers like waxflower increases the visual volume of the garland. Match your floral choices to the durability requirements of your specific display area.
Simple Spring Floral Garland Craft Techniques That Require No Prior Experience
The wrap and layer method is the most efficient technique for new crafters. Start with a thick jute twine or floral wire as your core anchor. Position small bunches of greenery against the twine and wrap floral wire tightly around the stems. Repeat this process by overlapping each new bunch to hide the previous set of mechanics. This creates a seamless appearance and ensures the structural integrity of the piece.
Direct pinning provides a faster alternative for foam based garlands. Use U-shaped floral pins to secure thick stems into a wet or dry foam cylinder. This method allows for precise placement of delicate spring flowers like ranunculus. Ensure you trim stems at a forty five degree angle to maximize surface area for water intake. Keep the spacing consistent to avoid gaps that expose the underlying foam or wire frame.
Flower Mala Making At Home A BeginnerS Guide To A Traditional Craft
The Cultural Roots Of Flower Mala Making At Home In South Asian Traditions

The flower mala is a foundational element in South Asian religious and social life. Practitioners use these garlands to honor deities during puja ceremonies and welcome guests at weddings. This tradition dates back thousands of years to Vedic periods. It emphasizes the temporary nature of life through the use of fresh blooms. The craft represents a physical manifestation of devotion and hospitality in daily practice.
Mala making serves a functional role in South Asian economies and households. Dedicated flower markets provide bulk materials like marigolds and jasmine for daily rituals. Marigolds specifically symbolize energy and the sun in Hindu culture. Families often pass down threading techniques through generations. This ensures the craft remains a standard skill for religious observance. Each string carries specific meaning based on the flower type and color selected.
Flowers in our hair and garlands on the wall remind us that beauty is simply a handmade labor of love. Every beginner starts with a single bloom and a heart full of memories.
— Martha Stewart
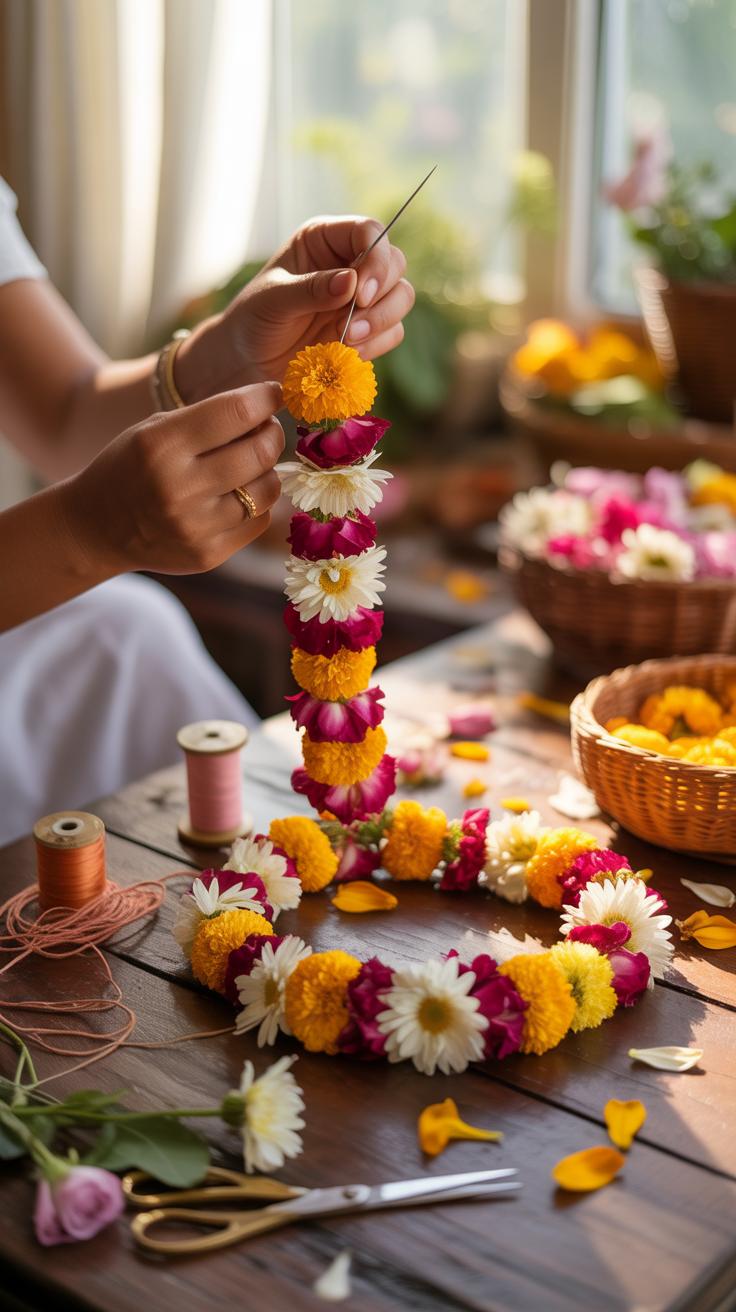
How To Thread Fresh Flowers For Authentic Flower Mala Making At Home
Authentic mala construction requires specific tools and fresh materials. You need a long metal needle and high-strength cotton thread. Marigolds are the standard choice for beginners because they have thick, durable stems. You must keep the flowers cool and hydrated before you start. Prepare the workspace by sorting blooms by size to ensure the finished garland looks uniform and professional during the process.
Push the needle directly through the green calyx at the base of the flower. This part provides the strongest support for the thread and prevents the bloom from falling off. Slide each flower down the string until it sits snugly against the previous one. Do not pull the thread too tight or the stems will snap. Secure the ends with a double knot to maintain the structural integrity of the garland.
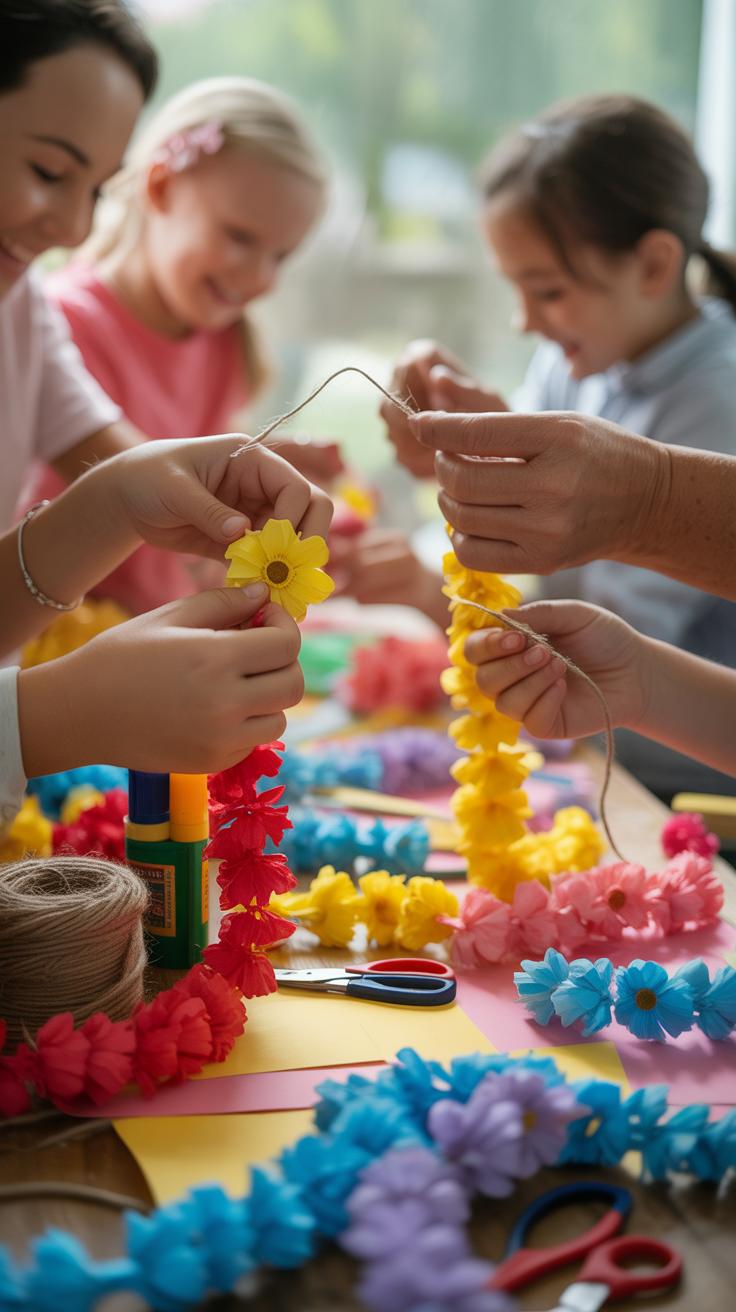
How To Make Paper Flower Leis A Fun And Easy Tutorial For All Ages
The Hawaiian Lei Tradition And Why Paper Flower Leis Are A Wonderful Craft Alternative
Polynesian voyagers brought the lei tradition to Hawaii. These garlands represent affection, honor, and hospitality. Traditionally, makers use fresh flowers, leaves, or shells. Natural resources are often scarce or expensive in non-tropical climates. Paper versions provide a durable and cost-effective solution for groups. They respect the guest of honor without risking wilting or triggering pollen allergies during events.
Crafting with paper allows for precise color control and longevity. Real floral leis die within hours. Paper leis last forever if stored correctly. This method works well for classrooms and large parties. Materials like crepe paper or cardstock are readily available at any supply store. You can teach basic geometry and cultural history through this tactile process. It remains a high-impact, low-cost decorative strategy for any host.
Step By Step Instructions On How To Make Paper Flower Leis In Under An Hour
You must prepare your workstation before starting. Efficiency depends on having all components within reach. Use sharp scissors to ensure clean edges on the paper. Standard printer paper works but colorful construction paper adds necessary weight. You will also need a sturdy string, a plastic needle, and spacers. Straws cut into one-inch segments serve as perfect spacers to maintain the garment shape and flower density.
- Cut Paper Shapes: Fold your paper several times to save time. Cut out simple four-petal or six-petal flower shapes. Aim for a diameter of three inches for every flower. Larger shapes create more volume while smaller ones look more delicate.
- Punch Center Holes: Use a hole punch or a thick needle to pierce the middle of every flower. Precise centering ensures the lei hangs straight on the body. Do not skip this step or the paper may tear during the threading process.
- Prepare the String: Measure a piece of twine or heavy thread to forty inches in length. This size fits most adults comfortably. Tie a large knot at one end to prevent the materials from slipping off. Leave a tail for the final knot.
- Thread the Components: Slide one paper flower onto the string. Follow it with a one-inch plastic straw spacer. Repeat this alternating pattern until you fill the entire length of the string. The spacers prevent the paper flowers from nesting together and losing their shape.
- Secure the Ends: Check the length of the garland once the string is nearly full. Remove any excess spacers if the lei feels too heavy. Tie the two ends of the string together using a double square knot. Trim any trailing thread for a professional finish.
Inspect the lei for balance after tying the final knot. Adjust the paper petals by gently pulling them outward to create a three-dimensional effect. Folding the petal edges slightly upward adds depth to the design. This simple assembly line approach allows one person to produce several units per hour. Store them flat in a dry environment to prevent moisture damage. Turn these simple steps into a high-speed production process for events.
How To Display And Style Your Floral Hanging Garland For Maximum Impact
Best Practices for Placing and Securing Garlands Indoors and Outdoors
Place your garland where it frames architectural features to maximize visual weight. Indoors, drape it over mantels or door frames to utilize existing structural support. High-traffic areas like entryways offer immediate visibility but require secure anchoring. Use command hooks or floral wire to prevent slipping. Ensure the garland sits at eye level or higher to create a sense of height and natural flow within the room.
Outdoor placement requires protection from direct sunlight and heavy wind. Hang garlands along porch railings or above seating areas. Use heavy-duty zip ties for security against gusts. Natural light enhances the colors, but heat wilts fresh stems quickly. Select shaded areas to keep the arrangement crisp for longer periods. Avoid placing garlands near heat vents or open flames. Proper positioning ensures the piece remains a focal point without obstructing movement.
Garland Preservation, Storage, and Maintenance Tips
Preservation starts with moisture control and temperature management. For fresh floral garlands, spray the foliage with an anti-transpirant sealant. This coating slows down water loss from the leaves and petals. Keep the garland in a cool, dark place until the event starts. If the design uses sturdy greens like eucalyptus, it will dry in place. If it uses delicate blooms, expect a shorter lifespan of forty-eight hours.
Storage for reusable silk or dried garlands requires a different strategy. Store these items in long, breathable garment bags to prevent dust buildup. Avoid plastic bins that trap moisture and cause mold growth. Keep the storage area dark to prevent UV rays from fading the fabric dyes. Shake the garland gently after removing it from storage to restore its volume. Proper handling during the teardown phase prevents structural damage to the central binding wire.
Frequently Asked Questions

What are the best types of flowers for a beginner to use when making a garland?
If you are new to DIY decor, start with hardy blooms that don’t wilt quickly. Carnations, chrysanthemums, and marigolds are excellent choices because their sturdy stems and dense petals can withstand handling. When following flower garland tutorials, beginners should also consider incorporating greenery like eucalyptus or ivy. These trailing plants provide a strong, flexible base that makes it much easier to attach your focal flowers securely.
How do I keep a fresh flower garland from wilting before my event?
To keep your creation looking vibrant, assemble it as close to the event time as possible. Once finished, lightly mist the petals with cool water and store the garland in a sealed plastic bag inside a refrigerator. Many flower garland tutorials recommend using a floral preservative spray to lock in moisture. If you are decorating outdoors, keep the arrangement in the shade until the very last moment to prevent heat damage.
Can I create a beautiful floral garland on a tight budget?
Absolutely! You can achieve a high-end look without overspending by mixing expensive focal flowers with affordable fillers like baby’s breath or waxflowers. Foraging greenery from your own backyard, such as fern fronds or privet branches, is another great way to save money. Additionally, using silk or foam flowers is a cost-effective alternative to fresh blooms, as these materials are reusable and often more forgiving for those practicing new techniques.


