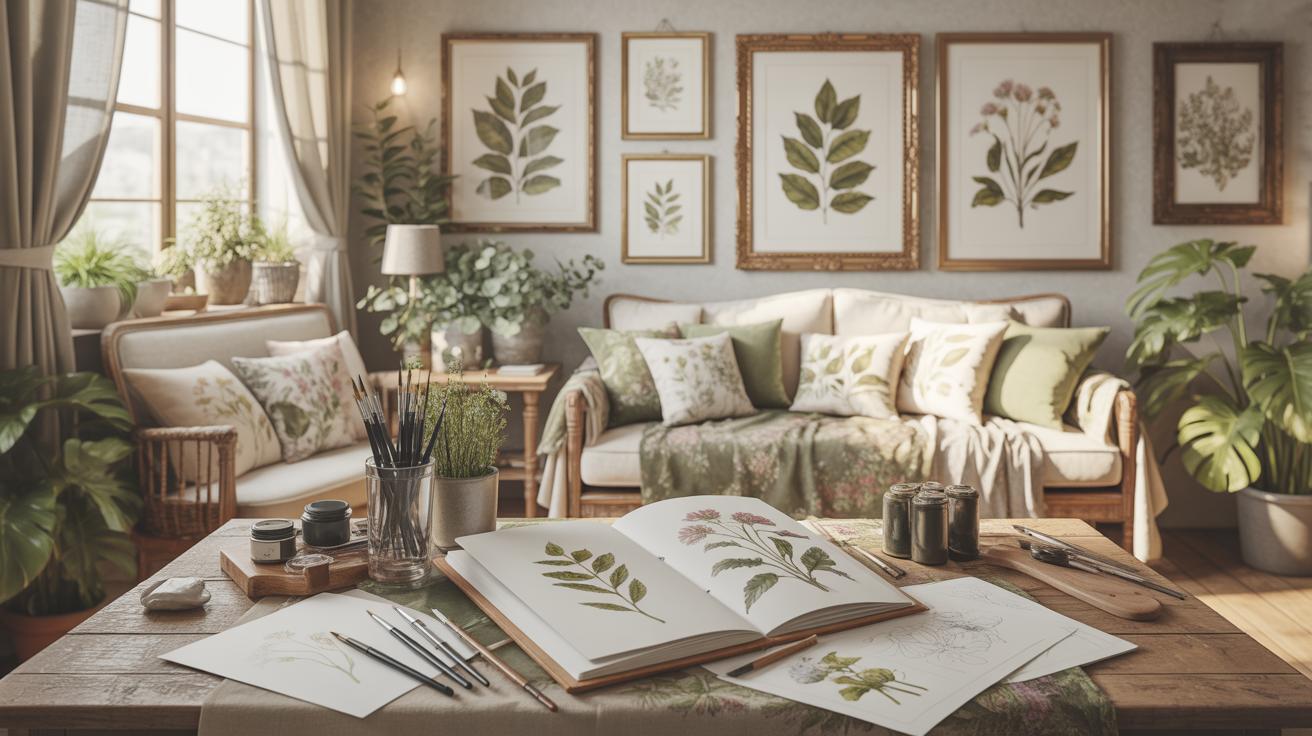
What Are Botanical Print Crafts And Why Are They So Popular
The History And Rise Of Botanical Print Crafts As A Creative Tradition
Botanical print crafts originated from the scientific need to document plant species. During the Age of Enlightenment, explorers and botanists used physical specimens to create accurate records. This practice led to techniques like nature printing. Artists applied ink directly to dried plants to transfer details onto paper. These early methods focused on anatomical accuracy rather than decoration. They provided a foundation for modern floral design and printmaking.
The Victorian era shifted these scientific tools into the domestic sphere. Making herbariums and pressed flower scrapbooks became a standard hobby for many families. Advancements in printing technology allowed mass production of botanical illustrations for home decor. Today, this tradition lives on through digital scanning and improved adhesive materials. Modern crafters use these historical blueprints to create functional art. The craft maintains its relevance by blending traditional techniques with contemporary tools.
Why Botanical Crafts Connect Us To Nature And Slow Living
Botanical crafts facilitate a direct physical connection to the environment. Gathering leaves and flowers forces makers to observe local seasonal changes. This process encourages a slower pace of production compared to digital art. Crafters must work with the natural constraints of their organic materials. This creates a tactile experience that digital platforms cannot replicate. It turns simple plant matter into lasting objects that represent specific times and places.
This discipline aligns with the slow living movement because it requires patience. Plants take days or weeks to dry properly before use. You cannot rush the preservation process without damaging the specimen. This wait time creates a disciplined workflow that rejects instant gratification. Collectors find value in the unique variations of every leaf and petal. The final products serve as quiet reminders of the outdoors within indoor living spaces.
Getting Started With Leaf Printing Art Ideas At Home
Choosing The Right Leaves For Leaf Printing Art Ideas That Actually Work
Success in leaf printing depends on the structural anatomy of the plant material. You must select specimens with prominent, raised veins on their underside. Flat or fleshy leaves lack the topography needed to hold and transfer pigment effectively. Deciduous trees like maple and oak provide the best results due to their rigid skeletal frames. Avoid waxy leaves because the slick surface repels water-based mediums and causes smudging.
Freshness dictates the quality of the final print. Pliable leaves conform to the substrate and produce a sharp image. Dry or brittle leaves crack under the pressure of a brayer or hand rubbing. Collect your samples shortly before you begin the printing process. If you must store them, place them between damp paper towels in a sealed bag. This prevents curling and maintains the surface tension required for clean botanical transfers.
Essential Materials And Setup Tips For Your First Leaf Printing Session
Preparation determines the speed and cleanliness of your workflow. You need a dedicated flat surface protected by a drop cloth or newsprint. Organize your tools so you can move from inking to pressing without pausing. Delays cause the pigment to dry on the leaf, which leads to faint or incomplete transfers. High-quality block printing ink or heavy-body acrylics yield the most professional results for beginners.
- Brayer or Rubber Roller: This tool applies an even layer of ink to the leaf surface. A roller prevents thick globs of paint from filling in the delicate vein details. Consistency is the primary goal here.
- Substrate Selection: Choose heavy paper or natural fabrics like cotton and linen. Textured surfaces absorb the medium better than coated papers. Proper absorption ensures the print remains crisp and does not bleed into the surrounding fibers.
- Printing Bench Hook or Plate: Use a non-porous surface like glass or plastic to roll out your ink. You need to work the pigment until it creates a tacky sound and a velvet texture. This indicates the ink is ready.
- Barren or Clean Roller: You need a tool to apply even pressure to the back of the paper. A barren or a wooden spoon works well. Steady pressure forces the ink from the leaf into the material.
- Tweezers: Use these to lift the specimen off the substrate after pressing. This prevents your fingers from touching the wet ink. It also stops the leaf from sliding and blurring the edges of the final botanical image.

An organized workspace prevents cross-contamination of pigments. Keep a clean zone for your unprinted paper and a separate wet zone for inking and pressing. Change your backing paper often to avoid ghost images on the front of your work. Use a consistent amount of pressure across the entire leaf area. This systematic approach ensures every print in your series maintains a high level of detail and clarity.
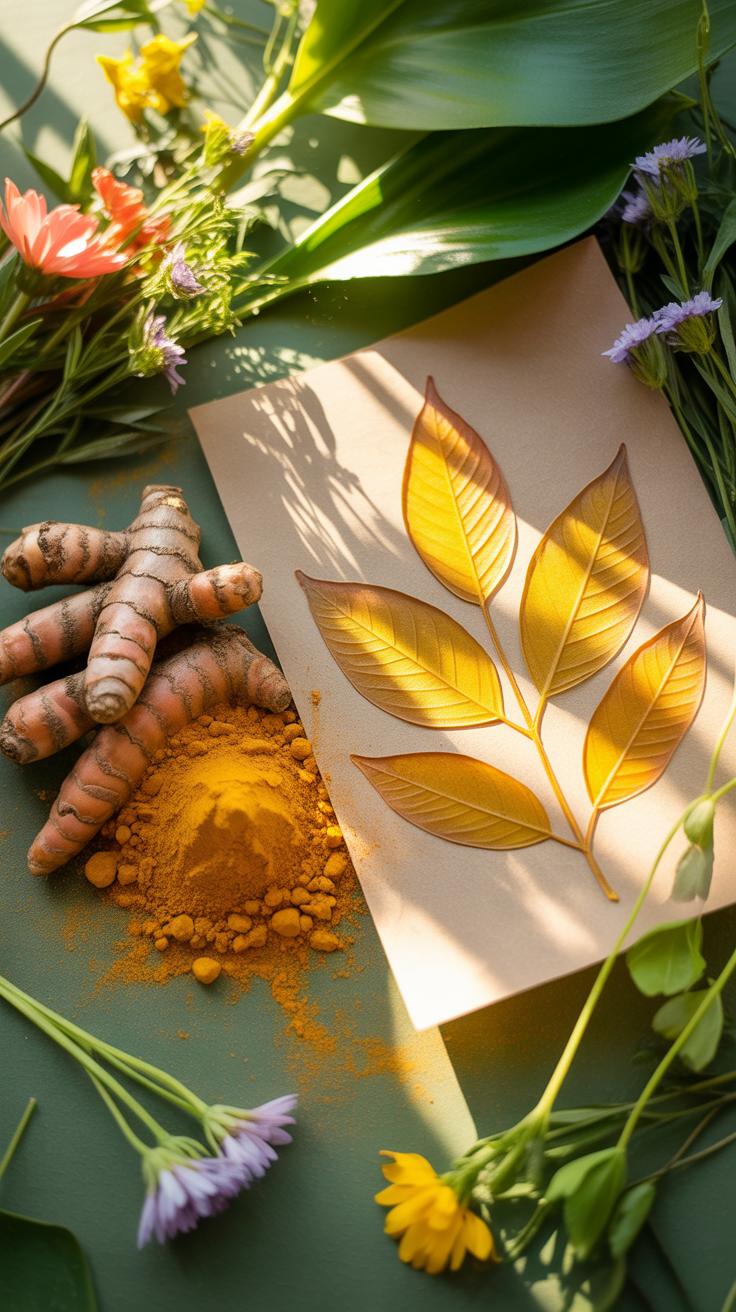
Exploring Turmeric Printing As A Natural Dye Technique
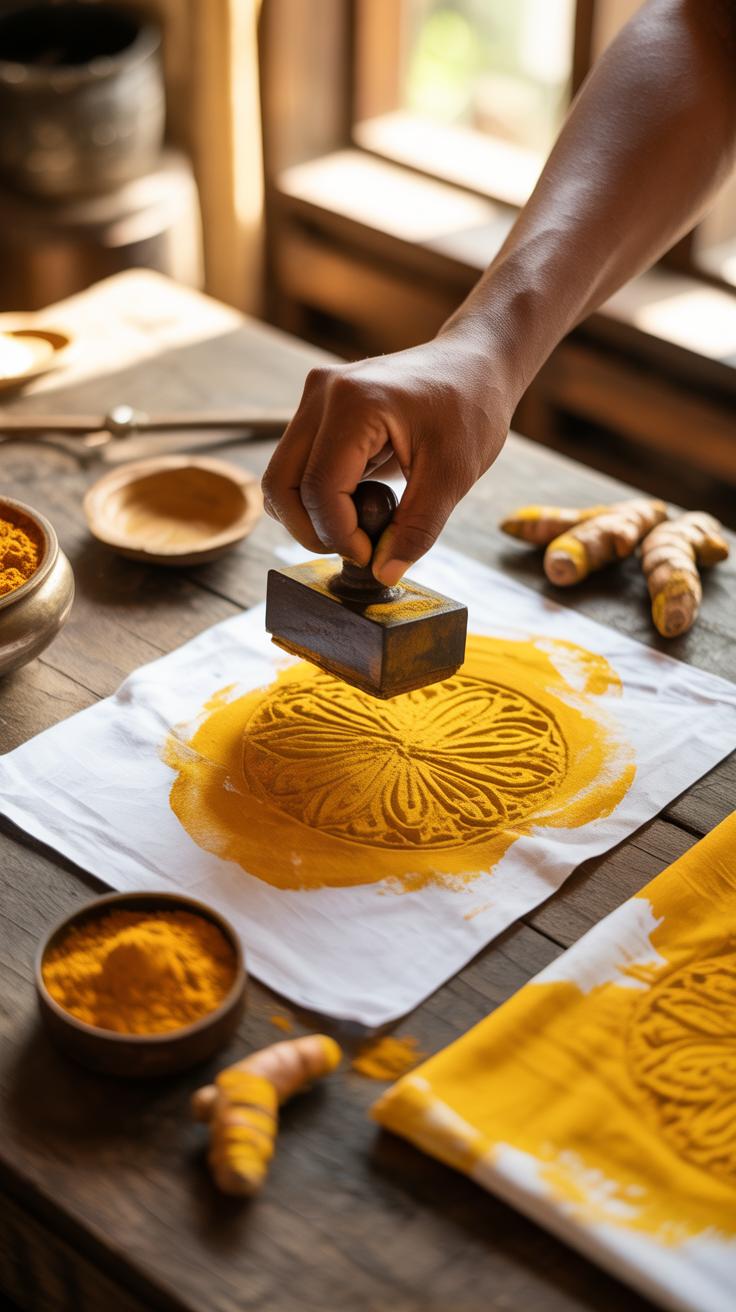
How Turmeric Works As A Natural Fabric Dye And What Makes It Unique
Turmeric contains curcumin. This chemical compound gives the root its intense yellow color. It acts as a direct dye. This means it bonds to natural fibers without a mordant. Most plant dyes require metallic salts to fix the color. Turmeric skips this step. It works best on cotton, silk, and wool. It provides a fast way to achieve deep saturation.
Curcumin is photosensitive. This trait makes it perfect for botanical print crafts. Light breaks down the pigment over time. You can use this weakness as a strength. By blocking light with leaves or flowers, you create high-contrast images. The exposed areas fade while the covered areas stay bright. This process creates a natural photograph on the surface of your material.
Step By Step Guide To Turmeric Sun Printing On Fabric And Paper

Mix ground turmeric with rubbing alcohol to create a concentrated liquid. Soak your fabric or paper in this solution until it reaches an even yellow tone. Hang the material to dry in a dark room. You must keep the treated surface away from sunlight until you are ready to print. This prep work ensures the dye remains reactive for the next phase.
Place your botanical specimens directly onto the dry material. Use a heavy glass sheet to press the plants flat against the surface. Move the assembly into direct sunlight for two to four hours. The sun will bleach the uncovered background to a pale cream. After exposure, remove the plants to reveal the vibrant yellow silhouettes underneath. Rinse the material in cool water.
Turmeric Sun Printing Harnessing Sunlight To Create Botanical Art
Understanding The Science Behind Turmeric Sun Printing And Light Exposure
Turmeric contains curcumin. This natural pigment reacts to ultraviolet light and high pH levels. You create a light-sensitive emulsion by mixing turmeric powder with high-proof alcohol. Applying this solution to paper or fabric creates a temporary photographic surface. This process is a variation of the anthotype. Sir John Herschel documented this method in 1842. It relies entirely on organic matter.

The science depends on the bleaching power of the sun. Curcumin molecules break down when exposed to intense UV rays. Areas blocked by botanical specimens stay yellow. Exposed areas fade to a pale cream color. This creates a high-contrast silhouette. You must use dry leaves for the best results. Moisture from fresh plants can ruin the chemical reaction on the paper.
Creative Project Ideas Using Turmeric Sun Printing For Home Decor
Use this technique to create custom wall art series. Frame multiple prints of local ferns or grasses to document regional flora. This fits well with the Arts and Crafts movement aesthetic. It emphasizes natural materials and handmade quality. Choose heavy watercolor paper to prevent warping during the coating process. These prints remain light-sensitive. You must display them away from direct window light.
Apply the turmeric solution to linen napkins for a unique table setting. This creates a rustic look for interior design projects. You can shift the color from yellow to deep red using a borax solution. This chemical reaction allows for more complex color palettes in your home styling. Always iron the fabric after printing to help set the remaining pigment. Use simple glass frames to protect the finished botanical work.
Fern Crafts Using NatureS Most Elegant Fronds In Your Art
Why Ferns Are A Favorite Choice In Botanical Print And Fern Crafts

Ferns dominate botanical crafts because of their unique vascular structure. Unlike flowering plants, ferns have complex, repeating patterns called fronds. These shapes provide high contrast and sharp edges during the printing process. Their flat profile makes them easy to press without adding bulk. This physical trait ensures they sit flush against paper or fabric surfaces. Professional crafters rely on this flatness for clean transfers.
Historical popularity stems from the Victorian Pteridomania craze. This period saw a massive surge in fern collecting and documentation. Designers today use ferns for their architectural symmetry and visual weight. Ferns represent a primitive plant group with over ten thousand species. This variety gives you endless options for texture and scale. You can create depth by layering different species like the Maidenhair or Sword fern.
Beautiful Fern Crafts You Can Make To Decorate Your Living Space
Sun printing is a standard tactic for fern art. You place dried fronds on light-sensitive cyanotype paper and expose it to UV rays. Sunlight creates a chemical reaction that turns the paper deep blue. The fern blocks the light and leaves a crisp white silhouette behind. This process produces professional results with minimal equipment. It captures fine details that hand-drawing often misses in complex botanical prints.
Hammered leaf printing offers another tactical approach for home decor. You place a fresh fern under a piece of fabric and strike it with a mallet. This force breaks the plant cells and releases natural chlorophyll into the fibers. The result is a permanent green pigment print of the actual plant. Use high-quality cotton or linen for the best absorption. This technique creates durable textiles used for pillows or table runners.
Pressed Flowers DIY Preserving Blooms Into Lasting Botanical Art
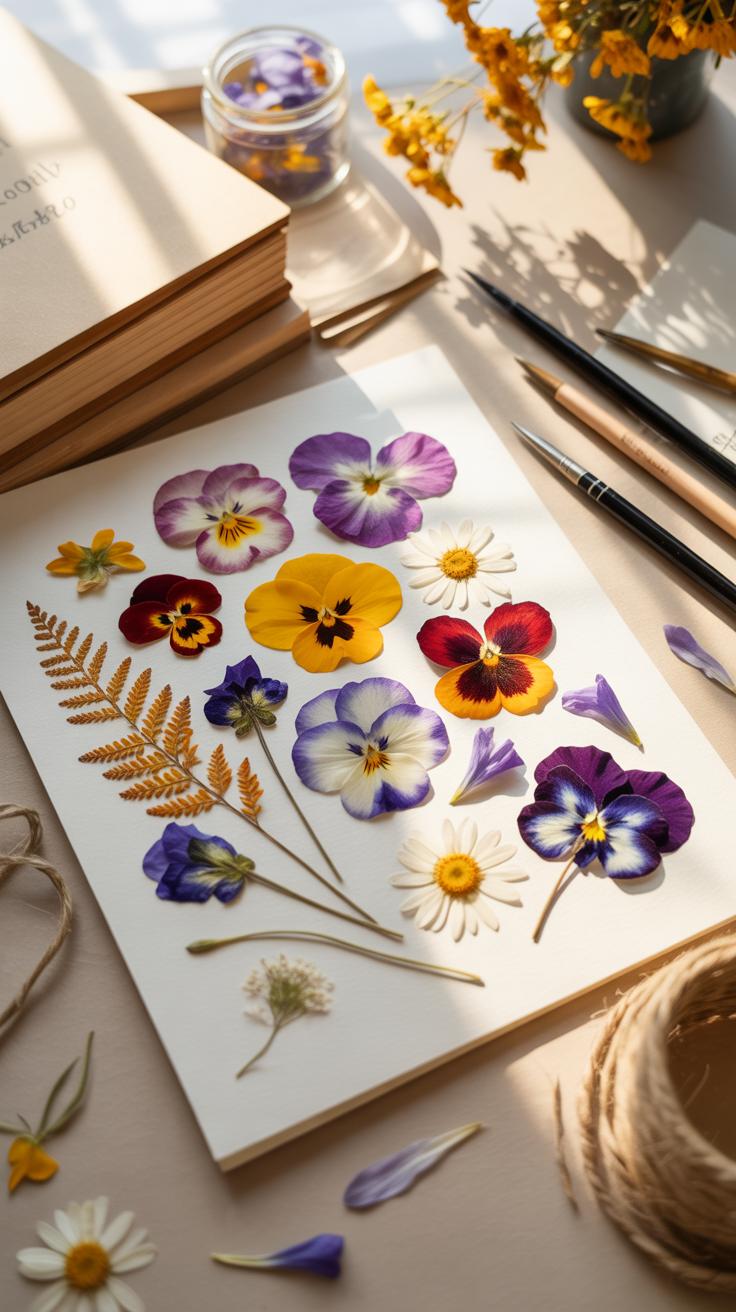
How To Press Flowers Correctly For Long Lasting Pressed Flowers DIY Projects
Select flowers at their peak dryness during the morning after the dew evaporates. Moisture causes mold and browning during the preservation process. Use flat-faced blooms like pansies or daisies for the best results. Thicker flowers require sectioning or thinning to dry evenly. Place specimens between sheets of pH-neutral blotting paper. This avoids acid damage and prevents the petals from sticking to the surface.
Apply consistent pressure using a heavy book or a wooden flower press. Tighten the bolts or add weight to remove all air. Keep the press in a warm, dry room with good airflow. Wait two to three weeks before opening the press to ensure total dehydration. Handling specimens too early leads to shriveling and color loss. Store finished pieces in airtight containers away from direct sunlight to prevent rapid fading.
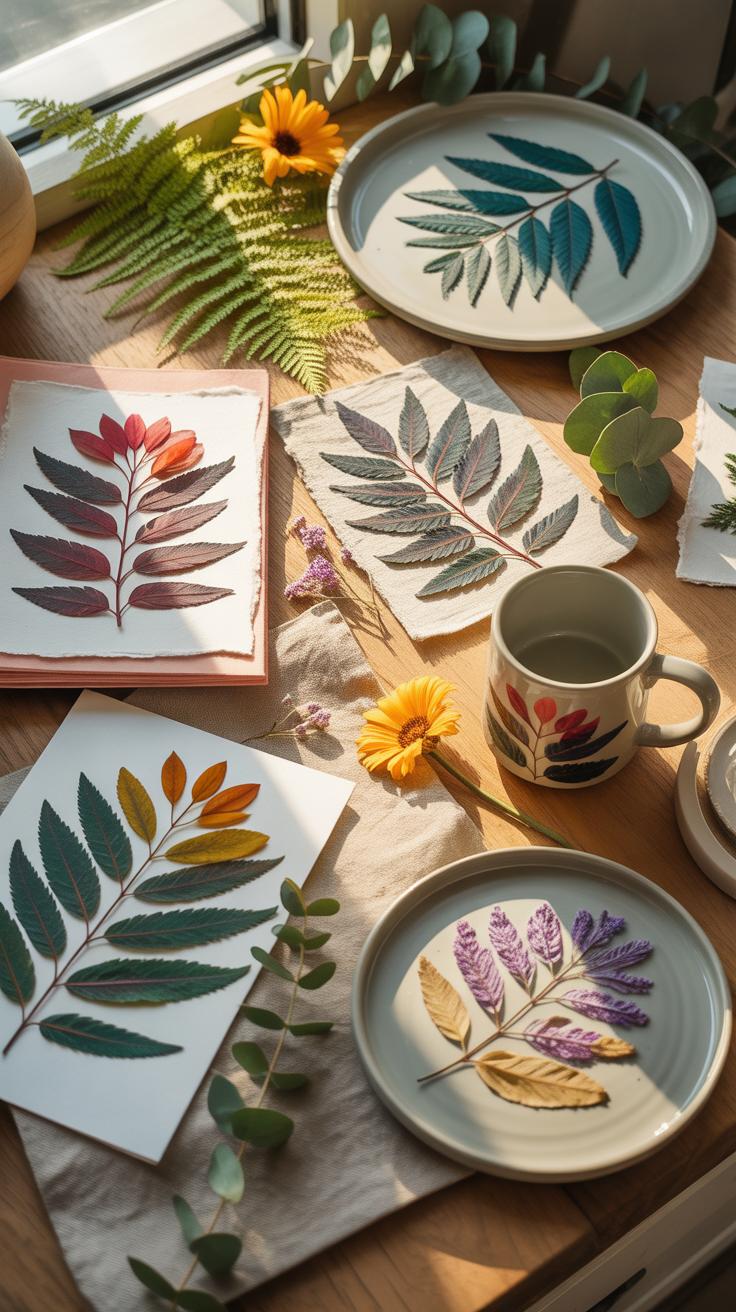
Creative Ways To Display And Use Pressed Flowers DIY Art Around The Home
Modern botanical displays focus on transparency and minimalist frames. Use double-pane glass frames to create a floating effect for your specimens. This technique highlights the delicate edges of the plants against your wall color. Secure the flowers with a tiny drop of acid-free glue to stay in place. Group these frames in odd numbers to follow standard interior design principles. This creates a professional gallery look.
Incorporate pressed botanicals into functional household items to increase their utility. Apply dried petals to handmade candles or resin coasters for a permanent bond. Use herbaria techniques to label each specimen with its Latin name and date of harvest. This adds a scientific layer to your decor. High-traffic areas require UV-resistant glass to protect the pigment. Consistent exposure to light destroys organic colors over time regardless of the mounting method.

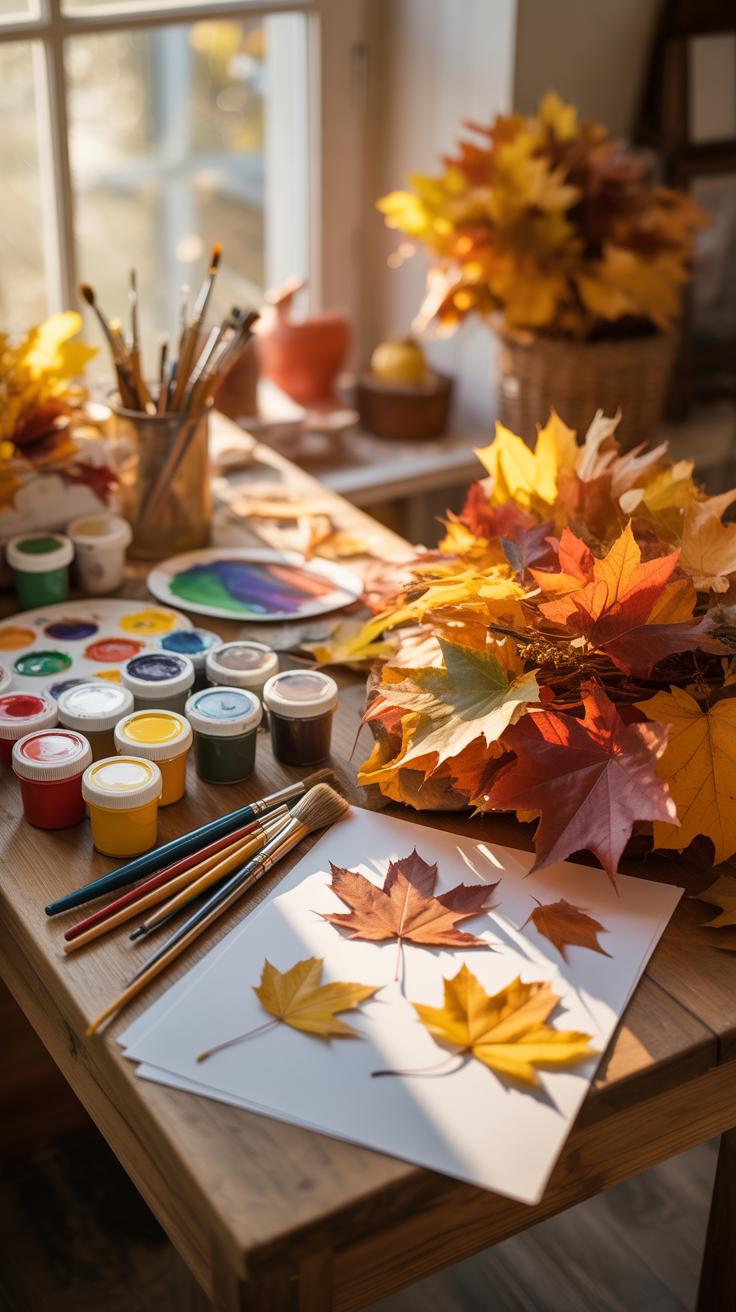
Dried Flowers Crafts Turning Seasonal Blooms Into Timeless DCor
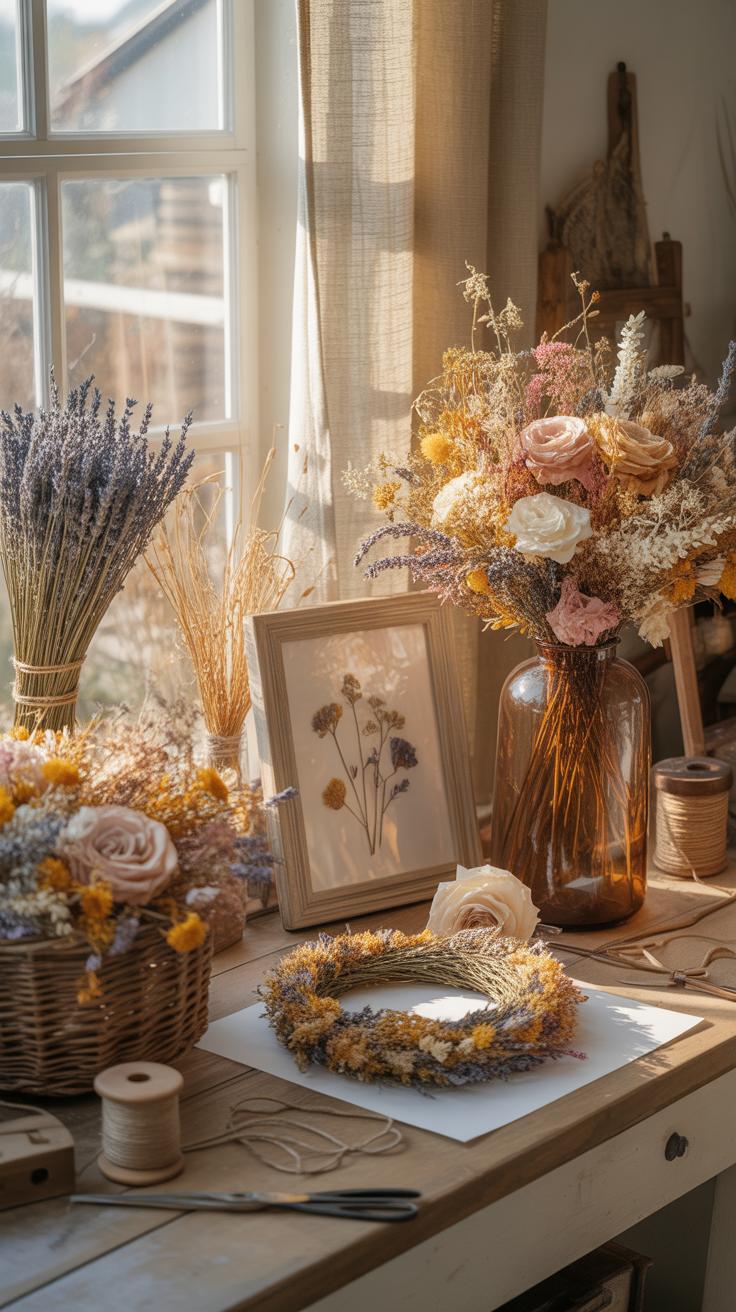
Best Methods For Drying Flowers At Home To Use In Dried Flowers Crafts
Drying flowers requires removing moisture quickly to prevent rot and color loss. Professionals select specific techniques based on the flower type and the intended final use. Air drying remains the most accessible method for stems. Pressing works best for flat botanical print crafts. Silica gel offers the highest color retention for three dimensional shapes. You must harvest plants at the right time for success.
- Air Drying: Tie bunches of flowers and hang them upside down in a dark, dry room with good airflow. This classic method suits sturdy varieties like lavender, strawflower, and yarrow. It takes two to three weeks for total moisture removal.
- Flower Pressing: Flatten blooms between sheets of absorbent paper using a heavy botanical press or books. This method is essential for creating framed art and stationery. It works best with thin flowers like pansies, daisies, and ferns.
- Silica Gel Desiccant: Submerge delicate flower heads in a container filled with silica sand. This chemical process pulls moisture out rapidly while maintaining the original structural shape of the bloom. It is the gold standard for roses and peonies.
- Microwave Drying: Use a microwave with silica gel to accelerate the drying process from weeks to minutes. This high speed tactic requires careful timing to avoid burning the plant tissue. It works well for hobbyists who need immediate results for projects.
- Glycerine Treatment: Replace the water in the plant with a glycerine solution to keep the foliage supple. This technique prevents the leaves from becoming brittle. It is ideal for preserving eucalyptus or magnolia branches for long term use in wreaths.
Environmental factors dictate the quality of your preserved material. High humidity levels will ruin your progress by introducing mold and mildew. Keep your drying area dark because ultraviolet light bleaches the natural pigments in the petals. Once the plants are brittle to the touch, they are ready for storage or assembly. Handle them with care to avoid shattering the delicate structures during the crafting process.
To have a botanical print is to keep a piece of summer always in your heart. By pressing petals and leaves into our homes, we preserve the quiet memories of the earth forever.
— Celia Thaxter
Inspiring Dried Flowers Crafts Ideas From Wreaths To Framed Arrangements
Modern botanical design focuses on clean lines and structural integrity. Wreaths built on minimalist brass hoops or grapevine bases allow the texture of the dried material to stand out. You can create a focal point by grouping similar colors or species together. These arrangements last for years if kept away from direct sunlight. They provide a sustainable alternative to fresh floral decor that dies within a week.
Shadow box frames protect delicate specimens from dust and physical damage. Arrange your dried stems on acid free paper to prevent chemical yellowing over time. This technique mimics historical herbarium sheets used by early botanists for scientific study. You can also incorporate dried petals into handmade paper or candles for functional art. These tactical choices ensure your botanical print crafts remain professional and durable for home display.
Floral Crafts That Double As Stunning Home DCor Pieces

How To Design Floral Crafts That Complement Your Interior Style
Match your craft to your architecture. Minimalist homes require monochromatic cyanotypes or stark black and white pressings. These clean lines reinforce modern geometry. Industrial spaces benefit from metal frames and heavy glass. Use rigid mounting techniques to keep the focus on the specimen. Choose frames that match your existing hardware. Consistency defines professional design.
Traditional interiors favor layered textures and ornate details. Use the decoupage method on wood or porcelain. This technique dates back to 18th-century Europe. It integrates botanical images directly into the furniture. Use high-quality matte sealants to avoid a cheap plastic look. Select vintage herbarium prints for a formal atmosphere. Proper scaling ensures the piece does not vanish on the wall.
Seasonal Floral Crafts Ideas To Refresh Your Home Throughout The Year
Rotate your botanicals to reflect the natural cycle. Spring calls for light-sensitive sun prints using early ferns and fragile blossoms. This process uses UV light to create permanent blue images. It captures the fleeting nature of the season. Summer allows for heavy clay impressions. Press fresh garden blooms into wet terracotta. Fire or air-dry these tiles for durable wall installations.
Autumn crafts utilize the high tannin content in fallen leaves. Use the Hapa Zome technique from Japan. This involves hammering pigments directly into fabric. It creates a raw and organic print. For winter, focus on evergreen needle pressings and dried seed pods. These structures hold their shape in low humidity. Framed coniferous branches provide visual weight during the colder months. Plan your harvests ahead of time.
Creating A Botanical Print Gallery Wall With Nature Inspired Art
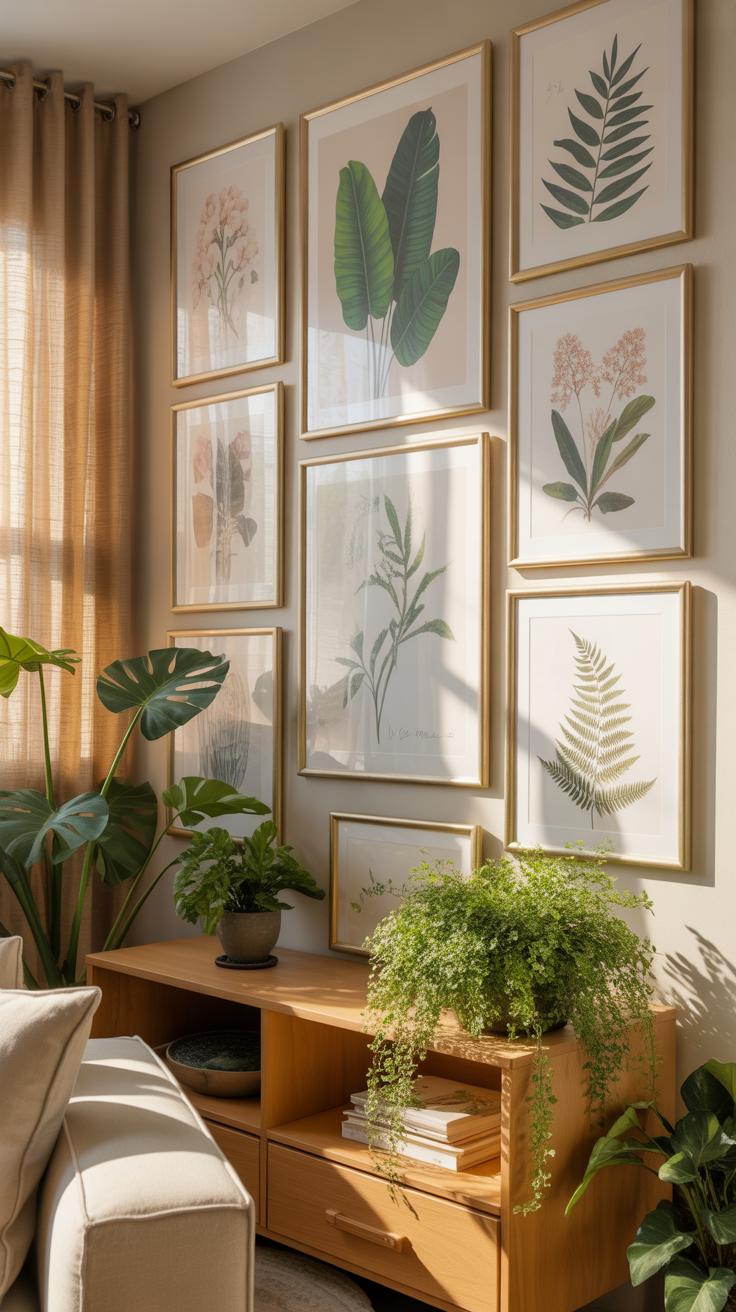
Curating And Arranging A Botanical Print Gallery Wall That Feels Cohesive
Cohesion requires a unifying element across all pieces. Select a specific theme like Victorian scientific illustrations or modern minimalist leaf silhouettes. Consistency in framing creates a professional look. Use matching wood tones or metal finishes to tie diverse prints together. Standardize the matting color to provide a clean visual break between the artwork and the wall. This structure prevents the display from looking cluttered.
Plan the layout on the floor before driving nails into the wall. Start with the largest piece as the central anchor. Build outward in a grid or an organic cluster. Maintain a consistent gap of two to three inches between frames. This spacing ensures the eye moves smoothly across the collection. Balance visual weight by placing darker or denser images toward the bottom or center of the arrangement.
Mixing Techniques Like Leaf Printing, Pressed Flowers, And Fern Crafts In One Display
A dynamic gallery wall integrates different physical textures and production methods. Combine two-dimensional leaf prints with three-dimensional pressed flowers. Use shadow boxes for delicate specimens like dried ferns to add depth. This variety mimics the complexity of a real garden. Ensure each piece follows the same color palette to maintain order. Mixing media prevents the display from feeling flat or repetitive over time.
Strategic placement dictates how the viewer experiences the craft. Position thick, tactile items like clay leaf impressions next to fine-line ink drawings. This contrast highlights the unique details of each botanical technique. Use archival-quality glass to protect organic materials from sun damage and fading. Proper mounting ensures that heavy items stay secure. This tactical approach creates a gallery that is both durable and visually balanced.
Eco Friendly Botanical Crafts That Are Kind To The Planet

Why Botanical Crafts Using Natural Materials Support Sustainable Living
Botanical crafts reduce reliance on synthetic dyes and plastics. You use renewable resources like leaves, petals, and wood blocks. This approach aligns with the Slow Design movement. It prioritizes local materials and seasonal cycles. You minimize carbon footprints by avoiding shipped chemical inks. Natural materials decompose safely back into the earth. This creates a circular production cycle that protects local ecosystems and water sources.
Traditional printing methods like Hapa Zome or cyanotype use minimal energy. These techniques rely on manual pressure or solar energy rather than industrial machines. This shift lowers your household carbon output. Using organic fibers like linen or hemp ensures your base material is biodegradable. You eliminate microplastic shedding during the washing process. Sustainable botanical crafting transforms garden waste into high-value decor. It proves that high-end design does not require environmental destruction.
How To Source Ethical And Low Impact Supplies For Your Botanical Print Crafts
Ethical sourcing begins with your local environment. Forage for fallen leaves and twigs rather than stripping live plants. This preserves the health of the host organism. Only collect common species to protect local biodiversity. Use reclaimed textiles for your printing surfaces. Old cotton bedding and linen scraps work better than new synthetic blends. Upcycling diverts waste from landfills and provides a cost-effective substrate for testing new techniques.
Choose non-toxic mordants like alum or soy milk to fix your prints. Avoid heavy metals like chrome or tin that pollute ground water. Buy inks from companies that disclose their full ingredient lists. Look for certifications like GOTS for any new fabric purchases. This ensures fair labor practices and ecological safety. Small-batch suppliers usually offer better transparency than big-box retailers. High-quality tools last a lifetime and reduce the need for repeat purchases.
Frequently Asked Questions

What are the easiest botanical print crafts for someone just starting out?
If you are new to DIY decor, the simplest project is creating pressed leaf wall art. Start by gathering interesting foliage from your backyard and flattening them between heavy book pages for a week. Once dried, mount them onto high-quality cardstock or linen paper. These botanical print crafts look incredibly professional when placed in a floating glass frame, instantly adding a touch of organic elegance to your living space without requiring advanced artistic skills.
How do I transfer botanical designs onto fabric items like tote bags or pillows?
To transfer botanical print crafts onto fabric, the iron-on transfer method is the most reliable for home crafters. First, print your favorite vintage floral illustrations onto specialized heat-transfer paper using an inkjet printer. Carefully trim the design, place it face down on your fabric, and apply firm heat with an iron. Once cooled, peel back the backing to reveal a custom, nature-inspired piece that looks like it was plucked from a high-end boutique.
Can I create beautiful botanical projects without spending a lot of money on supplies?
Absolutely! You can find a wealth of free resources by searching public domain archives like the Biodiversity Heritage Library for stunning vintage illustrations. Instead of buying expensive canvases, try upcycling old glass jars or wooden crates using decoupage techniques. By printing these free images at home and using basic school glue or Mod Podge, you can craft high-end decor on a thrift-store budget while celebrating the timeless beauty of nature.


