The Timeless Appeal Of Craft Flowers Made From Paper
Why Paper Flowers Have Endured Across Cultures And Centuries
Ancient civilizations used paper to mimic nature shortly after the invention of paper itself. China developed the earliest paper floral arts during the Song Dynasty to honor religious traditions and decorate festivals. These techniques traveled to Europe in the seventeenth century. Victorian crafters later refined the art into a high status hobby. They used tissue and crepe paper to create realistic botanical specimens.
Paper flowers thrive because they do not require specific climates or growing seasons. Artisans use them to preserve heritage and express local identity without agricultural limits. This craft remains a staple in Mexican folk art through the creation of cempasuchil for Day of the Dead. The durability of the medium ensures that cultural symbols remain intact. Modern designers still use these historical methods to build lasting displays.
How Paper Flowers Compare To Fresh Flowers For Special Events
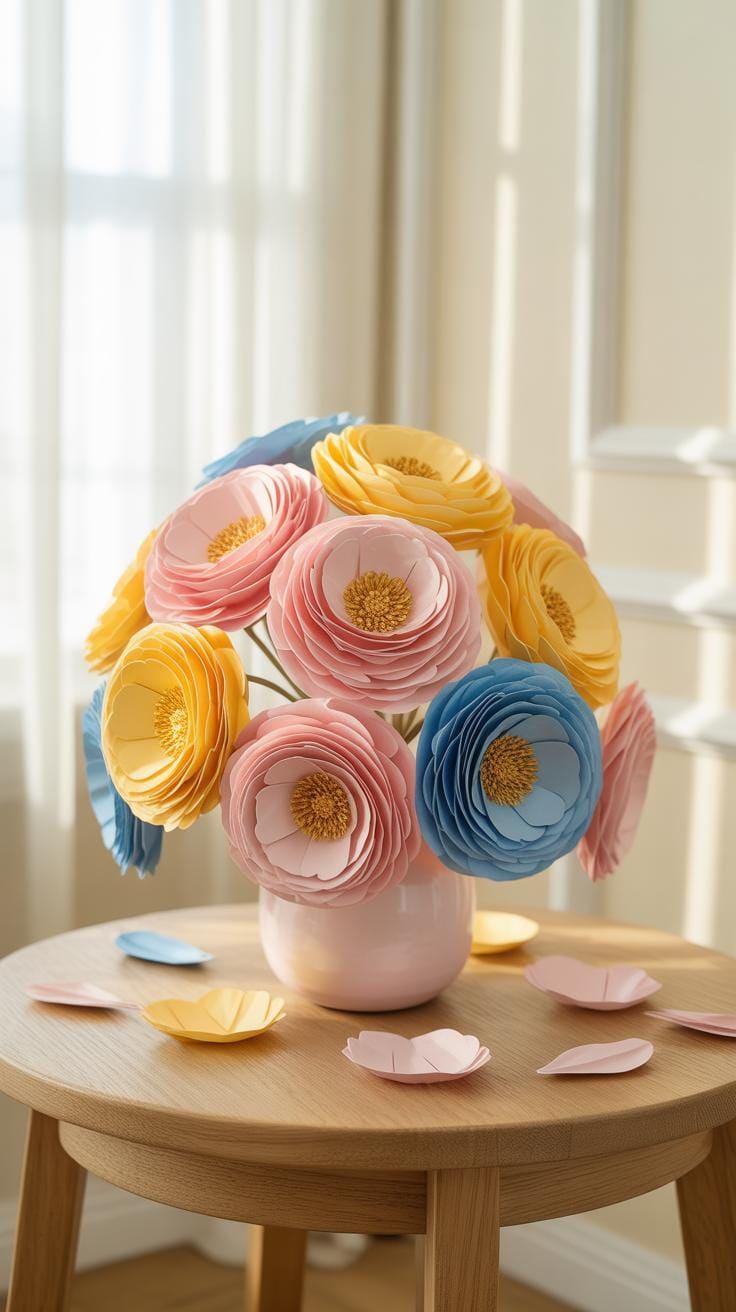
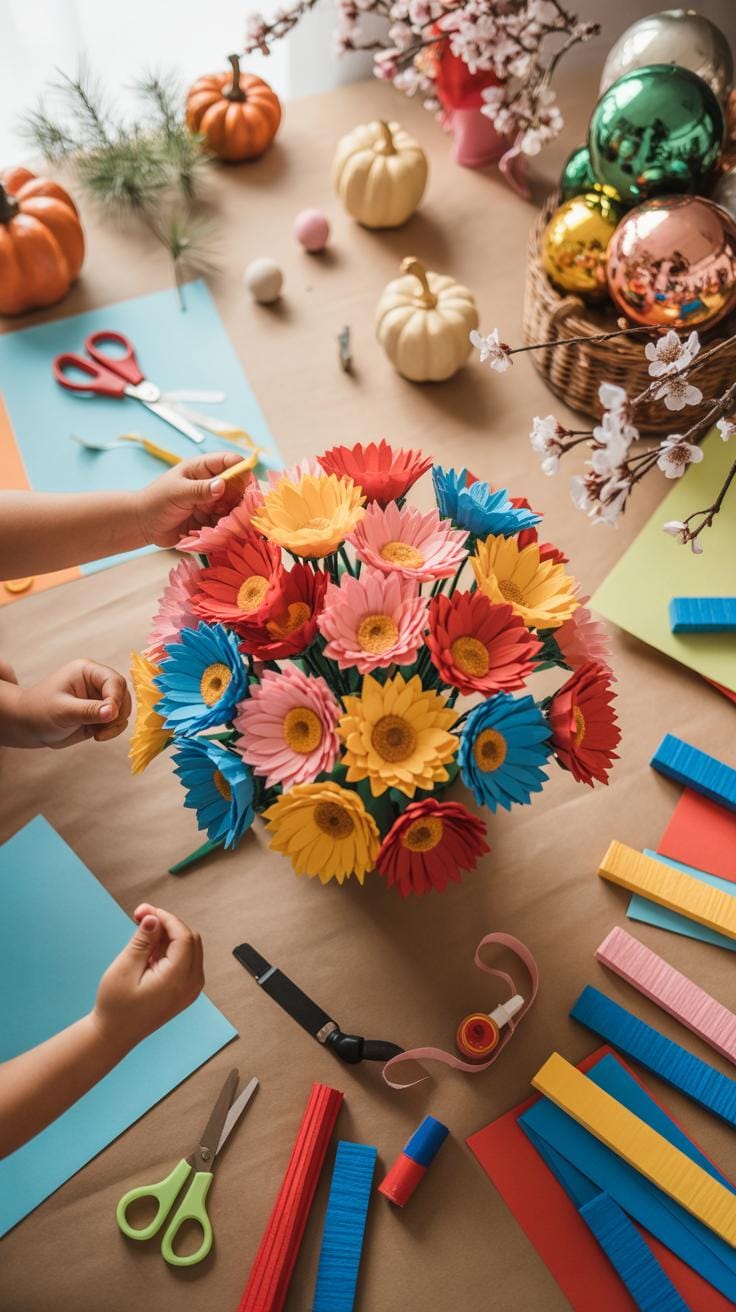
Fresh flowers die quickly and require expensive refrigerated transport. Paper flowers eliminate these logistics. You can build paper arrangements months before an event begins. They do not wilt under hot stage lights or in outdoor heat. This stability gives planners more control over the final look of a venue. Choosing paper reduces waste and ensures the decor stays perfect throughout the entire ceremony.
The cost efficiency of paper flowers comes from their long shelf life. You can reuse paper stems for multiple events or sell them after use. Natural flowers often cause allergic reactions in guests. Paper provides a hypoallergenic alternative that keeps everyone comfortable. The ability to manipulate paper allows for colors or sizes that do not exist in nature. This flexibility makes paper a strategic choice for high end design.
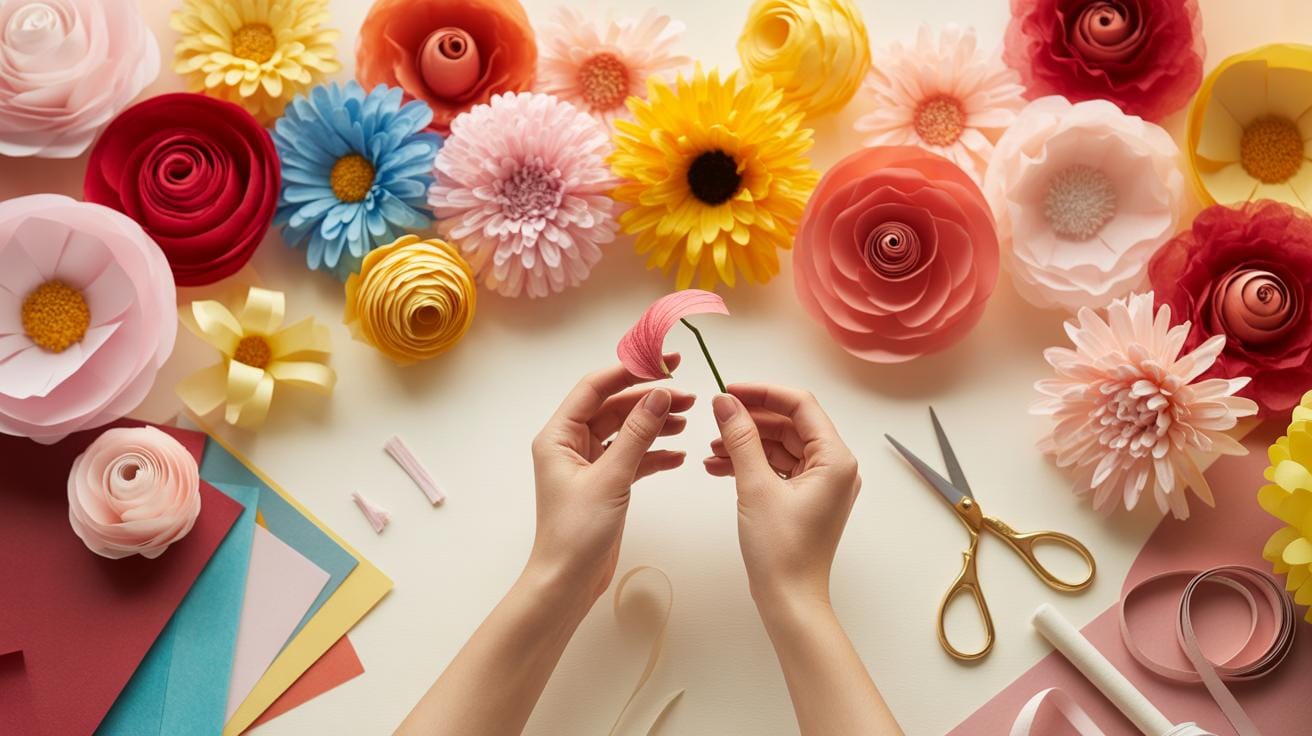
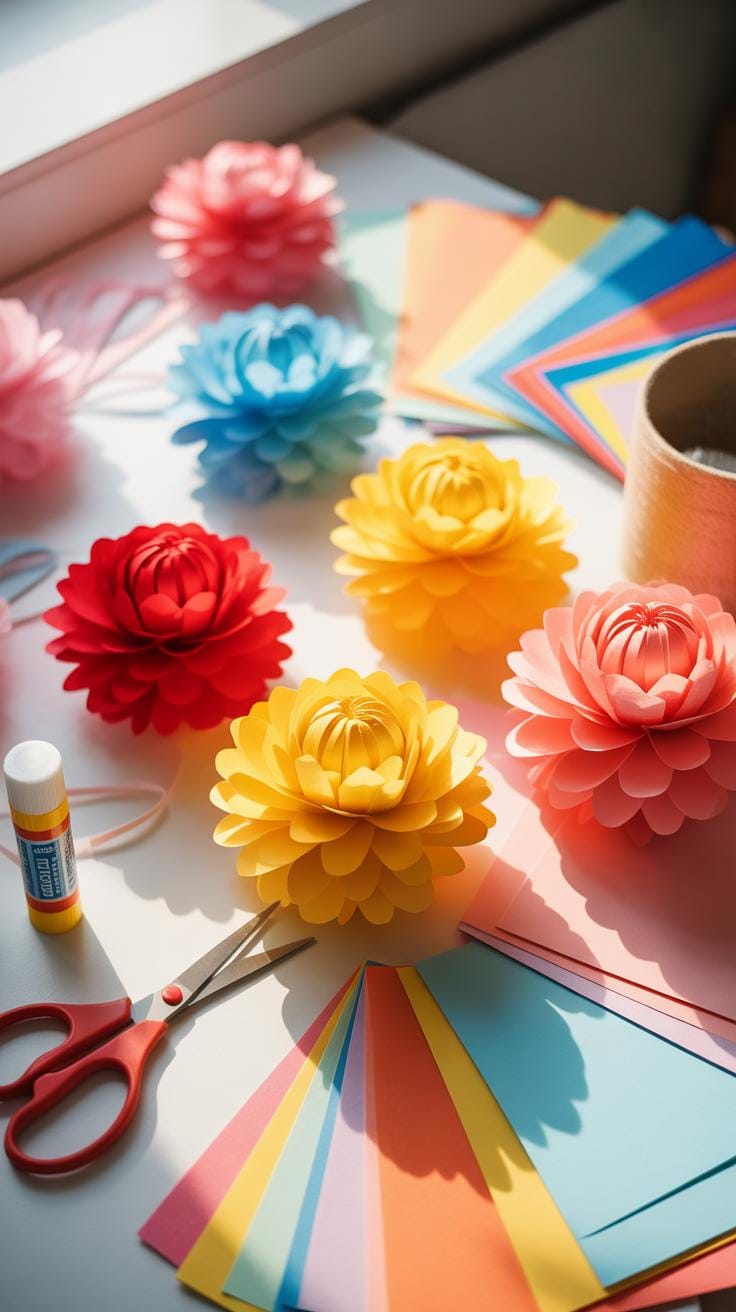
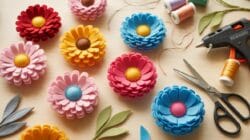
Essential Materials You Need To Start DIY Paper Flowers
Choosing The Right Paper Types For Diy Paper Flowers
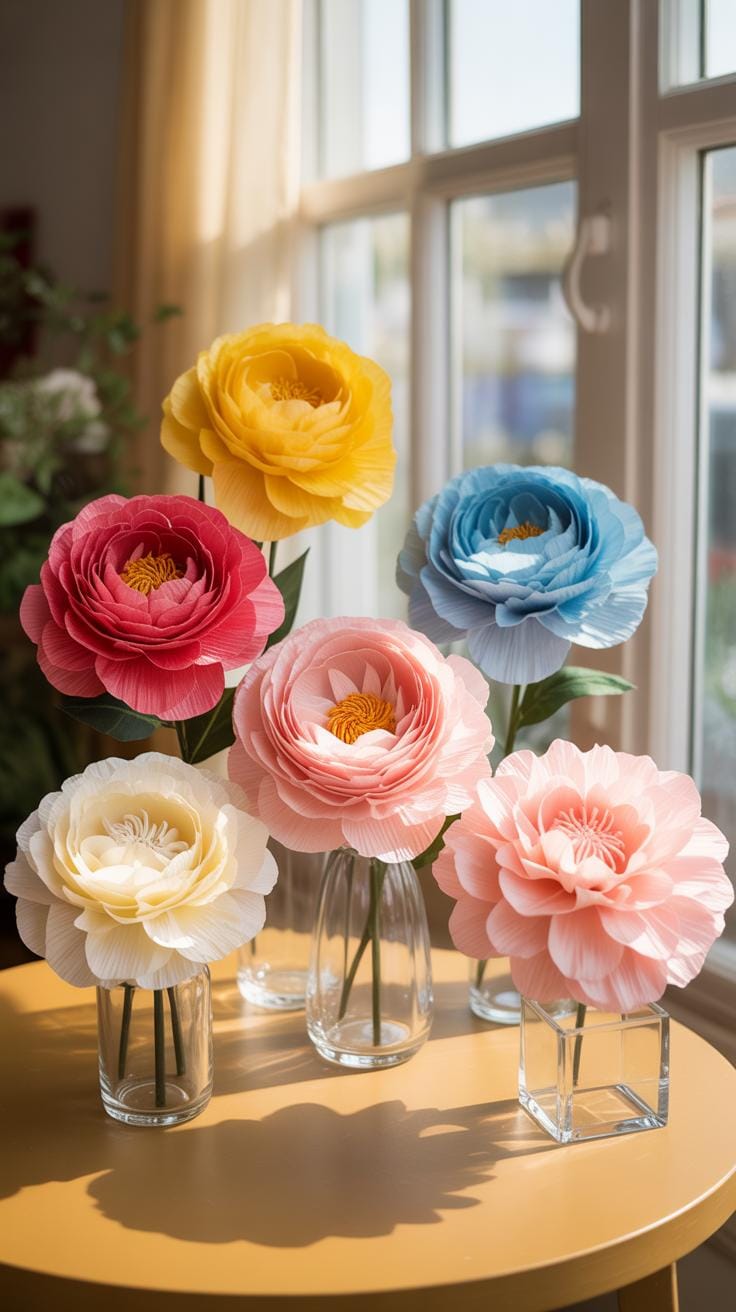
Crepe paper serves as the industry standard for realistic floral design. This paper underwent significant refinement during the Victorian era when floral decorations became popular social symbols. Heavyweight Italian crepe offers high elasticity for deep petal shaping. Lightweight fine crepe provides a delicate texture for smaller blooms. Choose based on the specific botanical structure you want to replicate.
Cardstock provides the rigid foundation required for large architectural flowers. Designers often use sixty-five pound to eighty pound cover stock for wall installations. This material holds a permanent crease when scored and folded correctly. Metallic and pearlescent finishes offer modern aesthetics for commercial displays. Match the weight of the paper to the size of the flower to prevent structural collapse.
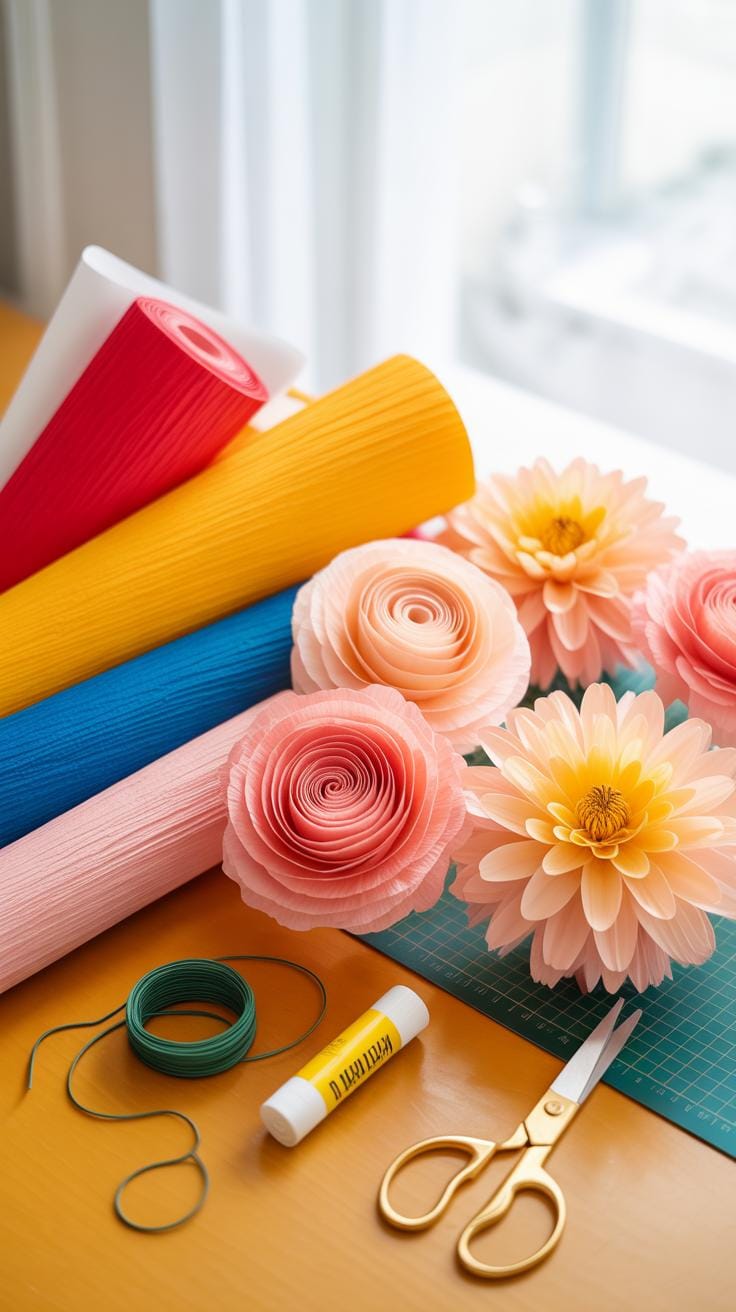
Must Have Tools And Supplies For Your Paper Flower Craft Projects
Precision cutting tools determine the final quality of your petal edges. Dull blades tear the fibers and ruin the organic look of the bloom. High-quality shears allow you to cut multiple layers of crepe paper at once. You also need shaping tools to manipulate the paper grain. Specialized wires provide the necessary internal skeleton for stems and heavy flower heads.
- Fabric Shears: Use high-carbon steel blades for clean cuts through thick crepe stacks. Dedicated paper scissors prevent dulling your fabric tools. Precision snips allow for intricate detail work on small flower centers and delicate stamen components.
- Hot Glue Gun: Select a dual-temperature model for maximum versatility. High heat creates a permanent bond for heavy cardstock petals. Low heat prevents melting thin crepe paper or burning your fingers during intricate assembly tasks.
- Floral Wire: Gauge size determines the strength and flexibility of your stems. Use eighteen-gauge wire for heavy blooms like peonies or roses. Choose thinner twenty-four-gauge wire for attaching leaves or creating delicate wildflower clusters.
- Floral Tape: This wax-coated ribbon seals the wire and binds components together. Stretch the tape as you wrap to activate its adhesive properties. It creates a smooth green surface that mimics a natural botanical stem.
- Bone Folder: This traditional bookbinding tool creates sharp creases in heavy cardstock. Use the curved edge to curl petals without tearing the paper fibers. It provides more control and consistency than using your fingers or a pencil.

Organization of your adhesive and shaping tools increases production speed. Keep a variety of glue types on hand for different materials. Liquid white glue works best for bonding delicate crepe to wire stems. Use scoring tools to prepare fold lines on thick paper before assembly. Proper tool maintenance ensures every cut remains sharp and every bond stays secure.
Beginner Friendly Flower Paper Craft Techniques To Try First
Simple Folding And Cutting Methods For Stunning Paper Blooms
Precision folding serves as the foundation for symmetric paper flowers. You must use clean creases to ensure the petals align correctly. The accordion fold technique creates immediate depth for pom-poms and carnations. Start with lightweight crepe or tissue paper. These materials respond best to multiple layers. Sharp shears are mandatory for clean edges. Dull blades tear the fibers and ruin the professional finish.
The fringe cut technique offers the fastest path to a realistic stamen or center. Slice thin parallel lines into a paper strip without cutting through the base. Roll this strip tightly to create density. For outer petals, use the template method. Trace uniform shapes onto cardstock and cut them out individually. This ensures consistency across the entire bloom. Repeatable patterns allow for faster production of large floral batches.
Each hand-folded petal captures a moment in time, preserving the fleeting beauty of a celebration long after the real blossoms have faded. Like memories, these paper flowers never wilt, keeping the soul of our most cherished days forever in bloom.
— Lia Griffith
How To Shape And Curl Petals For A Realistic Flower Paper Craft

Flat paper looks artificial and unprofessional. You must manipulate the paper fibers to create three-dimensional curves. Use a bone folder or the edge of a pair of scissors to break the internal tension of the paper. Grip the petal base and pull the tool across the surface with steady pressure. This mechanical action forces the paper to curl inward or outward based on your movement direction.
Cupping adds necessary volume to the flower head. Use a metal ball stylus and a foam mat for this step. Push the stylus into the center of a paper petal using circular motions. This stretches the paper into a bowl shape. Crepe paper requires a different approach called “ruffling.” Pull the edges of the paper apart gently with your thumbs. This creates a lifelike wavy texture found in real organic blooms.
Paper Flower Crafts As Creative Arts Activities For All Ages
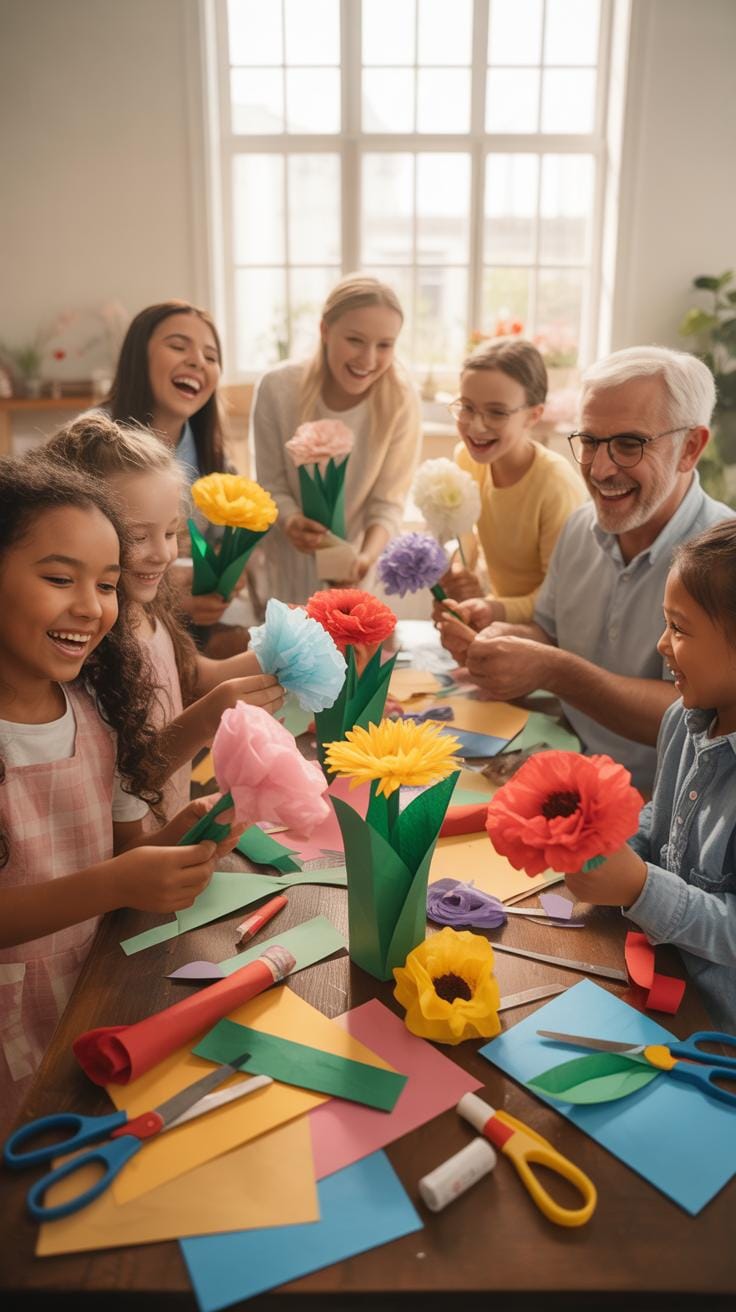
How Paper Flower Making Supports Creativity And Fine Motor Skills
Paper flower construction forces the brain to translate flat materials into three-dimensional objects. This process improves spatial awareness and geometric reasoning. Crafters must manipulate lightweight medium like crepe or tissue paper with precision. This constant handling builds finger dexterity and hand-eye coordination. It requires the mastery of tension and force to shape petals without tearing the fragile cellulose fibers found in the paper.
The activity serves as a gateway to color theory and botanical design. Replicating natural anatomy requires observation and deliberate decision-making. Users must select specific weights and grains of paper to achieve realistic curves. This focus on material properties encourages technical problem-solving. Consistent practice refines the small muscle movements needed for complex tasks. It turns basic hand movements into controlled, artistic expressions through repeated tactile engagement.
Adapting Creative Arts Activities To Suit Different Skill Levels

Beginners should start with heavy cardstock and simple templates. These materials offer more structural integrity and resist tearing during handling. Basic techniques include simple folding and gluing flat layers to create depth. Using pre-cut shapes removes the barrier of precision scissor work. This allows new crafters to focus on assembly and basic composition. Success at this stage builds the confidence needed for more difficult paper engineering.
Advanced crafters transition to crepe paper with high stretch ratios. This material allows for realistic cupping and curling using rounded tools or finger pressure. These experts use sculptural techniques like fluting and grain manipulation to mimic real botanical life. They also incorporate wire armatures and floral tape for structural support. Scaling difficulty involves increasing the number of parts and the fragility of the paper. Technical mastery requires patience and refined tool control.
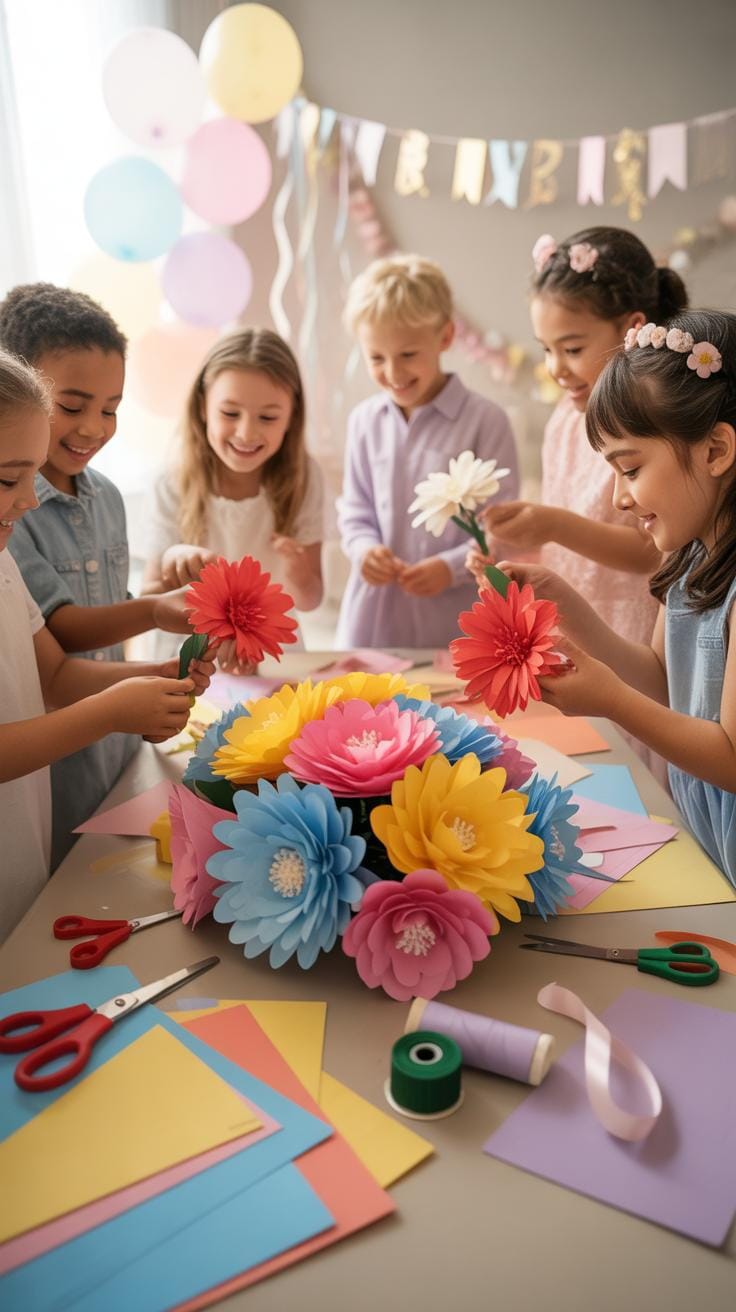
Exciting Children Activity Ideas Using Paper Flowers
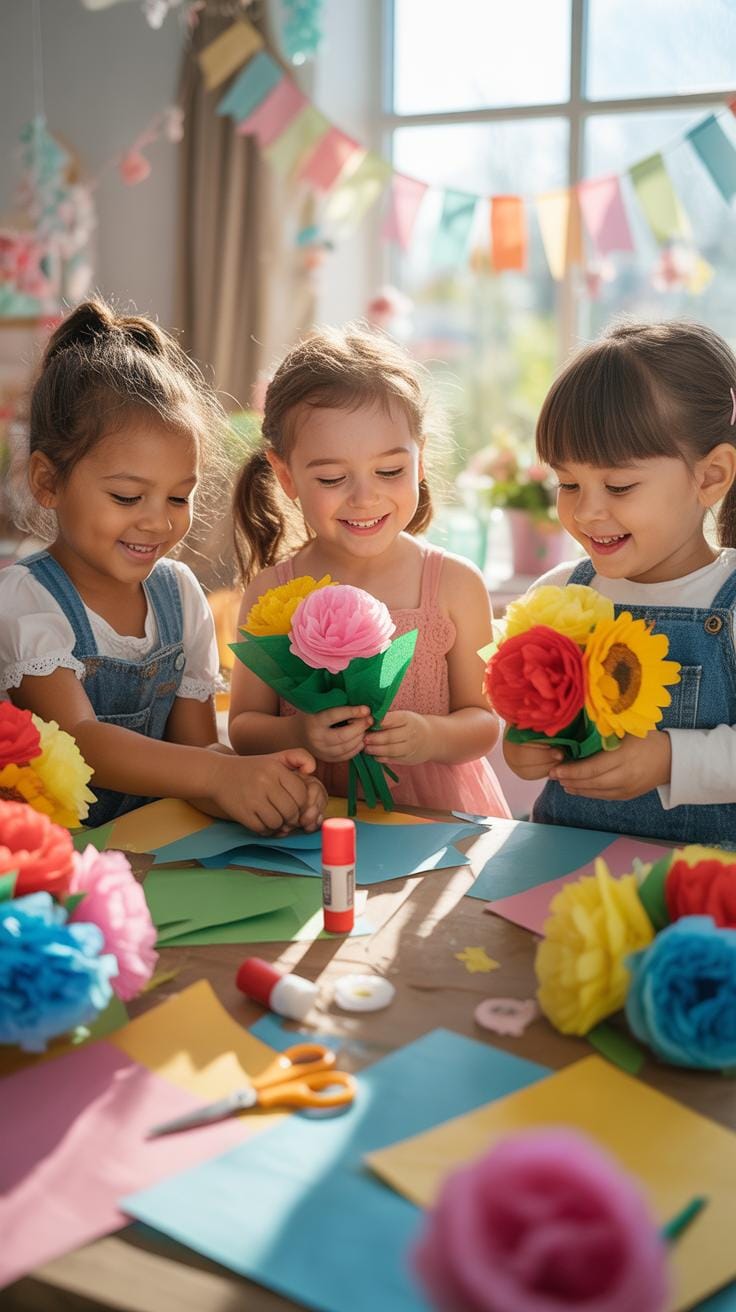
Themed Paper Flower Projects That Spark Imagination In Children
Themed projects focus child energy on specific goals. Fantasy garden themes allow kids to build oversized blossoms using butcher paper and cardboard tubes. Historical themes like Victorian floriography teach the language of flowers through simple construction. These projects require sturdy materials like 65-pound cardstock or heavy crepe paper. Using specific themes ensures children learn to recognize different shapes and petal patterns while they work.

Detailed craftsmanship develops fine motor skills through repetitive tasks. Children replicate nature by studying real botanical structures. This process grounds their creativity in reality. Use archival glue or double-sided tape for long-lasting results. These activities move beyond simple drawing and introduce three-dimensional spatial awareness. Strategic themes keep kids engaged by giving them a clear vision of the final product before they start cutting.
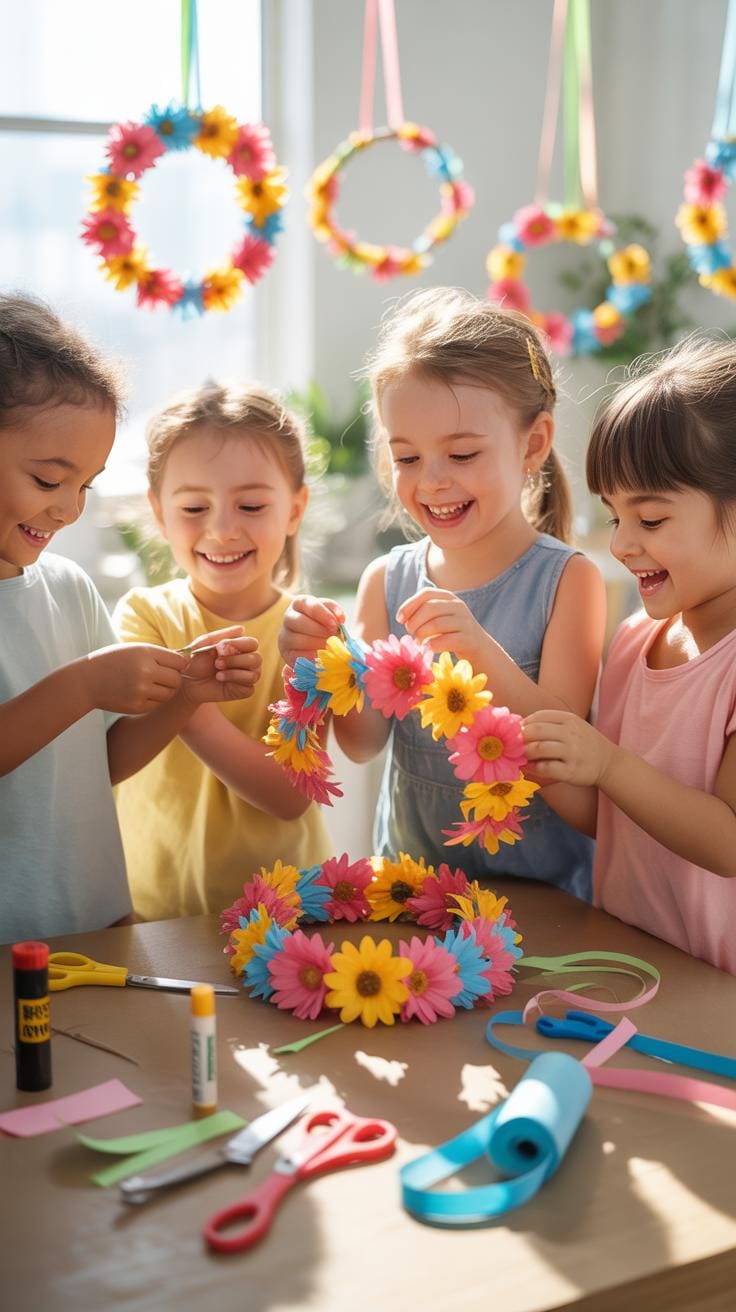
How To Structure Paper Flower Children Activity Ideas For Group Settings
Success in group settings depends on preparation and station management. Divide the workspace into specific zones for cutting, folding, and assembly. This prevents bottlenecking at the glue station. Provide pre-cut templates for younger children to maintain pace. Older children can handle measured folding tasks like origami or accordion pleating. Clear boundaries and specific roles reduce confusion and ensure every child completes their floral project within the timeframe.
Standardize tools to avoid conflict and maintain a safe environment. Use blunt-tip scissors and non-toxic adhesive sticks for all elementary age groups. Staff must demonstrate each step on a large scale before the children begin. Breaking the process into five-minute segments keeps the group synchronized. This structured approach ensures high quality output and minimizes material waste. Managed groups produce better results than unstructured free-play sessions during these technical craft activities.
Fun Kids Craft Activities With Paper Flowers For Birthdays And Parties
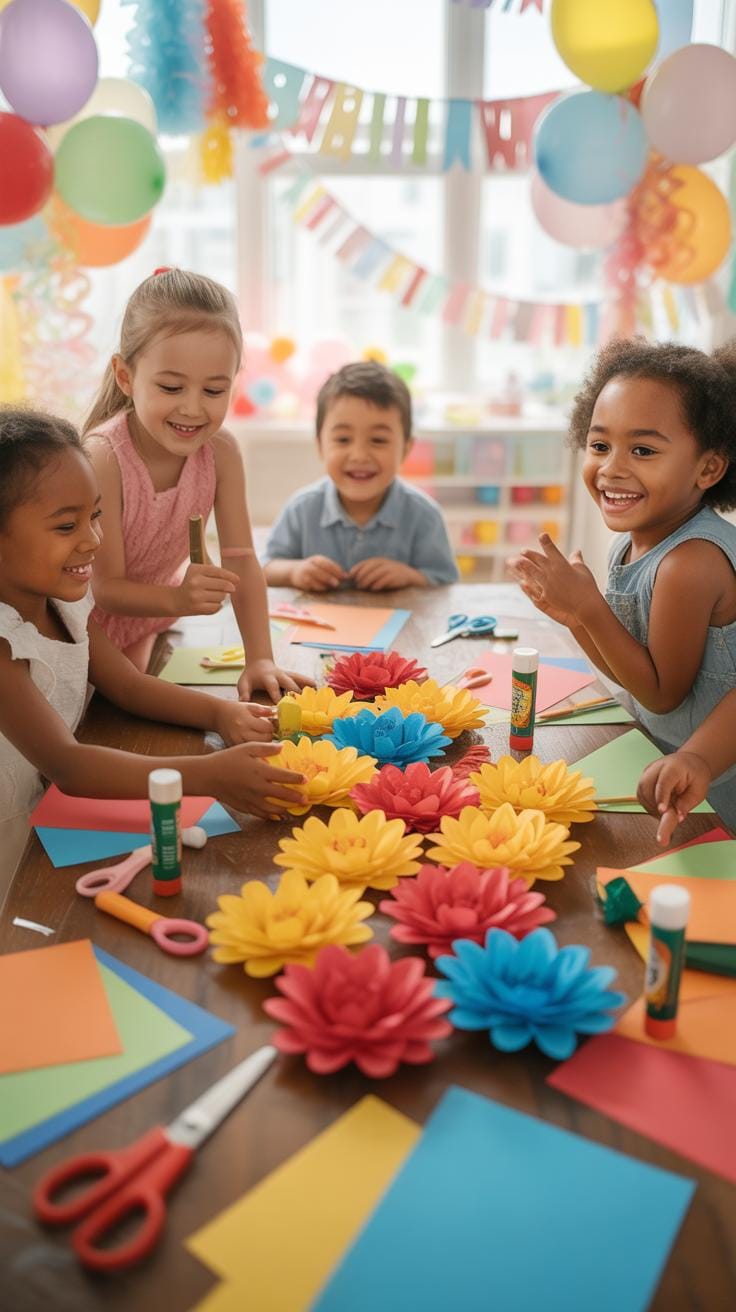
Creating Paper Flower Party Decorations With Kids Craft Activities

Kids can build large decorations using butcher paper and tempera paint. This method mirrors the scale of 1960s pop art installations. Children apply bright colors to wide sheets before cutting out oversized petal shapes. Adults assist by stapling these layers to a central cardboard disc. This creates durable wall art for party backdrops. It teaches children about basic geometry and structural integrity during assembly.
Construction paper serves as the primary material for tabletop centerpieces. Kids fold strips of paper into accordion pleats to mimic the petals of a dahlia. This technique develops fine motor skills and spatial awareness. Secure the folded units with pipe cleaners or white glue. These small sculptures stand upright when glued to heavy cardstock bases. Using different paper weights ensures the flowers remain upright throughout the event.
DIY Paper Flower Party Favors That Kids Can Make And Take Home
Pencil toppers represent a functional party favor that children can assemble quickly. Use precut felt or heavy cardstock circles to ensure the craft stays on schedule. Kids punch a hole through the center of three stacked layers. They slide the pencil through the opening to form the stem. This design allows the flower to stay in place without using messy liquid adhesives or hot glue.
Tissue paper lollipops provide a dual purpose as a treat and a craft. Children wrap layers of colorful tissue paper around the candy head. They secure the base with green floral tape to simulate a stem. This process introduces kids to the stretch and grip of adhesive tapes used in professional floristry. The final product is a portable item that guests take home after the celebration ends.
Kid Craft Ideas Paper Flowers For Holidays And Seasonal Celebrations
Seasonal Paper Flower Kid Craft Ideas For Spring, Summer And Beyond
Spring crafts focus on renewal and specific botanical accuracy. Use light weight crepe paper to mimic thin petals found in tulips and daffodils. These flowers require simple structural stems made from wire or pipe cleaners. Teaching children to layer paper circles creates depth without complex tools. This process builds fine motor skills. It also teaches the basic anatomy of common garden blooms found during the spring months.
Summer projects transition to bright colors and heat resistant materials. Use heavy construction paper or cardstock for outdoor displays. These materials hold their shape in humidity. Kids can create large sunflowers using yellow paper strips and brown textured centers. Focus on physical scale during this season. Large petals allow children to practice cutting straight lines. These durable designs survive longer when used as decorations for summer events and gatherings.
How To Use Holiday Themes To Inspire Paper Flower Kid Craft Projects
Holidays provide rigid color palettes and specific flower associations. Use red and white paper for winter celebrations like Christmas or Valentine Day. Poinsettias require pointed red leaves arranged in star patterns. Kids use glue sticks and safety scissors to assemble these layers. Incorporating holiday themes gives the craft a clear purpose. It connects the action of making to a specific cultural or family tradition held during the year.
The Victorian era influenced many modern holiday flower traditions. Use paper doilies to replicate lace textures from the nineteenth century. This technique works well for Mother Day or vintage theme projects. Children can learn the history of the language of flowers through these crafts. Matching specific colors to meanings adds an educational layer to the work. This makes the final product more than just a simple desk decoration.
Easy Kid Craft Paper Flower Projects For Weddings And Graduations
How Children Can Contribute Kid Craft Paper Flowers To Wedding DéCor
Children can build high volumes of simple accordion folds for wedding aisle markers. This method uses long strips of lightweight paper folded back and forth. Secure the center with a pipe cleaner to create a burst effect. These units serve as durable accents for outdoor ceremonies where real petals might wilt. Kids handle the repetitive folding while adults manage the final assembly and placement.
Large scale tissue paper pom-poms offer another entry point for young crafters. These flowers provide significant visual impact for reception ceilings and photo backdrops. Use Rounded petal cuts to mimic peonies or pointed cuts for a dahlia look. This work keeps children involved in the preparation phase without requiring sharp tools or hot glue. Finished pieces withstand handling better than delicate silk or fresh floral arrangements.
Graduation Bouquets And Centerpieces Made From Paper Flowers
Graduation bouquets require sturdy construction to survive ceremony crowds. Use the spiral cut method on heavy cardstock to create tight rosettes. Children can trace circles and cut the wavy lines to form the flower body. These paper blooms do not require water and remain intact throughout the entire event. Attach the flowers to wire stems wrapped in green floral tape for a professional and stable finish.
Table centerpieces for graduation parties benefit from incorporating school colors and custom elements. Kids can assemble flat petal flowers using pre-cut templates to save time. Layer three different sizes of paper to create depth and dimension. Use a brass fastener in the center to hold the layers together securely. Place these finished flowers in weighted glass jars or wooden crates to ensure they stay upright during the celebration.
Crafts To Do With Kids Building Paper Flower Wreaths And Garlands
Step By Step Guide To Making A Paper Flower Wreath As Crafts To Do With Kids
Creating a paper flower wreath focuses on motor skill development and color theory. Start with a sturdy cardboard base cut into a ring shape. Kids use pre-cut templates to minimize frustration and ensure uniform results. Use non-toxic glue sticks for assembly to maintain a safe working environment. Select heavy cardstock or construction paper to ensure the final product maintains its structural integrity over time.
- Base Preparation: Cut a circular ring from recycled corrugated cardboard or heavy cardstock. This provides the necessary tension to support the weight of multiple paper layers and decorative elements without sagging or tearing during the assembly process.
- Petal Construction: Secure five or six teardrop-shaped paper cutouts together at the base using a small dab of glue. Children can layer different colors to create visual depth. This step builds fine motor control and teaches basic geometric layering techniques.
- Center Details: Roll a thin strip of yellow or black paper into a tight coil to represent the flower stamen. Glue this center piece firmly into the middle of the petal arrangement. This adds a realistic focal point to each individual bloom.
- Attachment Phase: Apply a generous amount of liquid glue to the back of each completed flower. Press the bloom firmly onto the cardboard ring. Hold each piece for ten seconds to ensure a permanent bond before moving to the next section.
- Leaf Integration: Cut simple leaf shapes from green paper and tuck them under the edges of the flowers. These accents hide any visible gaps on the cardboard base. This finishing touch creates a full and professional appearance for the completed wreath.
Organization is critical when working with children on complex paper flower crafts. Sort all materials by shape and color before starting the project. This prevents confusion and keeps the workflow efficient. Encourage kids to overlap the flowers to hide the cardboard ring completely. A finished wreath serves as a durable piece of home decor or a personalized gift for family members during holiday seasons.
How Paper Flower Garlands Can Elevate Any Special Occasion Setting
Garlands transform flat walls into three-dimensional displays for birthdays or weddings. Designers use continuous twine or ribbon to link individual blooms into a linear format. This technique allows for vertical or horizontal installation depending on the venue layout. Paper garlands offer a cost-effective alternative to fresh greenery. They do not wilt and require zero maintenance during long events or multi-day celebrations.
Material selection determines the final aesthetic of the garland. Crepe paper provides a realistic texture and mimics the appearance of natural flora found in the Art Nouveau period. Cardstock offers a more modern and structural look suitable for corporate events or minimalist parties. Stringing the flowers at varied intervals creates a natural rhythm. This strategic placement draws the eye across the room and emphasizes the architectural features of the space.
Displaying And Preserving Your Paper Flower Craft Creations
Creative Ways To Display Paper Flower Arrangements At Special Events
Strategic placement maximizes the visual impact of paper flower crafts at events. Use vertical space by constructing flower walls or backdrops. These structures provide a focal point for photography. Attach individual blooms to large foam boards or wire mesh frames. Secure stems with heavy duty hot glue or floral wire. This method ensures the display remains stable throughout the duration of the event.
Centerpieces require different structural support than wall displays. Use weighted glass vases or ceramic pots to prevent tipping. Fill containers with dry floral foam to lock stems in place. For a modern look, mimic the Ikebana style by using pin frogs. This technique highlights the structural form of individual paper blooms. Proper spacing between flowers prevents the arrangement from looking cluttered and hides the internal support materials.
How To Store And Preserve Paper Flower Crafts So They Last For Years
Environment control is the primary factor in paper flower longevity. Sunlight causes rapid UV degradation and fades dye-based pigments. Store your creations in a cool and dry location. High humidity softens paper fibers and weakens structural adhesive bonds. Use archival quality boxes to prevent acid migration from the storage container to the flowers. Acid-free tissue paper provides necessary cushioning between delicate layers.
Maintenance requires a gentle touch to remove accumulated dust. Use a soft makeup brush or a pressurized air canister held at a distance. Never use water or liquid cleaners on paper crafts. To maintain the shape of heavy petals, use internal wire supports made of galvanized steel. If flowers lose their form, brief exposure to controlled steam can make fibers pliable for reshaping. Ensure the paper dries completely before returning to storage.
Frequently Asked Questions

What are the best types of paper for beginners starting with paper flower crafts?
If you are new to paper flower crafts, lightweight cardstock and crepe paper are the best materials to start with. Cardstock offers great structural integrity for larger petals, while crepe paper is incredibly forgiving due to its stretch and texture. Beginners should look for 65lb cardstock, which is easy to cut by hand or with a machine, ensuring your first floral project looks professional and vibrant.
How can I make my DIY paper flowers look more realistic for a special event?
To achieve a lifelike appearance, focus on adding dimension through shaping and shading. Use a bone folder or a pencil to curl the edges of your petals, mimicking the natural curves of real blooms. Incorporating ink or soft pastels to the edges of your paper flower crafts adds a beautiful gradient effect. High-quality floral tape and wire stems also provide the realistic movement needed for stunning event centerpieces.
Are paper flower crafts an affordable alternative to fresh flowers for weddings?
Absolutely! One of the biggest advantages of paper flower crafts is their cost-effectiveness. While fresh bouquets can cost hundreds of dollars and wilt quickly, paper versions are made from inexpensive materials like tissue or construction paper. Not only do they save you a significant amount on your decor budget, but they also serve as lasting keepsakes that guests can take home long after the celebration has ended.


