
What Are Pressed Flower Bookmarks And Why Are They So Popular As A Flower Bookmark
The History And Art Of Pressing Flowers For Decorative Use
Botanists originally pressed plants for scientific study. This practice dates back to the sixteenth century. Scholars dried specimens between paper to preserve their structural details. This method allowed researchers to document plant species across different regions. It created a permanent record for medical and biological advancement. The technique eventually shifted from purely clinical use into the realm of decorative art and domestic crafts.
The Victorian era turned flower pressing into a widespread social trend. People in the nineteenth century used pressed flora to decorate stationery and scrapbooks. This period saw the rise of the language of flowers. Individuals communicated specific emotions through their choice of plants. Pressing these items allowed them to keep those messages indefinitely. Modern pressing uses these same basic principles of pressure and moisture removal to create thin decorations.
Why Pressed Flower Bookmarks Have Become A Beloved Keepsake And Gift
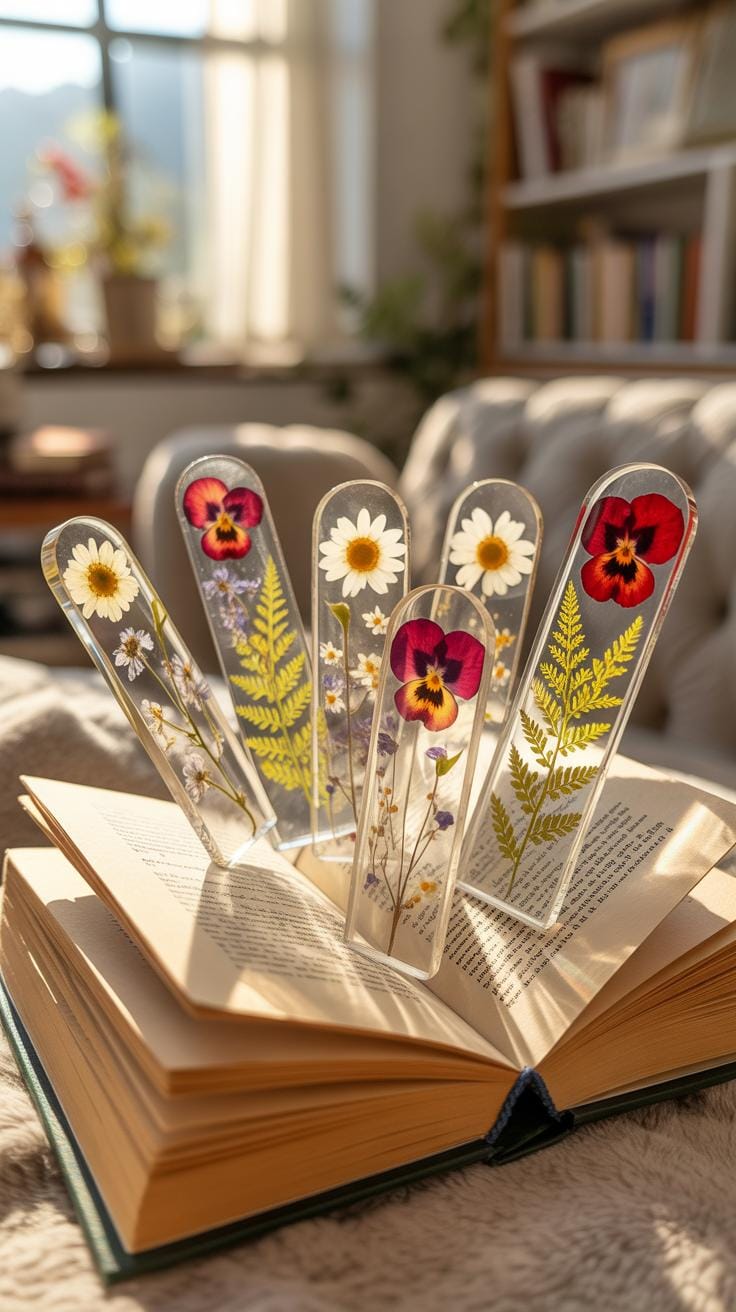
Pressed flower bookmarks function as functional art. They solve the problem of losing place in a book while protecting the pages from damage. Users value these items because they use real organic material instead of synthetic prints. The slim profile of a pressed flower fits perfectly between paper. It does not strain the book binding. This makes them more practical than bulky plastic or metal alternatives for many readers.
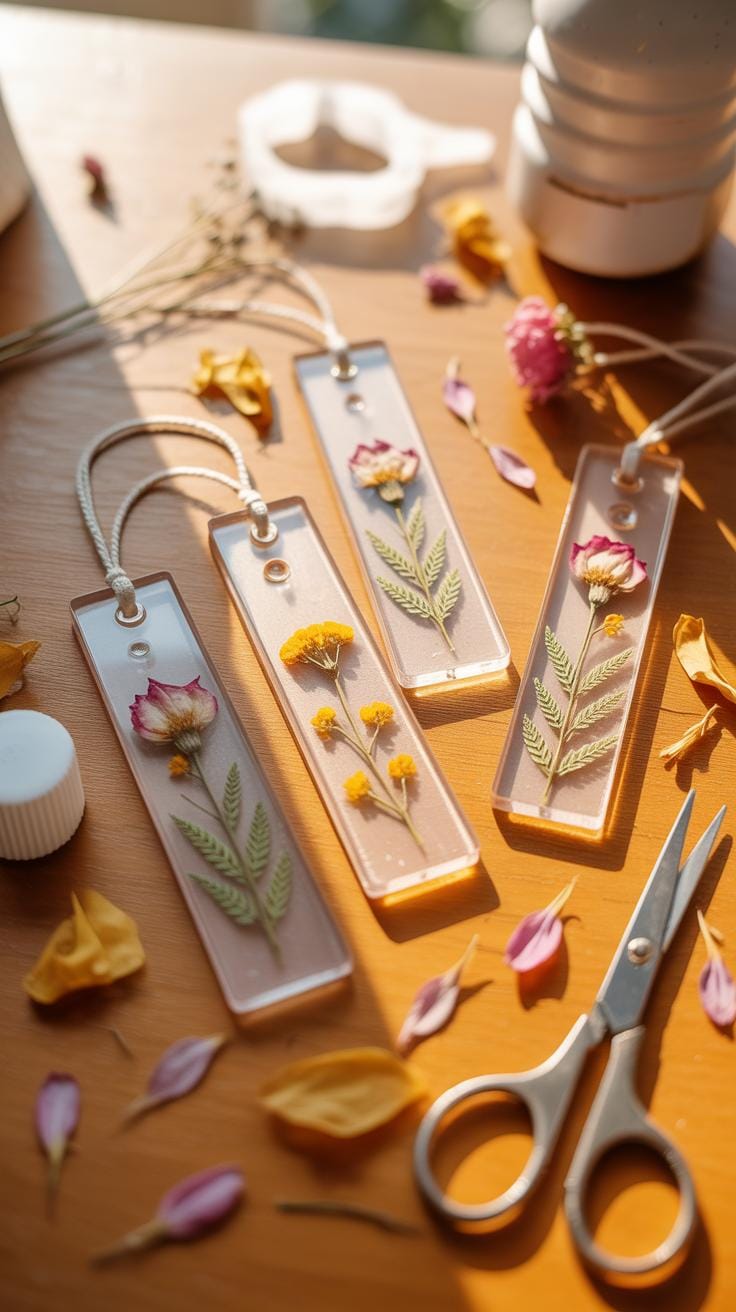
These items serve as high value gifts due to their tangible connection to nature. Each bookmark is unique because no two flowers are identical. This inherent variety makes them feel personal without requiring expensive customization. Modern makers often laminate these flowers or seal them in resin for durability. These methods preserve the color and form for years. They remain popular because they combine utility with a genuine historical craft.
Essential Materials You Need To Get Started With Diy Bookmarks

Choosing The Right Paper, Card Stock, And Laminating Supplies For Your Bookmark Base
Select a high-quality card stock between 80lb and 110lb weight. This thickness provides the structural integrity needed to support organic material without bending. Acid-free paper prevents yellowing over time and protects the chemical composition of the pressed petals. Avoid shiny or coated papers during the initial gluing phase. Porous surfaces allow adhesives to bond effectively and keep the botanical specimens in place permanently.
Lamination serves as the final protective barrier against moisture and friction. Use cold-press laminating sheets or thermal pouches for a professional finish. Cold lamination is safer for delicate or heat-sensitive flora that might discolor under high temperatures. If you prefer a natural aesthetic, use heavy vellum overlays. Vellum offers a translucent look that mimics historical botanical manuscripts while securing the dried elements against the base card.
The Must Have Tools And Adhesives For Assembling Your Diy Bookmarks
Precision assembly requires specific tools to handle fragile botanical tissue without causing tears. Tweezers are mandatory for placing small petals and stamens accurately on the card stock. You must use a pH-neutral adhesive to ensure the longevity of the plant pigments. Traditional white glues work well if applied sparingly with a fine-tip brush. This prevents moisture from warping the paper or saturating the dried fibers.
- Fine-Tipped Tweezers: Use stainless steel tweezers to move delicate specimens. They prevent natural oils from your fingers from touching the dried petals. This keeps the flowers clean and reduces the risk of accidental breakage during the layout process.
- Neutral pH Adhesive: Choose a high-quality bookbinding glue or specialized floral adhesive. This prevents the acid from eating away at the plant material over time. It ensures the bookmark remains intact for decades without the glue turning brown or brittle.
- Small Detail Brush: A synthetic brush allows for controlled glue application. Apply small dots of adhesive to the sturdiest parts of the flower. This method avoids visible glue seepage and maintains the clean visual lines of your final bookmark design.
- Precision Scissors: Small embroidery or decoupage scissors are necessary for trimming stems and leaves. Sharp blades ensure clean cuts without crushing the cellular structure of the dried plant. This level of detail separates amateur crafts from professional-grade botanical art.
- Bone Folder: This tool helps create crisp edges and removes air bubbles during the lamination process. Pressing the tool firmly across the surface ensures a tight seal between the paper and the plastic. It provides a flat, professional finish to the completed work.

Proper workspace preparation speeds up the assembly process and reduces waste. Keep a clean, dry surface free of dust and debris that could get trapped under the laminate. Use a self-healing cutting mat to protect your surfaces and provide a grid for measuring consistent bookmark dimensions. Organize your pressed flowers by color and size before applying any glue. Preparation ensures you work efficiently once the adhesive is active.
How To Select And Press Flowers For Your Pressed Flower Bookmark Craft
Best Flower Varieties To Use For A Pressed Flower Bookmark Craft
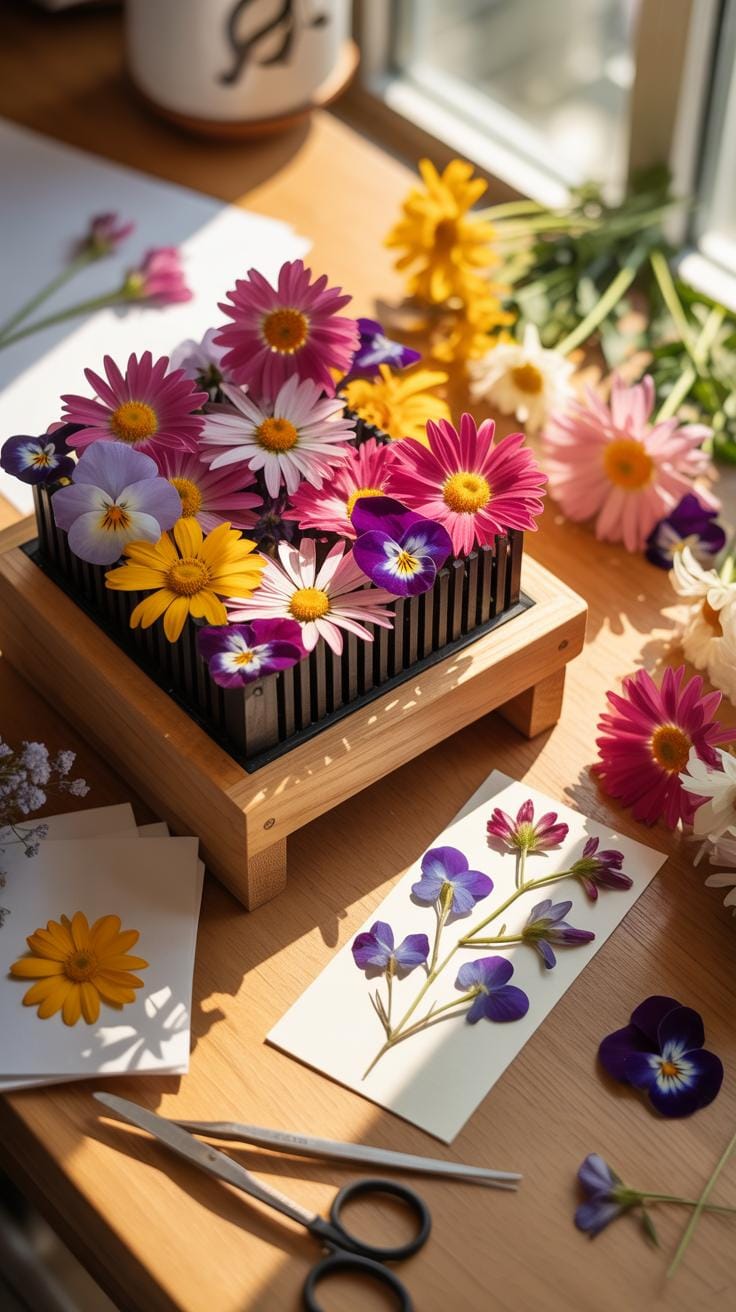
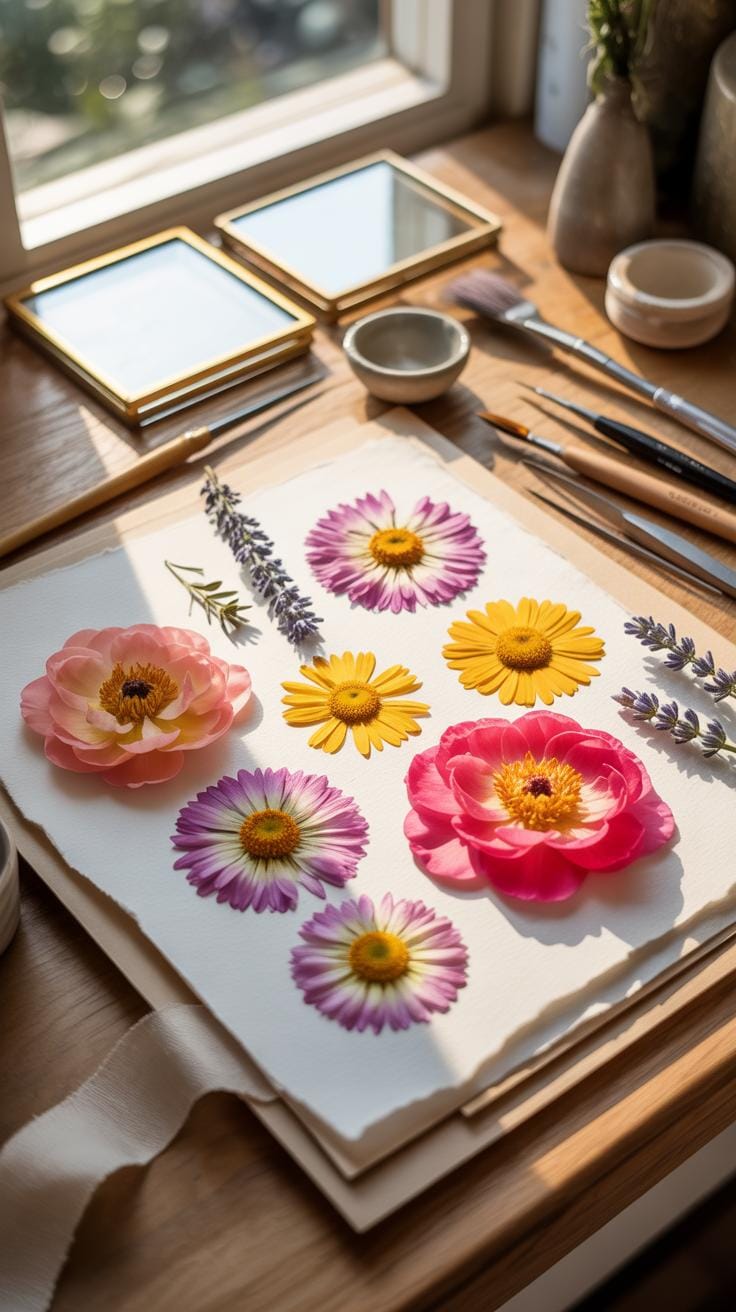
Select flowers with naturally flat profiles to ensure the bookmark remains thin. Thick centers or bulky stems create uneven pressure during the drying process. This leads to mold or trapped moisture. Choose species like pansies, violas, and cosmos. These varieties contain less water and maintain their structural integrity when flattened. Pick blooms at their peak color before they start to wilt or turn brown.
Avoid succulents or large lilies because they hold too much liquid. Moisture ruins the paper and causes the petals to rot. Stick to delicate greens like ferns and Queen Annes lace for texture. These plants dry quickly and keep their green pigment well. Always harvest in the morning after the dew evaporates but before the sun gets too hot. Dry petals produce the best results for lamination.
Flowers are a proud assertion that a ray of beauty outvalues all the utilities of the world. Preserving them between pages ensures that even in winter, our hearts may keep their gardens.
— Ralph Waldo Emerson
Step By Step Methods For Pressing Flowers Using A Book Or Flower Press

Position your specimens between two sheets of absorbent parchment paper or plain blotting paper. Do not use paper towels with textures as they leave imprints on the petals. Place the paper inside a heavy book or a wooden flower press. Distribute the flowers so they do not touch each other. This prevents sticking and allows air to circulate. Tighten the press straps or add extra weight on top.
Leave the flowers undisturbed for at least two to three weeks. Removing them too early results in curling or rehydration. Check for a paper-like texture to confirm they are ready. Use tweezers to handle the dried blooms to prevent oils from your skin from damaging them. Store the pressed items in a cool and dark place until you are ready to glue them. Proper drying ensures the bookmark stays flat.
A BeginnerS Step By Step Tutorial For A Diy Floral Bookmark Craft
Preparing And Arranging Your Pressed Flowers On The Bookmark Base
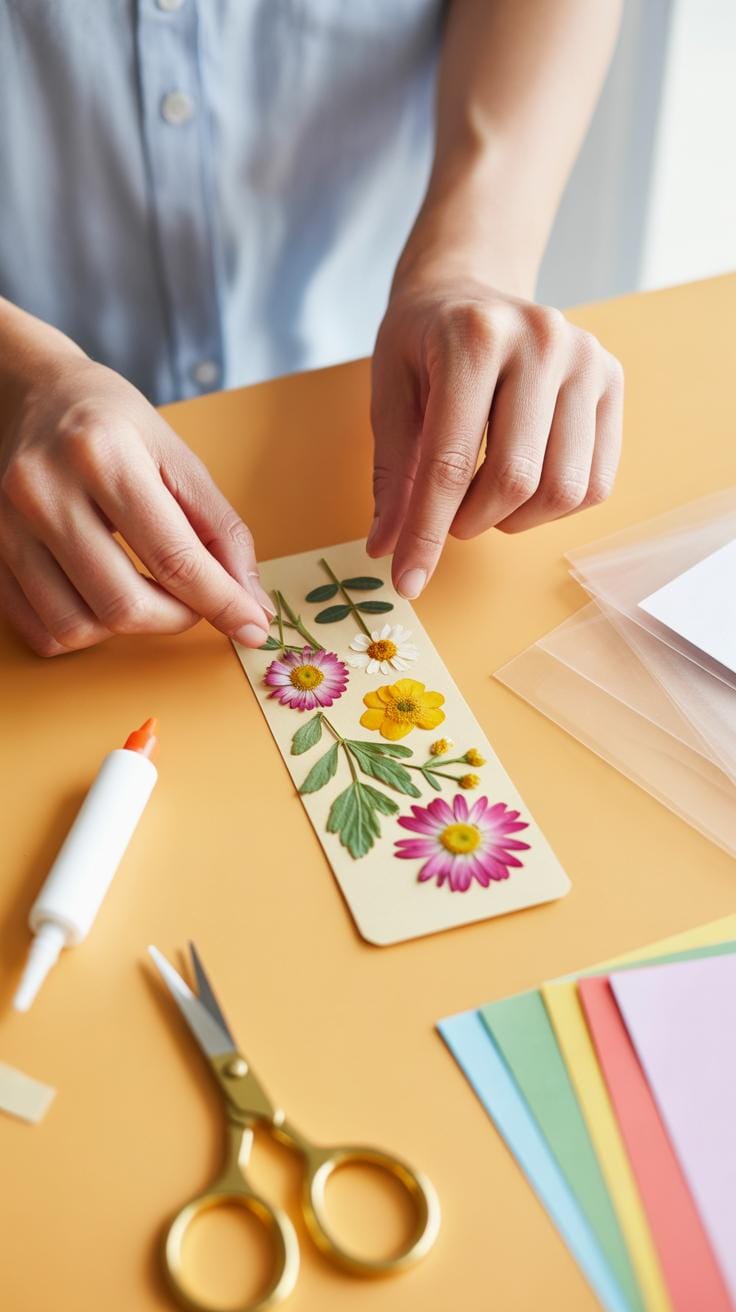
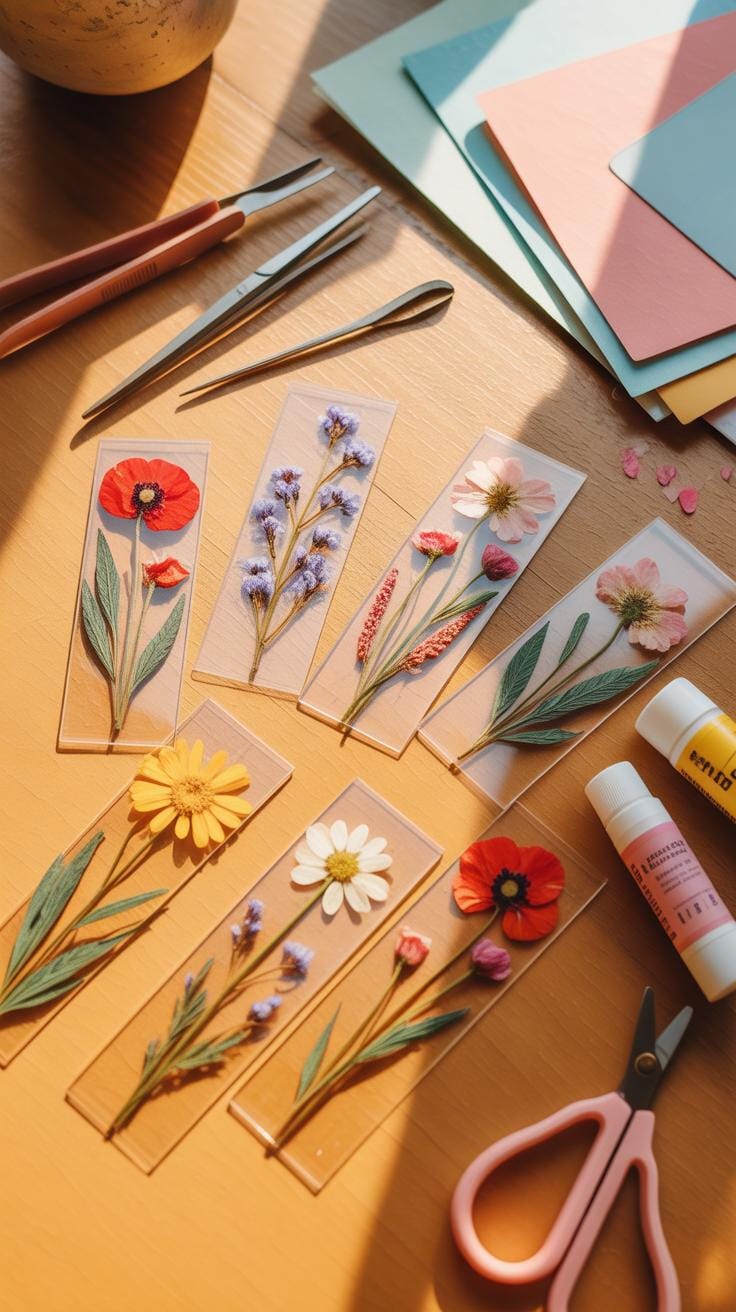
Select a heavy cardstock or specialized parchment for your base. This material must support the weight of the flora without sagging. Use tweezers to handle the delicate specimens. Oils from your skin damage the dried plant tissue over time. Place your largest focal elements first to establish a visual anchor. Arrange smaller filler pieces around these points to create a balanced composition.
Apply tiny dots of clear acid-free adhesive to the back of each bloom. Too much glue will saturate the paper and cause unsightly warping. Work from the bottom layer upward to maintain depth. Ensure all edges lay flat against the surface. Avoid overlapping thick stems which create bulk. A flat profile prevents the bookmark from damaging book spines during use once the project is complete.
Sealing And Finishing Your Diy Floral Bookmark Craft For A Professional Look

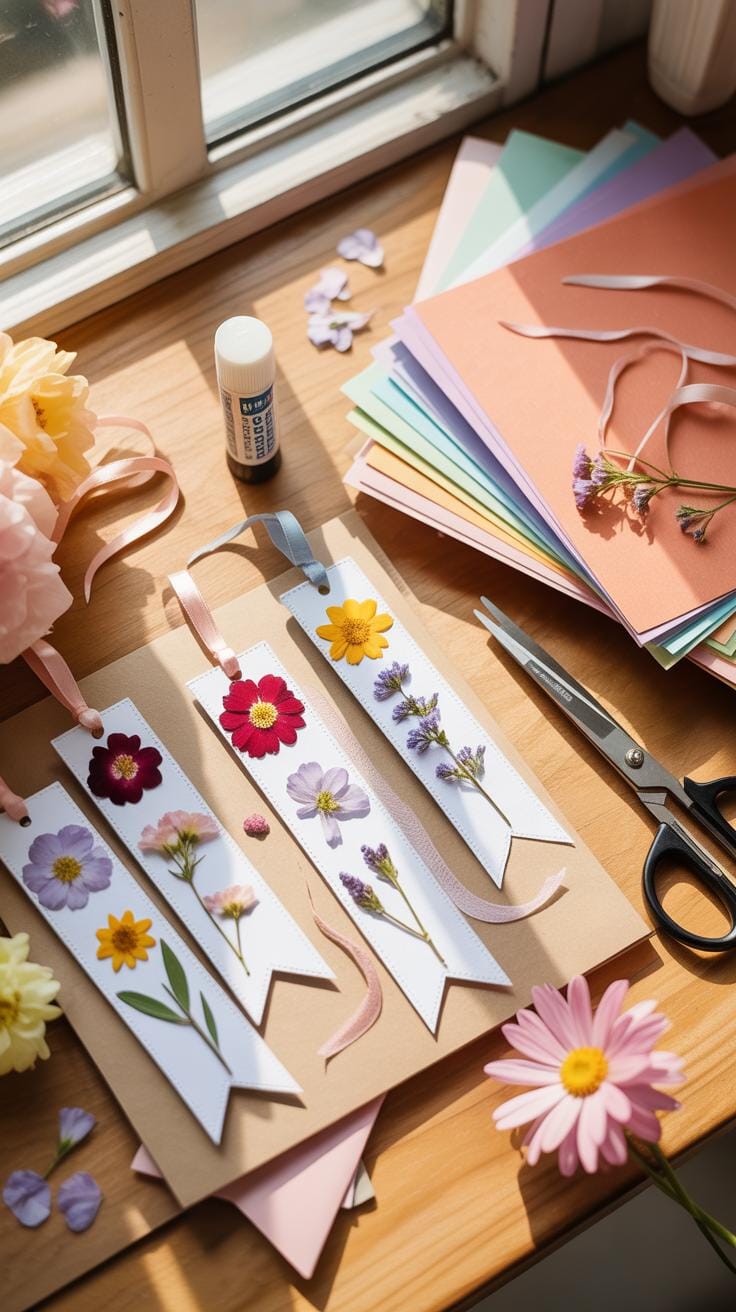
Protect your design with a cold-press lamination sheet or clear adhesive film. This step prevents oxygen from fading the organic pigments. Align the film carefully to avoid trapped air bubbles. Press from the center outward using a flat edge tool. This technique mimics the Victorian practice of preserving herbarium specimens under glass. A tight seal ensures the longevity of your botanical work.
Trim the excess laminate with a rotary cutter or sharp shears for clean edges. Leave a small border of plastic to maintain the airtight seal. Punch a single hole at the top center for a tassel. Use silk or cotton cord to match the natural aesthetic. These materials resist fraying and add a functional grip. Your finished product now offers a durable and professional tribute to classical botany.
Exploring Creative Design Ideas Within The World Of Pressed Flower Crafts
Using Color Theory And Flower Combinations To Create Visually Stunning Bookmarks
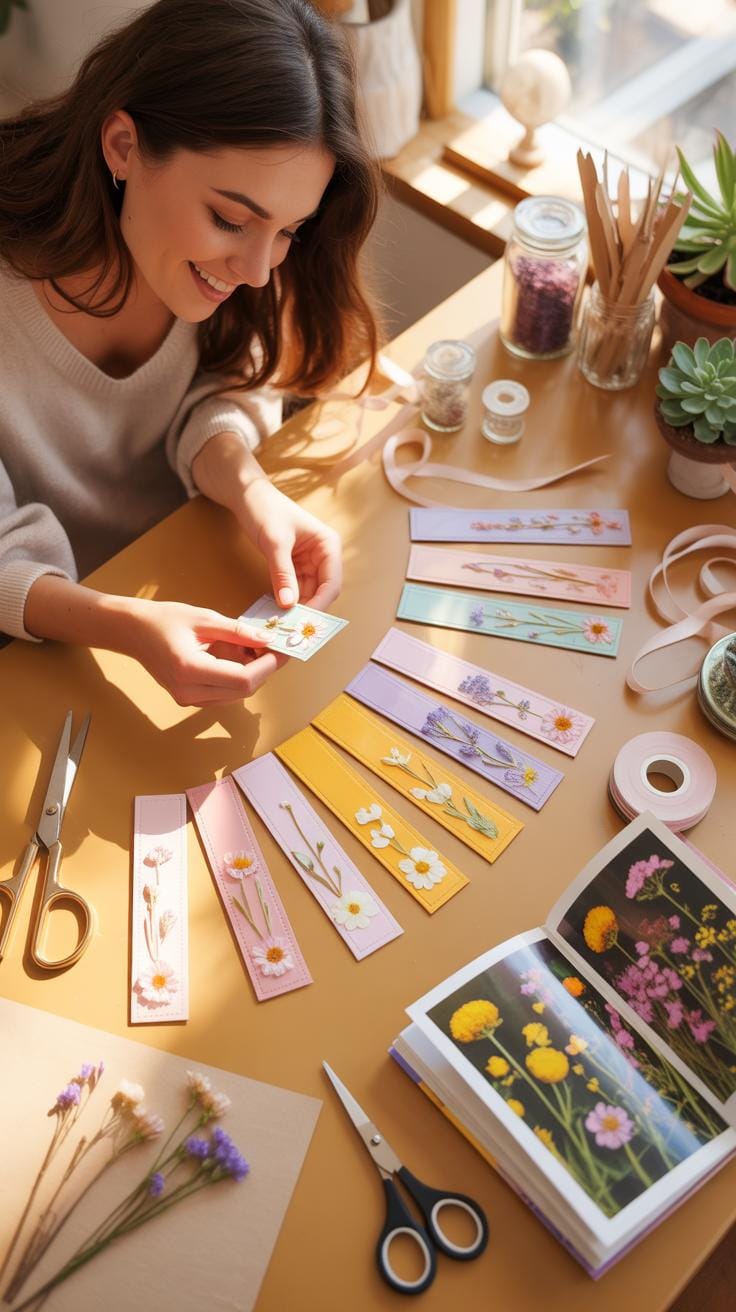
Effective bookmark design relies on the color wheel to guide the eye. Use complementary colors like purple violets and yellow primroses to create high contrast. This makes the bookmark pop against white paper. Analogous schemes use colors next to each other like red, orange, and yellow. These combinations feel harmonious and natural. Always consider how colors change during the drying process before finalizing your layout.

Light fastness varies between species. Blue and purple flowers often retain pigment better than reds or whites. Use dark backgrounds to make pale petals visible. Use light backgrounds for deep hues. Monochromatic designs use different shades of one color for a sophisticated look. Strategic color placement ensures the bookmark remains readable and attractive. Avoid overcrowding the space to maintain a clean and professional aesthetic for the user.
Incorporating Leaves, Ferns, And Other Botanicals Into Your Pressed Flower Crafts
Botanicals provide the necessary structural framework for floral arrangements. Ferns offer intricate geometric patterns that fill negative space without adding bulk. Their flat profile makes them ideal for thin lamination or clear sleeves. Use silver dusty miller or eucalyptus for muted tones. These elements act as anchors for brighter blooms. They add depth and a sense of scale to the narrow vertical format of a bookmark.
Historically, Victorian pressings focused on botanical accuracy and variety. Modern crafters use these green elements to frame delicate petals. Stems create leading lines that guide the viewer through the design. Grasses add verticality and movement to the composition. Choose specimens with low moisture content for faster drying times. Proper botanical selection prevents mold and ensures the bookmark stays flat. Structural variety creates a professional and balanced final product.
Advanced Techniques To Elevate Your Pressed Flower Bookmark Diy Projects
Using Resin Coating And UV Lamination To Preserve And Protect Your Pressed Flower Bookmark Diy

Resin coating offers the most durable protection for organic materials. Use a high-quality epoxy resin or UV resin to seal the flora. This process prevents oxygen from reaching the petals. It stops the oxidative browning that destroys plant pigments over time. Apply the resin in thin layers to avoid bubbles. Use a heat gun or torch to pop surface air pockets immediately.
UV lamination provides a faster alternative for mass production. Standard thermal lamination often fails because the heat damages delicate tissues. Seek out UV-resistant films to block solar radiation. Sunlight fades natural colors rapidly. These films act as a shield against ultraviolet rays. This method keeps the bookmark flexible while maintaining a professional finish. It ensures the item lasts through years of heavy book use.
Adding Calligraphy, Ribbon Tassels, And Embellishments For A Unique Finishing Touch
Professional markers and inks must be archival grade. Acid-free ink prevents yellowing and bleeding into the paper or resin. Apply calligraphy directly to the base cardstock before placing the flowers. Use a light box to ensure straight lines and consistent spacing. Historical scripts like Copperplate or Uncial add a classical aesthetic. This elevates the bookmark from a simple craft to a high-end gift.
Texture improves the tactile experience of the bookmark. Punch a clean hole at the top using a metal eyelet tool. This prevents the material from tearing under stress. Thread silk or grosgrain ribbons through the eyelet. Secure the ends to prevent fraying. Metal charms or wooden beads add weight and luxury. These small details signal quality to the user. They turn a functional tool into a keepsake.
Tips And Tricks For Making Perfect Diy Flower Bookmarks Every Time
Common Mistakes To Avoid When Crafting Diy Flower Bookmarks
Overlapping thick plant parts creates uneven pressure during the pressing stage. This mistake traps moisture in the center of the bloom. Trapped water leads to mold growth and total decay of the organic material. You must thin the back of heavy flowers with a blade before pressing. Ensuring consistent contact with the paper prevents localized rotting and ensures a flat surface for lamination.
Using low quality adhesives causes permanent staining on delicate petals. Many standard glues contain high acid levels that eat through plant cellulose over time. This chemical reaction turns vibrant petals into transparent or brown spots. Select acid free pH neutral adhesives designed for archival use. Apply the glue sparingly using a fine tipped brush to prevent seepage beyond the margins of the dried flower.
Pro Tips For Keeping Colors Vibrant And Preventing Your Pressed Flowers From Browning
Color retention depends on the speed of moisture removal and protection from ultraviolet light. Rapid drying locks in pigments before oxidation occurs. Once dried, flowers remain sensitive to environmental factors. Exposure to direct sunlight breaks down chemical bonds in the petals, leading to fading. Using a protective barrier helps maintain the original hue against oxygen and light damage during daily bookmark use.
- Pre-treat with Silica: Submerge fresh flowers in fine silica gel for twenty four hours before traditional pressing. This method pulls moisture out faster than paper alone. Rapid dehydration prevents the enzyme activity that causes browning in lilies and roses.
- Apply UV Sealant: Spray a light coat of UV resistant acrylic sealer on the dried specimens. This coating acts as a shield against sun damage. It prevents the yellowing often seen in white petals and keeps blues from turning gray.
- Control Temperature: Store your pressing kits in cool dry locations away from heaters. Heat speeds up the chemical breakdown of plant cells and darkens colors. Consistent low temperatures preserve the structural integrity and pigment density of the delicate flower petals.
- Use Blotting Paper: Replace standard printer paper with high quality acid free blotting paper. This material has superior absorption rates and pulls water away from the bloom instantly. Keeping the environment dry prevents the fermentation that turns vibrant greens into muddy browns.
- Select Peak Blooms: Harvest flowers specifically in the morning after the dew evaporates but before the sun is hot. Picking at the right time ensures maximum pigment concentration. Avoid flowers that are overripe as they have already begun the natural oxidation process.
Heat lamination can damage heat sensitive pigments if the temperature is too high. Use cold lamination or low heat settings to preserve the natural chemistry of the plant. If the petals change color during the sealing process, the heat has scorched the organic matter. Always test a single petal before sealing the entire composition to ensure the thermal settings match the flower species.

How To Make Dried Flower Bookmarks As Thoughtful Handmade Gifts
Personalizing How To Make Dried Flower Bookmarks For Birthdays, Weddings, And Special Occasions
Match specific species to the occasion to add value. For birthdays, use the recipient’s birth month flower. For weddings, source flowers that match the bridal bouquet or color scheme. This creates a direct connection between the bookmark and the event. Use acid-free cardstock in colors that contrast with the petals. Darker backgrounds make lighter flowers like Queen Anne’s Lace stand out.
Incorporate Typography to increase the gift value. Use a calligraphy pen or a fine-liner to add names, dates, or quotes. Position the text so it does not crowd the botanical specimen. If the bookmark is for a wedding favor, use the couple’s initials. Use archival ink to prevent fading over time. Professional finishes require precise placement. Balance the visual weight of the flower against the text.
Packaging And Presenting Your Handmade Dried Flower Bookmarks In A Beautiful Way
Presentation dictates the perceived value of the handmade gift. Place the finished bookmark inside a clear glassine sleeve. This protects its surface from skin oils and moisture during handling. Avoid plastic bags that trap heat and ruin the organic material. Use a heavy vellum wrap for a more premium feel. Secure the packaging with a simple hemp twine or a wax seal.
Consider the final delivery method. If mailing the bookmark, place it between two stiff pieces of recycled cardboard. This prevents the dried petals from cracking under pressure. Add a small card explaining the flower species and its origin. This adds a layer of botanical education to the gift. Consistent branding and clean lines make the product look professional rather than amateur. Simple materials highlight the natural beauty.
Turning Your Passion For DIY Flower Bookmarks Into A Small Creative Business
How To Price And Sell Your D.I.Y Flower Bookmarks On Platforms Like Etsy And At Local Markets
Profit requires a rigorous pricing formula. Calculate your cost of goods sold by totaling the price of paper, dried botanicals, and lamination or resin. Add your hourly labor rate to this base. Research current Etsy market rates for handmade botanical goods to ensure competitiveness. Most successful sellers use a three times markup on materials to cover platform fees and shipping supplies.
Physical markets demand a different strategy than digital storefronts. Invest in clear protective sleeves to prevent damage from handling by customers. Arrange your bookmarks by color or flower species to create visual impact. Use a simple card reader for digital payments to capture every sale. Always bring business cards that link to your online shop to encourage repeat orders and long term growth.
Building A Brand And Growing An Audience Around Your Pressed Flower Bookmark Creations
Effective branding relies on visual consistency. Choose a specific aesthetic like Victorian botanical study or modern minimalist. Use this style for all product photography and packaging materials. Clear and high quality photos are your best sales tool. Show the bookmarks in use inside books to help customers visualize the product. Consistent branding builds trust and makes your work recognizable across different platforms.
Content marketing drives organic traffic to your shop. Record short videos of your pressing process or the assembly of a new design. Share these on social media to demonstrate the hand crafted nature of your work. Focus on the botanical names and the meanings of the flowers you use. This educational approach positions you as an expert. Engaged followers turn into loyal customers who support your creative business.
Frequently Asked Questions

What are the best types of flowers to use for beginners?
If you are new to making pressed flower bookmarks, it is best to start with “flat” varieties like pansies, violas, or hydrangeas. These blooms have thin petals and a low moisture content, allowing them to dry quickly without molding. Avoid thick, succulent-like flowers or large roses until you gain more experience, as thinner botanical elements lay much flatter against the cardstock for a professional, seamless finish.
How do I seal my pressed flower bookmarks so they last for years?
To preserve your pressed flower bookmarks, you should protect the delicate botanicals from air and friction. Most enthusiasts use clear self-adhesive laminating sheets or a heat laminator for a durable, waterproof finish. Alternatively, you can apply a thin layer of acid-free decoupage glue or resin if you prefer a more artistic, textured look. Proper sealing prevents the petals from becoming brittle or losing their vibrant colors over time.
Can I make these at home without buying an expensive flower press?
Absolutely! You do not need professional equipment to create beautiful crafts. The traditional “heavy book” method is incredibly effective and completely free. Simply place your blooms between two sheets of parchment paper and tuck them inside a thick encyclopedia or dictionary. Weigh the book down with additional items and wait about two weeks. This DIY approach makes crafting unique bookmarks accessible to everyone regardless of their budget.


