What Is A Vase Filler And Why Does It Matter For Your DCor

Understanding The Role Of A Vase Filler In Interior Styling
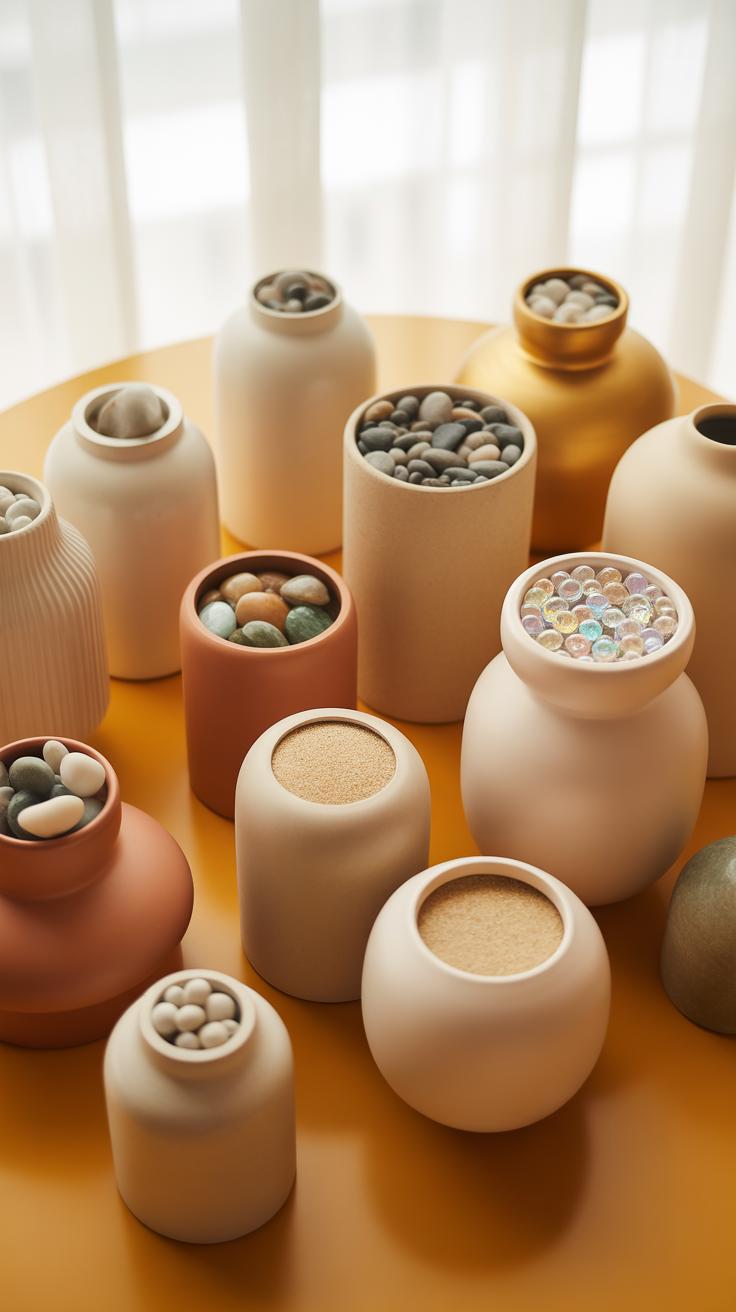
A vase filler acts as a structural and aesthetic foundation for floral arrangements. It serves two primary functions: mechanics and visual weight. Mechanically, fillers stabilize stems to keep them in place without using floral foam. From a design perspective, they occupy negative space within transparent vessels. This hides stems and creates a cohesive look that matches the surrounding room design.
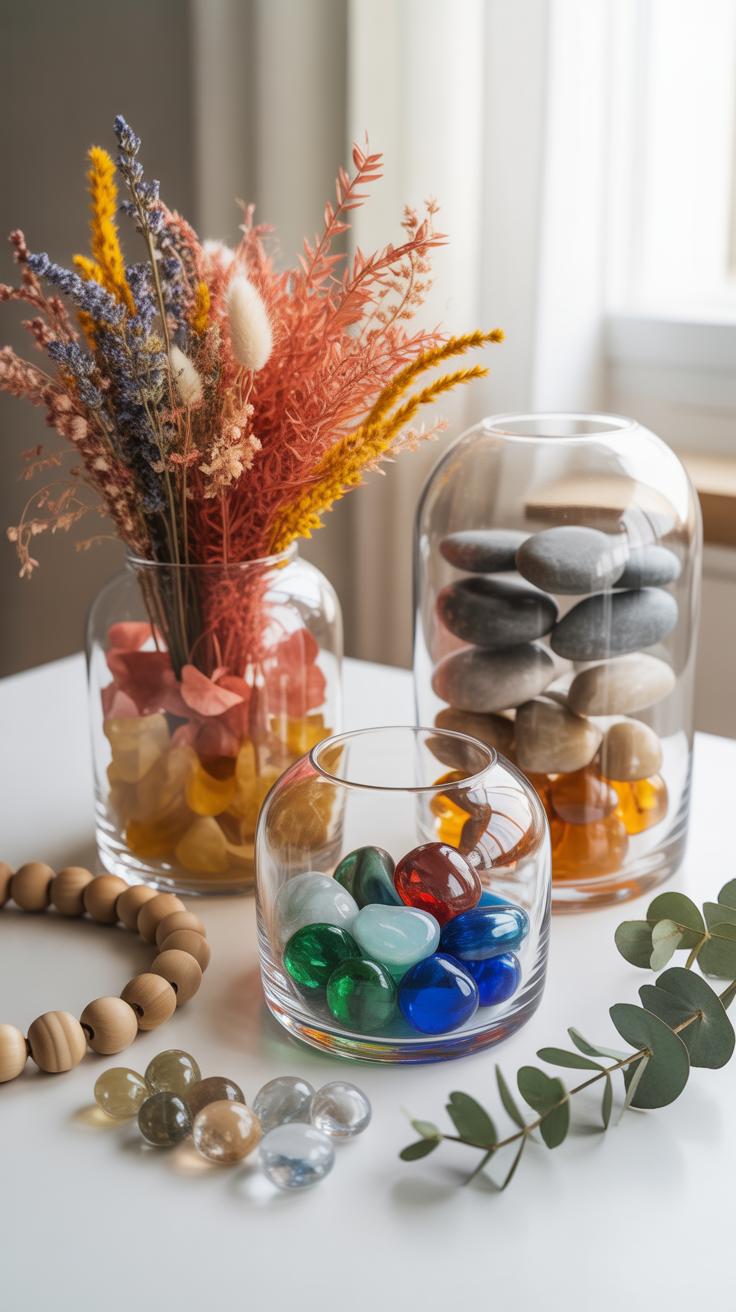
Professional stylists use fillers to control the color palette of a display. Common materials include river stones, glass beads, and organic moss. These choices influence the perceived value of the arrangement. A clear glass container looks empty without a base layer. High quality fillers ground the design and prevent the vase from appearing top heavy. This technique ensures the arrangement looks intentional and complete.
How The Right Filler Transforms A Plain Vase Into A Focal Point
Selecting the right material changes the texture and light refraction of a glass vessel. Smooth river rocks suggest a natural or zen aesthetic. Polished glass marbles reflect light to brighten dark corners. These materials draw the eye toward the center of the table. A plain vase becomes a deliberate design choice when you layer materials strategically. This adds depth to the overall room.
Designers utilize fillers to bridge the gap between furniture and floral elements. You can match filler colors to hardware or fabric swatches in the room. This makes the vase a bridge for the entire interior scheme. Without a filler, the vase is just a container. With the correct material, it becomes a structural anchor. This elevates a basic household item into a professional grade focal point for any setting.

Exploring The Most Popular Vase Fillers Ideas For Every Style And Budget
Natural Fillers: From River Stones And Sand To Dried Botanicals
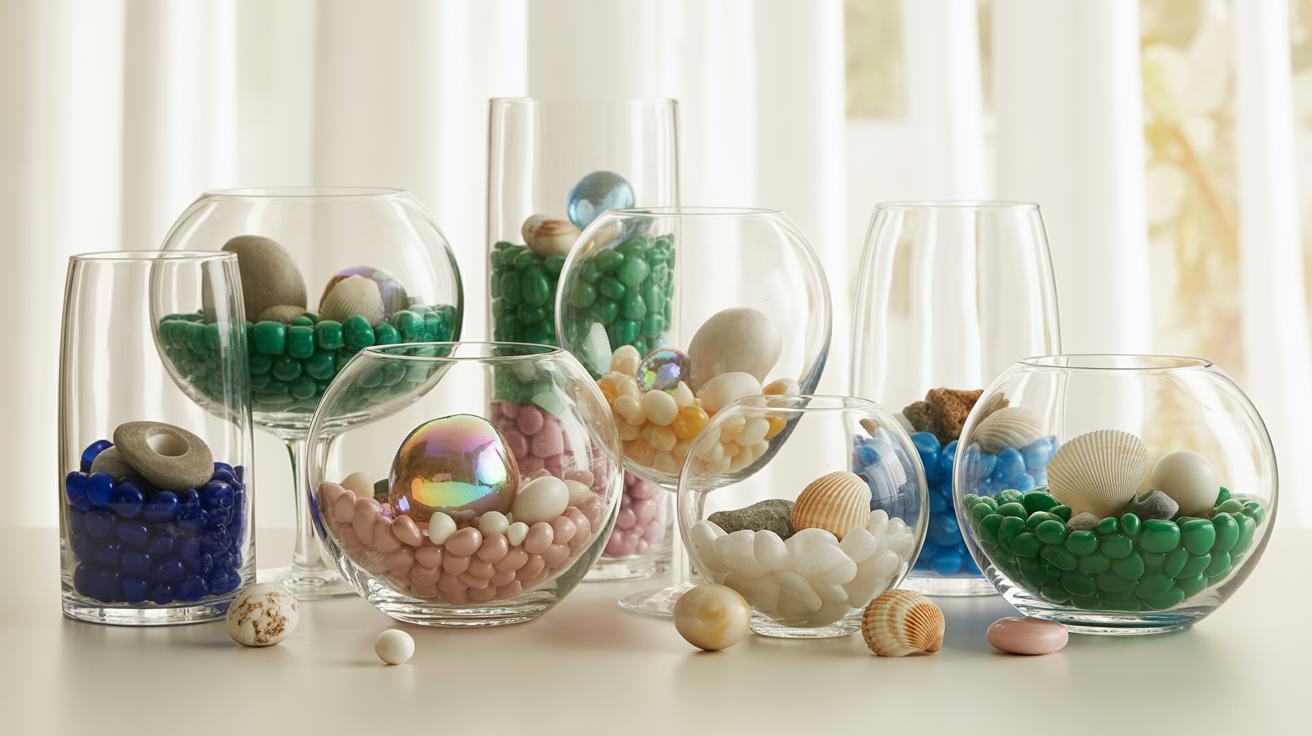
Natural fillers provide weight and stability for tall floral arrangements. River stones and pebbles offer a neutral base that anchors thick stems. These materials handle water well and do not degrade over time. Sand creates a firm foundation for thin silk stems or dried branches. Use layered sand to add visual depth to clear glass containers in coastal designs.
Dried botanicals like pinecones and moss offer texture without the weight of minerals. These materials work best in dry arrangements where moisture is not a factor. Moss hides foam blocks used in professional floral mechanics. Designers often use these biological elements to bridge the gap between organic flowers and industrial glass. Keep these materials dry to prevent mold growth and maintain the structural integrity.
Decorative Fillers: Faux Pearls, Glass Gems, And Ornamental Accents
Glass gems and acrylic ice provide clean lines for modern interiors. These non-porous materials reflect light and highlight the clarity of the water. Light passes through translucent gems to brighten the base of the arrangement. Use these fillers when you need a specific color match for an event theme. They are reusable and resist stains from plant food or minerals in the water.
Faux pearls and metallic spheres serve as high-contrast accents in formal settings. These fillers often require a floating technique using clear water gels. This method suspends objects at various heights to create a three-dimensional effect. Heavy decorative accents prevent top-heavy vases from tipping over during use. Select lead-free glass and colorfast plastics to ensure the filler does not leach chemicals into the floral water.

Clear Vase Filler Ideas That Create A Stunning Visual Impact
Why Transparent Vases Demand Thoughtful Filler Choices
Transparent glass exposes every design flaw within a vessel. Unlike opaque ceramic, clear glass requires a strategy for the entire interior space. You must consider the structural mechanics of the stems and the visual weight of the materials. Messy stem ends or cloudy water will ruin the aesthetic. Every layer you add becomes part of the final composition.
Designers use clear fillers to hide mechanics or add color. You must choose materials that remain stable when wet or submerged. These choices affect light refraction and how the eye perceives the arrangement size. Proper selection prevents the display from looking cluttered. Your goal is a clean look that supports the flowers without distracting the viewer from the primary focal point.
Top Materials That Look Beautiful Through Glass: Water Beads, Pebbles, And Citrus Slices
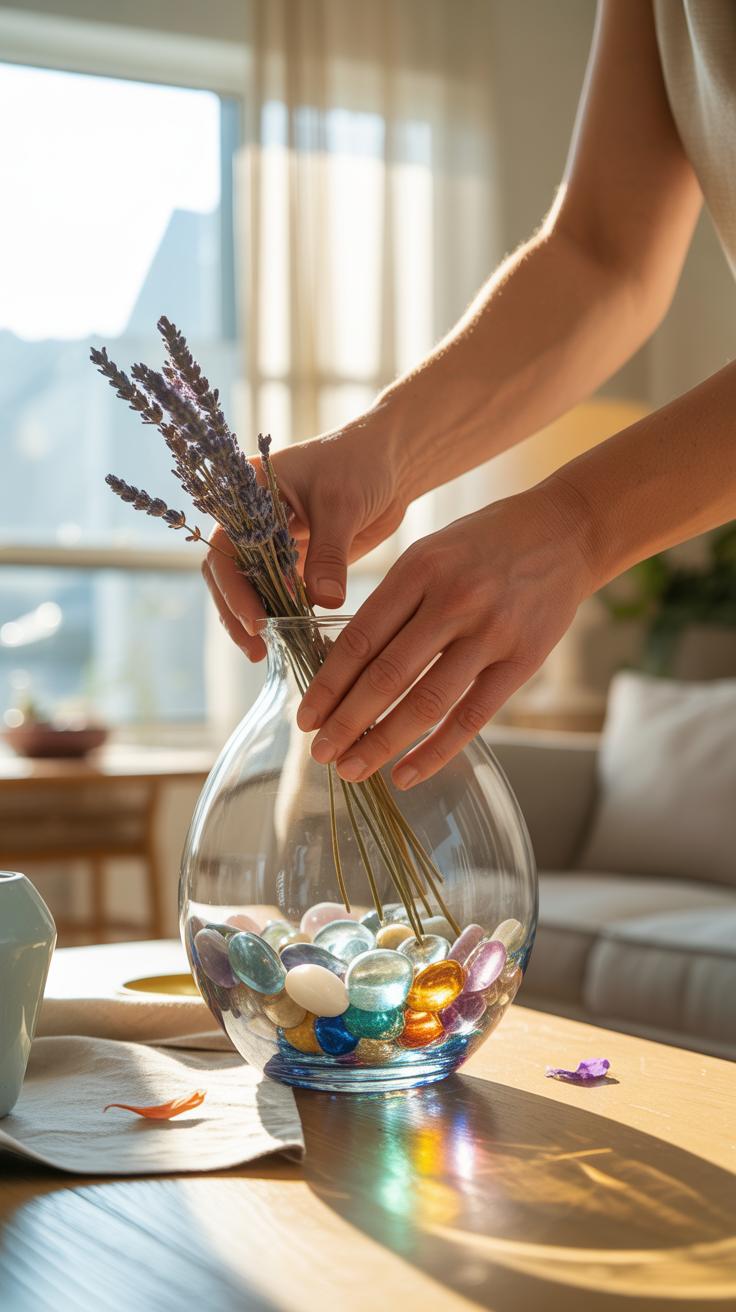
Water beads offer a modern look and keep stems hydrated. These polymer spheres expand in water and create a floating effect for your flowers. River pebbles provide a heavy base for tall arrangements. They offer a natural texture and secure heavy branches. Use dark stones for contrast or white stones for a crisp finish. Both materials provide excellent structural support.

Citrus slices add immediate color and a fresh scent to your display. Use thin rounds of lemons or limes tucked between two glass vases. This double-vessel technique protects the stems from acidic fruit juice. For a classic look, use polished sea glass. It mimics the appearance of natural water and diffuses light beautifully. Always wash your materials before placing them in the glass.
How To Decorate A Glass Vase Like A Professional Floral Designer
Layering Techniques That Add Depth And Dimension To Glass Vases
Professional designers use layering to hide structural elements and build visual interest. Start with the smallest materials at the bottom of the glass container. Sand or fine gravel creates a stable base. This foundation prevents heavier items from shifting. Compact layers provide better support for flower stems. You must ensure each layer is level before adding the next one. Use a long funnel to place materials precisely.
Contrast distinct materials to create visible bands. Move from smooth river rocks to jagged sea glass. This method mimics the natural sedimentary layers found in geology. Avoid mixing colors within a single layer. Clear boundaries make the design look intentional and expensive. Keep the thickest layer at the bottom for physical stability. This technique lowers the center of gravity. It prevents the glass vase from tipping over.
The beauty of a flower is only the beginning, for the secrets nestled at its stem tell the story of a home’s heart. Layering your vases with memories turns a simple arrangement into a timeless reflection of grace.
— Martha Stewart
Balancing Color Texture And Height For A Polished Glass Vase Display
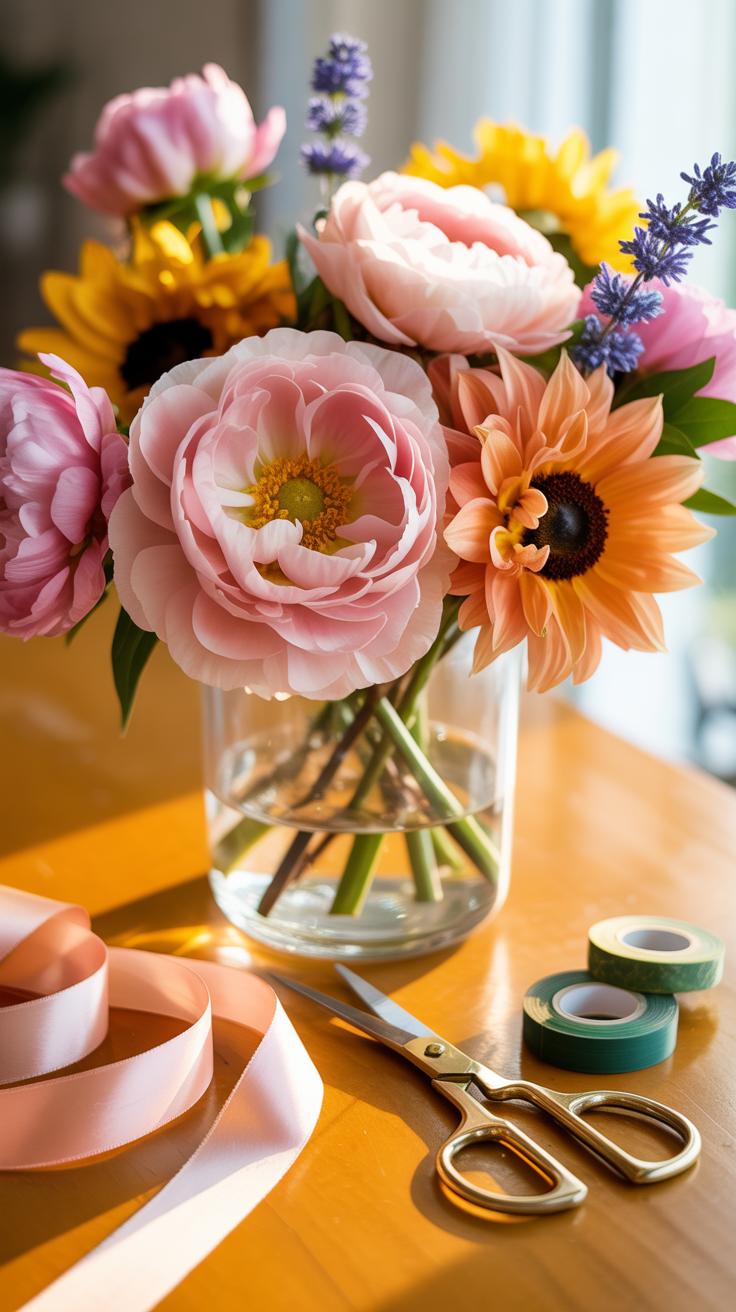
Correct balance requires a three-to-five ratio between the filler and the floral height. Choose a primary color for the filler that complements the bloom petals. Use neutral tones like white marble or clear gems to emphasize bright flowers. Monochromatic designs use different textures of the same color. High texture fillers like moss or wood chips create a rustic aesthetic. Smooth glass beads provide a modern finish.

Scale the filler size to the vase volume. Small vases require fine grains to avoid looking cluttered. Large floor vases need chunky stones or tall branches to fill the void. Space the filler items so they do not crush the stems. Leave enough room for water if using live plants. Professionals often use a double-vase technique. Insert a smaller cylinder inside the large one. Place filler between the two walls to save material.
Unique Vase Fillers That Go Beyond The Ordinary
Unconventional Filler Materials: Coffee Beans, Cinnamon Sticks, And Vintage Keys
Dry organic materials like coffee beans provide a stable base for heavy stems. These fillers create a monochromatic foundation that hides floral foam or clear water tubes. Use medium roast beans to avoid oily residue on the glass interior. This technique works best in dry arrangements where water contact would cause the organic matter to rot or leach tannins into the liquid.
Incorporate hard goods like vintage keys to reference the Industrial or Victorian design movements. Keys offer weight and structural integrity at the bottom of a vessel. Group these items by metal type to maintain visual cohesion. Use a double-vessel method to protect the artifacts from moisture. Place the keys in the outer glass and the water and flowers in a smaller internal container.
Seasonal And Holiday Inspired Fillers For A Refreshed Year Round Look
Seasonal filler shifts allow you to update a room without purchasing new furniture. Professional designers use high-density items that reflect the specific textures of the current season. You must consider the weight of these materials to ensure the vase does not tip. Natural elements or manufactured glass beads serve as the primary tools for achieving these timely, professional-grade aesthetic pivots.
- Pine Cones: Use small hemlock or spruce cones for winter displays. They take up significant volume and support woody stems well. Ensure they are kiln-dried to remove pests and sap before placing them in high-end glass vessels to prevent permanent clouding.
- Acorns: These work for autumn themes and provide a dense, rolling base. The rounded shape allows stems to slide into position easily. You should bake them at a low temperature first to kill larvae and harden the shells for long-term use.
- Polished River Stones: These stones fit the clean lines of early spring arrangements. They offer the highest weight-to-volume ratio of any filler. This makes them ideal for tall, top-heavy branches that require a low center of gravity to remain upright and stable.
- Dried Citrus Slices: Dehydrated lemon or orange rounds provide bright color for summer setups. Use the double-vessel technique to keep them dry. Their flat shape allows you to stack them against the glass for a structured, layered look that mimics professional catering displays.
- Cranberries: Fresh cranberries float in water and resist bruising for several days. They provide a bold red pop for holiday designs. Only use them in cold water to extend their firmness and prevent the skin from breaking and clouding the arrangement.
Switching fillers requires a complete cleaning of the vessel to remove mineral deposits or organic films. Each material interacts with the glass surface and light in different ways. Smooth glass beads reflect light while organic materials like nuts or seeds absorb it. Balance the filler texture against the floral foliage to ensure the base does not distract from the primary arrangement.
Practical Filling Vases Ideas For Everyday Home DCor
Simple Filler Combinations That Work In Living Rooms, Kitchens, And Entryways
Living rooms require scale and texture to anchor the space. Use large river rocks at the base of clear floor vases to provide weight and stability. Layer dried eucalyptus or willow branches on top of these stones. This setup offers height without blocking sightlines across the room. The stones lock the stems in place and prevent the vessel from tipping over in high-traffic areas.
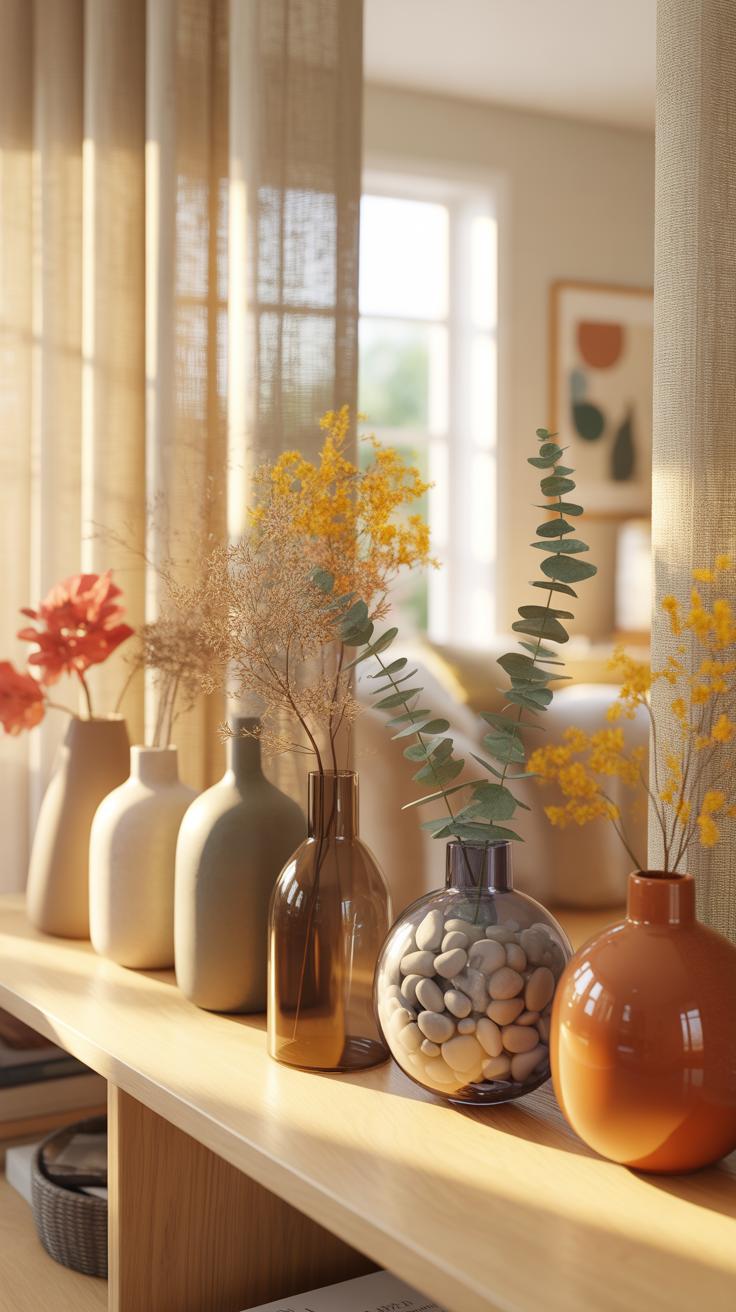
Kitchens and entryways demand functional materials that handle humidity or temperature shifts. Fill glass jars with dried citrus slices or coffee beans for a sensory effect. These organic materials provide deep color and mask stem ends in small vessels. Use polished white marble chips in entryways to reflect natural light. This technique brightens dark corners and creates a clean look for guest arrivals.
How To Match Your Vase Filler To Your Existing Color Palette And Furniture Style
Identify the dominant undertones in your furniture before selecting fillers. Warm wood tones like oak or walnut pair best with earth-toned materials. Use burlap, moss, or terracotta beads to complement these surfaces. For modern metal or glass furniture, choose high-contrast fillers. Black polished pebbles or clear glass gems create a sharp look. This alignment ensures the vase enhances the room instead of clashing.
Coordinate your filler colors with the existing textile palette in the room. Match the filler shade to the secondary color in your rugs or pillows. Use a monochromatic approach for a minimalist aesthetic by matching white fillers to white walls. For a bold look, select a complementary color from the opposite side of the color wheel. This method creates a focal point that draws the eye immediately.
Choosing The Best Filler For Vases Based On Shape Size And Material
How Vase Shape Influences The Type Of Filler You Should Use
Vase geometry dictates filler movement and stability. Tall cylinder vases require heavy, dense fillers like river stones or glass marbles at the base. These materials lower the center of gravity to prevent tipping. Narrow necked bottles limit your options to fine grains or small beads. You must choose fillers that flow easily through the aperture without clogging. Shape determines how much filler the viewer actually sees.
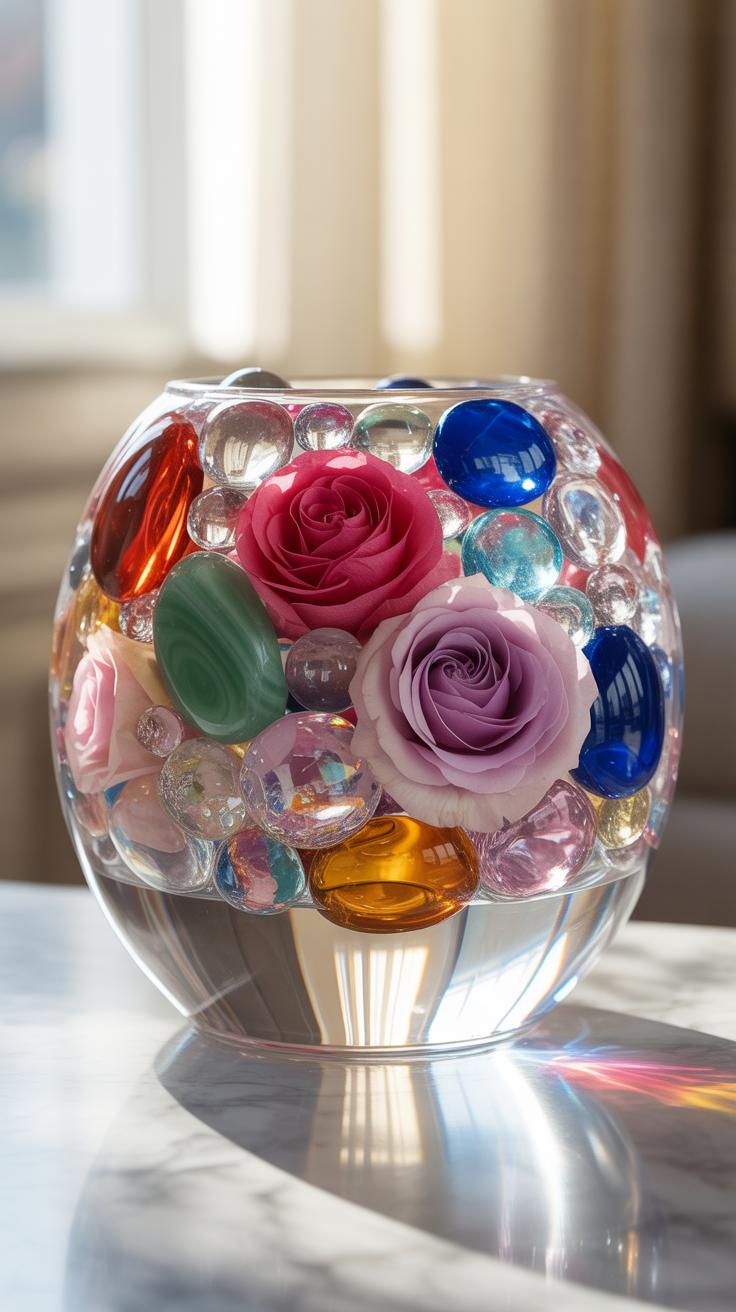
Wide bowls and flared vessels demand structural fillers to hold stems in place. Large river rocks or geometric acrylic blocks work best here. They create a firm grid for flower placement. Round fishbowl shapes benefit from clear, light-refracting fillers. These materials maximize the visual impact of the curved glass. Always match the scale of the filler to the volume of the vessel to maintain proper visual balance.
Matching Filler Weight And Texture To Ceramic, Glass, And Metal Vases
Vessel material dictates the physical limits of your filler choice. Clear glass exige aesthetics and cleanliness. Use polished gems or clean architectural sand to avoid showing ugly debris. Ceramic and stone containers hide the filler from view. This allows you to use cheaper, utilitarian materials like floral foam or gravel. You only need to focus on how the filler supports the weight of the floral arrangement.
Metal vases react to moisture and pH levels. Avoid acidic fillers or wet organic materials in unlined copper or brass vessels. Use dry woods or synthetic pearls to prevent corrosion. For heavy stoneware, choose lightweight fillers like perlite if you need to move the arrangement. For light plastic or thin glass, use heavy lead-free glass beads. The goal is to balance the total weight for safety and long-term durability.
Creating A Show Stopping Large Vase Centerpiece For Events And Entertaining
Structural Filler Strategies For Tall And Oversized Centerpiece Vases

Large scale centerpieces require a stable internal foundation to prevent the arrangement from shifting or collapsing. Professional designers use heavy base layers like polished river stones or tumbled glass to lower the center of gravity. This prevents top-heavy floral displays from tipping over during high-traffic events. The weight at the bottom provides a counterweight to long stems and heavy blooming branches used in vertical designs.
Internal mechanics rely on density and friction to hold materials in place. For clear vessels, acrylic ice or glass marbles hide stem ends while maintaining visual clarity. In opaque containers, chicken wire or floral foam provides the necessary grip for angled insertions. These structural fillers ensure that each element remains at the exact height and angle intended. Stability is the primary goal when selecting fillers for oversized vessels.
Step By Step Approach To Building A Large Vase Centerpiece From Base To Top
Begin by cleaning the vessel to remove dust and oils that degrade water quality. Place the heaviest structural filler at the bottom to secure the base. Fill the vase with water or specialized floral solutions before adding any botanical elements. Ensure the filler level remains consistent to provide a professional look. This initial layer dictates the entire balance of the final centerpiece.
- Base Weight: Add three inches of heavy river rock or glass pebbles to the bottom of the vessel. This creates a solid anchor point for the heaviest stems and prevents the vase from wobbling or tipping over.
- Water Management: Fill the container with room temperature water treated with floral preservative. Check the water level against the filler height to ensure all stems will reach the liquid once inserted through the decorative layers.
- Crowning Layer: Place a thin layer of decorative moss or fine sand over the structural base to refine the look. This adds a finished aesthetic and hides the raw mechanical components of the arrangement from the guests.
- Primary Infrastructure: Insert rigid branches or thick stems into the base filler to establish the height and width limits. These elements create the skeleton of the arrangement and support the softer flowers that follow in the process.
- Secondary Infusion: Tuck smaller flowers and greenery into the gaps created by the primary stems. The friction between the stems and the base filler keeps these shorter pieces from sinking too deep into the large vase.
Finish the arrangement by inspecting the filler for gaps or visible mechanics. Add small amounts of top-dressing filler to maintain a clean appearance at the water line. Monitor the water level daily as large centerpieces consume fluids rapidly. A well-built centerpiece stays upright and fresh for the duration of the event. Proper layering ensures the design survives transport and handling.
Vase Filling Ideas For Weddings Events And Special Occasions

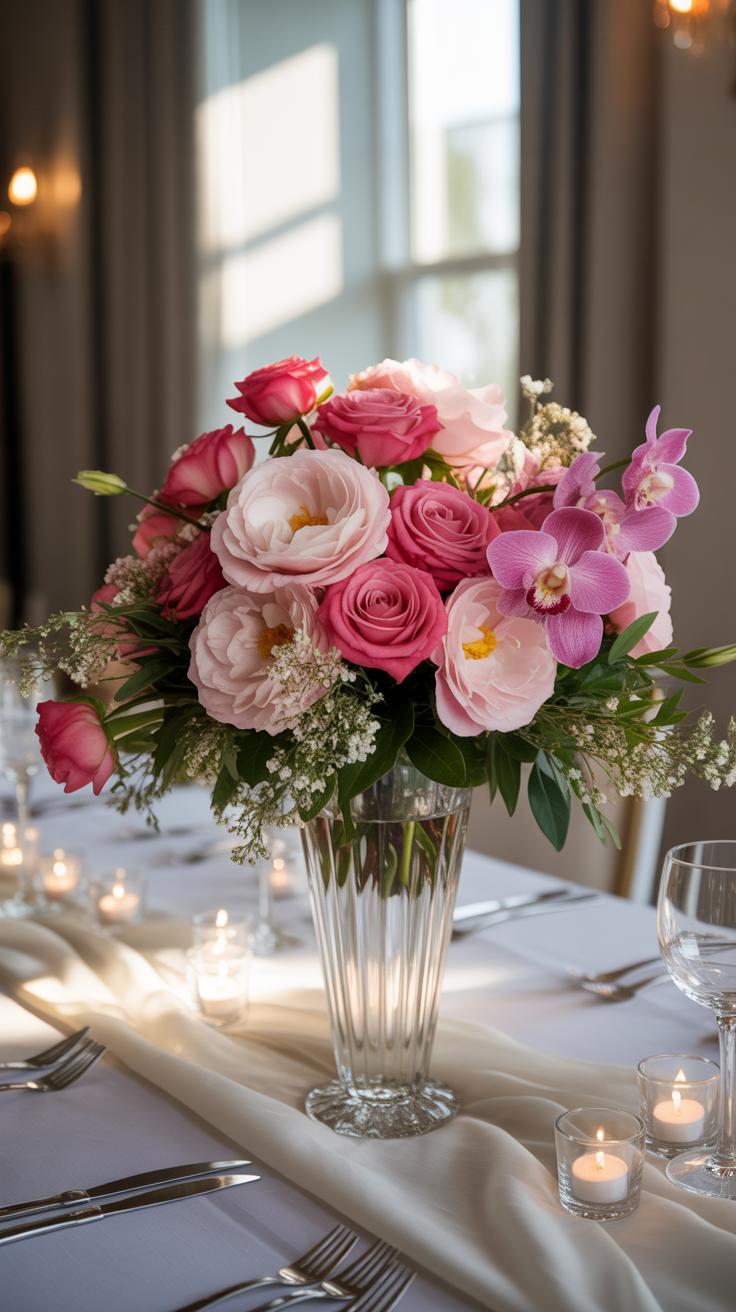
Romantic And Elegant Filler Choices For Wedding Table Arrangements
High end wedding design relies on light refraction and depth. Clear glass cylinders filled with polished glass monocles or clear acrylic ice create a clean base. These materials disappear when you add water. This effect makes floral stems appear to float. It mimics the Neoclassical focus on symmetry and clarity. Professionals use submersed LED pucks at the base to illuminate the filler from within.
Layered pearls or white marble chips provide a structured foundation for romantic themes. These materials hide floral foam or plastic cages effectively. Use cool toned stones for modern events and warm toned sand for traditional settings. This choice dictates the visual weight of the centerpiece. Ensure the filler height reaches at least one third of the vase. This ratio maintains proper balance for tall floral towers.
Budget Friendly Vase Filling Ideas That Still Look Luxurious And Intentional
Low cost filler options focus on volume and texture. Dry goods like white beans, lentils, or split peas offer an organic look for rustic events. These items are heavy enough to stabilize branch arrangements. They provide a matte finish that contrasts well with glass. Designers often use these in clear square vessels to emphasize sharp lines. This technique lowers costs while maintaining a high design standard.
Natural elements like river rocks or citrus slices fill space quickly. Buy bulk stones from hardware stores instead of floral wholesalers to save money. Slice lemons or limes thinly and press them against the glass walls. Fill the center with water to keep the fruit fresh during the event. This method uses color to draw the eye away from inexpensive floral stems. It maximizes impact for a minimal financial investment.
Care Maintenance And Refreshing Your Vase Filler Over Time
How Long Different Vase Fillers Last And When To Replace Them
Organic fillers like fresh fruit or untreated wood degrade quickly. Citric acid in lemons damages glass and clouds water within three days. Dried botanicals last one to two years if kept away from direct sunlight and humidity. Sunlight bleaches natural pigments and makes stems brittle. Moss stays green for months but requires low light. Check organic materials weekly for signs of mold or insects to prevent infestation.
Synthetic fillers like acrylic ice and glass beads last indefinitely. These materials only require replacement if they chip or lose their luster. Water gel beads have a specific lifecycle of several weeks. They shrink as water evaporates. You can rehydrate them a few times before they lose structural integrity. Discard gels when they become cloudy or refuse to expand. Monitor all submerged fillers for bacterial film every few days.
Cleaning And Storing Reusable Vase Fillers To Protect Your Investment
Clean glass and acrylic fillers to remove mineral deposits and dust. Use a mixture of mild dish soap and warm water. For stubborn hard water stains, soak the material in white vinegar for twenty minutes. Rinse thoroughly to ensure no chemical residue remains. Air dry all items on a flat towel before storage. Trapped moisture causes clouding and bacterial growth inside storage containers.
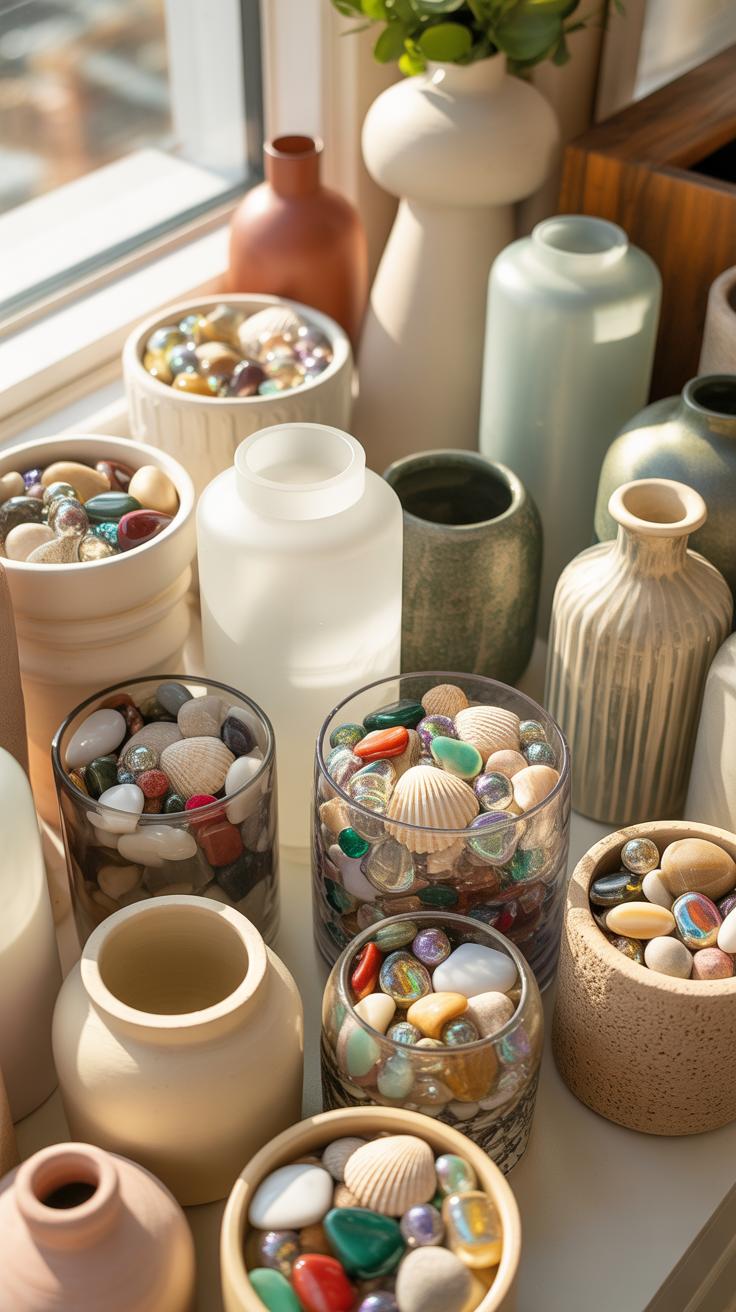
Store reusable fillers in airtight plastic bins or heavy duty bags. Organize them by color and material type to save time on future projects. Avoid storing heavy glass items on top of fragile acrylics to prevent scratching. Keep storage containers in a temperature controlled environment. High heat warps plastic fillers and melts wax based components. Label each container clearly to maintain an efficient inventory of your design assets.
Frequently Asked Questions

What are vase fillers and why should I use them?
Vase fillers are decorative materials used to stabilize flower stems or add visual interest to glass containers. Using various vase filler techniques allows you to customize your home decor by adding color, texture, and height to any arrangement. Beyond aesthetics, they provide structural support for heavy blooms, ensuring your floral designs stay perfectly in place while reflecting your personal style and the seasonal atmosphere of your living space.
How do I layer different materials without them mixing together?
Creating clean, distinct layers is one of the most popular vase filler techniques for a professional look. To keep materials like sand, pebbles, or colored glass separate, use a funnel to carefully pour each layer against the glass wall. Avoid shaking the container once you begin. If you are using fresh flowers, place a smaller cylinder inside a larger one to hold water, then tuck your dry fillers into the outer gap.
Are there affordable or DIY options for beautiful vase fillers?
Absolutely! You do not need to spend a fortune to achieve a high-end look. Inexpensive items like dried beans, citrus slices, river rocks, or even wine corks make excellent fillers. For a nature-inspired approach, try using pinecones, acorns, or sea shells collected from your backyard or local beach. These budget-friendly vase filler techniques prove that with a little creativity, you can create stunning, sustainable centerpieces using common household items.


