Why Mason Jar Centerpieces Have Stood The Test Of Time
The Origins And Everyday Appeal Of Mason Jars As Decor
John Landis Mason patented the threaded glass jar in 1858. These vessels revolutionized food preservation by creating airtight seals with zinc lids. Farmers and households relied on them for winter survival. This utility created a massive supply of durable glass in American homes. Today, the thick soda-lime glass remains a practical choice for decor. Its heat resistance and structural integrity make it safer than thin floral vases.
Modern appeal stems from this industrial heritage. The jars offer a neutral aesthetic that fits various environments. Clear glass allows full visibility of contents like sand, water, or stems. The standard neck size simplifies floral arrangements by supporting heavy blooms without extra foam. Users choose these jars because they are cheap and nearly indestructible. They transition easily from storage containers to functional centerpiece bases without losing their structural value.
How Mason Jar Centerpieces Became A Staple In Modern Entertaining
The rise of Shabby Chic and Farmhouse design movements solidified these jars as decor staples. Designers in the late twentieth century began repurposing vintage utilitarian items. This shift prioritized found objects over expensive crystal. Mason jars fit this trend perfectly. They provide a nostalgic connection to agrarian roots. Event planners adopt them to lower costs while maintaining a consistent visual theme. They work across weddings, birthdays, and corporate events.
Tactical versatility drives their continued use in professional entertaining. You can paint, tint, or wrap these jars to match specific color palettes. The glass surface accepts spray paint and twine adhesives readily. Because they come in uniform sizes like pint and quart, they create symmetry on long tables. This uniformity allows for rapid bulk assembly. Hosts use them because they solve the problem of expensive rentals. You buy them once and reuse them indefinitely.
Essential Materials For Simple Mason Jar Centerpieces Anyone Can Gather

Choosing The Right Mason Jar Size And Style For Your Centerpiece
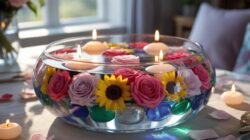
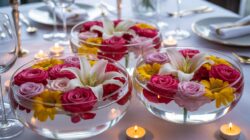
Standard mouth jars work best for tight floral arrangements. Narrow openings support stems and keep flowers upright without extra hardware. Wide mouth jars accommodate larger items like floating candles or thick citrus slices. Choose 16-ounce pint jars for low profiles that do not block eye contact across dining tables. Use 32-ounce quart jars for floor displays or large buffet focal points.
Authentic vintage jars feature embossed logos from the late nineteenth century. These blue or green glass options add historical depth. Modern clear jars provide the best visibility for layered fillers like sand or stones. Smooth sided jars allow for clean adhesive application if you use paint or wraps. Always check the rim for chips before use. Damaged glass creates safety risks and ruins the design.
Basic Supplies You Need Before Getting Started
Preparation prevents assembly failures and poor aesthetics. You must gather structural tools before handling delicate greenery or decorative fillers. Professional florists use specific mechanical aids to hold stems and heavy objects in place. High quality adhesives ensure wraps and ribbons stay secure against the glass surface. Using the wrong tape or glue leads to peeling and sliding as temperatures change in the room.
- Adhesive Options: Hot glue guns provide immediate bonds for thick fabrics like burlap or heavy rope. Double sided tape works well for paper wraps and thin lace. Always clean the glass with rubbing alcohol before applying any adhesive to ensure a permanent grip.
- Cutting Tools: Heavy duty wire cutters handle thick floral stems and decorative wire. Standard kitchen shears will dull quickly if used on woody plants. Sharp scissors are necessary for crisp edges on ribbons and twine to prevent unappealing fraying at the ends.
- Floral Frog: This heavy metal device sits at the bottom of the jar to hold stems at specific angles. Modern plastic versions or chicken wire inserts offer cheaper alternatives. These tools are vital for sparse designs that require precise placement of individual flower heads.
- Cleaning Agents: Microfiber cloths and glass cleaner remove fingerprints and dust from the jar exterior. Residual oils prevent paint from sticking and make clear glass look cloudy. Clean jars reflect light better and enhance the overall color of your centerpiece materials.
- Surface Protection: Place rubber feet or felt pads on the bottom of the jar. Mason jars have rough glass rings that can scratch finished wood tables. This small step protects expensive furniture and prevents the jar from sliding on smooth surfaces during your event.

Select fillers based on the weight and balance of your jar. Heavy rocks or marbles at the base prevent tall quart jars from tipping over. Distilled water keeps natural flowers fresh and prevents mineral buildup on the glass interior. If using flameless candles, ensure the jar opening allows easy access to the power switch. Proper logistics make the centerpiece functional and safe for the entire duration of your event.
Nature Centerpieces Bringing The Outdoors To Your Table
Using Seasonal Greenery, Branches, And Natural Elements In Your Jars
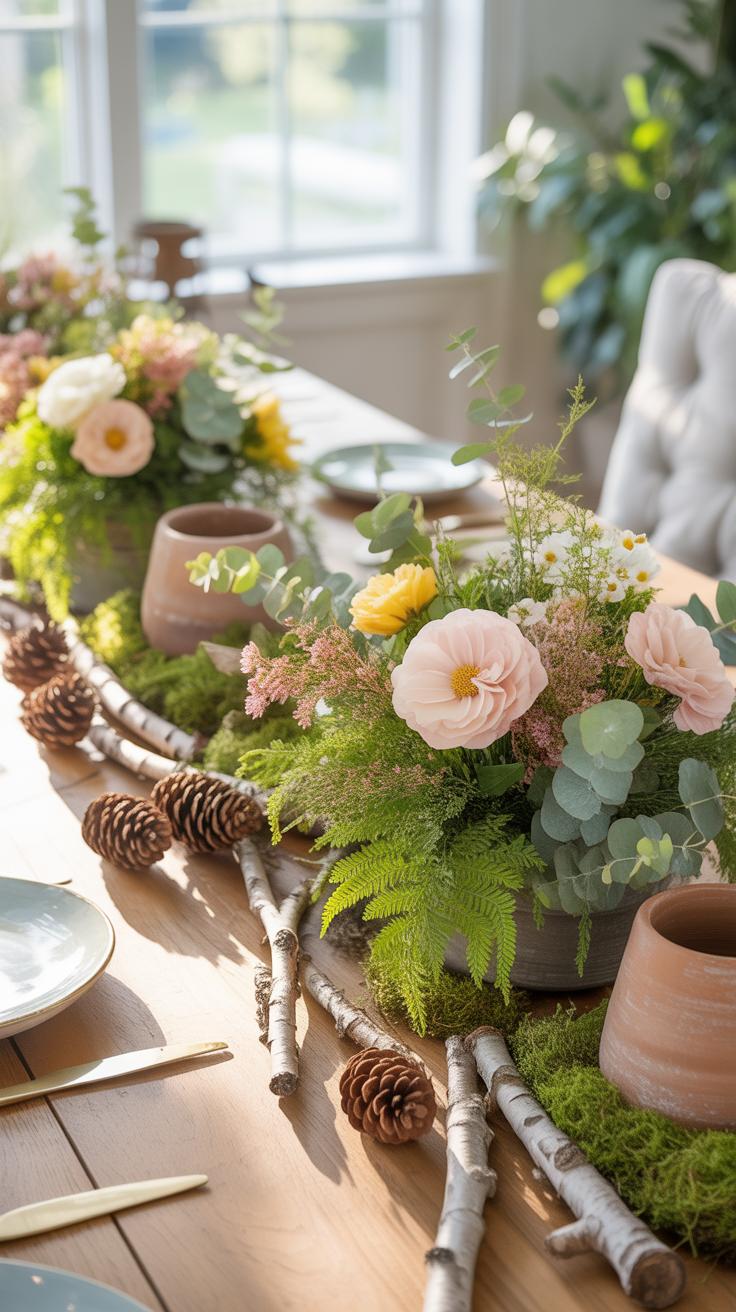
Natural elements provide structural integrity and visual weight to Mason jar centerpieces. Select materials based on the current growing season to ensure durability and availability. Woody stems like eucalyptus, olive branches, or pine offer firm support for heavier accents. These materials work well in narrow-mouth jars because the glass neck cinches the stems. This creates a natural fan shape without using plastic floral foam or specialized tools.
Contextualize your design by matching botanical choices to historic styles. Use ferns and moss for a Victorian terrarium look. Select pine cones and evergreen boughs for a winter rustic aesthetic. Avoid overcrowding the jar to prevent decay. Clean all debris and lower leaves from stems before insertion. This step prevents bacterial growth in the water. Focus on proportion by keeping the height of the greenery under twice the jar height.
How To Keep Nature Inspired Mason Jar Arrangements Looking Fresh Longer

Maintenance determines the lifespan of organic centerpieces. Cut all woody stems at a forty-five-degree angle using sharp shears. This increases the surface area for water absorption. Use lukewarm water for most branches to jumpstart the hydration process. Add a small amount of bleach or a commercial floral preservative to the jar. This kills bacteria that block the stems. Change the water every two days to maintain clarity and health.
Temperature control is a critical factor for longevity. Keep Mason jar centerpieces away from direct sunlight and heating vents. High heat causes rapid evaporation and wilting in thin-leaved plants. For non-flowering greenery, mist the leaves daily to replicate natural humidity levels. Remove any yellowing or soft foliage immediately to stop the spread of rot. Proper airflow around the jars also prevents mold growth on organic materials like bark or moss.
Mason Jar Flower Centerpieces Fresh And Faux Options Explored
Best Fresh Flowers That Thrive In Mason Jar Arrangements
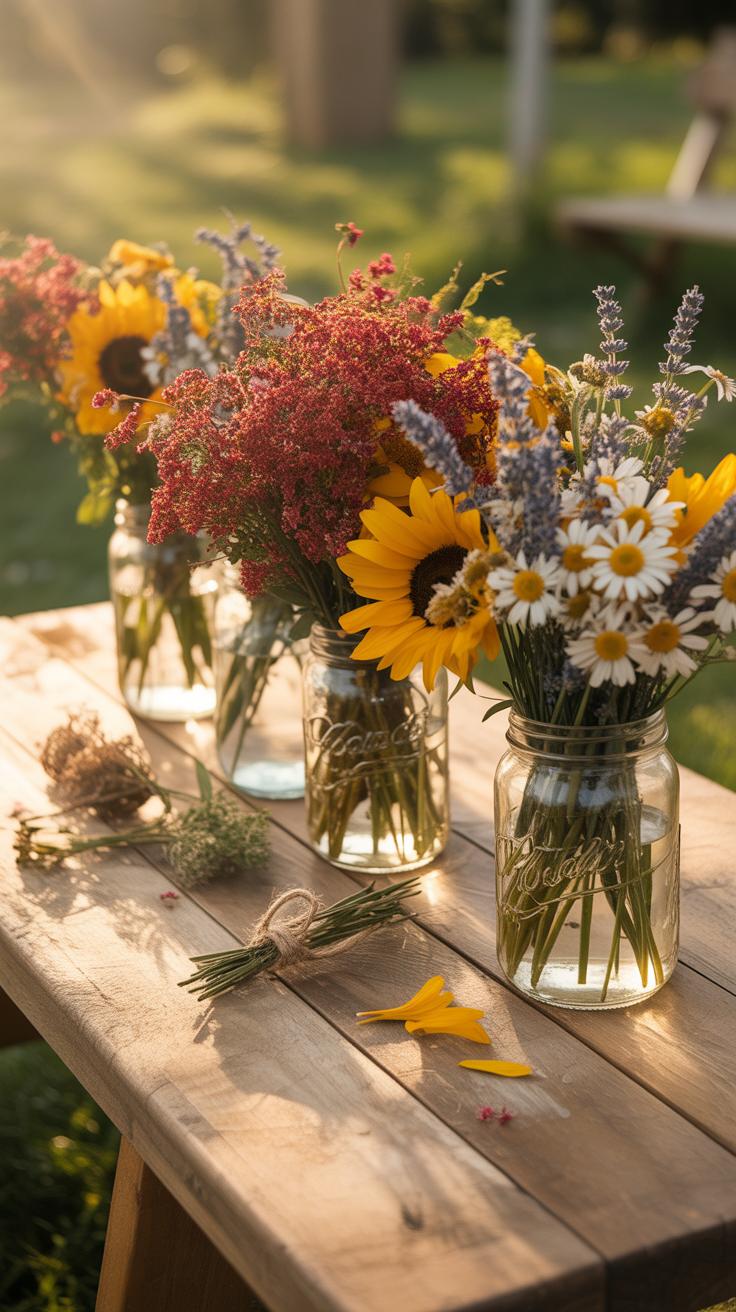
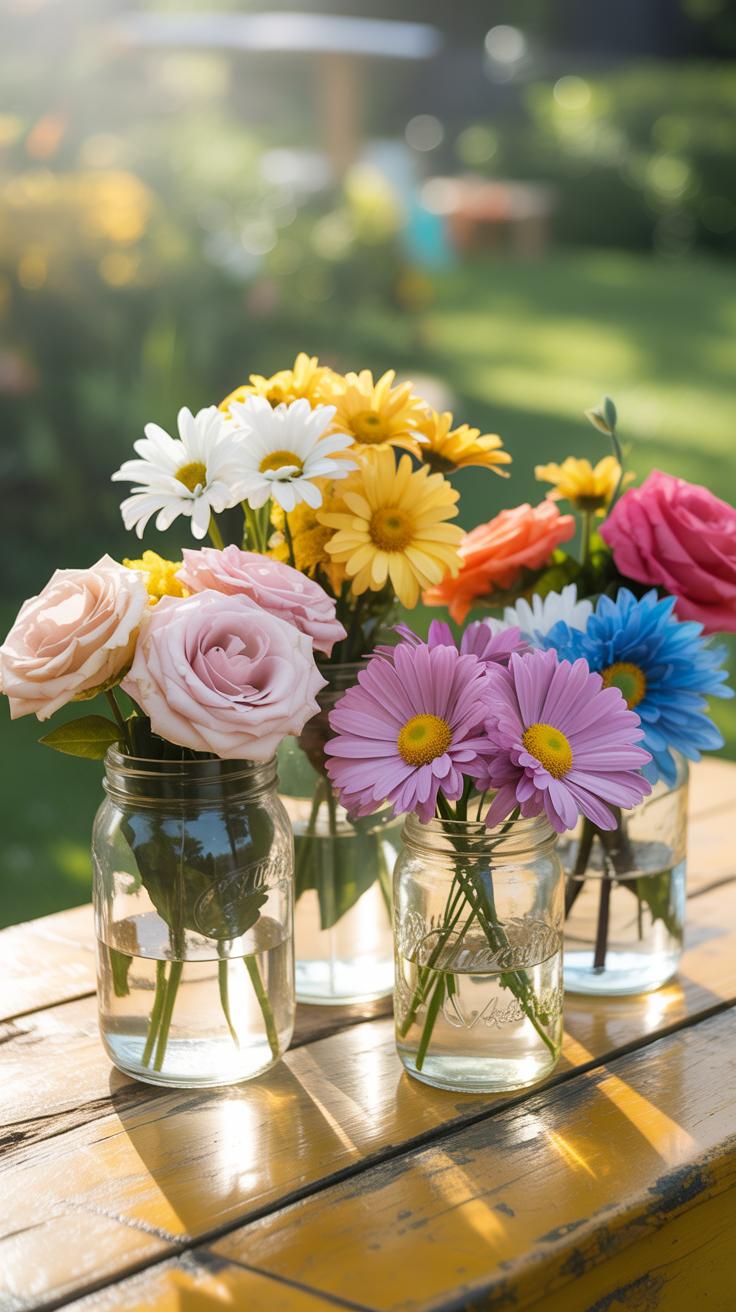
Standard wide mouth mason jars support heavy blooms better than narrow vases. Hydrangeas and sunflowers work well because their thick stems stay upright in shallow water. These hardy flowers fill space quickly and hide the glass rim. You must cut stems at a forty five degree angle to maximize water intake. Change the water every two days to prevent bacteria growth in the jar.
Small jars require delicate flowers with flexible stems like spray roses or ranunculus. Use floral tape to create a grid across the mouth of the jar. This tactic holds thin stems in place and maintains the visual balance of the arrangement. Keep these jars away from direct sunlight and heat drafts. High temperatures cause the glass to warm the water and wilt the flowers fast.
There is a humble beauty in a glass jar that reminds us how the simplest things in life are often the most genuine. Creative joy begins when we turn the everyday into something heartfelt and shared.
— Joanna Gaines
How Faux Florals Can Deliver Long Lasting Mason Jar Flower Centerpieces
High quality silk or polymer flowers remove the need for water management. Modern faux stems often feature wire cores that allow for precise positioning inside the jar. You can bend these stems to create a natural lean that mimics real growth patterns. Use dry filler like river rocks or sand to anchor the stems at the base. This provides necessary weight to prevent the jar from tipping.
Long term displays benefit from permanent floral arrangements that do not attract insects. Use wire cutters to trim stems to the correct height instead of folding them. This keeps the inside of the glass looking clean and professional. Dust the petals regularly with a dry cloth to maintain the color. Faux options work best for high traffic areas where water spills would cause damage to furniture.
DIY Mason Jar Centerpieces Step By Step Creative Ideas
Personalize Your DIY Mason Jar Centerpieces With Paint And Twine

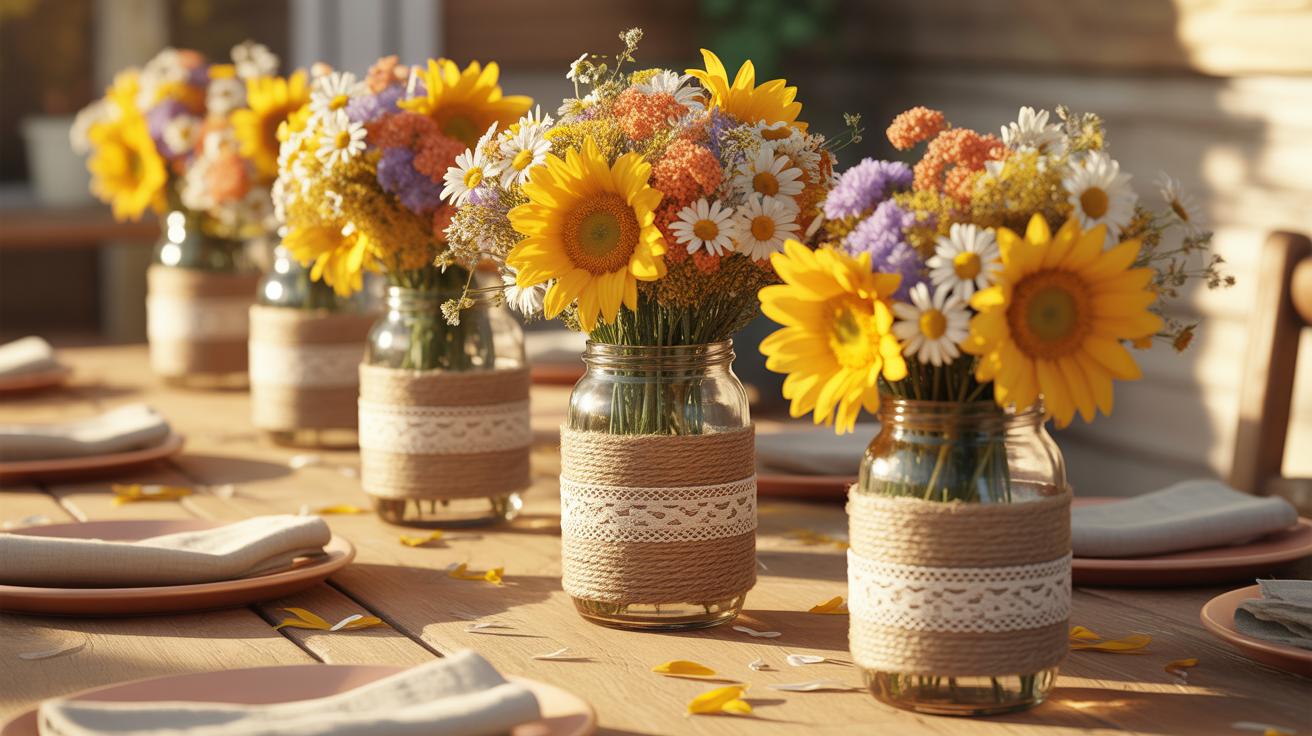
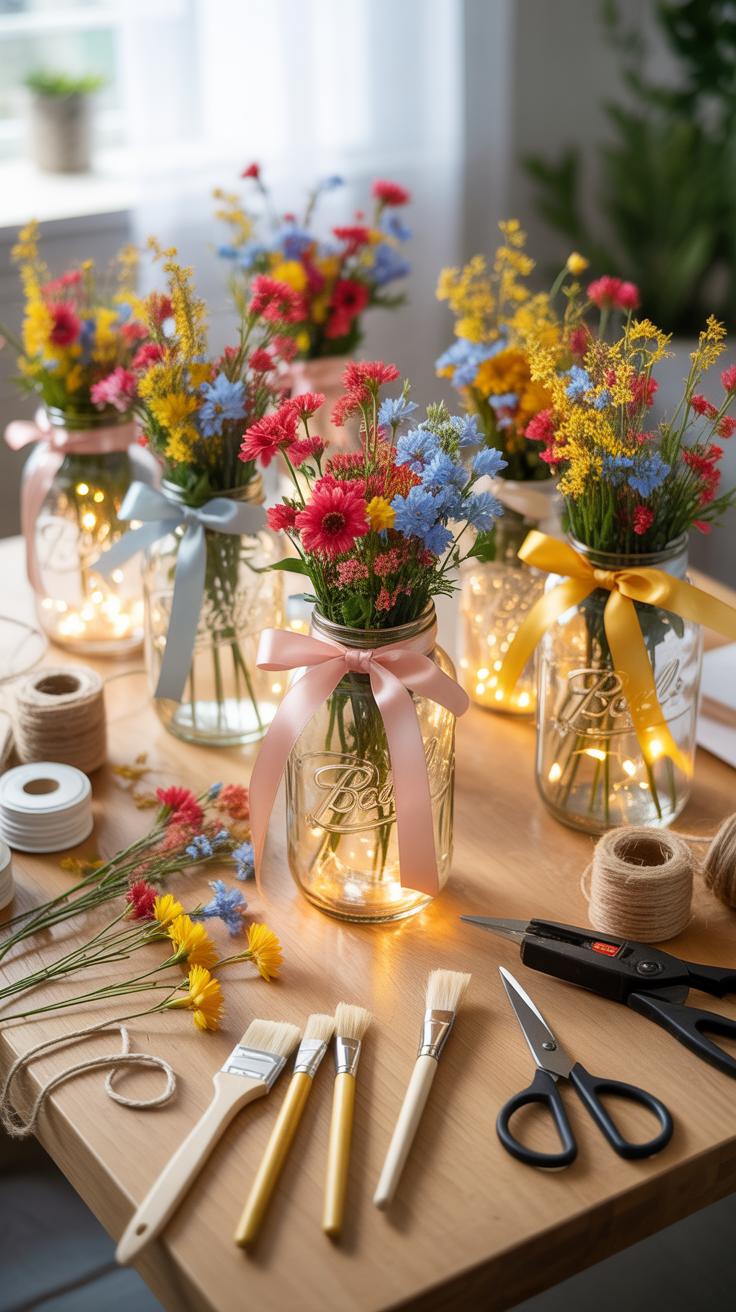
Clean the glass surface with rubbing alcohol to ensure paint sticks. Apply two thin coats of chalk paint for a matte finish or acrylic for gloss. Chalk paint mirrors the Shabby Chic movement of the late twentieth century. Sand the dried surface lightly to expose the glass edges. This technique creates an aged look that replicates vintage canning jars found in early American kitchens.
Wrap natural jute twine around the jar neck multiple times. Secure the ends with a small dab of hot glue or tie a tight square knot. Use cotton twine for a cleaner aesthetic or hemp for a rougher texture. This adds tactile contrast against the smooth painted surface. Direct application of materials creates a professional result without specialized tools. Focus on clean lines and consistent tension.
Simple DIY Techniques That Make Every Jar Look Professionally Styled
Professional stylists use specific layering methods to hide structural components. You must stabilize the contents to prevent tipping or shifting. Fill the bottom third of the jar with heavy media if using tall stems. This manages the center of gravity and secures the design. Professionals avoid overcrowding because negative space highlights the quality of your materials. Use these tactical adjustments for high-end results.
- Geometric Grouping: Arrange jars in odd numbers like three or five to create visual balance. Align them in a straight row for modern minimalist settings or cluster them for a dense floral appearance.
- Water Clarity: Use distilled water if the glass is clear to prevent mineral buildup and cloudiness. Add a drop of bleach to keep the water transparent for several days when using live cut flowers.
- Inverted Lighting: Place a waterproof LED puck light at the bottom of the jar before adding filler. This uplighting technique emphasizes the texture of the glass and mirrors high-end architectural lighting used in professional events.
- Grid Tape Method: Apply clear floral tape in a grid pattern across the jar mouth. Insert stems into the gaps to control their position precisely. This keeps the arrangement from collapsing or leaning toward the edges.
- Monochromatic Fillers: Use single-color materials like white sand, black river rocks, or clear glass marbles. Uniform colors eliminate visual clutter and draw the eye toward the primary focal point at the top of the jar.
Select a consistent color palette to unify the display. Use metallic spray paint on the lids to add a modern industrial touch. Remove the flat center disc of the lid to leave only the threaded ring. This hides the raw glass edge while allowing stems to pass through the top. This method turns a standard utility item into a finished piece of decor. Ensure all elements serve a purpose.
Mason Jar Wedding Centerpieces Elegant Ideas For Every Budget


How To Style Mason Jar Wedding Centerpieces For Rustic And Boho Themes
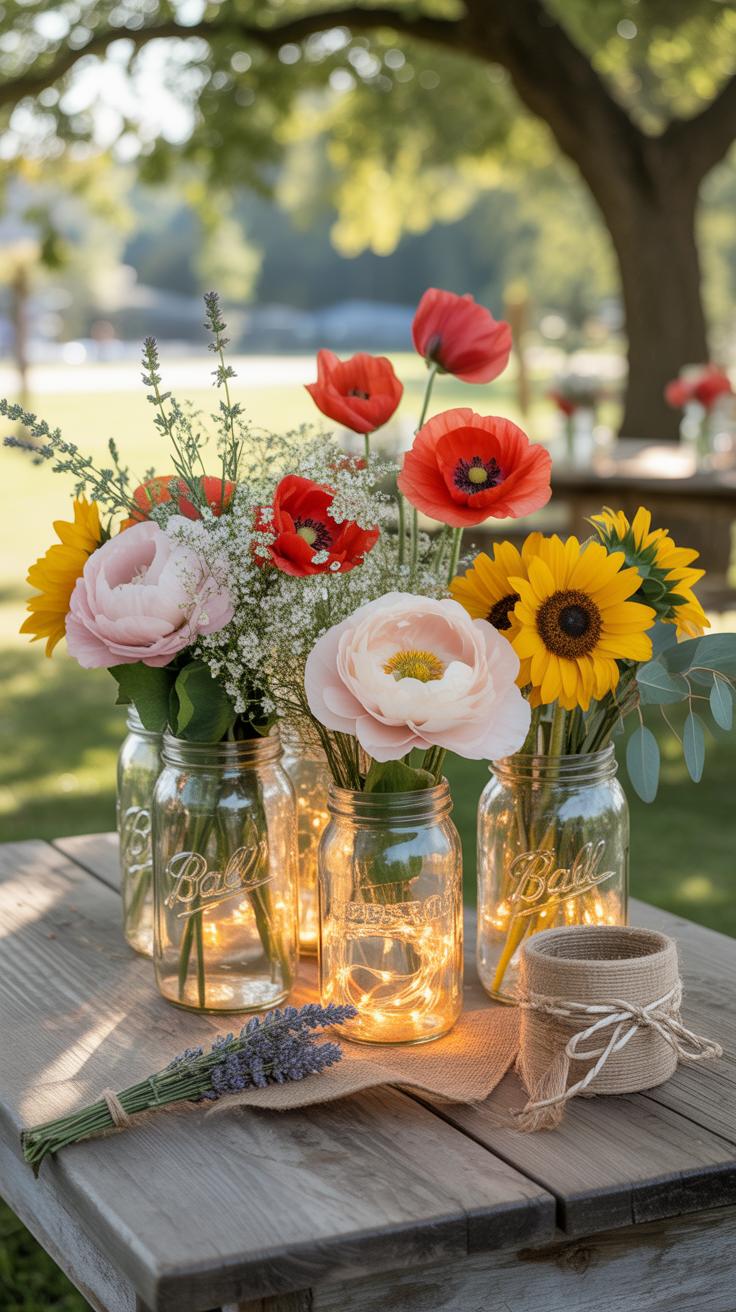
Rustic wedding style relies on raw textures and Earth tones. Use wide-mouth jars to hold heavy blooms like sunflowers or hydrangeas. Wrap the glass in jute twine or burlap to hide stems and add grip. This look mimics the practical farm aesthetics of the early twentieth century. Stick to clear glass jars to maintain a clean and authentic heritage appearance.
Boho themes require a mix of shapes and colors. Combine amber jars with clear ones to create visual depth on the table. Use eucalyptus and dried pampas grass to add height and movement. Avoid perfect symmetry. Instead, group jars of different sizes together. Incorporate macrame sleeves or lace trim to echo the textured fabric patterns common in Bohemian design movements.
Scaling Up Your Mason Jar Centerpieces For Larger Wedding Receptions
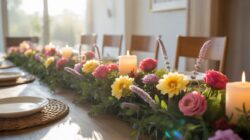
Large receptions demand efficiency and volume. Source jars in bulk cases of twelve to save money. Use standard quart jars for main tables and pint jars for cocktail areas. Consistency across fifty tables keeps the room looking organized. Pre-fill jars with water and floral preservative forty-eight hours before the event. This strategy ensures the flowers stay hydrated during the long setup process.
Maximize visual impact by grouping three jars per table. Place them on top of wood slices or mirror bases to increase the footprint of the centerpiece. This fills the empty space on large round tables without requiring expensive decorations. Use battery-operated LED fairy lights inside the jars for evening events. These lights provide a safe glow that lasts longer than traditional wax candles.
Simple Elegant Wedding Centerpieces DIY With BabyS Breath And Soft Blooms
Why Baby’S Breath Remains A Timeless Choice For Mason Jar Arrangements
Baby’s breath serves as a functional filler in floral design. It originates from the Gypsophila family and provides a high volume of small white flowers on thin stems. Historically, designers used it to create airiness in dense bouquets. Its structural rigidity allows it to stay upright in a glass jar without heavy support. This makes it a primary choice for low-cost floral decor.
The white color of the petals creates high contrast against clear or tinted glass jars. This visual clarity helps the eye focus on the center of the table. Baby’s breath thrives for long periods without water compared to more delicate blooms. It dries well and maintains its shape over time. This durability ensures that the Mason Jar Centerpieces remain intact throughout the entire wedding event.
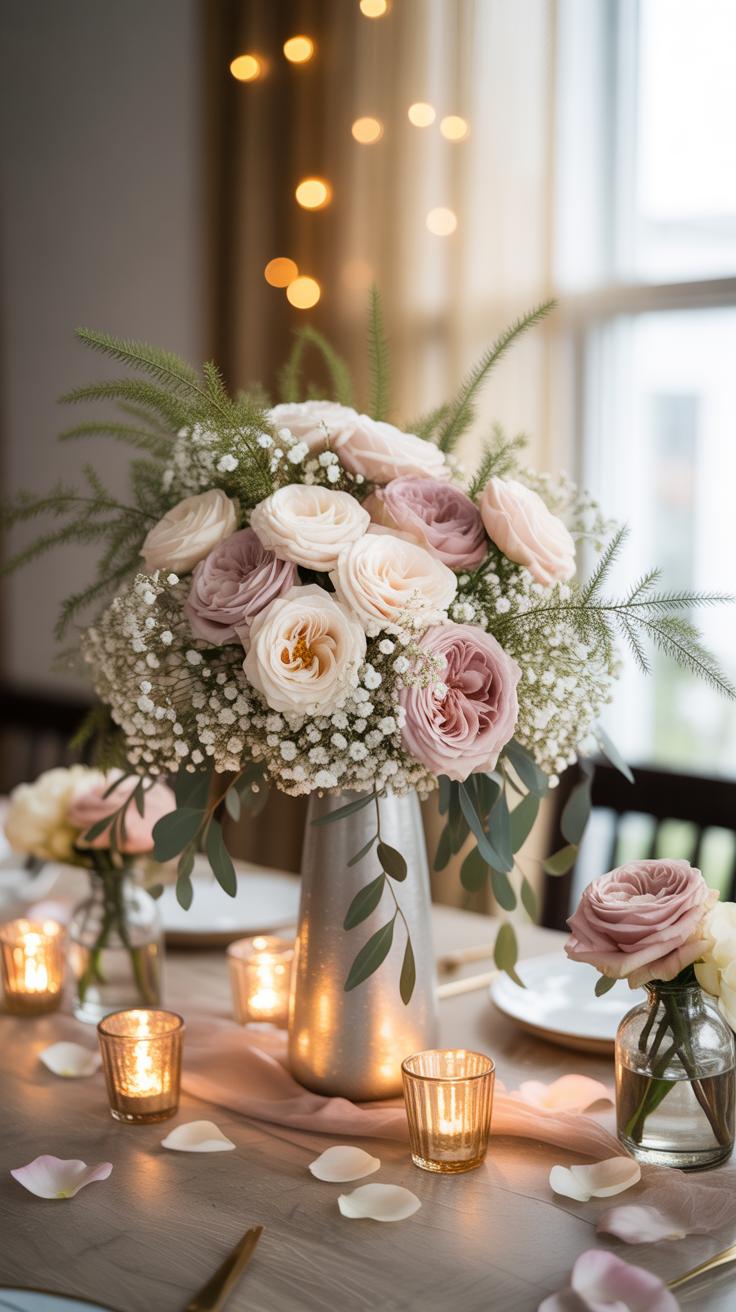
Pairing Baby’S Breath With Roses And Eucalyptus For A Refined Look
Combining Mason Jar Centerpieces with roses and eucalyptus adds depth and texture. Roses provide a focal point due to their large petal count and saturated colors. Eucalyptus adds a muted green tone and a scent that masks the earthy smell of jar water. This combination follows classic Victorian floral principles. It balances soft textures with rigid lines to create a professional look for guests.

Execution requires proper layering techniques. Start by placing the eucalyptus stems first to establish the perimeter of the jar. Insert the roses into the center at varying heights to create dimension. Fill the remaining gaps with small sprigs of baby’s breath. Trim all stems at a forty-five degree angle before placement. This maximizes water intake and keeps the arrangement fresh. Use floral tape to secure the structure if needed.
Creative Ways To Display And Group Your Mason Jar Centerpieces
Using Varying Heights And Clusters To Create Visual Interest On Any Table
Effective Mason Jar Centerpieces rely on vertical variation to guide the eye across the table. Use wooden blocks or vintage books to elevate specific jars above the rest. This technique mimics the principles of the Arts and Crafts movement by emphasizing structural honesty and balance. Avoid placing three identical jars in a flat line. Instead, create a triangular cluster using three different sizes like quart, pint, and half-pint jars.
Grouping jars in odd numbers creates a natural focal point that feels stable yet dynamic. Mix glass textures like smooth modern jars with embossed vintage styles to add depth without clutter. Use a central tray or a mirror base to unify the cluster into a single unit. This prevents the display from looking scattered. Proper spacing ensures each jar remains distinct while contributing to the overall design of the event space.
Repurposing And Storing Your Mason Jar Centerpieces After The Event
Repurposing glass jars minimizes waste and maximizes your initial investment. Clean the glass thoroughly to remove adhesive or wax residue before reuse. These durable vessels serve as functional storage for small hardware or kitchen dry goods. Mason jars were originally patented in 1858 for their airtight qualities. Use this utility to store items that require protection from moisture. They also serve as sturdy containers for future home projects.
Proper storage protects the glass from chips and cracks between uses. Wrap each jar in individual sheets of newsprint or bubble wrap to prevent glass-on-glass contact. Place them in a divided corrugated box to keep them upright and stationary. Store the boxes in a cool and dry environment away from foot traffic. Label the exterior of the box by size and type. Systematic storage ensures your centerpieces remain ready for immediate deployment later.
Frequently Asked Questions

What are the best items for a beginner to put inside a mason jar?
If you are new to crafting, start with simple fillers like river rocks, sand, or colorful marbles to anchor your display. For a botanical look, single-stem flowers or sprigs of eucalyptus work beautifully. These versatile Mason Jar Centerpieces require zero technical skill and immediately add a rustic charm to your dining table or kitchen counter without the stress of complex floral arrangements.
How do I prevent flowers from tipping over in a mason jar?
To keep your floral Mason Jar Centerpieces stable, create a “grid” across the mouth of the jar using narrow clear floral tape. This allows you to tuck stems into specific squares so they stay upright and evenly spaced. If you prefer a more natural look, you can tightly pack the jar with stems or use green floral foam at the base to secure heavier blooms.
Can I create beautiful table decor using jars I already have at home?
Absolutely! One of the best things about this hobby is its accessibility. You can upcycle old pasta or pickle jars for a sustainable DIY project. Simply soak them in warm soapy water to remove labels, then add a touch of twine or ribbon around the rim. These budget-friendly accents look just as polished as store-bought versions and make for stunning, eco-conscious home decor.


