What Is Dried Flower Wall Art And Why ItS Trending
The Rise Of Botanical Aesthetics In Modern Home DéCor
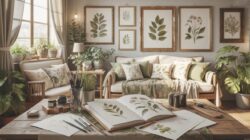
Modern homeowners now prioritize Biophilic design. This movement connects indoor spaces with nature. Dried Flower Wall Art serves this need without the maintenance of living plants. High-end interior designers use these pieces to add three-dimensional texture to flat walls. This shift honors the Arts and Crafts movement’s focus on natural forms. People want organic shapes to balance the sharp lines of modern furniture.
The trend grew as sustainable living became a status symbol. Consumers now reject plastic decor and mass-produced items. They favor handmade pieces using real biological materials. Botanical art creates a calm environment in high-stress urban settings. It offers a permanent connection to the seasons. Collectors value the unique variation found in every preserved stem. This shift reflects a broader demand for authentic and eco-friendly home styling.
Why Dried Flower Wall Art Outlasts Fresh Floral Arrangements
Fresh flowers die within days. They require constant water changes and create waste. Dried Flower Wall Art uses preservation techniques like silica gel drying and air-drying. These methods remove moisture while keeping the cellular structure intact. A professional piece maintains its color and shape for years. This durability makes it a one-time investment for a permanent design solution. It eliminates the recurring cost of fresh stems.
Technical longevity is a core advantage. Fresh blooms wilt and drop petals quickly. Preserved arrangements remain stable in controlled indoor climates. You do not need to worry about sunlight or hydration. This makes them ideal for hard-to-reach wall placements. They provide the same high-end look as fresh displays without the operational burden. Strategic buyers choose dried options for their high return on investment and minimal upkeep requirements.
Top Dried Flower Wall Ideas To Inspire Your Next Interior Update
Gallery Wall Arrangements Using Mixed Dried Botanicals
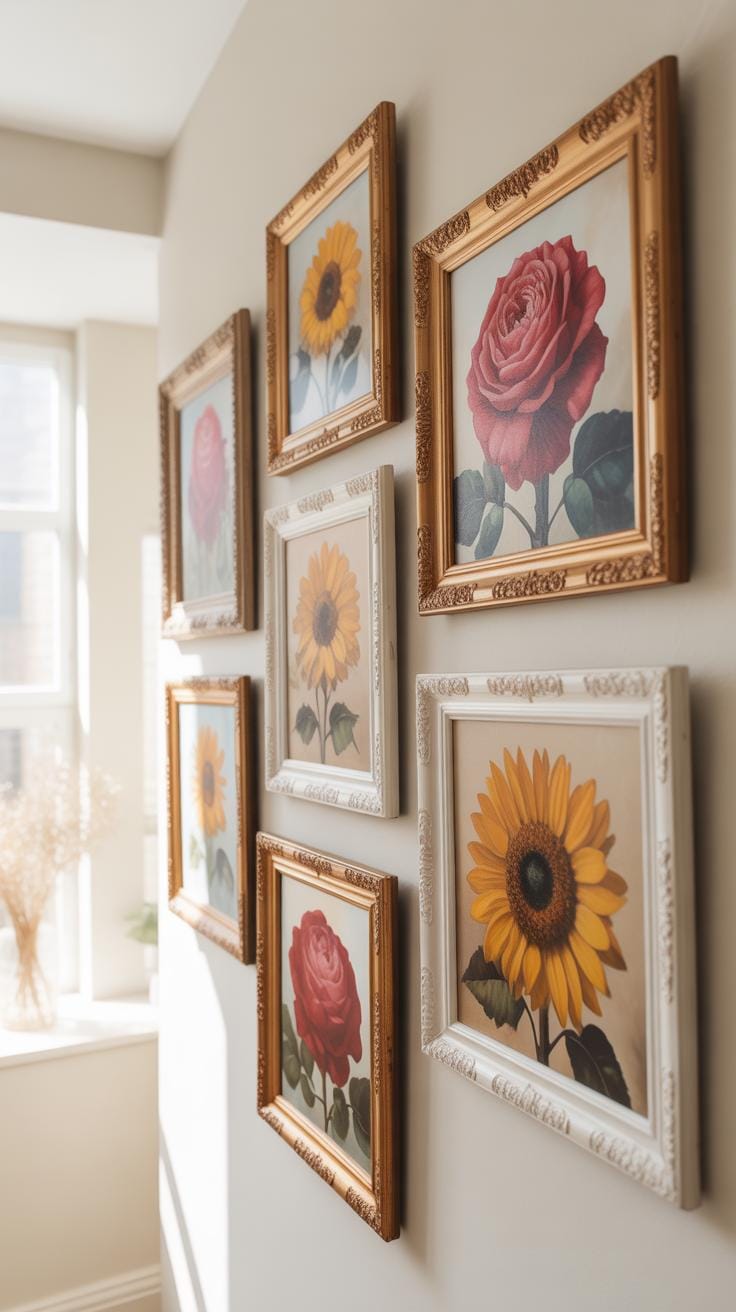
Build a gallery wall by mixing framed pressed flowers with three-dimensional shadow boxes. Use different frame sizes to create visual weight and balance. Use acidic-free mounting paper to prevent the botanicals from yellowing over time. Position the largest pieces first as anchors. Fill the remaining gaps with smaller specimens. This method allows you to showcase various textures like flat ferns and bulky proteas together.
Incorporate natural wood or thin metal frames to maintain a professional look. Use UV-protective glass to stop colors from fading due to sun exposure. Arrange the botanicals by species or color palette for a structured appearance. Avoid clustering heavy stems at the top of the display. Keep the spacing between frames consistent to ensure the layout looks intentional. This tactical approach turns individual botanical pieces into a unified structural installation.
Minimalist Vs. Maximalist Dried Flower Wall Ideas For Any Style
Minimalist designs focus on single stems and clean lines. Use a few high-quality specimens like eucalyptus or baby’s breath. Mount them on a plain white wall using clear adhesive hooks or thin copper wire. This style prioritizes negative space and allows the natural architecture of the plant to stand out. It works best in modern or industrial interiors. Keep the color palette neutral to maintain a sharp focus.
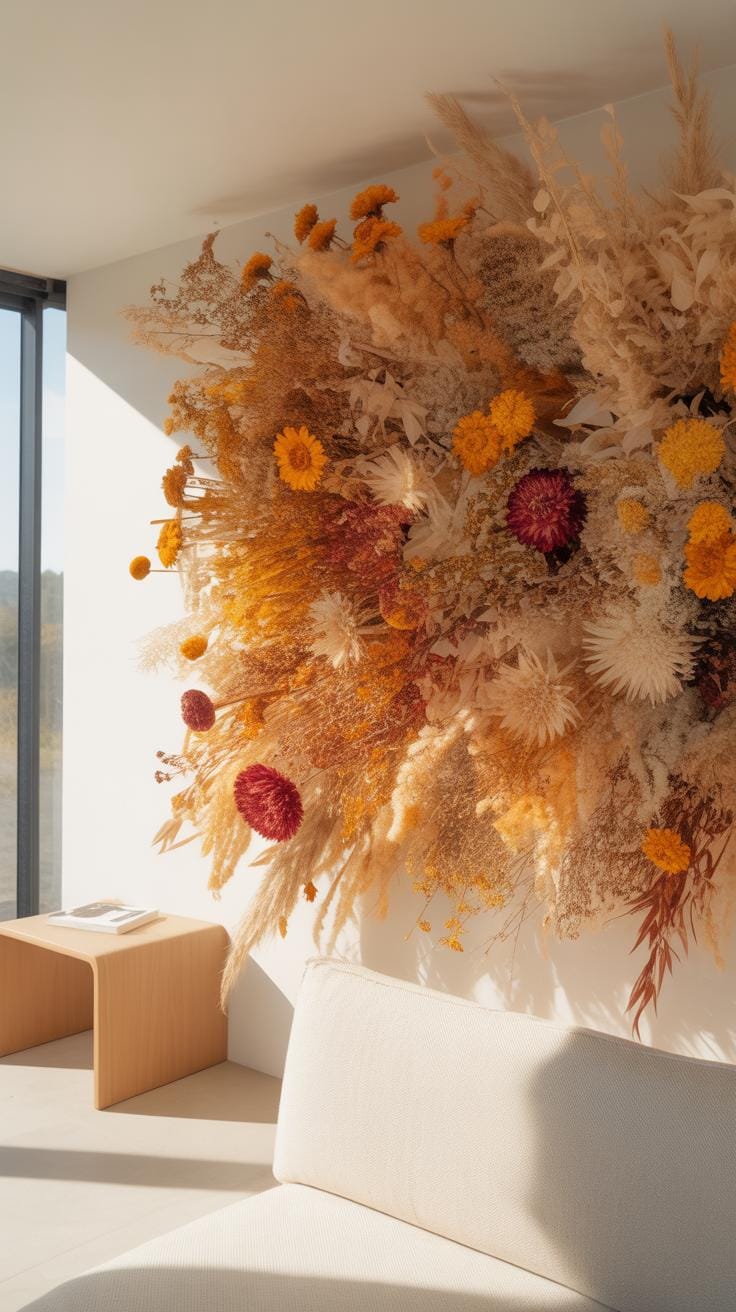
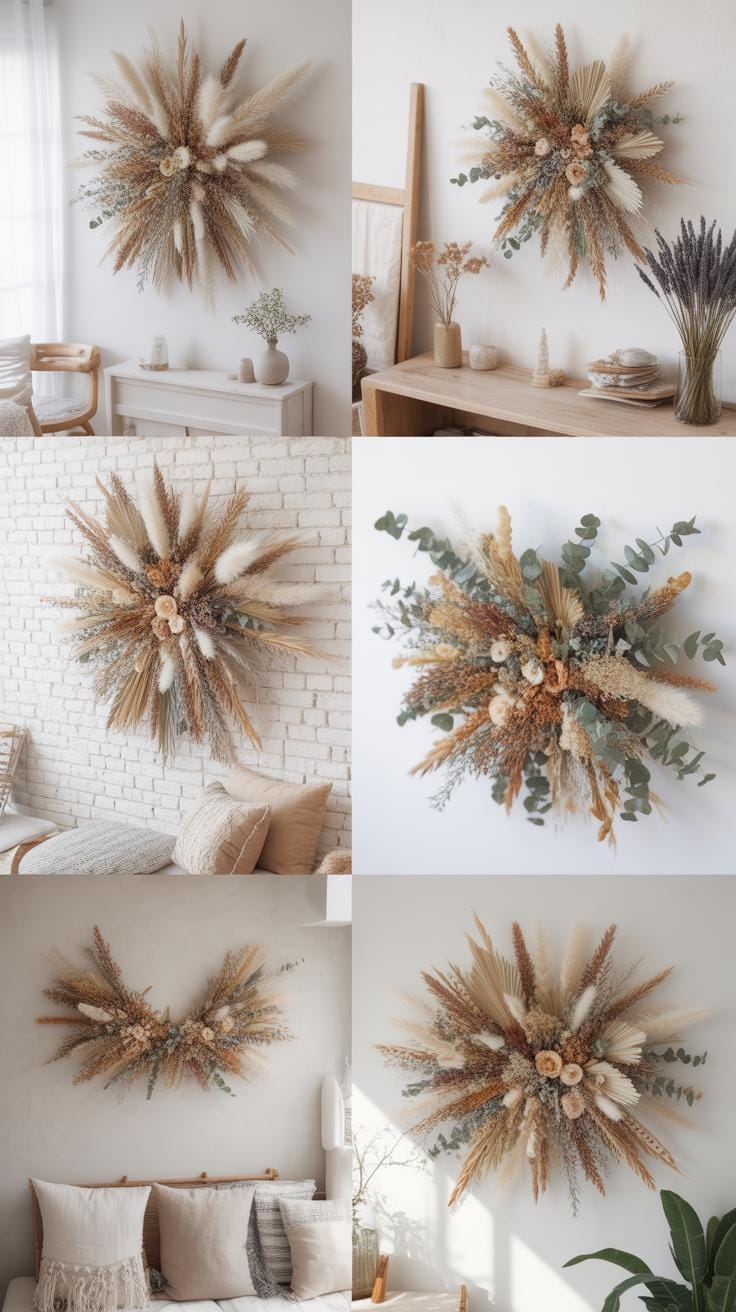
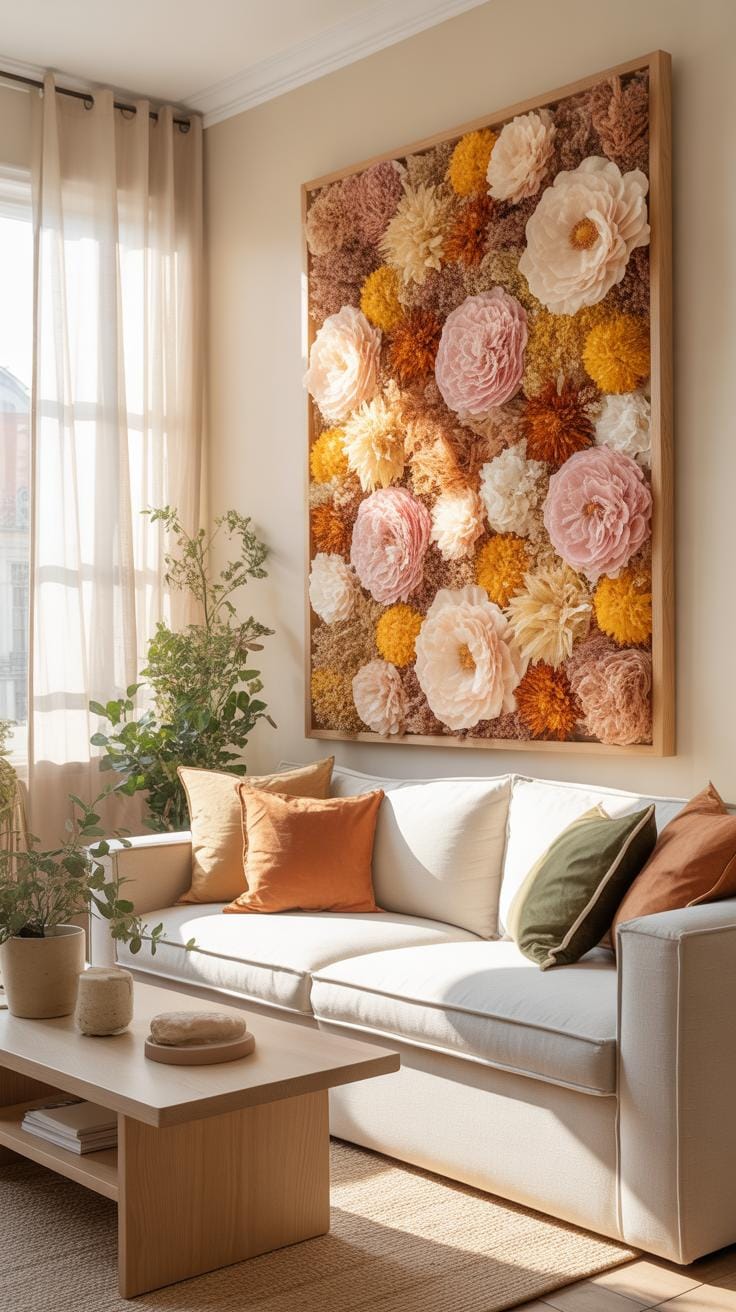
Maximalist designs reject empty space and embrace saturation. Cover large wall sections with dense layers of pampas grass, straws, and dried palms. Use chicken wire or floral foam as a hidden base to secure the volume. Mix vibrant dyed moss with natural earth tones for high contrast. This style draws from the Victorian era of botanical collecting but adds modern scale. Use varied heights and depths to create a massive texture profile.
Pressed Flower Crafts A Timeless Technique For Beautiful Wall Art
The History And Art Of Pressing Flowers For Home Decoration
Flower pressing dates back to ancient Egypt and Japan. Japanese Oshibana art evolved during the sixteenth century. Samurai warriors used this practice to improve focus and patience. They created intricate landscapes using flattened botanical specimens. This technique preserved the color and structure of plants for decades. It shifted from a meditative exercise to a popular decorative craft worldwide.
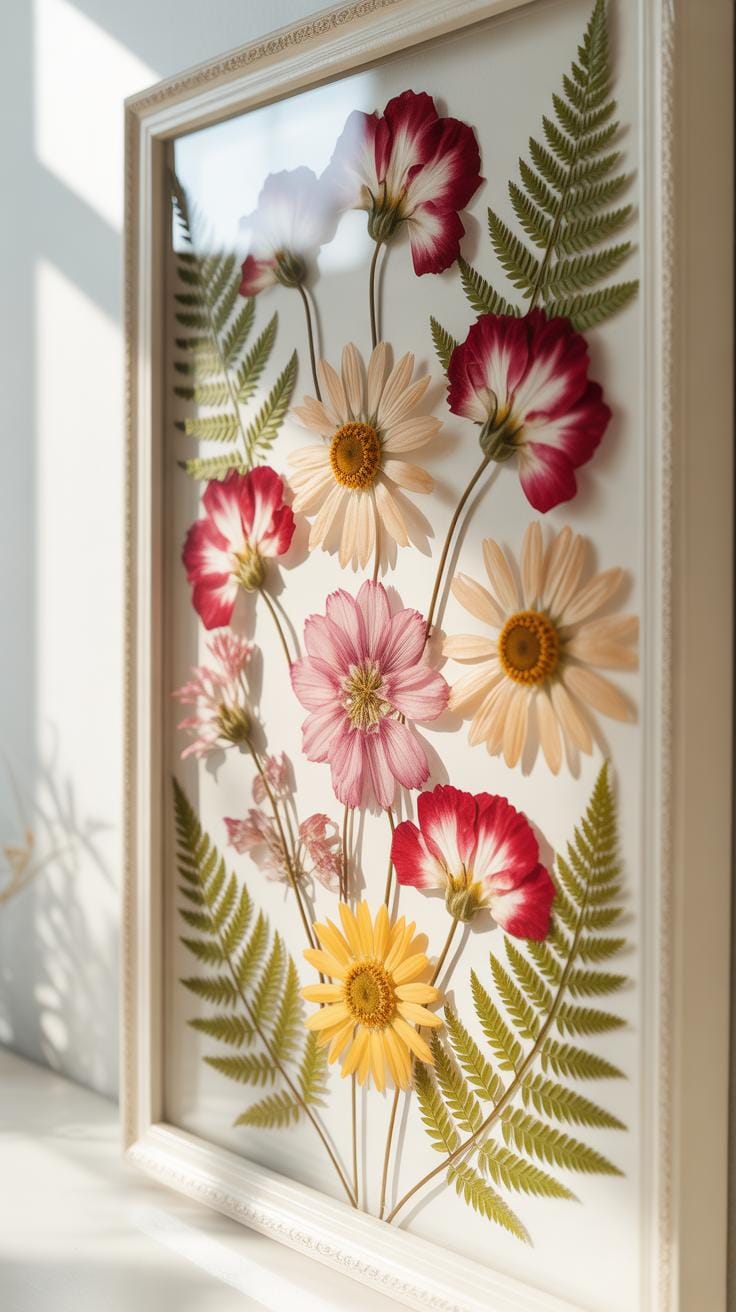
In the Victorian era, pressing flowers became a mainstream hobby. People kept herbaria to document botanical discoveries. Enthusiasts used these dried plants to decorate scrapbooks and wall frames. Modern design movements now use this method for minimalist aesthetics. You can create clean lines and natural focal points in any room. Simple preservation ensures your wall art stays vibrant and structurally sound for years.
Essential Materials You Need To Start Pressed Flower Crafts
To start, you must select tools that remove moisture quickly. Proper equipment prevents browning and mold growth in your specimens. You need a dedicated flower press or heavy books to apply even pressure. Absorbent paper layers are critical for the drying process. High-quality materials ensure your botanical art looks professional and lasts through different seasons without fading significantly.
- Wooden Flower Press: Two solid boards with bolts use mechanical pressure to flatten thick blooms. This tool provides more consistent force than heavy books. It remains the standard for professional-grade results.
- Blotting Paper: This specialized paper absorbs moisture from plant tissues without sticking to them. Avoid using paper towels with textures as they leave permanent marks on delicate petals. Plain newsprint serves as a cheap substitute.
- Corrugated Cardboard: These sheets provide airflow between layers of flowers. Air circulation speeds up drying and prevents rot during the pressing phase. Proper ventilation is vital for maintaining the original color of the petals.
- Precision Tweezers: Handling dry, brittle flowers with fingers often causes breakage. Stainless steel tweezers allow you to position tiny stems and leaves with extreme accuracy. This tool is essential for complex geometric arrangements.
- Acid-Free Glue: Standard adhesives turn yellow over time and damage organic fibers. Use pH-neutral glue to secure specimens to their mounting board. This keeps your wall art clean and stable for long-term display.
Once you gather these supplies, choose flowers with low moisture content. Flat-faced blooms like pansies or daisies work best for beginners. Avoid thick bulbs until you master the drying timeline. Secure your finished pieces behind UV-protective glass to prevent sunlight damage. This final step protects your investment and keeps the natural colors sharp. Proper mounting techniques distinguish hobbyist work from gallery-quality decor.
How To Choose The Perfect Flower Frame And Flower Picture Frames For Your Wall
Matching Flower Frame Styles To Your Room’S Color Palette And Aesthetic
Match frame materials to your existing interior design style to ensure visual cohesion. Use raw oak or light maple frames for Scandinavian and Minimalist rooms. These light woods complement muted floral tones without overwhelming the space. Industrial spaces require blackened steel or dark walnut frames to anchor the wall. Match your wood grains to your floor or furniture to keep the room grounded.
Coordinate your flower colors with the frame finish to control contrast levels. Use gold or brass frames to elevate formal Victorian or Art Deco settings. These metals highlight the warm yellows and deep reds in dried arrangements. Choose matte black frames for modern galleries to make bright petals pop. Avoid using busy patterns on frames. Simple profiles let the botanical textures remain the primary focal point of the artwork.
Glass Front Vs. Open Frame Flower Picture Frames: Which Works Best For Dried Botanicals
Glass-front frames provide the best protection for long-term botanical displays. Sealed frames prevent moisture from re-hydrating the plant tissue. This stops mold growth and structural decay. Use UV-protective glass to prevent the sun from bleaching the natural pigments in the petals. This method keeps the specimen flat and intact. It is the tactical choice for preserving expensive or rare floral arrangements over several years.

Open-frame designs offer more texture but lack environmental protection. Use these in low-traffic areas where humidity stays constant. Exposed flowers gather dust quickly and become brittle without a barrier. This style works well for thick 3D bouquets that do not fit behind glass. Choose open frames only if you plan to replace the flowers frequently. The lack of glass makes the organic elements vulnerable to physical damage and fading.
Dried Flowers DIY How To Make Stunning Wall Art At Home
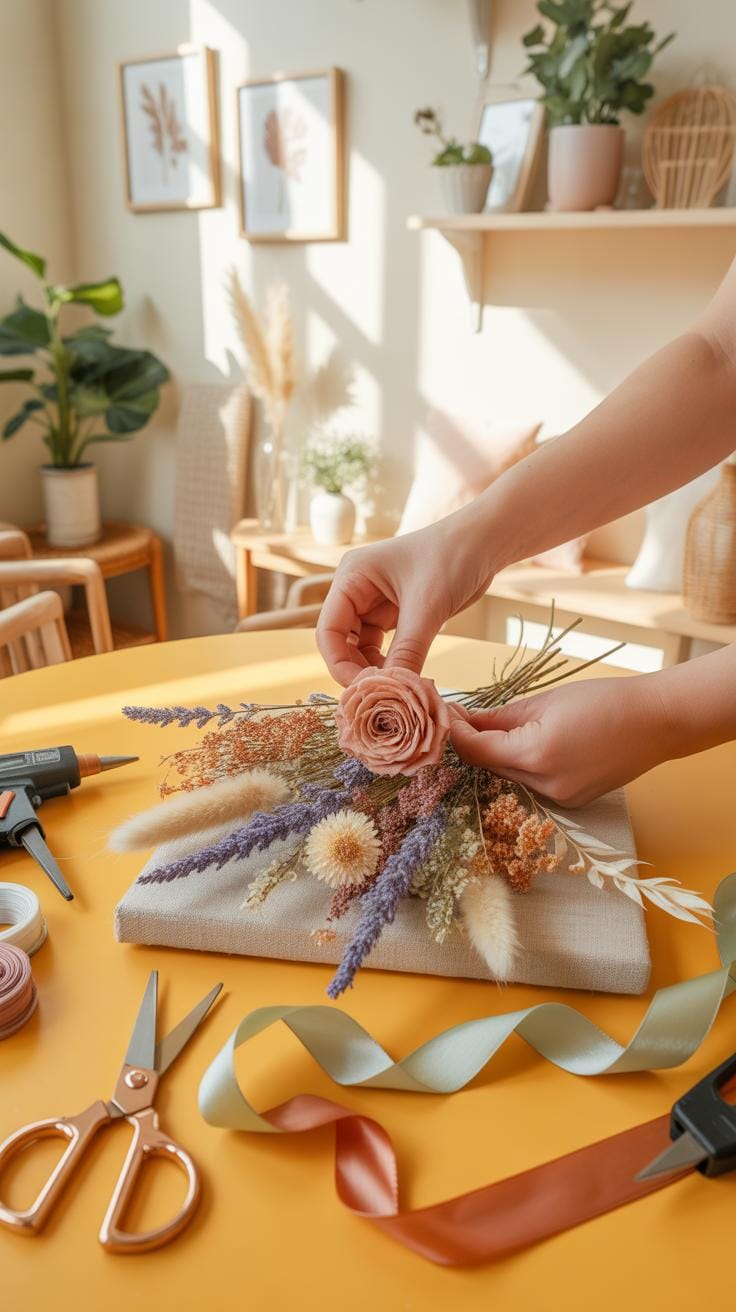
Step By Step Guide To Creating Your First Dried Flowers DIY Wall Piece
Select a mounting surface based on your desired aesthetic. Wood panels work for rustic styles while glass frames suit modern minimalism. You must ensure all plant materials are completely moisture-free before assembly. Trapped humidity causes mold and ruins the piece within weeks. Gather your tools including floral wire, hot glue, and tweezers for precise placement. Planning your layout on a flat surface prevents errors during final adhesion.
- Pressing the Botanicals: Place fresh flowers between parchment paper inside a heavy book or professional press. Apply even pressure for two to three weeks until the petals feel like paper. This removes water while preserving the structural integrity of the cell walls.
- Preparing the Base: Clean your glass or wood surface with isopropyl alcohol to remove oils and dust. A sterile surface ensures the adhesive bonds permanently. Trace your frame size on a template paper to guide your design without smudging the final mounting material.
- Arranging the Composition: Position the largest focal flowers first to establish a center of gravity. Layer smaller filler stems and greenery around these primary points. Use a balanced or asymmetrical layout depending on the visual weight of your chosen species and colors.
- Securing the Elements: Apply small dots of clear-drying glue to the thickest parts of the stems. Use tweezers to press the flora onto the backing. Avoid using excessive glue as it can seep through thin petals and create visible shiny spots on the finished art.
- Sealing the Frame: Place the glass over the arrangement carefully to avoid shifting the pieces. Secure the backing clips tightly to minimize oxygen exposure. If using an open shadow box, spray a light coat of UV-resistant floral sealant to prevent color fading from sunlight.
Mount the finished work away from direct heat sources and high humidity zones like bathrooms. Intense light breaks down organic pigments through photodegradation. Use a level to ensure the piece sits straight on your wall. Proper installation protects your labor and ensures the organic materials last for several years. Maintain the art by dusting the frame weekly with a dry microfiber cloth to keep the glass clear.
Common Mistakes To Avoid When Crafting Dried Flower Wall Art At Home
Many beginners use flowers that still contain internal moisture. This mistake leads to browning and fungal growth inside the frame. You must wait until the stems snap easily before sealing them away. Skipping the UV protection step is another tactical error. Natural colors fade quickly when exposed to window light. Always apply a sealant or use UV-filtered glass to maintain the original saturated hues of the petals.

Poor adhesive choice often ruins delicate DIY projects. Standard school glue lacks the strength for heavy stems while industrial solvents can melt thin leaves. Use pH-neutral floral adhesive to prevent chemical burns on the plant tissue. Additionally, overcrowding the frame creates a cluttered look that lacks professional polish. Leave enough negative space to allow the individual shapes of the botanicals to stand out. Proper spacing defines the quality of the final design.
Wall Dried Flower Decor Styles To Complement Every Interior Theme
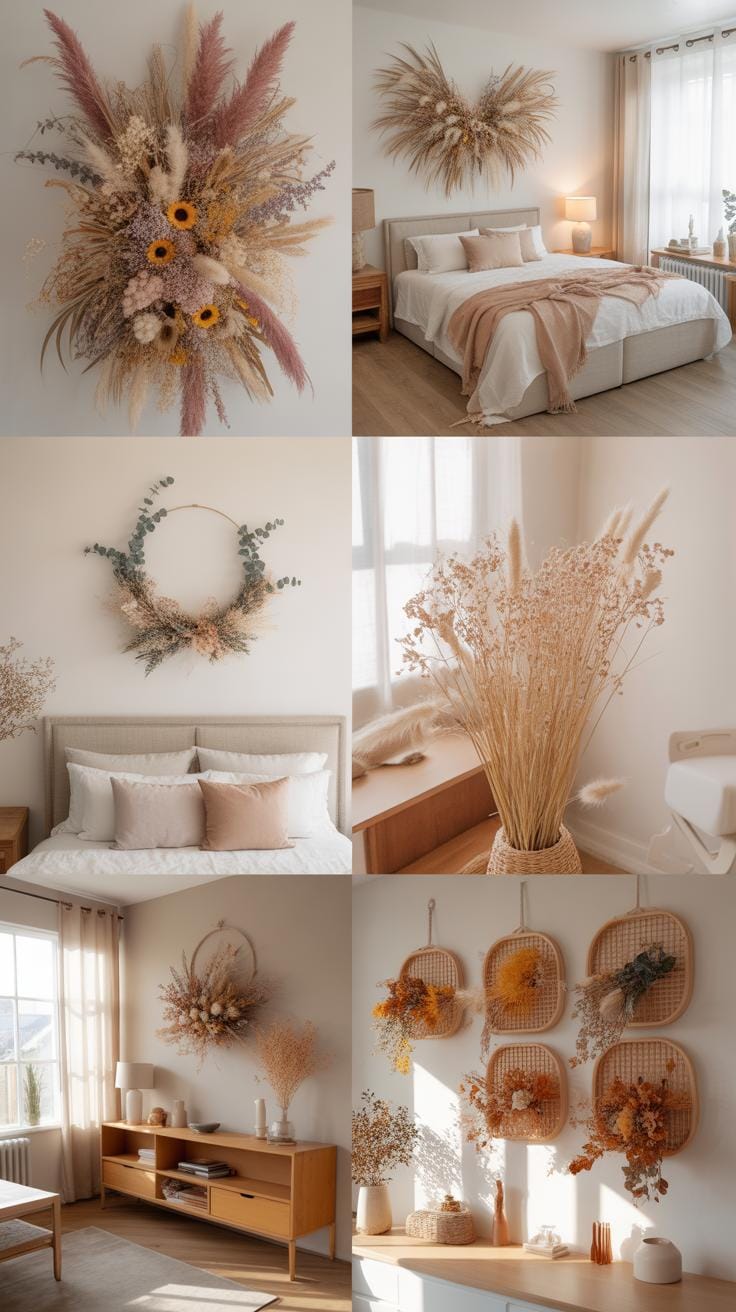
How To Style Dry Flowers Wall Decor In Bohemian And Rustic Interiors
Bohemian interiors prioritize organic textures and layered materials. Use large scale pampas grass installations to add height and volume to empty walls. Hand woven rattan frames or macrame hangings provide the necessary structural support for delicate stems. Focus on warm earth tones like ochre, terracotta, and deep brown. These colors mimic natural decay and growth cycles found in traditional desert and forest landscapes.
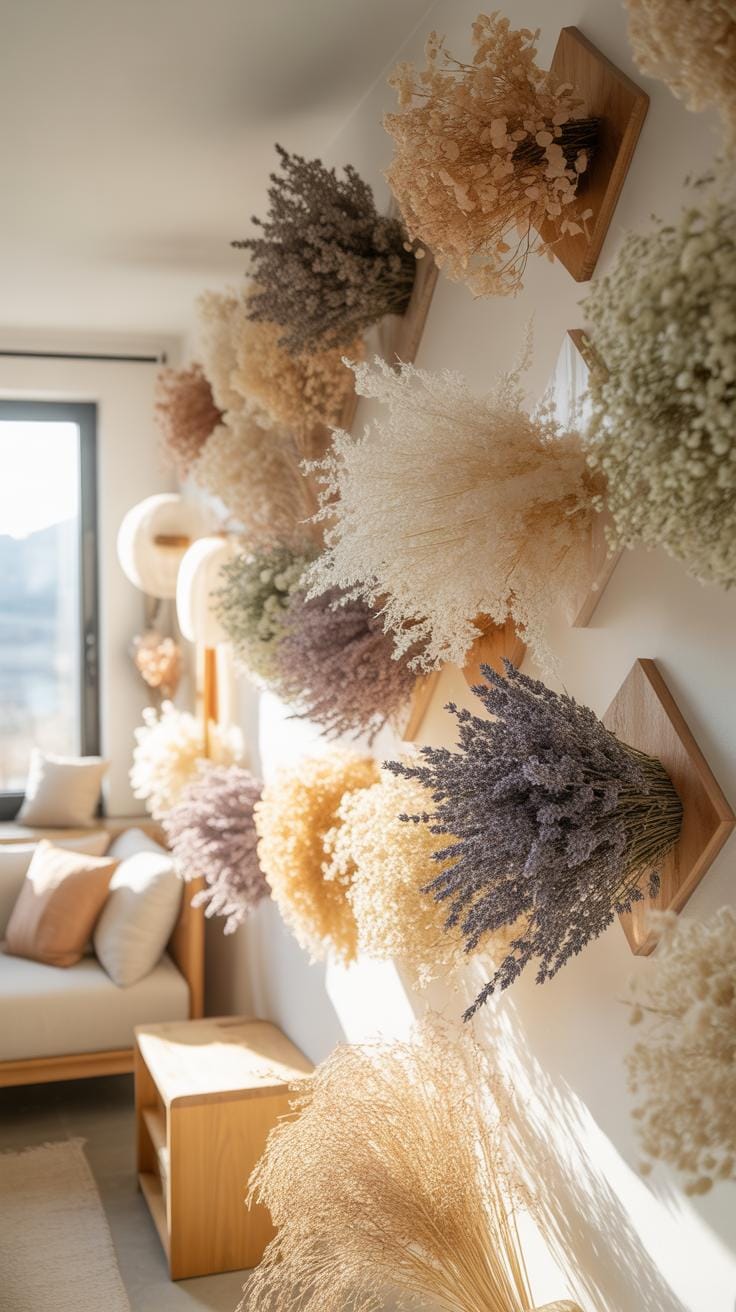
Rustic design relies on reclaimed wood and aged metals to create a weathered look. Mount dried lavender or eucalyptus bundles onto salvaged timber boards using iron clips. This technique emphasizes the raw utility of the materials. Ensure the floral arrangements look sparse rather than manicured. Authentic rustic style avoids perfect symmetry. Use twine and wire to secure heavy branches. This approach honors historical methods of air drying botanical harvests.
Incorporating Wall Dried Flower Decor Into Scandinavian And Contemporary Spaces

Scandinavian design demands functionality and clean lines. Use single stem displays in thin glass tubes or acrylic frames. This minimalist approach highlights the unique geometry of each flower without cluttering the visual field. Stick to a neutral palette of whites, creams, and soft greys. These tones reflect natural light and maintain the airy feel essential to Nordic interiors. Position these pieces on white walls to maximize contrast.
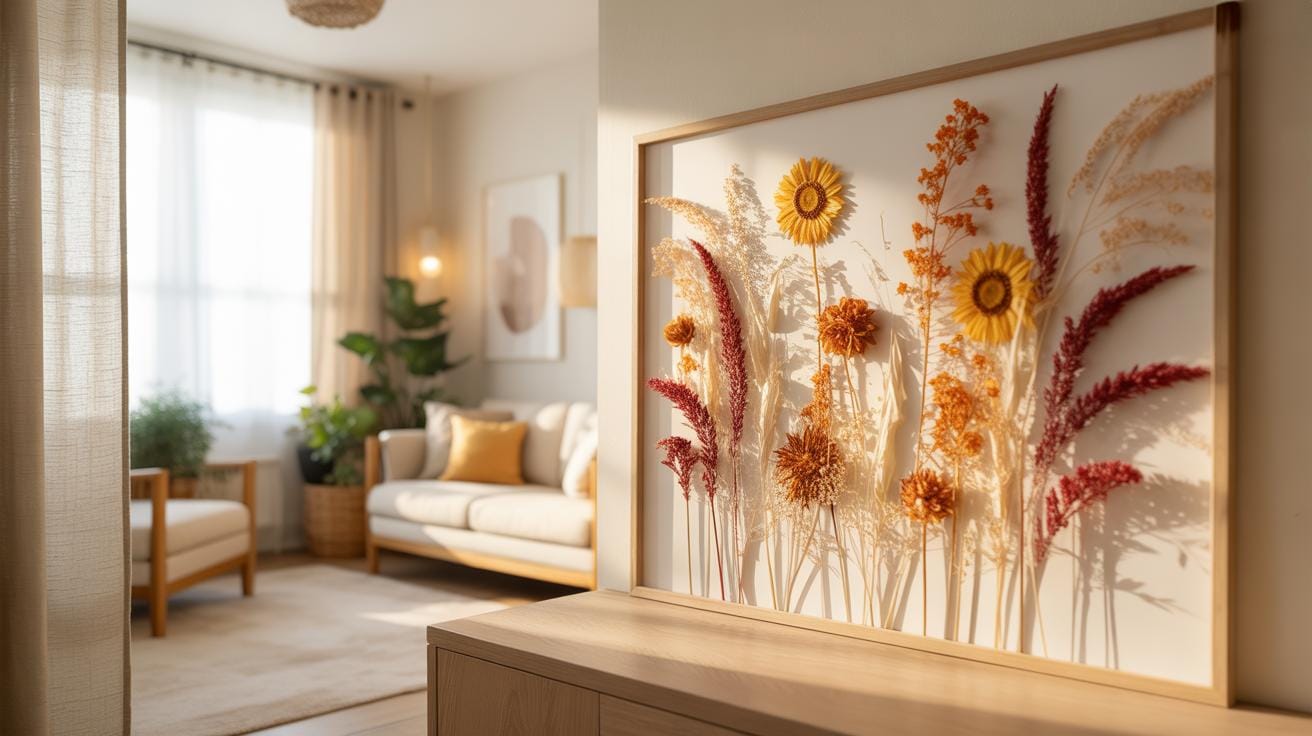
Contemporary spaces require bold statements and geometric shapes. Choose shadow boxes with black or metallic frames to house pressed botanicals. This creates a museum quality look that fits modern architectural standards. Arrange multiple frames in a strict grid pattern to maintain order. Focus on structural plants like protea or palm leaves. These species offer sharp silhouettes that complement modern furniture. Avoid busy patterns to keep the focus on the architectural form.
Dried Flowers Crafts Creative Ideas That Go Beyond Basic Arrangements
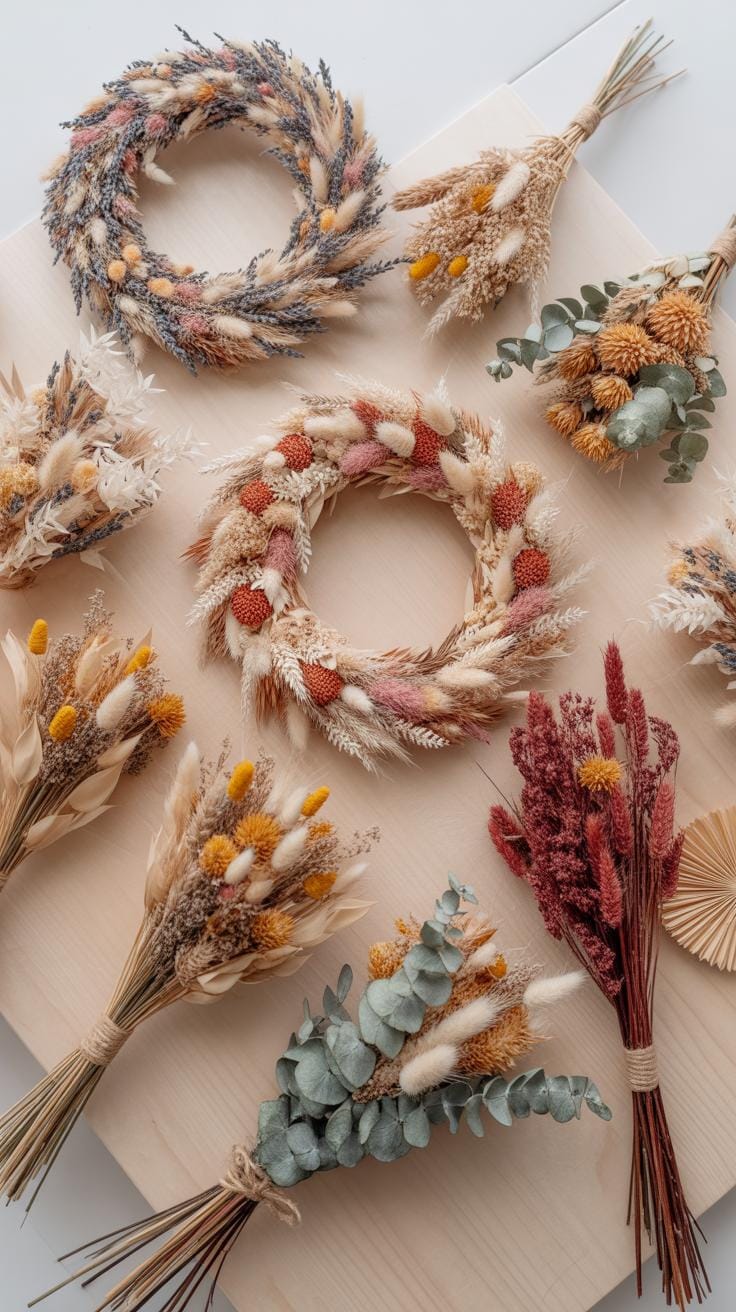
Wreaths, Hoops, And Shadow Boxes: Unique Dried Flowers Crafts For Your Walls
Modern wall art utilizes geometric brass hoops to create minimalist floral displays. These frames hold stems using thin florist wire or clear adhesive. Unlike traditional full wreaths, these hoops focus on asymmetrical balance. They leave sections of the metal exposed to match industrial or mid century styles. This technique reduces weight and prevents the arrangement from overwhelming smaller wall spaces.
Shadow boxes provide a controlled environment for fragile botanical specimens. They protect dried material from dust and physical contact. You can mount stems to acid free cardstock using small drops of pH neutral glue. This method mimics Victorian herbarium displays but fits modern interior design. For more depth, layer the flowers at different heights within the frame to create a three dimensional effect.
How To Preserve Color And Shape In Dried Flowers Crafts For Long Lasting Art
Heat and moisture destroy dried flowers quickly. You must hang your art away from direct sunlight to prevent UV bleaching. Natural pigments fade when exposed to intense light over time. Use an acrylic spray sealant to bond the petals and prevent shedding. This clear coating acts as a moisture barrier. It keeps the plants from absorbing humidity which causes wilting and rot.
Silica gel provides the best results for shape retention during the drying phase. This desiccant pulls moisture out while supporting the physical structure of the bloom. Sturdy flowers like roses and hydrangeas hold their form better than thin petals when using this method. Avoid hanging art in bathrooms or kitchens. The high humidity in these areas softens the plant fibers and leads to mold growth.
Dried Flowers Ideas Wall Decor Room By Room Styling Guide
Best Dried Flowers Ideas For Wall Decor In Living Rooms, Bedrooms, And Hallways
Living rooms require bold focal points to anchor the seating area. Use large-scale frames or wreaths featuring robust species like Protea or Banksia. These flowers hold their structural integrity in high-traffic zones. Position them away from direct sunlight to prevent UV rays from bleaching the pigments. This placement ensures the organic tones remain vibrant. Proper mounting prevents damage from vibrations caused by doors or heavy foot traffic.

Bedrooms and hallways demand a different tactical approach. In bedrooms, choose soft textures like pampas grass or lavender to create a calm environment. Use glass-encased frames to keep dust away from linens. In hallways, use vertical arrangements to maximize narrow pathways. Stick to flat-pressed stems in slim frames to prevent snagging. These choices optimize tight transitions while maintaining a cohesive design throughout the home interior.
Flowers are the beautiful hieroglyphics of nature with which she indicates how much she loves us. The best dried flower wall art preserves these fleeting memories to grace a stylish home with everlasting warmth.
— Johann Wolfgang von Goethe
Scaling Your Dried Flowers Ideas For Wall Decor Across Small And Large Spaces
Large walls will swallow small arrangements and create visual clutter. You must match the scale of the art to the surface area. For expansive walls, use triptych sets or oversized hanging installations. Grouping multiple smaller frames in a grid also works to fill space. This method creates a single massive unit from smaller parts. Always maintain a three-inch gap between frames to ensure the layout looks intentional and professional.
Small spaces require precision to avoid overwhelming the room. Focus on single, high-quality specimens in minimalist frames. Use light-colored botanicals to make a cramped nook feel more open. Do not use bulky shadow boxes in tight corners. Instead, choose flat-pressed frames that sit close to the wall. This saves physical space while providing a clear visual accent. Careful scaling ensures the floral elements enhance the room rather than distracting from its function.
Where To Buy The Best Dried Flower Wall Art For A Stylish Home
Top Online Marketplaces And Artisan Shops For Curated Dried Flower Wall Art
Etsy remains the primary marketplace for custom dried flower wall art. Most high-end artists use this platform to reach global buyers directly. You can find specialized work such as 3D shadow boxes and silica-preserved botanical frames. Check for sellers who specialize in specific preservation tech. Look for shops with high ratings for shipping fragile items. This ensures your piece arrives without petal loss.
Direct artisan websites offer the most exclusive designs. Many established floral studios now sell permanent collections online. These sites provide better transparency on the sourcing of their plants. They often use high-quality woods like oak or walnut for frames. Buying direct usually eliminates middleman fees found on large commercial sites. This allows more budget for better materials and complex botanical arrangements.
What To Look For When Purchasing Dried Flower Wall Art: Quality, Longevity, And Value
Analyze the drying method before you commit to a purchase. Air-dried flowers lose color faster and become brittle. Silica gel preservation keeps the structure and pigment intact for years. Check if the artist uses UV-resistant glass or acrylic. Sun exposure is the primary enemy of organic art. High-quality frames prevent moisture from entering and causing mold growth inside the display.
Examine the density of the floral arrangement. Cheap products look sparse and show the backing material. Premium wall art features layered textures and various species. Ensure the seller uses professional floral fixatives to stop shedding. Verify the origin of the flowers to avoid illegal poaching of wild species. Well-made pieces retain their visual value for five to ten years with minimal maintenance.
Frequently Asked Questions

What exactly is dried flower wall art and why is it popular?
Dried flower wall art consists of preserved botanical elements arranged into aesthetic displays, such as shadow boxes, wreaths, or framed pressed blooms. This trend has gained immense popularity because it brings the beauty of nature indoors without the maintenance of live plants. These everlasting arrangements offer a sophisticated, bohemian texture that complements modern interiors, providing a sustainable and long-lasting alternative to fresh bouquets for stylish home decor.
How do I properly hang and maintain my dried flower wall art?
To display your dried flower wall art, choose a spot away from direct sunlight and high humidity to prevent fading or molding. Use sturdy picture hooks for heavy frames or Command strips for lightweight organic hangings. Maintenance is simple: occasionally use a soft makeup brush or a hair dryer on a cool, low setting to gently remove dust, ensuring your delicate botanical arrangement remains vibrant and beautiful for years.
Can I create beautiful dried flower wall art on a budget?
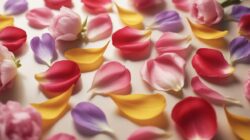
Absolutely! Creating your own dried flower wall art is a very budget-friendly project. You can forage for wildflowers, grasses, or even repurpose grocery store bouquets by air-drying them upside down. By using affordable thrift store frames or simple wooden embroidery hoops, you can craft a high-end look at a fraction of the cost. DIY preserved florals allow you to customize your gallery wall while staying within a modest decorating budget.


