Why Stepping Stones Pathway Designs Are A Must Have In Modern Gardens
The Functional Role Of A Stepping Stones Pathway In Garden Design
Stepping stones provide a stable surface for walking through outdoor spaces. They define specific routes and prevent users from wandering into planting beds. Designers use these paths to connect key zones like patios, sheds, and gates. Proper spacing ensures a natural gait and reduces physical strain. This structure creates a visual map that guides visitors through the landscape without constant verbal direction.
A well-placed path also manages drainage by keeping feet above wet soil. Modern designs use porous materials like natural stone or precast concrete to allow water infiltration. This prevents pooling on the walking surface and reduces runoff into storm drains. By selecting flat and slip-resistant materials, you minimize safety hazards in damp conditions. These paths serve as the backbone of a functional and navigable garden layout.
How Pathways Improve Garden Traffic Flow And Protect Your Lawn
Repetitive foot traffic destroys grass and compacts the soil underneath. Compacted soil starves roots of oxygen and prevents water from reaching the base of the lawn. Stepping stones absorb the mechanical pressure of footsteps. By concentrating traffic onto durable surfaces, you preserve the health of the surrounding turf. This prevents the formation of muddy dead zones and unsightly dirt tracks in high-use areas.
Strategic placement dictates how people move through a property. Straight paths facilitate quick transit between points, while staggered layouts slow down movement for better viewing. Clear paths keep guests away from delicate ground covers and irrigation systems. Limiting foot traffic to stones reduces the maintenance needed for lawn repair. Smart design uses these paths to control movement and maintain the aesthetic integrity of the grass.

Most Popular DIY Stepping Stone Projects For Home Gardeners
How To Make A DIY Stepping Stone Using Concrete And Simple Molds
Set your mold on a flat surface to prevent uneven stone thickness. Apply a commercial release agent or a light coat of cooking spray to the interior walls. Mix your concrete in a bucket until it reaches a thick peanut butter consistency. Pour the mixture slowly to avoid trapping air pockets. Vibrate the mold by tapping the sides gently to settle the wet material.
Level the surface with a straight board or trowel after pouring. Let the concrete cure in a shaded area for at least forty eight hours. Keep the stone damp during this stage to increase final strength. Remove the stone from the mold carefully to avoid chipping the edges. Smooth any rough spots with a masonry stone once the piece is fully dry.
Every stepping stone in a garden is a bridge to a cherished memory, guiding your path through the evolving beauty of nature.
— Gertrude Jekyll
Essential Materials You Need To Start Your DIY Stepping Stone Project
Success in creating durable garden paths depends on using the correct raw materials. You must select a concrete mix designed for strength and outdoor exposure. Standard portland cement mixed with sand and aggregate works best for heavy foot traffic areas. Using the wrong ratio leads to cracking during winter freeze cycles. Gather all your tools before you start the mixing process to save time.
- Pre Mixed Concrete: Use a high strength fiber reinforced mix for maximum durability. These products contain the correct ratio of cement and sand required for outdoor load bearing applications. They resist cracking better than standard blends.
- Molds: Plastic containers or timber frames serve as reliable forms for your stones. Ensure the chosen mold is at least two inches deep to provide structural integrity. Flexible plastic allows for easier removal once the concrete hardens.
- Release Agent: Petroleum jelly or dedicated non stick sprays prevent the concrete from bonding to your mold. This step is critical for maintaining clean lines and preserving the mold for future use. Apply it evenly across all interior surfaces.
- Mixing Tools: A heavy duty bucket and a sturdy shovel or trowel are necessary for blending materials. You must achieve a uniform texture without dry clumps of powder. Specialized mixing paddles attached to drills can speed up the labor.
- Protective Gear: Rubber gloves and safety glasses protect your skin and eyes from caustic lime in the cement. Dust masks prevent inhalation of fine particles during the dry mixing phase. Always prioritize physical safety when handling raw masonry chemicals.
Organization of these materials ensures a steady workflow and consistent results across multiple stones. Measure your water carefully to avoid a soup like consistency which weakens the finished product. Keep your workspace clean to prevent debris from contaminating the wet concrete. Proper preparation reduces waste and improves the professional appearance of your DIY garden path. Follow these steps to build a path that lasts for decades.

Creative Stepping Stone Pathway Layouts That Elevate Any Yard
Straight Vs. Curved Stepping Stone Pathway Styles And When To Use Each
Straight pathways follow formal design principles found in French and Italian Renaissance gardens. These layouts emphasize symmetry and lead the eye to a specific focal point or destination. Use straight lines to move people quickly through high-traffic zones or to frame a modern home. They create a sense of order and authority. This style works best in narrow side yards where space is limited and efficiency is required.
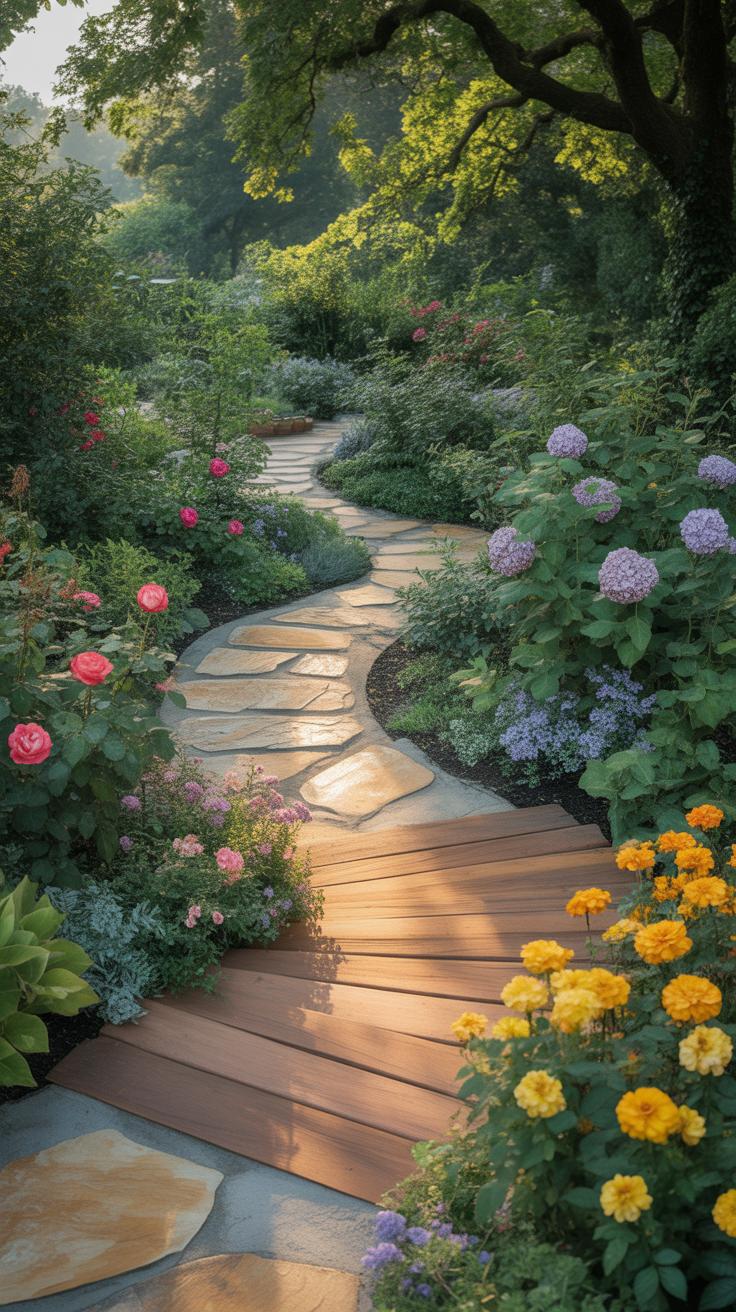
Curved pathways mimic natural landscapes and the English landscape movement. These layouts force visitors to slow down and observe their surroundings. Use curves to hide the end of the path or to navigate around trees and landscape features. This technique makes small yards feel larger by breaking up sightlines. Choose curved designs for informal gardens where you want to promote relaxation and exploration rather than direct utility.
How Spacing And Stone Placement Shape The Feel Of Your Garden Path
Proper spacing determines the physical rhythm of the walk. Standard placement puts the center of each stone twenty to twenty-four inches apart. This distance matches the average human stride. Shortening this gap forces a slower pace and smaller steps. Increasing the distance makes the path feel more open but can cause discomfort for some users. Accurate measurements prevent tripping hazards and ensure the path remains functional for all ages.

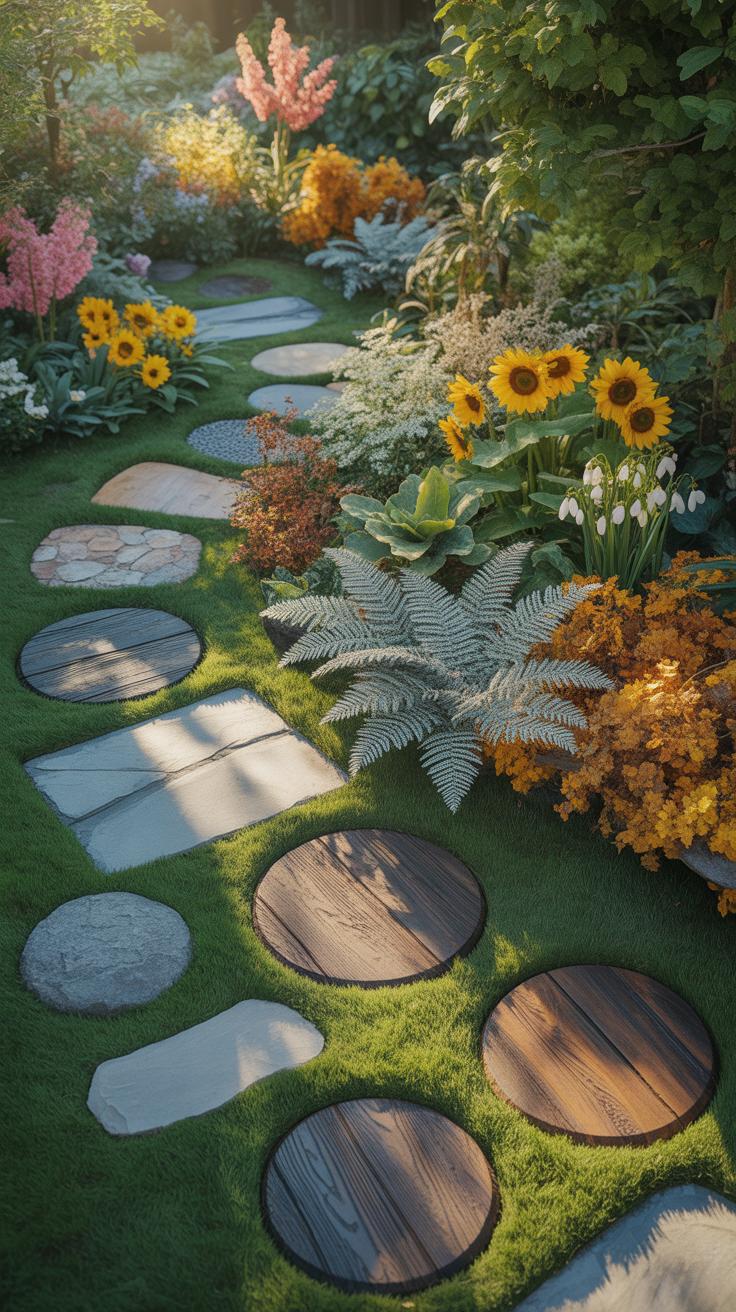
Stone placement also dictates the visual weight of the landscape. Placing stones in a perfectly aligned row creates a rigid and disciplined look. Staggering the stones in a zigzag pattern creates a wider, more casual feel. This offset placement allows more greenery to grow between the gaps. Keep stones level with the ground to prevent mower damage. Consistent placement ensures the path stays safe and easy to maintain throughout the year.
Best Materials For Garden Stepping Stones That Last Through Every Season
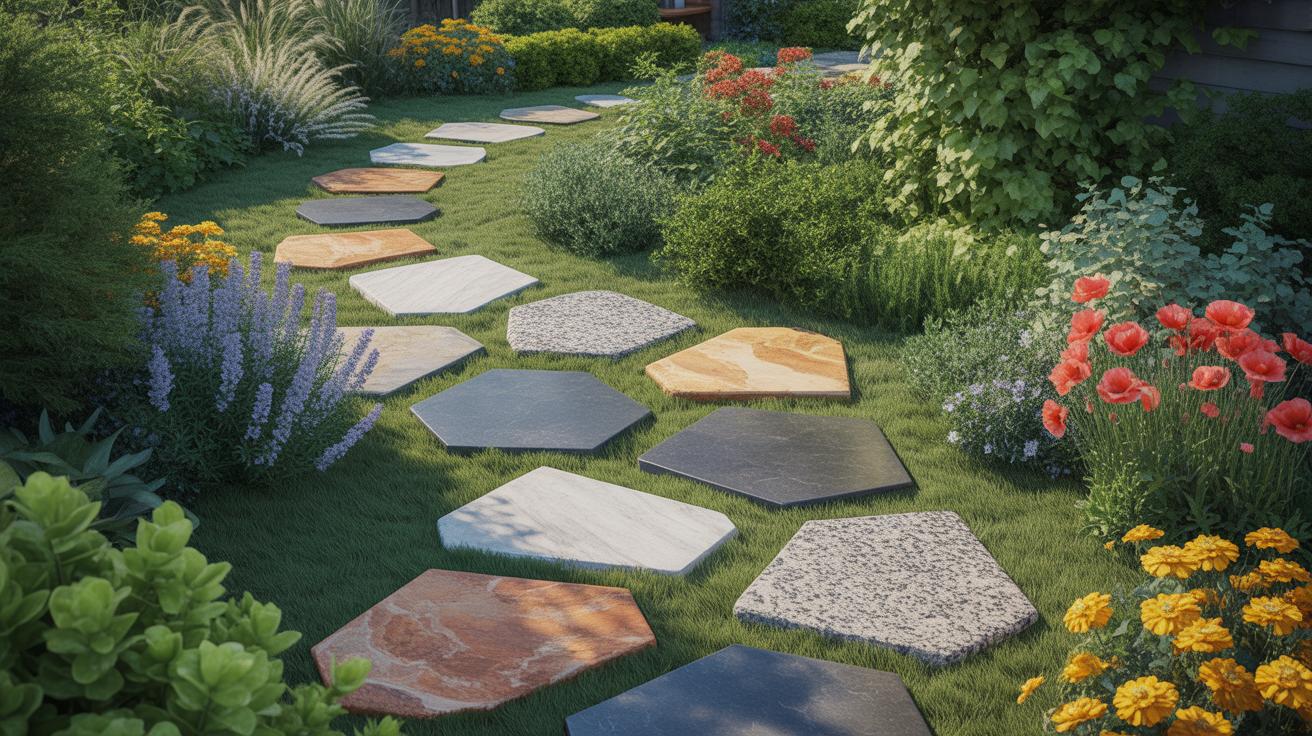
Natural Stone Vs. Concrete: Choosing The Right Material For Garden Stepping Stones
Natural stone offers superior longevity and a unique aesthetic profile. Flagstone, slate, and granite withstand heavy foot traffic without losing structural integrity. These materials do not fade under intense sun exposure. Natural stone resists cracking because it handles thermal expansion better than most synthetic options. You invest more upfront for natural stone, but you save on replacement costs over the decades.
Concrete provides a budget friendly alternative with high versatility. Manufacturers cast concrete into uniform shapes for easy installation. Modern concrete mixes include reinforcement fibers to prevent snapping under pressure. However, concrete is porous. It absorbs water which leads to surface scaling in cold climates. Choose high strength precast concrete pavers if you want a uniform look. Avoid cheap DIY mixes for high traffic pathways.
How Weather And Soil Conditions Affect The Durability Of Your Garden Stepping Stones

Freeze thaw cycles destroy low quality stones. Water enters small pores in the material and expands as it turns to ice. This pressure causes the stone to flake or split. You must select non porous materials like granite or sealed concrete in northern climates. Dense materials resist this internal pressure. Proper drainage under the stone also prevents water from pooling and causing winter damage.
Soil stability dictates whether your stones stay level. Clay soils expand and contract with moisture changes. This movement shifts stones and creates trip hazards. You must install a sub base of crushed gravel and sand to offset soil movement. This base allows water to drain away from the stone seat. Use thicker stones in soft soil areas to distribute weight and prevent sinking over time.
Stunning Garden Paths Ideas That Blend Beauty With Practicality
How To Design Garden Paths That Complement Your Existing Landscape Style
Select materials based on the architectural era of your home. Formal English gardens require geometric precision and sawn stone like slate or sandstone. Organic or rustic landscapes work better with irregular flagstones. Match the stone color to your home exterior or existing hardscape. Contrast creates focal points while matching creates a seamless flow. Consistency prevents the path from looking like an afterthought.

Determine the path width based on foot traffic volume. Main walkways should be thirty-six inches wide to allow two people to walk adjacent. Secondary paths can be eighteen inches wide for a single person. Use straight lines for modern minimalist designs. Curved paths work best for traditional and cottage styles. These curves guide the eye and slow down movement. Proper spacing ensures a natural walking gait.
Combining Ground Cover Plants With Garden Paths For A Lush Natural Look
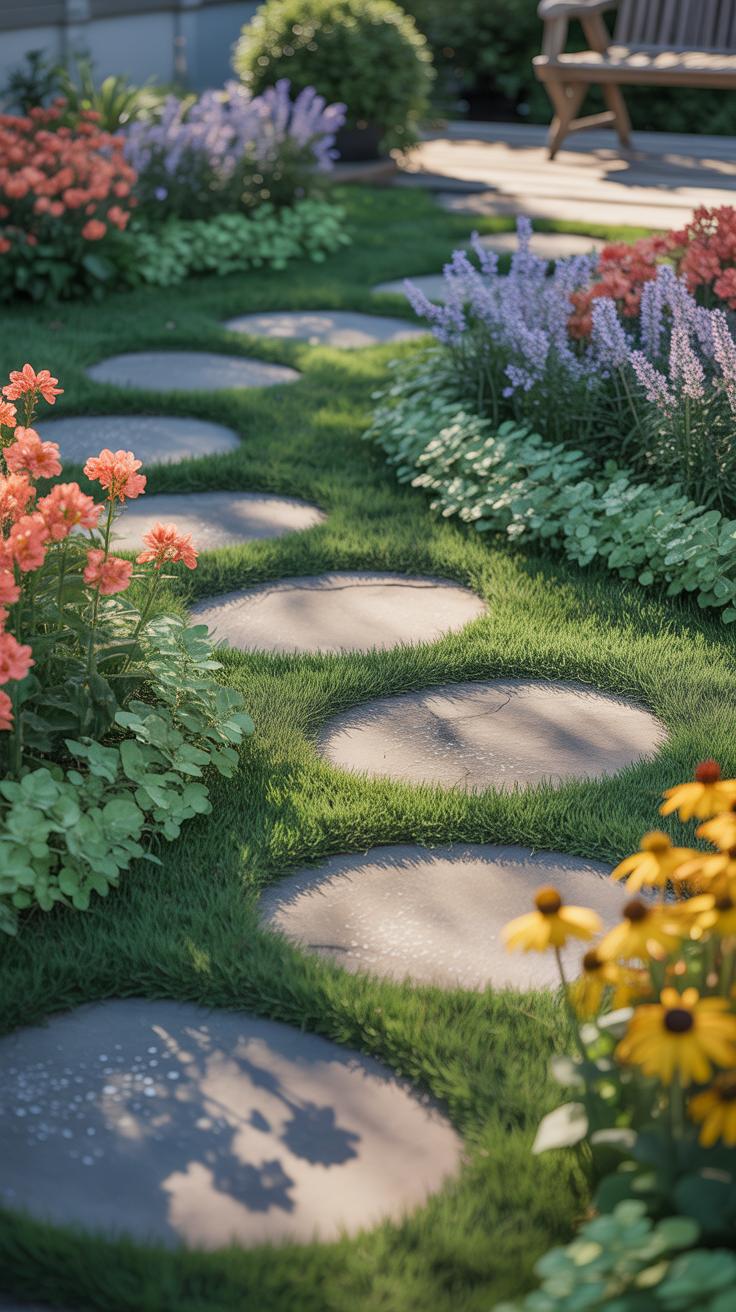
Incorporate low-growing perennials between stones to soften hard edges. Creeping thyme and Irish moss are standard industry choices. These plants tolerate foot traffic and suppress weed growth. Ensure the soil level sits one inch below the stone surface. This protects the plant crowns from direct crushing. Choose species that thrive in your specific sun exposure and soil drainage conditions. Consistent moisture is necessary for establishment.
Use ground covers to unite the path with the surrounding garden beds. This technique blurs the transition between structural elements and nature. Thyme releases a scent when stepped on which adds a sensory layer to the design. Sedum works well in dry rocky areas between large pavers. Always verify the mature spread of your chosen plants. Excessive growth can hide the stone entirely and create a tripping hazard.
Top Stepping Stone Designs Ideas To Match Every Garden Aesthetic
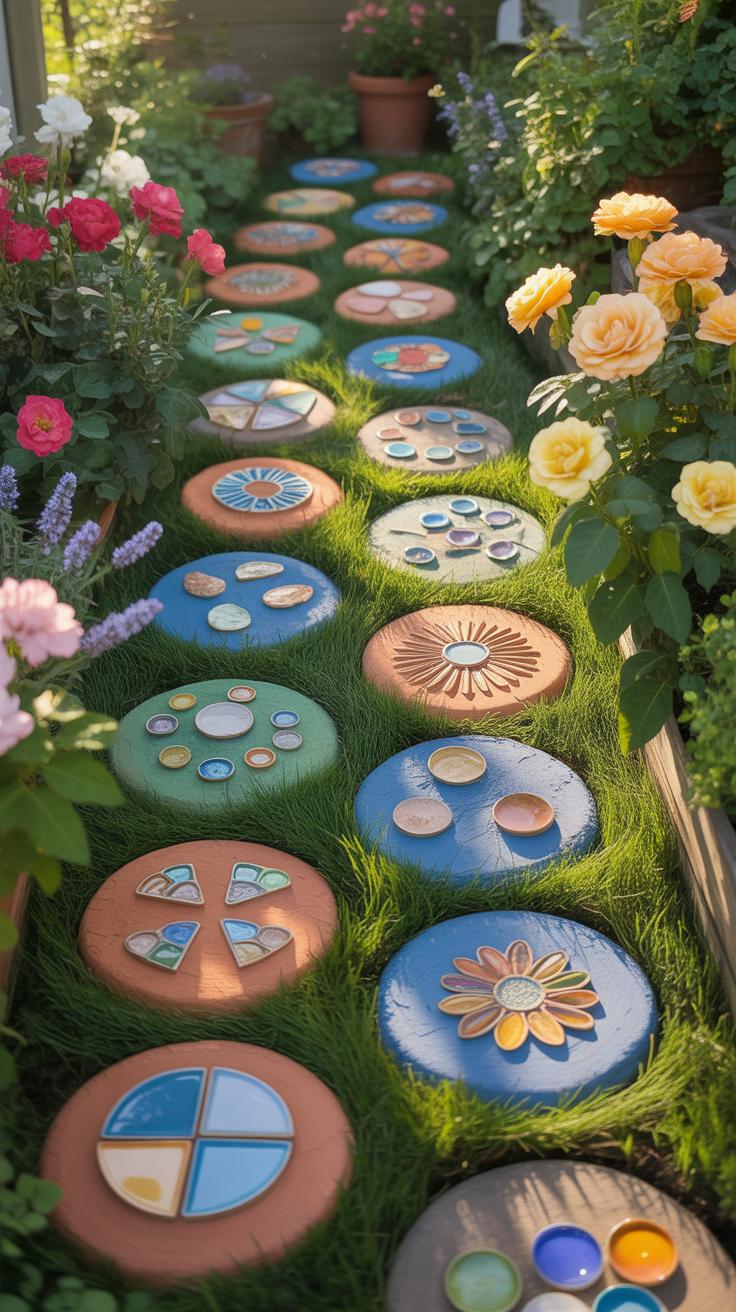
Mosaic And Decorative Stepping Stone Designs Ideas For A Personalized Touch

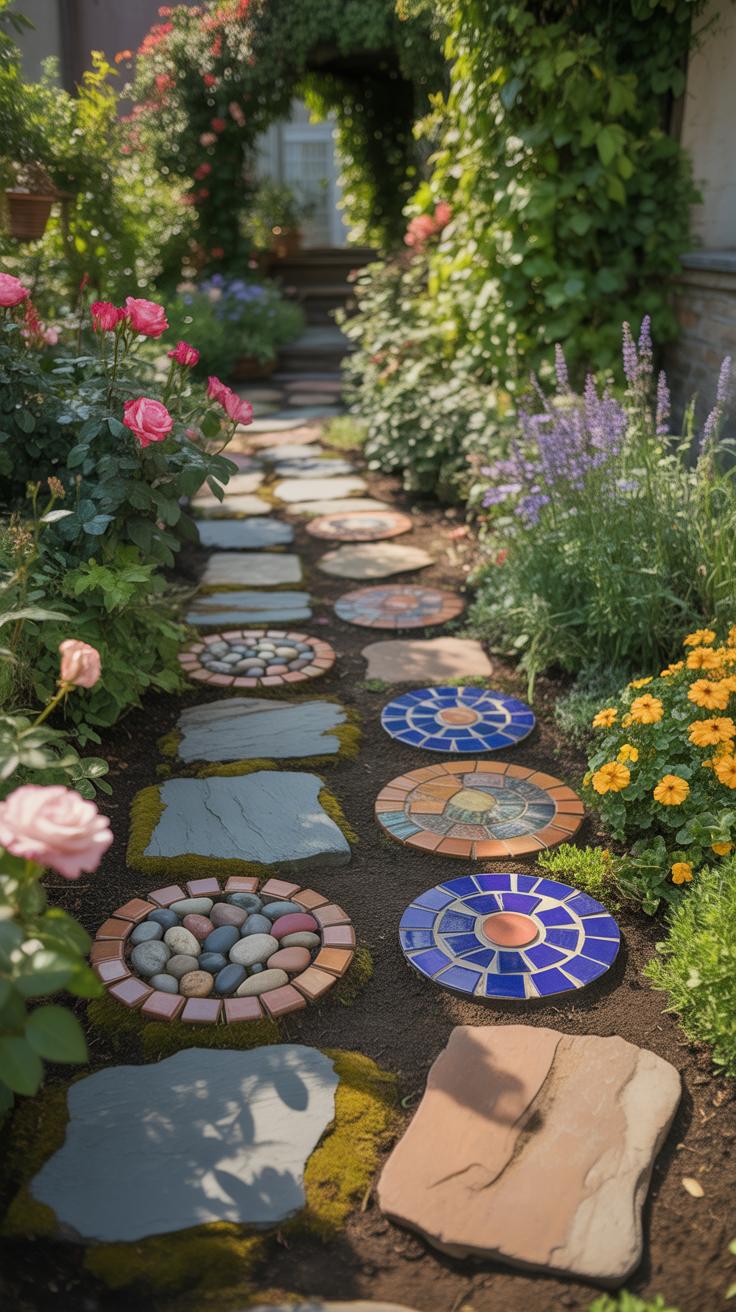
Mosaic techniques involve embedding glass, pebble, or ceramic fragments into a wet concrete base. This method dates back to ancient Mesopotamia and provides a durable, non-slip surface for foot traffic. Builders use mesh backing or indirect methods to ensure a flush finish. This prevents tripping hazards and protects the grout from early erosion or cracking during winter freeze-thaw cycles.
To execute this design, choose frost-resistant tiles and high-strength mortar. Direct application works best for flat stones used in low-traffic areas. You must seal the finished stone with a penetrating masonry sealer to prevent water penetration. This maintenance step keeps the colors bright and stops moss from breaking the bond between the decorative pieces and the concrete base over time.
Minimalist And Modern Stepping Stone Designs Ideas For Contemporary Gardens
Modern garden design relies on clean lines and geometric precision. Rectangular pavers made from architectural-grade concrete or basalt offer a high-performance solution. These materials provide a uniform color palette and sharp edges that define the walkway space. Designers place these stones with intentional gaps to create a floating effect. This layout manages drainage and directs the eye through the landscape.
Install these stones on a compacted gravel sub-base with a sand leveling layer. This prevents shifting and ensures the path stays level under heavy use. Use dark charcoal or slate tones to contrast with light-colored pea gravel or ground cover. These materials resist staining and maintain their structural integrity in harsh climates. Focus on symmetrical spacing to achieve the professional, structured look required in contemporary spaces.
How To Use Stepping Stones Front Yard Layouts To Boost Curb Appeal


Designing A Welcoming Entrance With Stepping Stones Front Yard Arrangements
A front yard layout must direct foot traffic toward the primary entrance. Designers often use the Japanese concept of Roji or “dewy ground” to create a transition from public to private space. Large pavers provide a stable surface for guests. Staggering stones creates a natural look while straight lines offer modern formality. Correct spacing ensures a comfortable stride for most adults.
Scale the stones to match the house proportions. Small stones look cluttered on large properties. Use wide flagstones or oversized concrete slabs for better visual impact. Contrast stone colors against the lawn or mulch to help the path stand out. Proper installation involves excavating soil and laying a gravel base. This prevents the stones from shifting or sinking over time.
Top Tips For Maintaining Stepping Stones Front Yard Installations Year Round
Regular maintenance preserves safety and aesthetics throughout the seasons. Organic debris like wet leaves can make stone surfaces slick and dangerous. Sweep paths once a week to prevent moss and algae growth. Check for shifting units after heavy rain or winter freeze-thaw cycles. Keeping the edges clean prevents grass from overgrowing the stones and obscuring the walking path.
- Monitor Leveling: Ground shifting occurs during seasonal temperature changes. Reset any stones that sit unevenly to prevent trip hazards. Compact the base material before placing the stone back into its original position.
- Control Weed Growth: Seeds settle in the gaps between stones and germinate quickly. Use polymeric sand or landscaping fabric to block sunlight and prevent root development. This keeps the path lines sharp and clean.
- Apply Sealants: Natural stones like sandstone or slate can absorb moisture and crack. Apply a breathable sealer every three years to protect against salt damage and stains. This maintains the stone color and structural integrity.
- Clear Winter Snow: Use a plastic shovel or a brush to remove snow from path surfaces. Metal blades can scratch or chip natural stone and decorative concrete. Avoid using rock salt which erodes the surface of the stones.
- Manage Drainage: Ensure water flows away from the stones during heavy rain. Standing water causes erosion and destabilizes the path foundation. Clean surrounding gutters and adjust grade levels to keep the walkway dry and stable.
Good drainage is the most critical factor for long-term durability. Check the pitch of the yard to ensure runoff does not pool on the walking surface. Replace any cracked stones immediately to maintain a professional appearance. If using wood or composite materials, inspect for rot or sun damage. Consistent upkeep ensures the front yard path remains a functional asset for the property.

Inspiring Stepping Stone Path Ideas For Small And Large Garden Spaces
Stepping Stone Path Ideas That Work Beautifully In Compact Urban Gardens
Small gardens require precision and vertical logic. Use oversized rectangular pavers to create a sense of width in narrow corridors. This technique exploits an optical illusion that makes small plots feel larger than reality. Select dark pavers like slate or basalt to absorb shadow and add depth. Place stones closer together to ensure easy walking without overextending your stride in tight quarters.
Maintain tight clearances to preserve precious planting space. Fill gaps between stones with low profile groundcovers like Irish Moss or Elfin Thyme. These plants withstand light foot traffic and stay green year round. Avoid loose gravel in tiny gardens because it spills onto surrounding surfaces easily. Use a sand base for stability to prevent stones from shifting. Compact designs prioritize clean lines and functional movement over decorative flourishes.
Grand Scale Stepping Stone Path Ideas For Expansive Backyard Landscapes
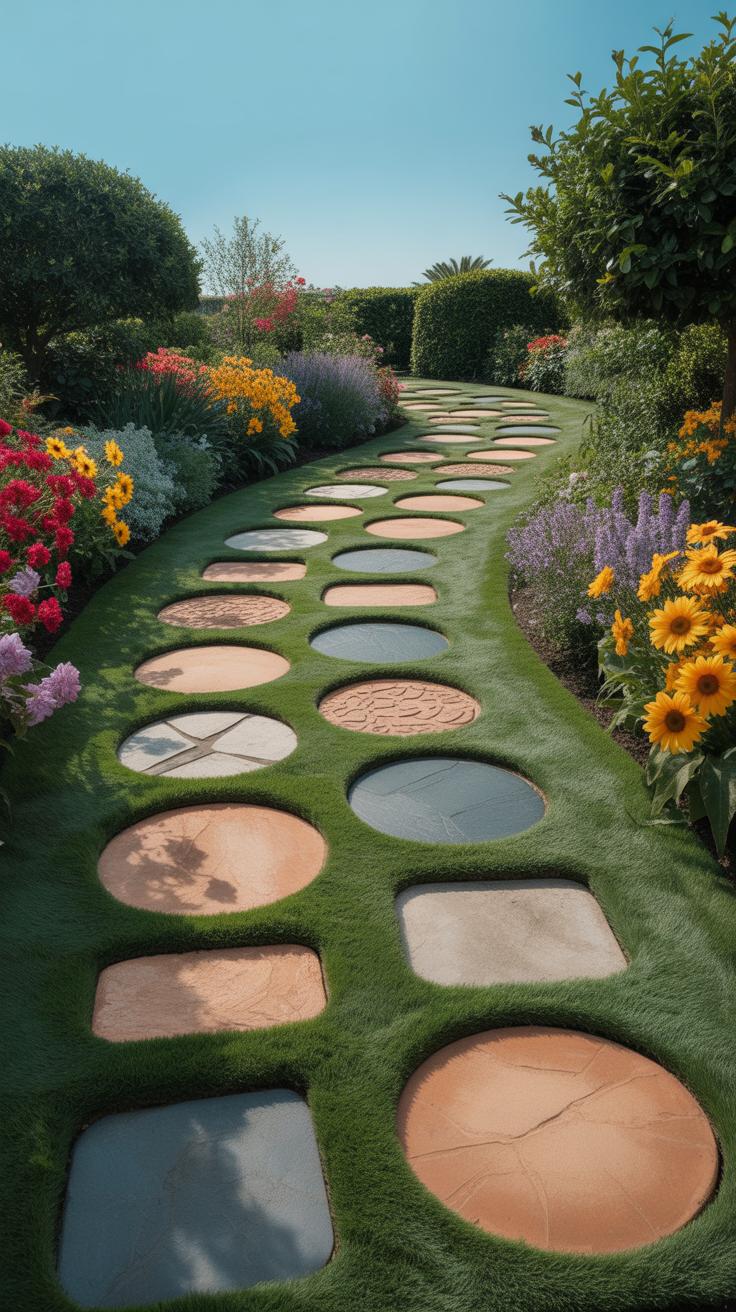
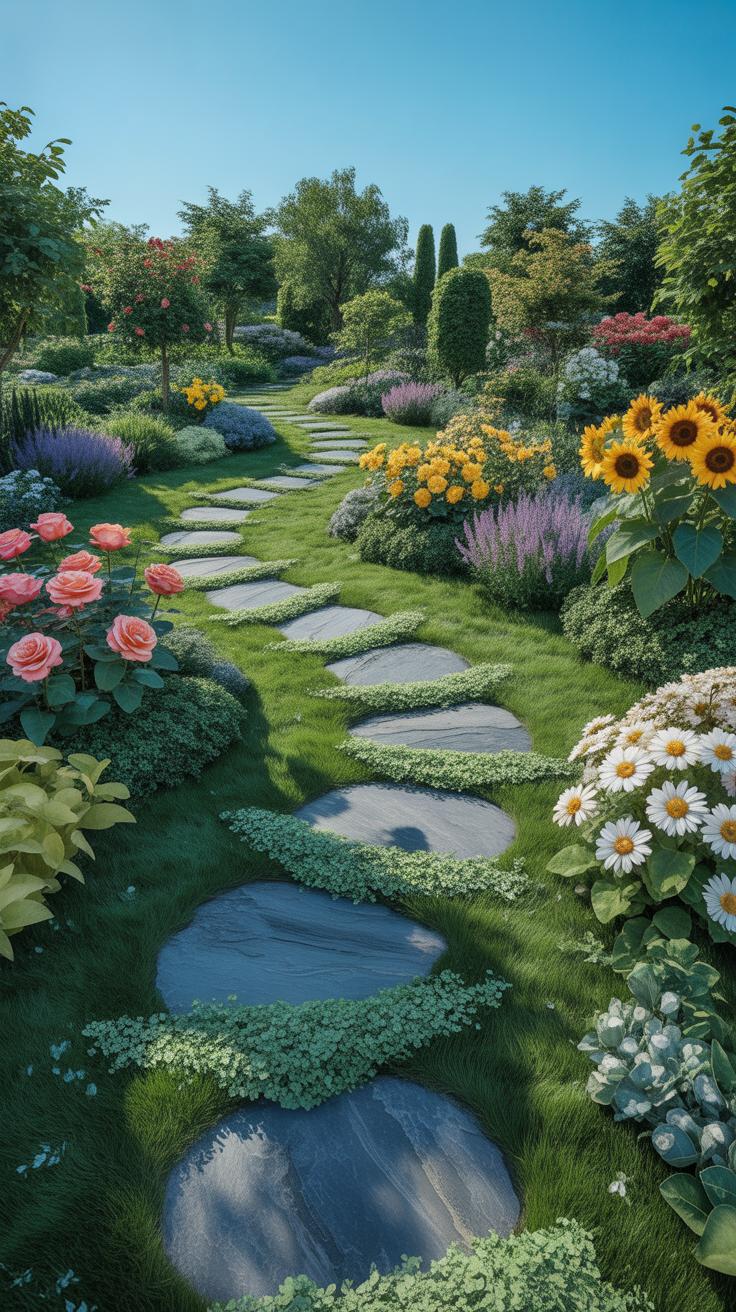
Large landscapes demand high contrast and bold materials to define space. Use irregular flagstone or large limestone slabs to anchor the visual field. Create wide paths that allow two people to walk side by side comfortably. Spaced stones work well here to slow the pace and encourage viewers to observe the surroundings. Natural stone paths tie distant garden zones together while maintaining a cohesive architectural language across the property.
Engineering is critical for long paths. Excavate four to six inches deep to create a solid subbase of crushed rock. This prevents heavy stones from sinking into soft soil over time. Use stabilizing plastic grids if you choose to fill large gaps with pea stones or river rock. Proper drainage ensures the path remains safe and dry during heavy rain. High quality installation ensures the path survives decades of freeze and thaw cycles.
Frequently Asked Questions

What are the best materials to use for a beginner garden project?
If you are just starting out, pre-cast concrete or natural flagstone are the best choices for your backyard. These materials are durable, widely available at local home centers, and incredibly easy to level. When exploring various garden stepping stone ideas, beginners should prioritize slip-resistant textures. Choosing larger, heavier stones ensures stability underfoot, making your first DIY landscaping project both a beautiful success and a safe addition to your outdoor space.
How do I properly install stepping stones to prevent them from wobbling?
To ensure a professional finish, start by excavating a shallow hole slightly larger than your stone. Fill the base with an inch of leveled sand or fine gravel to provide drainage and a stable foundation. Place your stone firmly on top and use a rubber mallet to settle it. This method is a staple among garden stepping stone ideas because it prevents shifting and ensures a smooth, trip-free walking surface through your flowerbeds.
Are there any low-cost ways to create a beautiful garden path?
Absolutely! You can achieve a high-end look on a budget by using reclaimed materials like broken bricks or smooth river rocks arranged in patterns. Another affordable tip is to cast your own stones using basic concrete mix and plastic molds. By getting creative with recycled items, you can implement stunning trends without the high price tag, proving that stylish landscaping is accessible to every homeowner regardless of their project budget.


