What Are Wind Chimes And Why Are They Perfect For Your Garden
The History And Cultural Significance Of Wind Chimes
Wind chimes originated in ancient Southeast Asia and later spread to China and Japan. Archeologists found evidence of wind bells made from bone and bamboo dating back to 3000 BC. By 1100 BC, the Chinese developed metal bells for ritual use and military signaling. These early instruments were not toys. They served as precise tools for communication and religious protection across many regions.
In East Asian cultures, wind chimes became essential tools for Feng Shui practices. Practitioners hung them to direct the flow of energy and block negative forces. This tradition moved to the West through trade routes and colonial expansion in the 1800s. Modern garden wind chime ideas stem from these functional roots. Today, designers use them to combine historical metal casting techniques with modern acoustic engineering.
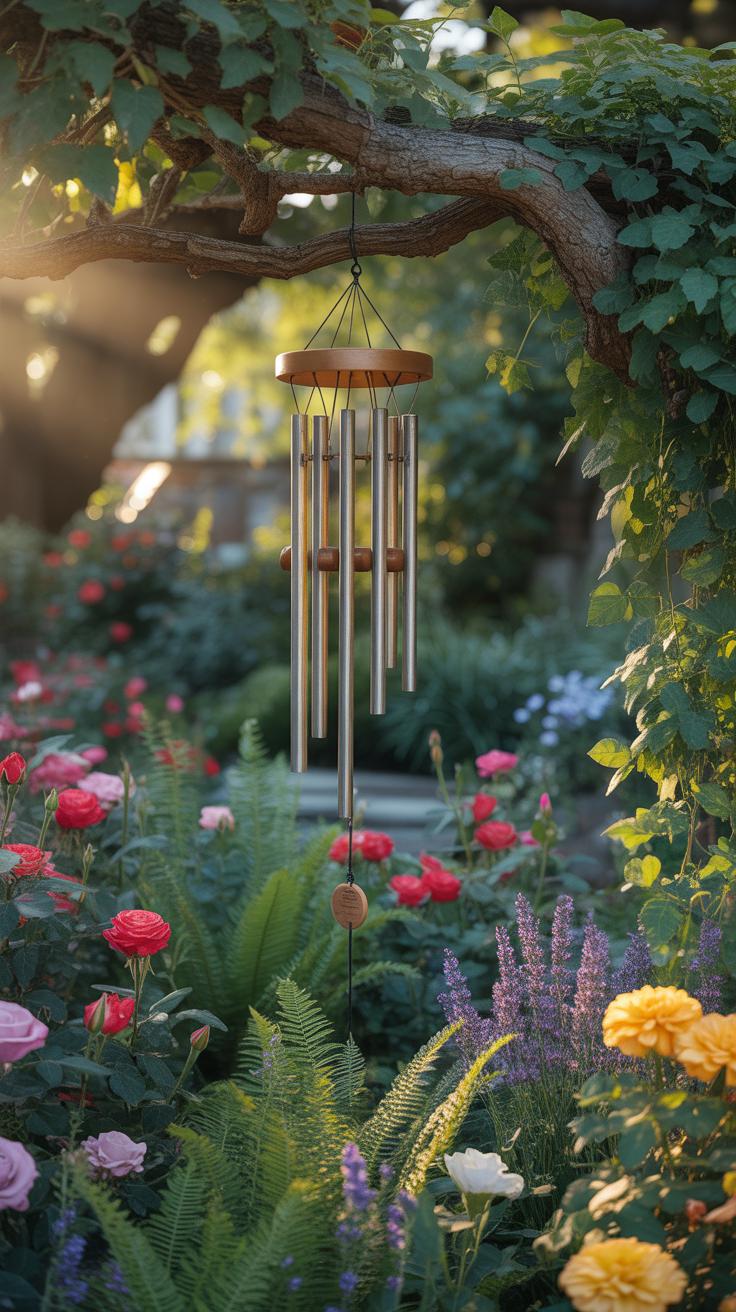
How Wind Chimes Enhance The Atmosphere Of Your Outdoor Garden Space
Wind chimes serve as an acoustic layer that masks unwanted noise pollution. They create a sound barrier against traffic and equipment. This makes your garden feel more private and secluded. The presence of consistent sound helps people relax. It provides a focal point for the ears. Use them to define different zones in your yard. Strategic placement changes how guests experience your layout.
Metal and wood chimes also act as visual anchors in a landscape design. They catch the light and add vertical interest to flat spaces. Hanging them near pathways or seating areas creates a sensory experience for visitors. You can use them to signal changes in wind patterns or weather conditions. This provides practical data about your local microclimate. Select materials that match your existing garden hardware for a unified look.

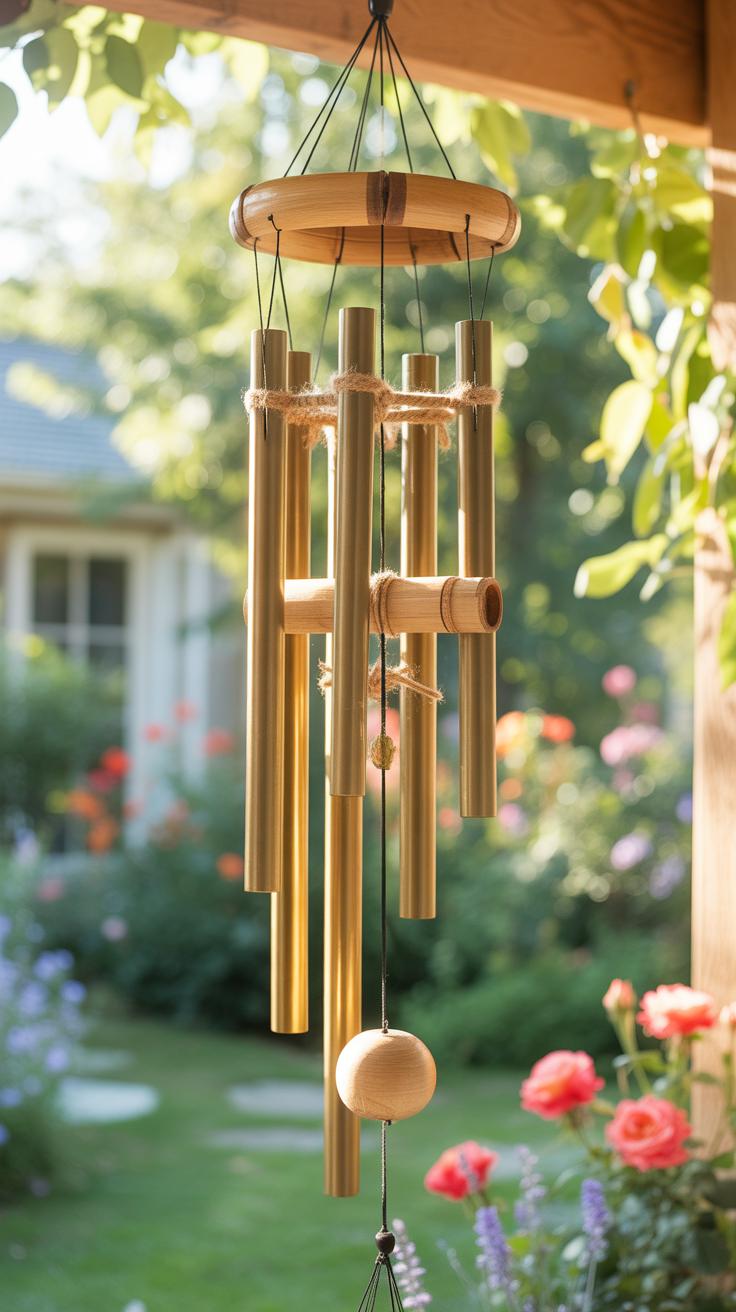
Essential Materials You Need To Get Started With DIY Wind Chimes

Choosing The Right Chime Materials Metal Wood Bamboo And Beyond
Material choice dictates the acoustic profile and durability of your garden wind chime ideas. Metal tubes like aluminum and brass produce sharp clear tones with long sustain. Aluminum remains the industry standard because it resists corrosion and offers precise pitch control. Heavier metals like steel provide deeper industrial sounds but require protective coatings to prevent rust in wet outdoor environments.
Organic materials offer a different tactical advantage for garden design. Bamboo and wood create hollow percussive sounds rather than metallic ringing. These materials fit Zen and Ming dynasty historical aesthetics where subtle natural integration is the priority. However organic materials crack over time when exposed to extreme sun or moisture. You must seal these surfaces with marine grade varnish to ensure structural integrity.
A Complete List Of Tools And Supplies For Your Wind Chimes Craft Project
Building a high quality wind chime requires specific precision tools and durable connecting hardware. You cannot rely on standard household string for outdoor use because UV rays and friction will snap it. Professional builders use industrial grade lines and calibrated suspension points to ensure the chime stays level. Proper hole placement on the chime tubes determines the resonance and strike point accuracy.
- Nylon Braided Cord: Use high strength UV resistant nylon or dacron line for the suspension system. These materials resist rot and handle the constant friction of the chime tubes moving in the wind without fraying or snapping.
- Power Drill and Cobalt Bits: You need a steady drill and specialized bits to penetrate hard metals or thick bamboo. Cobalt bits are necessary for stainless steel while standard high speed steel bits work for aluminum and wood projects.
- Suspension Ring or Header: This component acts as the primary load bearing fruit for the entire assembly. Select a weather treated wood disc or a heavy duty stainless steel ring to support the weight of the hanging tubes.
- Pipe Cutter or Hacksaw: Precision cuts ensure that your chime tubes produce the intended pitch and frequency. A pipe cutter creates clean burr free edges on metal tubing which improves the overall safety and aesthetic of your finished garden piece.
- Center Punch Tool: Use this tool to mark your drill holes on round surfaces like metal pipes. It prevents the drill bit from slipping and damaging the material which ensures your suspension holes are perfectly aligned for balanced hanging.

The chime clapper or striker must be a specific density to produce a clean sound. Select a material that is softer than the tubes to avoid harsh clanging. Hardwood discs or high density polyethylene work best for strikers because they withstand constant impact. Position the striker at the center point of the tubes to maximize the vibration and achieve the best acoustic results.
Step By Step Guide To Making Your First Wind Chimes Homemade Project

How To Measure And Cut Chime Tubes For The Best Sound Quality
Accurate measurements determine the musical scale of your chime. Aluminum and copper tubes produce the clearest tones. You must calculate length based on the metal type and thickness. Professional makers use specific ratios to ensure harmony. Scale length dictates the pitch. Longer tubes create deeper bass notes. Shorter tubes result in higher treble sounds. Use a pipe cutter for clean edges.
Precision cutting prevents dull vibrations. Deburr the cut ends with a metal file to remove sharp edges. This process improves the resonance of the metal. Focus on the strike point. You must drill suspension holes at exactly 22.4 percent from the top of the tube. This location is the fundamental node. Drilling elsewhere kills the vibration. Secure the tube tightly before you start drilling.
Assembling And Hanging Your Homemade Wind Chimes For Maximum Effect

Assembly requires durable cordage like braided nylon or stainless steel wire. These materials resist rot and UV damage. Center the top support disk to balance the weight. Ensure the striker hits the tubes at their widest point for the best volume. The striker should be a hard material like wood or acrylic. Soft materials dampen the sound. Secure each line with industrial strength knots.
Strategic placement maximizes wind catch. Hang the unit in a location with steady airflow like a porch corner or garden gate. Avoid placing them against solid walls. Walls block the wind and muffle the sound. Ensure the wind sail is large enough to move the striker in light breezes. A heavy sail requires strong gusts. Level the top piece to prevent lopsided ringing.
Creative Wind Chimes DIY Ideas Using Recycled And Upcycled Materials

Repurposing Old Keys Silverware And Glass Bottles Into Wind Chimes
Metal objects like skeleton keys and vintage silverware produce high-pitched, melodic tones. Use stainless steel or silver plated spoons and forks for the best resonance. Drill small holes through the handles using a cobalt drill bit. Suspend these items from a central hub using high strength nylon line. This setup creates a durable chime that resists rust and physical wear.

Glass bottles offer a deeper, hollow sound profile. Scoring and snapping wine bottles creates clean cylinders for airflow. Use a glass cutter and thermal shock to separate the base from the neck. Suspend a wooden clapper inside the glass tube to strike the edges. This method repurposes waste into functional outdoor decor. Ensure you sand the cut edges to prevent injury.
How To Upcycle Driftwood And Seashells Into Stunning Windchimes Homemade
Driftwood serves as a stable horizontal anchor for hanging elements. Saltwater exposure hardens the wood and strips away bark for a clean look. Secure eye hooks into the bottom of the wood at equal intervals. Use these hooks to attach vertical strings of shells or stones. Balance the weight across the wood to keep the chime level in high winds.
Seashells produce a soft, clicking sound when they collide. Choose thick shells like conchs or scallops for better durability. Use a small masonry bit to drill holes without cracking the calcium structure. String the shells together using fluorocarbon fishing line. This material stays clear and resists UV damage. Position the shells close enough to touch during a light breeze for constant sound.
How To Design Rustic Wind Chimes That Complement A Natural Garden Aesthetic
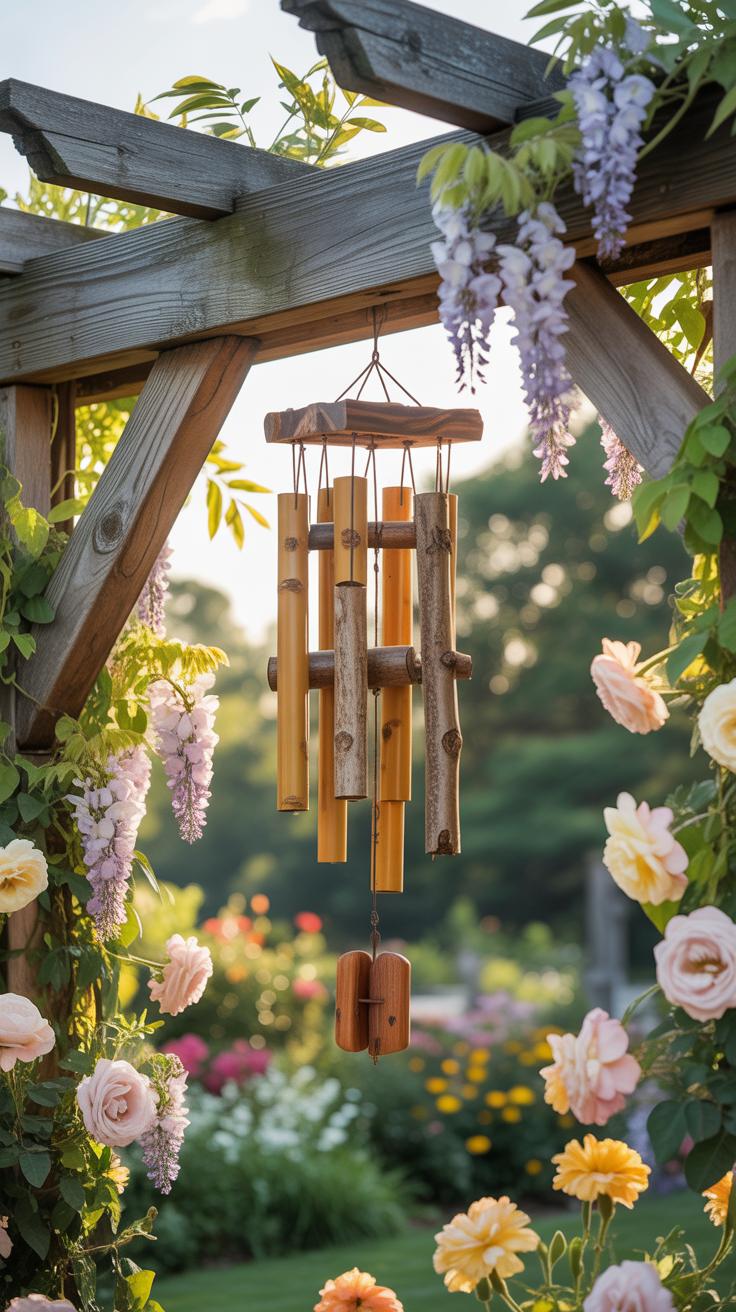
Using Reclaimed Wood And Natural Twine To Create Rustic Wind Chimes

Select seasoned hardwoods like oak or cedar for the suspension head to ensure long-term durability. Reclaimed wood resists rot better when it has already weathered the elements. Cut the wood into thick rounds or rectangles to provide a stable base for the chimes. Drill clean holes through the wood to prevent splitting. Smooth the edges with sandpaper to keep the twine from fraying over time.
Natural twine serves as the primary connector for rustic designs. Use jute or hemp cord because these fibers offer high tensile strength and a matte finish. Secure each chime with a double knot to prevent slipping during heavy winds. Apply a thin layer of clear beeswax to the twine. This coating protects the organic fibers from moisture and UV damage. Proper tension ensures the chimes hang straight and strike correctly.
Incorporating Stones, Pine Cones, And Branches For An Earthy Rustic Look
Drill through river stones using a diamond-tipped masonry bit to create heavy clappers. Heavy stones produce a deep and resonant sound when they strike metal or wood. Select smooth stones with high mineral density for better sonic vibration. Suspend the stones at varying heights to create a layered visual effect. Balance the weight of the stones against the strength of your main support branch.
Pine cones and fallen branches provide the structural framework for a woodland aesthetic. Use sturdy birch or hickory branches as the horizontal support bar. These woods hold their shape without bowing under weight. Attach pine cones near the bottom of the strings to act as wind catchers. Their large surface area pulls in light breezes. This movement forces the chimes to collide and produce sound even in low wind.
Exploring Beautiful Wind Chimes Craft Ideas For Every Skill Level

Beginner Friendly Wind Chime Craft Projects You Can Complete In An Afternoon
Beginners should focus on the assembly of found objects to ensure success. Use a sturdy base like a stainless steel colander or a thick driftwood branch. Select high density materials for the clappers to produce clear sounds. Terracotta pots and vintage silverware provide reliable acoustic feedback. Secure these items with nylon fishing line or waxed polyester cord for durability against wind and rain.
Strategic placement of the center strike increases the frequency of the chimes. Align the dangling elements so they hang at varying lengths. This creates a staggered visual effect and prevents tangling during high winds. Use simple overhand knots or crimp beads to lock the chime components in place. Quick assembly projects allow you to test tone and weight balance immediately before finalizing the knots.
Advanced Wind Chimes Craft Techniques For Experienced DIY Enthusiasts
Advanced makers utilize metalworking and glass cutting to create precise acoustic instruments. You must calculate the exact length of aluminum or copper tubing to achieve specific musical notes. Use a pipe cutter for clean edges and a drill press for consistent hole placement. Deburr all edges to prevent the suspension cord from fraying over time. This technical approach requires patience and precision tools.
Incorporating fused glass requires kiln knowledge and thermal management. You must anneal the glass properly to prevent cracking when temperatures shift outdoors. Experiment with different suspension geometries like the circular Pythagorean layout to optimize strike patterns. Use high grade stainless steel wire or marine grade cable for the internal skeleton. These methods ensure the chime survives extreme weather while maintaining its aesthetic and melodic integrity.

Top Garden Crafts To Pair With Your Wind Chimes For A Cohesive Garden Design

Complementary Garden Crafts Like Birdbaths Planters And Stepping Stones
Pairing wind chimes with stone birdbaths creates a central focal point for your outdoor space. Heavy stone bases contrast with the vertical movement of hanging metal or bamboo tubes. This combination anchors the design visually and physically. Use materials like concrete or carved granite to reflect the industrial or organic tones of your chimes. Proper placement ensures that the auditory and visual elements occupy different vertical planes.
Custom planters allow you to integrate color and texture directly below your chimes. Choose plants like ornamental grasses or ferns that move in the same wind that activates the chimes. This creates a unified sensory experience for any observer. Position terra cotta or glazed ceramic pots to reinforce the Mediterranean or Asian aesthetic of your garden. Use heavy planters to stabilize shepherd hooks if you lack overhead hanging points.
Tips For Arranging Wind Chimes Alongside Other Garden Decorations Harmoniously
Effective garden design requires balancing sound and sight across different zones. Grouping chimes with silent objects prevents sensory overload while maintaining a clear theme. High-quality arrangements focus on proximity and scale. Large chimes require substantial ground features like boulders or statues to maintain visual weight. Smaller glass chimes work better near delicate items like fairy gardens or light wire trellises. Use these tactics to direct traffic.
- Visual Anchoring: Place large chimes above solid objects like stone benches or heavy wooden chests. This grounding technique prevents the chimes from appearing adrift in open space. It creates a defined destination for visitors to sit and listen.
- Material Matching: Use identical metals for chimes and garden stakes to create a professional look. If you use copper chimes, install copper solar lights or plant labels nearby. Consistent material use signals a deliberate and high-end design strategy.
- Height Variation: Mount chimes at different levels compared to your birdhouses and feeders. This staggering prevents visual clutter and allows each craft to stand out. It also ensures that wind flow reaches the chimes without being blocked by larger structures.
- Sound Layering: Position chimes near water features to blend mechanical and natural sounds. The rhythmic splashing of a tiered fountain softens the sharp metallic ring of aluminum tubes. This creates a complex soundscape that feels intentional rather than accidental.
- Color Coordination: Match the finish of your chime tubes to the glaze on your ceramic planters. Silver chimes pair well with cool blue or grey pots. Bronze or wood chimes thrive among earthy browns and deep greens. Consistent palettes simplify the overall garden view.

Strategic placement ensures your garden crafts do not compete for attention. Keep chimes away from heavy bird feeders to avoid startling wildlife with sudden noise. Use stepping stones to lead people toward the sound source without placing the chimes directly in the path of travel. This creates a series of discovered moments throughout the landscape. Proper spacing maintains the integrity of each individual design element.
Understanding Wind Chime Tuning How To Make Wind Chimes That Sound Beautiful
The Science Behind Wind Chime Tones: Length, Material, And Frequency
Tube length and wall thickness determine the pitch of your garden wind chime. Shorter tubes vibrate faster and produce higher frequencies. Longer tubes vibrate slower to create deeper bass notes. Dense materials like hardened aluminum or structural steel provide the best resonance. Soft metals like copper produce shorter decay times and muted sounds. You must understand these physical properties to control the acoustic output.
Suspension points are critical for maximum vibration. Each tube has an optimal hang point called a node. This point sits at exactly 22.42 percent of the tube length from the top. Drilling here allows the metal to vibrate freely without dampening the sound. Moving the hole away from this node kills the sustain and ruins the clarity. Precise measurements ensure your chime produces a clean and professional tone.
How To Tune Your Homemade Wind Chimes To A Specific Musical Scale
Tuning requires removing material to change the vibration rate. You raise the pitch by cutting small increments from the bottom of the tube. Use a high quality file or a pipe cutter for this task. Check the pitch constantly with a digital chromatic tuner after every cut. Always sand the edges smooth as burrs interfere with the frequency. Accurate tuning separates premium garden wind chimes from basic noise makers.
Most professional chimes use the pentatonic scale for a harmonious sound. This five note sequence avoids dissonant intervals. You do not need musical expertise to build a tuned set. Calculate your lengths based on the speed of sound through your chosen metal. Follow a specific frequency chart to match each tube to a note. This methodical approach ensures your chime produces a cohesive melody regardless of wind speed.
How To Weatherproof And Maintain Your Garden Wind Chimes For Longevity

Best Sealants And Finishes To Protect Your Wind Chimes From The Elements
Metal chimes made of aluminum or copper require thin coats of clear enamel or marine grade varnish to prevent oxidation. Aluminum naturally resists rust but loses its shine without a protective barrier. Copper develops a green patina over time which some owners prefer. Use a UV resistant spray to stop the sun from cracking the finish on wood top pieces or strikers.
Wood components need deep penetrating oils like teak or tung oil to repel moisture. These oils soak into the grain and stop the wood from rotting or splitting in heavy rain. Apply a fresh coat every six months to keep the material dense and stable. Avoid thick paints that bubble and trap water against the surface. High quality sealants extend the life of your Garden Wind Chime Ideas.
Every piece of sea glass or rusted key holds a memory waiting to sing in the breeze. When you craft your own chimes, you are simply giving the wind a voice to tell your family’s stories.
— Martha Stewart
Seasonal Maintenance Routines To Keep Your Wind Chimes Looking And Sounding Great
Inspect the suspension cords twice a year for signs of fraying or sun damage. High winds and constant movement wear down nylon and hemp strings. Replace weak lines with braided polyester cord to ensure the chimes do not fall and break. Clean the tubes with a damp cloth and mild soap to remove bird droppings or salt buildup. Salt air corrodes metal quickly if you live near the coast.
Store your chimes indoors during extreme weather events like hailstorms or winter freezes. Frozen moisture inside metal tubes can expand and warp the material. This change in shape ruins the pitch and tone of the instrument. Oil the swivel hooks and metal rings to prevent squeaking or seizing. Regular care keeps the sound crisp and prevents mechanical failure during the peak summer and spring seasons.
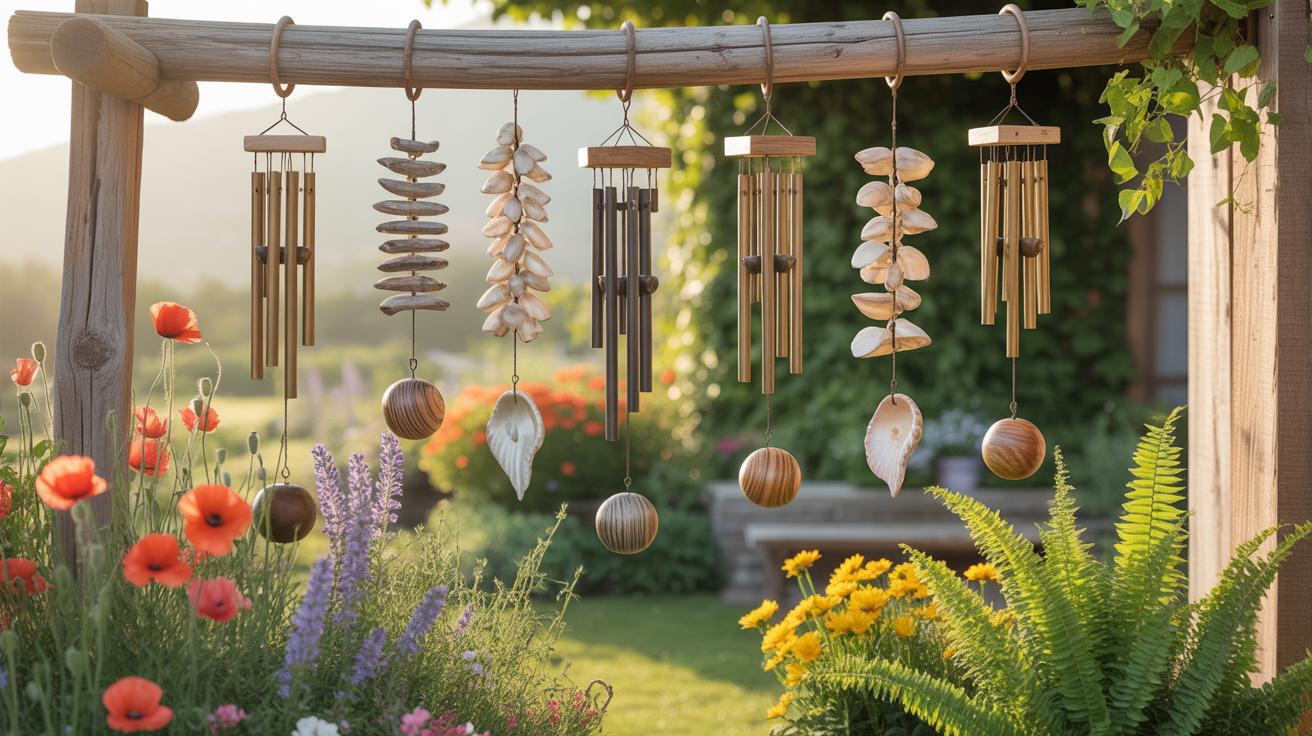
Inspiring Garden Wind Chime Ideas To Spark Your Next DIY Wind Chimes Project

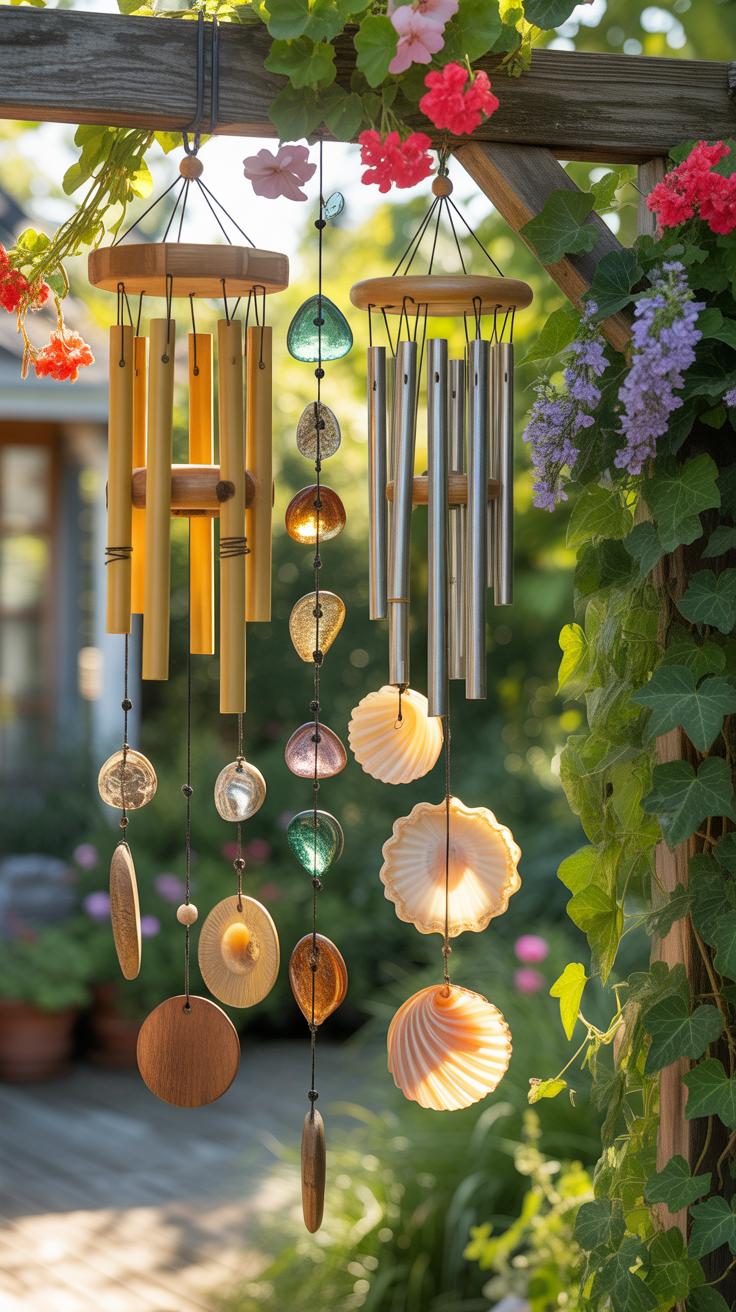
Themed Wind Chime Designs: Coastal, Bohemian, Zen, And Cottage Garden Styles
Strategic design starts with material choice. Coastal themes use driftwood and capiz shells to mimic ocean sounds. Bohemian styles prioritize vibrant glass beads and mismatched metals for a layered look. Zen designs require bamboo or thick hollow stone to produce low, grounding tones. Cottage gardens benefit from repurposed steel spoons or copper tubing. Match your material density to the intended environment for the best acoustic results.
Precision matters in thematic execution. Use hemp rope for rustic cottage vibes and nylon cord for sleek Zen aesthetics. Coastal setups need stainless steel hardware to resist salt air corrosion. Bohemian projects allow for irregular spacing and varying weights. Always test the strike point of the clapper against your chimes. Proper alignment ensures the theme sounds as good as it looks. Focus on structural integrity first.
How To Personalize Your Wind Chimes Diy Project As A Meaningful Gift Or Keepsake
Personalization adds value to functional garden art. Incorporate vintage skeleton keys or silver flatware from family collections to create legacy pieces. These metal items provide distinct, high-pitched tones. Use metal stamping kits to engrave names or dates directly onto copper or brass chimes. Choose materials that survive local weather patterns. A meaningful gift must last multiple seasons without degrading. Select durable cords for outdoor longevity.
Customizing the wind sail is the most effective way to change performance and meaning. Use a heavy stone or a flat piece of glass at the bottom of the center string. This part catches the breeze and triggers the sound. Laser-cut wood or stamped metal work well for sails. Smaller sails require more wind to move the clapper. Match the sail weight to the recipient’s local wind conditions for maximum utility.
Frequently Asked Questions

What are the best materials for a melodic garden wind chime?
Selecting the right materials is the first step in exploring garden wind chime ideas. Metal tubes, such as aluminum or brass, offer the most resonant and clear tones, while bamboo provides a soft, hollow percussion perfect for zen spaces. If you prefer a delicate tinkling sound, glass or seashell chimes are excellent choices. Always consider how the material’s durability and unique acoustic properties will complement the overall mood of your outdoor sanctuary.
How can I make a DIY wind chime that looks professional?
To create a professional-looking piece, start by choosing a sturdy anchor like a weathered branch or a circular metal hoop. Use high-quality nylon string or fishing line to suspend your melodic elements at varying lengths for visual interest. When testing different garden wind chime ideas, ensure you include a central “clapper” that hits the chimes evenly. Adding finishing touches like waterproof beads or a decorative sail pendant will elevate the final aesthetic.
Can I create beautiful garden chimes using affordable household items?
Absolutely! You don’t need a large budget to bring stunning garden wind chime ideas to life. Look for everyday items in your kitchen or garage, such as vintage silver spoons, old skeleton keys, or colorful terracotta plant pots. These upcycled materials create unique, rustic sounds and eccentric visual appeal. By repurposing items you already own, you can craft a personalized musical ornament that adds character to your patio without spending a dime.


