

The Minimalist Container Gardening Vegetables Mandate

Buy Containers By Displacement, Not By Instagram
You want your patio to look intentional. That’s why you’re stalling on container size. Here’s the mechanism: root systems don’t care about aesthetics. They care about volume. A vegetable’s root depth determines what thrives and what dies. Tomatoes need 18 to 24 inches minimum. Peppers need 12 inches. Lettuce needs 6 to 8 inches. Pick the container size that matches your plant, not your decor taste.
Most advice says start small. That’s incomplete. Small containers dry out fast, force frequent watering, and stress plants into stunted growth. You either overwater and rot the roots, or underwater and watch yield collapse. A 5-gallon bucket grows better tomatoes than a decorative 2-gallon pot. The extra soil holds moisture longer, provides more nutrients, and lets roots expand. Displacement solves the problem before it starts.
Holes That Drain Or Plants That Die
Water physics is your operating principle here. Soil saturation kills roots through oxygen starvation, not moisture itself. Drainage holes force water through the soil profile and out the bottom. Without them, water pools at the base and turns the root zone anaerobic. Roots suffocate. Fungal pathogens proliferate. The plant dies slowly, and you blame yourself for overwatering when the container was the culprit.
Drainage holes are non-negotiable. Drill or punch them if they don’t exist. One hole per 4 to 5 square inches of container bottom works. Use a 1/4-inch drill bit or larger. Add a thin layer of gravel or broken pottery shards at the bottom to prevent soil from clogging the holes. Place the container on a surface that allows water to escape underneath. A patio surface that slopes even slightly helps. Test drainage before planting by pouring water through. If water pools, add more holes.
Sunlight: Your Unflinching Patio Garden Architect

Track Sun Paths And Map Energy Flow
You want to believe your patio is shadier or sunnier than it actually is because moving containers feels like failure. Here’s the mechanism: plants don’t care about your effort or intentions. They convert light energy into chemical energy through photosynthesis, and the quantity and timing of that light determines survival. Your patio isn’t static. Shadow patterns shift across seasons as the sun’s angle changes.
Spend three days observing your space at three times daily: morning, midday, evening. Mark where direct sun hits from spring through fall. Most vegetables demand six to eight hours of unobstructed sunlight. Tomatoes, peppers, and beans won’t produce without it. Leafy greens tolerate partial shade. Document what you find, not what you hope. This data becomes your placement foundation.
Position Containers For Maximum Photosynthetic Output
Everyone says “put plants in the sun” then wonders why nothing grows. The real work is spatial optimization. Using a term from biology, you’re managing the light saturation point of each plant species on your patio. Some plants max out their photosynthetic efficiency at six hours of direct light. Others need eight or more. Reflective surfaces amplify available light by twenty to thirty percent.
Place tall containers and trellised plants on the south or west side of your patio in northern climates, where they catch peak afternoon rays without blocking shorter plants. In hot climates, afternoon shade prevents heat stress on sensitive crops like lettuce. Position north-facing spaces for herbs that thrive in dappled light. Rotate containers every two weeks if growth slows. This prevents plants from chasing light and developing lopsided root systems. Consistent positioning beats constant adjustment.
Soil: The Microbial Engine Of Your Balcony Vegetable Garden

What Actually Goes In The Container
You want to feel like you’re doing this right, so you buy bags labeled “potting mix” without asking what’s actually inside. That’s the trap. The mix is just a vehicle for what matters: pore space and microbial habitat. Most commercial potting mixes are 40-60% perlite or vermiculite (for drainage), 30-50% peat moss or coconut coir (for water retention), and maybe 10-20% compost. The numbers don’t matter as much as understanding why. You need air gaps so roots don’t rot, material that holds water without becoming cement, and organic matter where microbes colonize.
The real mechanism is simple: peat and coir are dead plant material. Perlite and vermiculite create channels. Compost introduces the organisms that will break down nutrients into forms your plants can actually absorb. A patio vegetable garden lives or dies on this microbial layer, not on the soil texture itself. Most people skip learning this and wonder why their tomatoes stall in July. Grab a bag of quality potting mix, add finished compost to 20-30% by volume, and you’ve built an environment where biology does the work instead of you rationing fertilizer every week.
Forest Floor Economics Applied To Containers
Ecology teaches us nutrient cycling, and containers operate on the same principle as a forest floor: inputs must equal outputs or the system depletes. In a forest, leaves fall, decompose, and feed trees again. In your patio garden, that cycle breaks because you remove the vegetables and their nutrients never return to the soil. The fix is deliberate replenishment, not guessing when to feed.
Start with compost at planting time. As the season progresses, side-dress with compost every 4-6 weeks or use a slow-release organic fertilizer. Don’t wait for yellowing leaves to react. The soil’s microbial community needs consistent carbon input to stay active and convert minerals into plant-available forms. Test this: containers that receive monthly compost additions outperform those fed liquid fertilizer alone, because the microbes have substrate to process. Establish a rhythm: plant, mulch the surface with half an inch of compost, repeat that top-dressing monthly. This simple protocol keeps the microbial engine running at full capacity through the growing season.
Water: The Scarcity Principle For Small Terrace Vegetable Garden

Moisture Probes: Feedback Loops For Hydration
You want a moisture probe because you’re afraid of killing plants and looking incompetent. The real mechanism is this: containers dry unpredictably based on wind, sun angle, pot material, and soil composition. A probe gives you data instead of guessing. You move from reactive watering (daily splashing) to responsive watering (soil tells you when). This is feedback loop language from systems engineering. Your patio becomes a closed system where the probe is the sensor that prevents both drought and rot.
Most people skip the probe and eyeball it. That fails because soil surface dries faster than roots need water. A basic analog probe costs under fifteen dollars and solves the information gap. Push it two inches deep, read the dial, water only when it drops below 4 on a 1-10 scale. You remove the guesswork that kills more container vegetables than any pest ever will.
Deep Watering, Less Frequency
Everyone says water daily. That’s backwards for containers. Shallow frequent watering creates weak roots that stay near the surface, chasing each wet cycle. Deep infrequent watering forces roots down into the soil profile where moisture is stable and temperatures don’t swing as hard. This is the opposite of what new gardeners do, and it’s why their plants stress. Water until it drains from the bottom of the pot, then wait until the probe tells you it’s dry again.
The frequency shifts dramatically when you adopt depth. A tomato in a five-gallon pot might need water every other day in summer with shallow watering, but every three to four days with deep soaking. The soil holds more usable water because roots access it fully. Check the probe before each watering session. This single protocol prevents ninety percent of container vegetable failures, because roots either drown in shallow water or hunt desperately in dust. Deep watering with delayed intervals ends both problems at once.
The Succession Planting Protocol: Maximizing Garden Layout Vegetable Yield

Rotate Crops Between Container Seasons
You want proof that your patio garden isn’t failing you. That’s the real fear here. Crop rotation isn’t mystical—it’s pest and disease economics. Bugs and pathogens specialize in specific plant families. When you plant tomatoes in the same container year after year, you’re handing the same pest population a renewable food source. They multiply. Soil depletes the specific nutrients that crop demanded. You lose yield without understanding why.
Think of it like military supply lines from agricultural science. Each plant family draws down different soil nutrients and hosts different enemy forces. Tomatoes (Solanaceae) attract different pests than beans (Fabaceae). Rotate your containers: plant tomatoes this season, beans next season in that same pot. The pest population starves. Nitrogen replenishes because legumes fix it. You break the cycle that kills gardens. After three seasons of different families, you can return to tomatoes safely because the pest pressure has collapsed.
Plant On A Two Week Stagger
The common advice says plant everything at once and harvest everything at once. That’s how you end up with thirty peppers in week three and nothing for the next eight weeks. Staggered planting means you plant the same crop every fourteen days in separate containers. Lettuce germinates in three weeks. If you plant week one, harvest week four. Plant week two, harvest week five. You never run dry.
The mechanism is simple: growth cycles don’t align with your appetite. A single planting produces a spike. Your patio has physical space, so use it. Plant basil in container A on day one. Plant basil in container B on day fourteen. Container A feeds you from week three to week seven. Container B feeds you from week five to week nine. The overlap extends your harvest window from four weeks to six weeks with zero additional effort. Stack containers vertically if space limits you. Every inch of patio becomes a continuity engine for produce.
Vertical Expansion: The Apartment Dweller’s Patio Garden Ideas Strategy

Think In Layers, Not Footprint
You want to garden without sacrificing your actual living space. That’s the real constraint here. The mechanism is simple: you’re borrowing from real estate economics. In real estate, value climbs when you build up instead of out. Same principle applies to your patio. A 4×8 concrete slab at ground level holds maybe 12 containers. Stack vertically and you triple that capacity without adding square footage. Height becomes your actual resource, not the slab beneath it.
Most people treat a patio like a floor to fill. Wrong frame. Treat it like airspace to engineer. Your patio’s cubic footage matters more than its square footage. A six-foot wall can hold 30 plants in the same footprint that holds 10 on the ground. You’re not adding complexity. You’re just redirecting where things sit. Tomatoes, peppers, and herbs don’t care if they’re climbing a trellis or sprawling across soil. They produce the same. Your output doubles because your vertical real estate wasn’t being used.
Structures That Earn Their Weight
Trellises and shelves aren’t decoration. They’re infrastructure that changes the math of what you can grow.
- Wall-mounted trellises: Fixed to patio walls or railings, these support vining vegetables like peas, beans, and cucumbers. Attach with lag bolts rated for your local wind load. Vines climb naturally; you just provide the frame.
- Tiered shelving units: Metal or wood shelves in 3 to 4-tier configurations hold multiple containers at different heights. Each shelf receives staggered sunlight. Place shade-tolerant greens lower, sun-demanding tomatoes higher.
- A-frame trellises: Freestanding structures that don’t require wall attachment. Set them perpendicular to your sun path. Both sides get light. Beans and peas use both faces simultaneously.
- Hanging planters on chains or cables: Suspend containers from overhead beams, pergolas, or awnings. Trailing herbs like basil and oregano cascade naturally. This uses the one dimension most patios ignore completely.
- Railing planters: Containers that straddle existing patio railings. They add no footprint. Shallow-rooting crops like lettuce and spinach thrive. Weight distribution matters here. Fill containers slowly and test before going full.
Every structure must justify its footprint. A trellis only works if it catches adequate light. A shelf only works if you can access plants to harvest and water. Don’t build prettier. Build for output per square foot. Install structures so morning sun hits climbing crops first. Afternoon shade protects leafy greens. Water pooling on shelves kills roots. Angle surfaces at 5 degrees to shed rain naturally.
Pest & Disease: The Unavoidable Ecosystem Of Your Terraced Vegetable Garden

Stop Waiting For Permission To Act
You want a patio garden that doesn’t require constant vigilance or expensive interventions. The real mechanism at work here comes from biology: your container garden is a closed ecosystem with accelerated pest reproduction. Unlike ground gardens with natural predator diversity, patio containers concentrate both plants and problems in tight quarters. The solution isn’t prevention—that’s a myth. The solution is ecological deterrence through Integrated Pest Management, which stacks multiple weak barriers instead of betting everything on one spray.
IPM operates on a decision hierarchy: tolerate minor damage, encourage natural predators, deploy physical barriers, then escalate to targeted intervention only when thresholds are crossed. Most gardeners skip straight to chemicals because they haven’t defined what “problem” actually means. A few aphids on a tomato plant aren’t a problem. Fifty aphids colonizing new growth is. You establish action thresholds before pests arrive, then execute the cheapest viable option that meets your threshold. Introduce native beneficial insects like ladybugs or parasitic wasps by planting flowering herbs nearby. This transforms your patio from an isolated container into a functioning food web.
Sight Lines Beat Spray Bottles
Early detection is pattern recognition applied to plant tissue. You inspect containers every two to three days, scanning leaf undersides and new growth for discoloration, webbing, holes, or unusual spotting. Pests telegraph their arrival before populations explode. Powdery mildew appears as white coating on leaves. Spider mites create fine webbing and yellow stippling. Fungal diseases show as brown or black spots with defined edges. You’re not looking for perfection. You’re looking for the moment intervention becomes cheaper than crop loss.
Documentation matters more than most gardeners admit. Photograph affected leaves and note the date, weather conditions, and plant species. This creates a personal record of what actually happens in your microclimate, not what a generic guide predicts. If spider mites hit your patio tomatoes every July, you adjust your watering schedule in June to reduce humidity stress before they arrive. If powdery mildew thrives in your specific exposure, you prune for air circulation preemptively. The goal is identifying patterns specific to your setup, then breaking the cycle before it accelerates.
Strategic Plant Selection: The ROI Of Your Balcony Garden

Vegetables That Actually Pay For Themselves
You want to feel like you’re winning without admitting you just want proof the effort wasn’t wasted. Here’s the mechanism: apply Pareto’s principle from economics to your patio. The 80/20 rule states that 80 percent of results come from 20 percent of inputs. In a patio garden, this means five vegetables will outproduce and outlast the rest. Cherry tomatoes, basil, lettuce, peppers, and green beans demand minimal intervention and generate continuous harvests. Plant these, ignore the noise.
Most people plant randomly and expect abundance. Wrong. These five vegetables handle container constraints without sulking, tolerate slight neglect, and produce multiple harvests per season. Cherry tomatoes fruit for months in a 5-gallon pot. Basil regrows after every pinch. Lettuce you cut-and-come-again for 8 weeks straight. Peppers sit and work. Green beans climb a simple trellis and deliver weekly. Skip heirloom tomatoes, rare peppers, and experimental herbs until you’ve proven you’ll actually harvest what you plant.
Matching Your Seasons To Real Daylight Hours
Spring, summer, fall, and winter each have different solar angles and day lengths. Cold-season crops need shorter days and tolerate shade. Warm-season crops demand eight to ten hours of direct sun. Plant lettuce, spinach, and kale in early spring or late summer when your patio catches afternoon shade but still receives five to six hours of sun. Run tomatoes and peppers March through September where they’ll track the high summer sun across your deck.
- Spring (March-May): Lettuce, spinach, peas, and radishes thrive in cool nights and lengthening days. These germinate fast and mature before heat arrives.
- Summer (June-August): Tomatoes, peppers, basil, and beans demand peak sunlight and warmth. These are your heavy hitters and longest harvest window.
- Fall (September-November): Kale, broccoli, and Swiss chard handle cooling nights and shorter days. Plant these by late August for October-through-December yield.
- Winter (December-February): Most patios go dormant here. Garlic planted in November sits dormant and emerges in spring. Accept the off-season.
- Succession Planting: Sow lettuce every two weeks from March through September. As one crop matures, start another. This stacks harvests across the season.
The mistake is planting everything at once and expecting year-round abundance. You can’t. Work with daylight, not against it. Track your patio’s sun exposure across three months before deciding what goes where. Then align your planting calendar to what that location can actually support. Your harvest follows the sun.
The Real Obstacle To A Thriving Patio Garden Is Not Effort, But Your Unexamined Assumptions
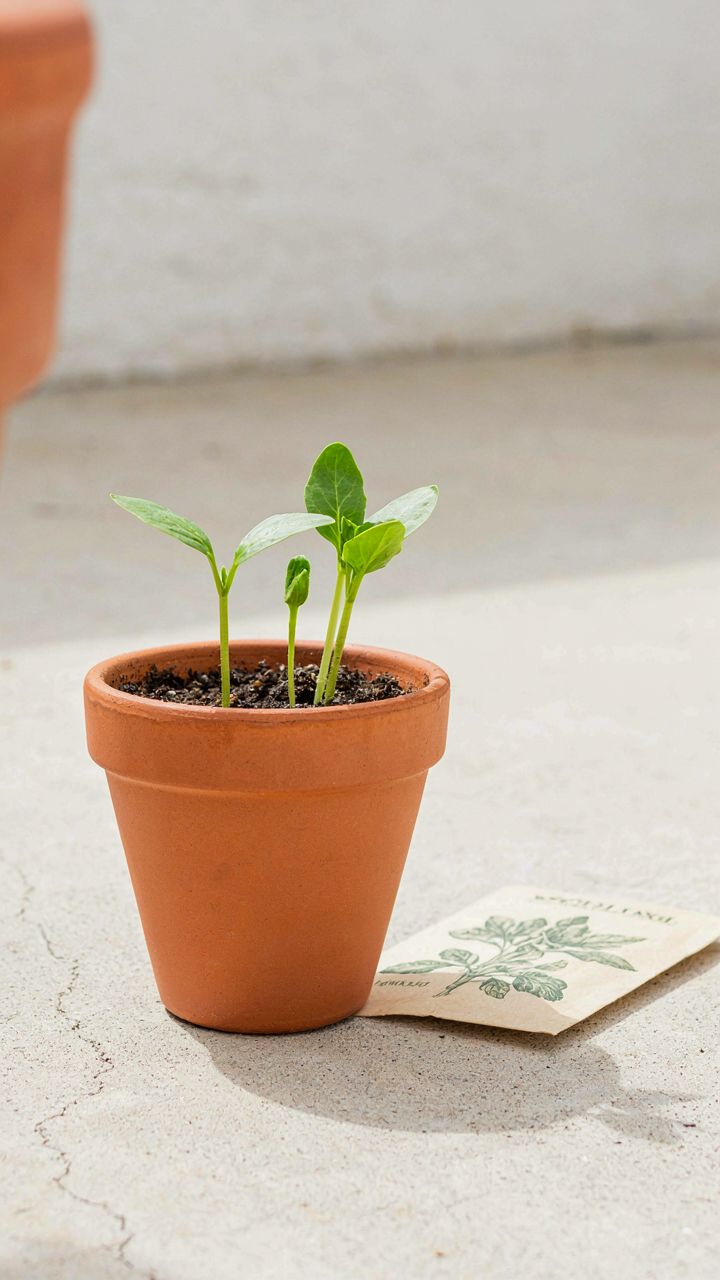
You’ve convinced yourself you need perfect conditions before you start. You don’t. You need one container, one seed packet, and thirty seconds to plant it. Most people kill their patio vegetable garden before it exists by waiting for the ideal moment. That moment never arrives. Buy a pot today. Fill it with soil. Plant something. Your assumptions about what’s required will crumble the moment you see something actually grow.



