

The Bee Balm Deception: Why Common Advice Fails You

What Typical Guides Miss
You want to believe bee balm is foolproof because admitting otherwise means you wasted money on seeds that died. The reality is simpler: most guides tell you bee balm is “hardy” and “low-maintenance” without naming the actual constraint that kills it. They skip the mechanism. Bee balm fails in most beginner gardens because of soil drainage, not because the plant is weak. It’s a plant that evolved in moist but not waterlogged habitats. Soggy clay suffocates the roots faster than drought does. Most generic advice stops at “plant in sun” and never addresses the soil component that determines survival.
The distinction matters because a beginning gardener with heavy clay soil will follow the standard playbook, water regularly, and watch the plant rot from the base up. They’ll blame themselves or the plant variety. Neither is the problem. The problem is that standard advice assumes average conditions that don’t exist in most yards. You need to know the actual failure point before you can design around it. Bee balm in heavy soil without amendment or raised bed placement dies reliably, regardless of sunlight or watering frequency.
Why Your Bee Balm Actually Struggles
Fungal biology explains what’s happening underground before you see it above. Bee balm roots require oxygen availability to maintain healthy tissue, similar to how fungi need specific conditions to colonize. When soil stays consistently wet, anaerobic bacteria and fungus move in and spread up the stem. You see wilting or powdery mildew on the leaves, but the real damage happened weeks earlier in the root zone. The plant wasn’t weak. The environment became hostile.
The second hidden factor is spacing. Beginners plant bee balm too densely, mimicking decorative spacing from nursery photos. Tight spacing traps humidity around the foliage and reduces airflow, which accelerates fungal spread. Even in well-draining soil, crowded bee balm develops powdery mildew because the leaves stay damp too long after rain. The solution isn’t fungicide. It’s planting 18 to 24 inches apart, minimum, and ensuring water doesn’t pool around the base. Fix the drainage and spacing first, then everything else works.
Beyond Watering: The Soil’s Silent Language For Bee Balm Plant

Soil Structure: The Unseen Foundation
You want simple rules so you don’t fail. But soil structure isn’t something you can memorize from a checklist. It’s a system that either works or doesn’t, and most gardeners miss it entirely because they’re focused on watering schedules instead of what’s actually happening below the surface. Think of soil structure like a supply chain in logistics: if the distribution network fails, the goods never arrive no matter how much inventory you have. Bee balm needs pore space—the gaps between soil particles—to move oxygen and water through the root zone. Compacted soil kills this system instantly.
Bee balm grows in loam or sandy loam with decent drainage. You don’t need to be precious about it, but you do need crumb structure, which is soil held together loosely enough that roots push through without resistance and water doesn’t pool. If your soil turns to cement when wet or blows away like dust when dry, you have a structure problem, not a fertility problem. Fix this first by mixing in organic matter like compost. Work it in the top six to eight inches where the roots establish themselves. Do this once at planting and skip it if your existing soil already crumbles when you squeeze it.
Nutrient Cycling, Not Just Adding Fertilizer
Everyone sells you bags of NPK because that’s the product they can package. The real mechanism is nutrient cycling, a biological process where soil organisms break down organic matter and release nutrients available to roots over time. Bee balm doesn’t demand heavy feeding—it’s a prairie plant that evolved in systems where nutrients cycle through plant litter and microbial decomposition, not synthetic inputs. A soil rich in active microbial life feeds your plant steadily without you adding anything after the first season.
Stop thinking of fertilizer as the answer. Instead, maintain organic matter in the soil so that microbes have something to decompose year-round. Each fall, let fallen leaves and dead plant material stay on top of the bed. By spring, it breaks down into the soil and feeds the next cycle. If you must feed, apply a general-purpose compost in early spring, once. Bee balm tolerates poor soil better than most plants, which means over-fertilizing with nitrogen actually causes weak growth and powdery mildew. Underfed bee balm outperforms overfed bee balm consistently.
Sunlight Is Not Enough: Mastering Microclimates For Beebalm Flowers

Shade’s Surprising Benefits For Beebalm
You think full sun means maximum growth. It doesn’t for Bee Balm in hot climates. The mechanism is simple: afternoon heat stress reduces flowering and invites powdery mildew, the single biggest threat to Bee Balm health. In zones 7 and above, dappled afternoon shade actually increases bloom production and plant longevity. Direct morning sun triggers photosynthesis. Filtered afternoon light prevents leaf scorch and keeps soil moisture stable longer.
Most gardeners miss this because nursery labels say “full sun” without specifying latitude or climate zone. Bee Balm tolerates full sun in cooler regions, but partial shade in hot ones isn’t a compromise—it’s an optimization. Plant it where it gets six hours of direct sun before 2 PM, then transitions to shade. This timing aligns with how the plant evolved in eastern woodland edges, not open prairies. Your soil stays cooler, fungal pressure drops, and flowers sustain longer into late summer.
Wind Protection: A Hidden Growth Factor
Borrow the principle from anemology—the study of wind patterns. In Bee Balm, wind acts as a stress multiplier. Strong wind increases transpiration rates, dries soil faster, and physically damages flower heads before they reach peak bloom. Protected sites produce denser flower clusters and require less frequent watering. Exposure to constant wind forces the plant to allocate energy to structural reinforcement instead of flowering.
Position your Bee Balm garden where natural barriers block prevailing summer winds. A fence, shrub border, or adjacent taller perennials work. Even a single row of taller ornamental grasses on the windward side measurably improves stem strength and bloom count. Check your local wind patterns—most regions have consistent directional flow. Place Bee Balm on the lee side of that flow, not in the funnel. This reduces establishment time and cuts disease pressure by lowering leaf wetness cycles that trigger mildew.
The Bee Garden Ecosystem: Your Unseen Allies

Predators And Parasites Do The Real Work
You want a bee garden because you think bees do all the heavy lifting. They don’t. The mechanism that actually keeps your bee balm healthy is predation and parasitism. Ladybugs, parasitic wasps, and ground beetles eliminate the pest populations that would otherwise collapse your plants before bees ever arrive. Ignore these species and you’re running a garden on life support.
Bee balm attracts specific predatory insects through its flowering structure and nectar availability. Parasitic wasps lay eggs in aphid and spider mite bodies, killing them from inside. Ladybugs consume dozens of soft-bodied pests daily. None of this happens by accident. The plant’s dense foliage and extended bloom time create the habitat these predators need to survive and reproduce on your property.
Underground Networks Run The Supply Chain
Mycology teaches us about symbiosis in ecosystems, and bee balm exists inside a fungal partnership you can’t see but absolutely depend on. Mycorrhizal fungi attach to the plant’s roots and extend far beyond what the roots alone can reach. They pull nitrogen, phosphorus, and water from soil your plant would never access independently. In exchange, bee balm feeds them sugars from photosynthesis. This isn’t optional for plant vigor. This is foundational.
When you amend bee balm soil with organic matter, you’re not just feeding the plant. You’re feeding the fungal network that actually feeds the plant. Native fungi thrive in undisturbed mulch and decomposing material. Tilling destroys these networks. Heavy fertilizer kills them. The plants that look strongest in year three aren’t the ones you fed aggressively in year one. They’re the ones where you let the fungal infrastructure mature in place.
Plant Combinations: The Monoculture Trap

Why Polyculture Beats Bee Balm Alone
You want a low-maintenance garden, which means you’re hoping nature does the work for you. That’s the trap. A stand of pure Bee Balm looks intentional for one season, then powdery mildew moves in, soil depletes unevenly, and pest pressure concentrates. Ecology works on redundancy, not minimalism. Polyculture in horticulture borrows from agricultural systems: instead of monoculture’s fragility, you build resilience through functional diversity. Each plant occupies a different niche and checks the others’ weaknesses.
Bee Balm in polyculture doesn’t run the show. It anchors a structure where other species handle jobs Bee Balm cannot. Black-eyed Susan extends bloom season. Coneflower roots deeper, breaking compacted soil. Salvia attracts different pollinators and fills spatial gaps at different heights. The Bee Balm becomes one actor in a system that self-corrects. Mildew pressure drops because airflow improves and microbial diversity increases. You stop fighting the garden because the garden fights for itself.
Strategic Pairing, Not Just Filler
Most companion planting advice is decoration dressed as strategy. The common recommendation to “plant flowers together” ignores mechanism. Real synergy demands specificity: which plants address which actual problems Bee Balm creates or faces. Bee Balm spreads aggressively and attracts spider mites under stress. Thyme repels spider mites and occupies ground space, preventing Bee Balm from overrunning the bed. That is synergy, not proximity. Catmint blooms when Bee Balm typically weakens in midsummer, filling the visual gap while reducing the urgency to deadhead.
Select companions that either extend functionality or balance failure modes. Bergamot (Bee Balm genus member) suffers in poor drainage. Pair it with Joe-Pye weed, which tolerates wet conditions and attracts larger pollinators, protecting the smaller-flowered species from being overlooked. Space plants according to mature spread, not current size. Overcrowding now guarantees mildew and pest outbreak later. Your plant list succeeds only if each species occupies its intended footprint without competition for light or water.
The Bee Balm Resilience Protocol: Engineered For Neglect
Watch What Dies, Not What Thrives
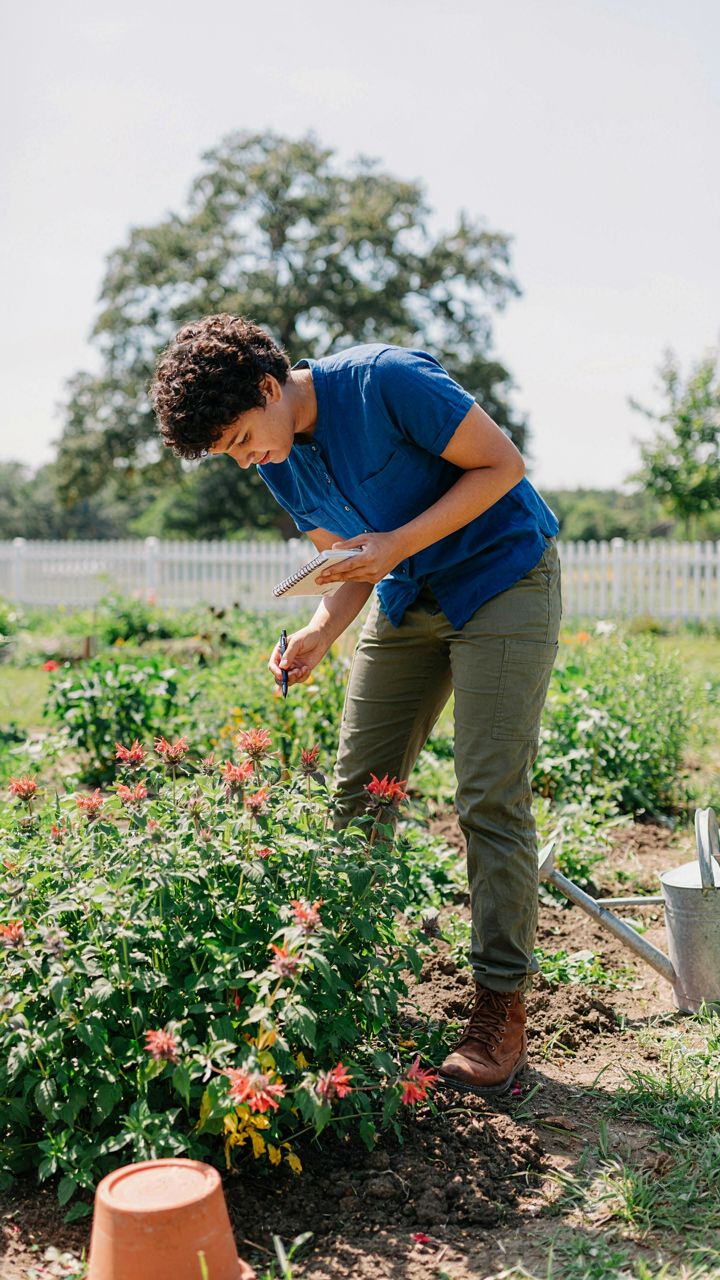
You want a bee balm garden that doesn’t demand constant attention because you’re tired of plants becoming another guilt project. The mechanism is simple: observation creates data, and data reveals which interventions actually matter. Most gardeners skip this step and copy generic care sheets instead of learning what their specific soil, drainage, and microclimate demand from bee balm.
Start by planting in fall or early spring, then document what happens without touching anything for the first month. Track which plants show stress signals: yellowing leaves, slow growth, wilting during dry spells. Mark the spots where water pools after rain or where soil dries fastest. This isn’t overthinking. It’s the difference between guessing and knowing what your bee balm actually needs to survive.
Soil Preparation, Then Disappear
The common advice about “well-draining soil” is incomplete. What matters is the leverage point: bee balm fails when roots sit in wet soil for more than 48 hours after rain, but thrives in poor soil if drainage works. Amend your planting area once with compost or aged manure, create a slight mound if your ground stays damp, then stop fiddling. The plant does the rest.
Bee balm is a nitrogen-hungry perennial, but it stabilizes after year one. Add compost in spring of year two only if growth stalls. Most beginners overfeed their bee balm, triggering leggy stems that fall over and powdery mildew infections. Plant it right the first time and your intervention shrinks to near zero.
Beyond Purple: Cultivating Specific Beebalm Flower Purple & Red Bee Balm

Match Your Cultivar To Your Soil
You want the Instagram-worthy color, not the brown, weak flowers wilting by July. Here’s the mechanism: bee balm doesn’t fail because of neglect—it fails because you planted a cultivar bred for different soil chemistry than what you have. Soil pH determines nutrient availability, which directly controls anthocyanin production in red and purple varieties. Acidic soil (pH 6.0-6.5) intensifies purples. Neutral to slightly alkaline (pH 6.5-7.5) favors reds. Most cultivars like ‘Jacob Cline’ and ‘Raspberry Wine’ perform best in pH 6.0-7.0. Test your soil before buying. Don’t guess.
The real error most people make is assuming all bee balm varieties tolerate all conditions equally. They don’t. ‘Purple Rooster’ needs consistent moisture and slightly acidic conditions to show true color. ‘Fireball’ demands better drainage and tolerates higher pH. ‘Violet Queen’ leans toward acidity. Amend your soil to match the cultivar you want, not the other way around. This takes two weeks of prep instead of years of mediocre blooms. The difference between a thriving plant and a surviving one is rarely the plant itself—it’s the match between genetics and ground.
Feed The Pigment, Not The Plant
Everyone says “water consistently and fertilize monthly.” That’s incomplete. Bee balm doesn’t need more nitrogen—it needs the micronutrients that build color: boron, copper, and potassium. Nitrogen drives leaf growth, which actually dilutes flower pigment concentration. The real lever is potassium, which directly strengthens cell walls and intensifies anthocyanin expression in red and purple flowers. Use a fertilizer with a higher K number (the third number on the NPK ratio). A 5-10-10 blend beats 10-10-10 for color intensity.
Apply potassium-rich fertilizer once at bud break in early summer, then hold back on nitrogen. Purple varieties respond fastest to this shift—you’ll see noticeably deeper color within three weeks. Red varieties need consistent potassium but also benefit from slightly higher phosphorus (middle number) to push flower size and saturation simultaneously. Skip the monthly feeding habit. Feed strategically by growth stage instead. Once flowers form, stop fertilizing entirely. Late feeding triggers leafy growth that pulls resources away from open blooms, fading your color just when it should peak.
Scaling Your Pollinator Garden: From Patch To Big Garden
Plan For Growth Before You Plant
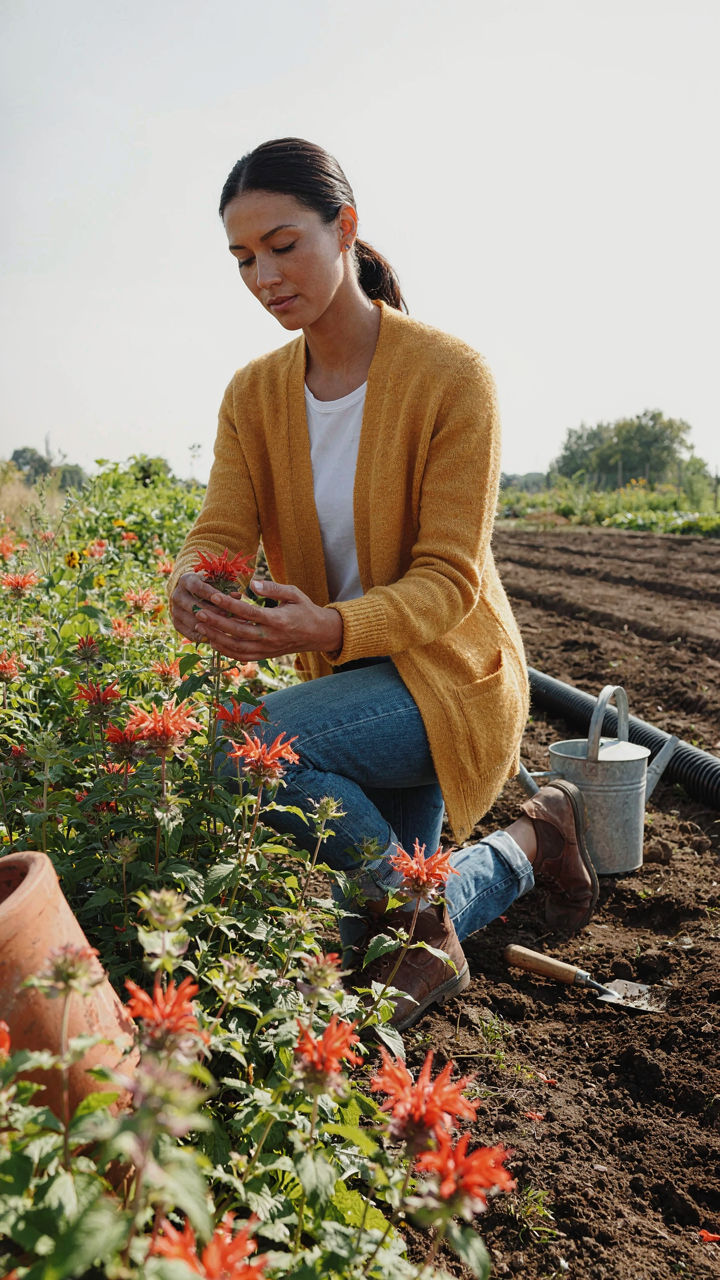
You want to look like you know what you’re doing. That’s the real reason you’re reading this. The mechanism that separates people who expand gardens successfully from people who restart every year is this: they design for scale from day one, not as an afterthought. Most beginners plant in isolation, then panic when they need more space. Build your infrastructure to accommodate three times your current footprint before you add a single plant.
Bee Balm spreads aggressively through underground rhizomes. This isn’t a flaw, it’s the plant’s expansion strategy, and you need to borrow it for your garden design. Map your current bed’s perimeter, then identify where you’ll add sections two and three. Plan pathways between zones now. Prepare soil amendments in bulk. The cost of doing this wrong compounds faster than the cost of getting it right initially.
- Rhizome containment barriers: Install root barriers at bed edges before planting. Prevents Bee Balm from colonizing adjacent areas you didn’t intend, saving remediation labor later.
- Water infrastructure: Run drip lines or irrigation headers before expansion zones. One connection point beats retrofitting when beds multiply.
- Bed orientation: Face new sections the same direction as your original bed for consistent sun exposure and easier maintenance rotation.
- Access points: Leave 3-foot minimum pathways between all planned sections. Narrow paths become impassable once plants mature and fill their space.
- Soil stockpiling: Buy compost and amendments in volume now. Prices drop with bulk purchasing, and you’ll need it when expansion happens.
The gardeners who scale efficiently treat their first patch as a proof of concept for a system, not a finished product. Document what works: which Bee Balm varieties perform in your conditions, what pest pressure actually appears, how much water your soil retains. Use this data to design section two with fewer variables. Expansion becomes replication, not experimentation.
Economics Of Garden Expansion
This is where conventional gardening advice fails hard. Everyone says start small and expand slowly. That’s risk-averse nonsense masquerading as wisdom. The economic reality is this: you pay setup costs regardless of scale. Labor for bed construction, soil amendment, irrigation setup, and pest management spreads across more plants when you build bigger. A three-bed system costs marginally more in initial capital than a one-bed system, but your cost per plant drops significantly.
Calculate your true cost per square foot of established Bee Balm growth. Factor in amendments, water, time spent on maintenance, and replacement plants that fail. Most beginners discover too late that their small garden required nearly identical labor to a medium garden. The difference between a 100-square-foot garden and a 300-square-foot garden is not three times the work once systems are in place. The marginal effort drops sharply because you’re not rebuilding infrastructure. Expand in intentional increments rather than reactive desperation.
Winter Is Not The End: The Bee Balm Cycle Of Renewal

What Actually Happens Underground
You want to believe your bee balm will just come back because you’ve heard it’s “perennial.” That’s the trap. Winter dormancy isn’t a rest period—it’s the mechanism that makes spring vigor possible. Biologically, bee balm enters senescence: the plant redirects energy from foliage into the root system, where carbohydrates accumulate. Frost kills the above-ground stems, but the perennial root crown survives and hardens. This isn’t passive waiting. This is the plant’s seasonal swap from growth to storage.
The stems you see turning brown and collapsing aren’t a failure. They’re the plant completing its cycle. If you cut them down to two to three inches above soil in late fall, you remove diseased tissue that harbors powdery mildew spores and fungal overwintering sites. The plant enters dormancy cleaner and lighter. Come spring, new shoots push up from that hardened root crown with more vigor than if you’d left dead biomass standing. This is why neglected bee balm gardens fail. They skip the mechanical reset.
Locking In Next Season’s Explosion
The common advice is to “mulch your bee balm for winter protection.” That’s incomplete. Mulching prevents soil temperature swings that stress the root crown, but it’s only half the work. What actually matters is what you do in fall before dormancy locks in. Bee balm depletes soil nitrogen through its growth cycle. If you don’t replenish it, spring shoots emerge weak and thin-stemmed, prone to powdery mildew and spider mites.
- Cut stems to two to three inches in late fall: Remove dead tissue and disease vectors before dormancy hardens the root crown and reduces spring pathogen pressure.
- Apply compost around the root zone in October: Add one to two inches of finished compost to replenish nitrogen and organic matter before the soil freezes solid.
- Avoid fresh manure completely: Fresh manure introduces pathogens and ammonia that damage dormant root systems during freeze-thaw cycles.
- Mulch only after the first hard frost: Early mulch traps moisture and causes root rot; wait until soil temperature drops below 40 degrees Fahrenheit.
- Apply two to three inches of aged mulch maximum: Excessive mulch smothers the root crown and invites vole damage during winter.
In spring, when soil temperature reaches 50 degrees Fahrenheit consistently, the root crown wakes first. It draws on stored carbohydrates and the nitrogen you added in fall. Shoots emerge faster, thicker, and more densely. The plant establishes a stronger immune system before heat stress arrives. This timing sequence isn’t negotiable. Skip fall prep and your bee balm spends spring recovering instead of expanding.
Pruning: The Art Of Strategic Removal, Not Just Chopping

Redirect Energy, Shape Tomorrow’s Growth
You want your bee balm to look full and productive without actually understanding why it matters. Here’s the mechanism: bee balm grows from lateral buds along its stems. When you remove the top growth, you don’t kill the plant. You redirect its stored energy downward and outward to those dormant buds instead. It branches.
Cut bee balm stems back by one-third to one-half in early summer, right after the plant flowers or when it reaches 12 to 18 inches tall. This timing works because the plant still has the growing season ahead to produce new lateral stems. Remove the top portion of the stem just above a leaf node where two leaves emerge. The plant pushes new growth from that point, creating a denser structure with more flower heads per plant.
Remove Disease Before It Spreads
Everyone says to deadhead and prune for shape. Nobody mentions the real reason pruning saves bee balm: stopping powdery mildew before it takes the whole plant. Powdery mildew is a fungal infection, and like all infections, containment beats treatment. The mechanism is simple. Infected leaves stay on the plant and spread spores. Remove them and you remove the vector.
Cut out any leaf showing white powdery coating or gray spots at the base of the plant first, where humidity stays highest and air moves slowest. Remove entire stems if the infection climbs above the lower third. Make cuts at a 45-degree angle one-quarter inch above a healthy leaf node, pointing downward so water runs off. Do this in morning when leaves are dry, and dispose of infected material in the trash, not your compost pile.
Stop Asking For Permission To Cultivate The Garden That Matters

You don’t need the perfect conditions, the ideal soil pH, or someone’s approval to plant bee balm. You need to stop overthinking and buy seeds today. Most people never start because they’re waiting for certainty that never comes. Your bee balm garden won’t fix your life, but it will prove you can build something that thrives on its own. That’s the real skill you’re after.



