
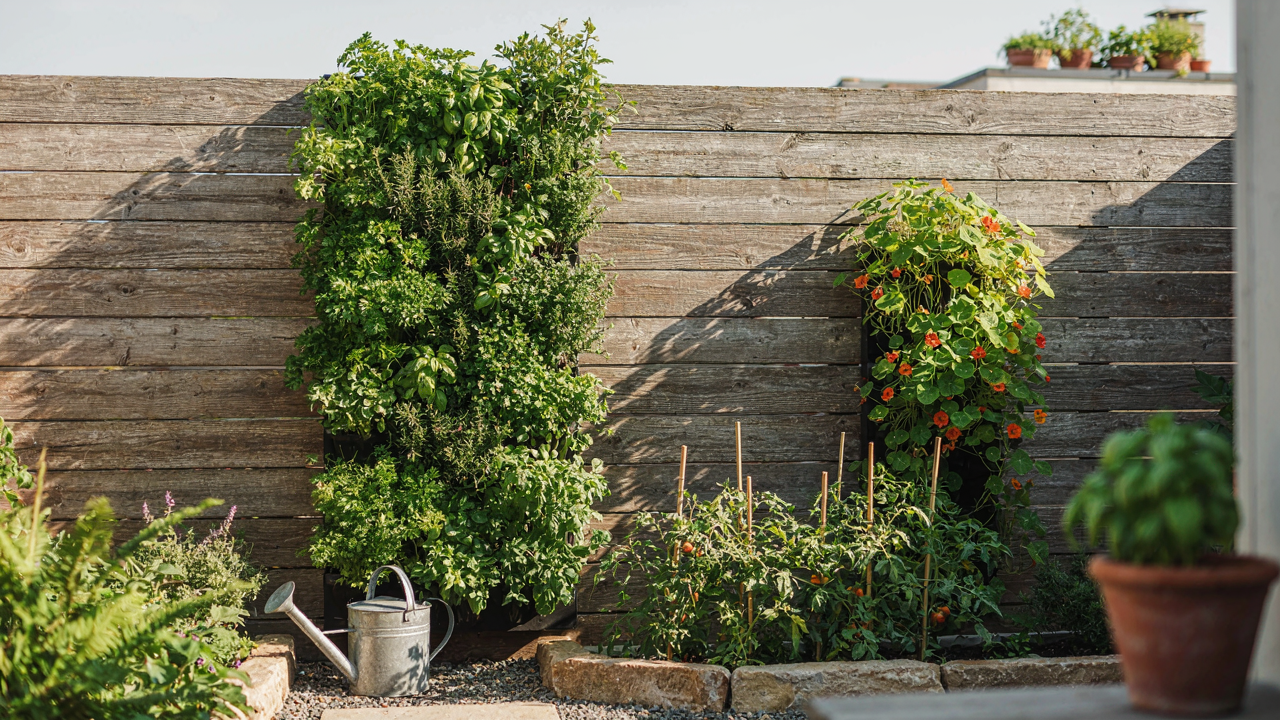
The Vertical Advantage: Beyond Patio Decor

The Space Efficiency Trap
You want vertical gardens to solve your space problem without admitting you haven’t optimized your existing footprint yet. Here’s the mechanism: vertical structures don’t create usable space, they redistribute it. A wall-mounted trellis uses the same square footage as a ground bed, just oriented differently. The real win is density per cubic foot, not magic multiplication. You fit more plants into the vertical plane because you’re stacking growing layers where nothing existed before, but you only gain an advantage if your ground space is actually constrained or already claimed.
The constraint that matters is sunlight access, not square footage. A vertical structure only compounds your growing problems if you position it in partial shade. The plants on lower tiers shade the ones beneath them, creating a light hierarchy that means your bottom layers produce 40 to 60 percent less than your top tier. This isn’t a design flaw, it’s physics. You mitigate it by choosing shade-tolerant species for lower levels or spacing structures wider apart to let light penetrate. The beginner mistake is treating all vertical space as equivalent.
Sunlight Capture And Tiered Light Distribution
Sunlight behaves like a resource in resource allocation problems: finite, unevenly distributed, and subject to loss through competition. Your top tier captures direct rays; each layer below inherits what the layer above doesn’t intercept. Position your vertical structure so its axis runs north to south if you’re in the Northern Hemisphere, which maximizes east and west exposure across all tiers. Morning sun from the east and afternoon sun from the west both reach lower levels longer than midday sun does from above.
The protocol is to conduct a shadow trace on your site during the season you’ll grow most aggressively. Identify where shadows fall at 9 AM, noon, and 3 PM. If any shadow covers your proposed structure location, move it or don’t build there yet. Most beginners skip this step and wonder why their bottom-tier tomatoes stay green. Plant sun-demanding crops on the highest tier where you have uninterrupted direct exposure, and reserve lower tiers for herbs like mint or parsley that tolerate 4 to 5 hours of partial sun instead of the 6 to 8 hours full-sun crops demand.
Debunking “Easy”: The Hidden Costs Of Convenience

Setup Speed Masks Long Term Friction
You want to believe vertical gardens are low maintenance because admitting they’re not feels like failure. The real mechanism is simple: initial assembly time and long-term management demands operate on completely different scales. A trellis takes two hours to install. The plants need active intervention every week for months.
Most vertical structures fail because people front-load their effort, then vanish. A living wall mounted on an exterior wall faces weather stress that a ground bed doesn’t. Soil compaction, root density shifts, and structural settling accelerate. You’ll spend more time troubleshooting a failing vertical system than you’d spend maintaining the same plants horizontally, where gravity helps drainage and root penetration.
Water Movement Changes Everything
Irrigation engineers call this “flow path optimization,” and vertical gardens violate it at every level. Water doesn’t distribute evenly through stacked soil. It finds cracks, pools at weak points, and leaves dry zones untouched. The common advice to “install drip irrigation and forget it” ignores the actual problem: vertical growing redirects water behavior in ways that demand constant calibration.
A 3-foot tall pocket planter requires different water volume and frequency than a 6-foot structure, even with identical plants. Evaporation rates differ between sun exposure at the top versus shade at the base. You’ll adjust your watering schedule three times before you find the right cadence, wasting water and plant health in the process. Document your exact watering protocol before you claim the system works.
The Gutter Garden Protocol: Simplicity Redefined
What You Actually Need To Buy
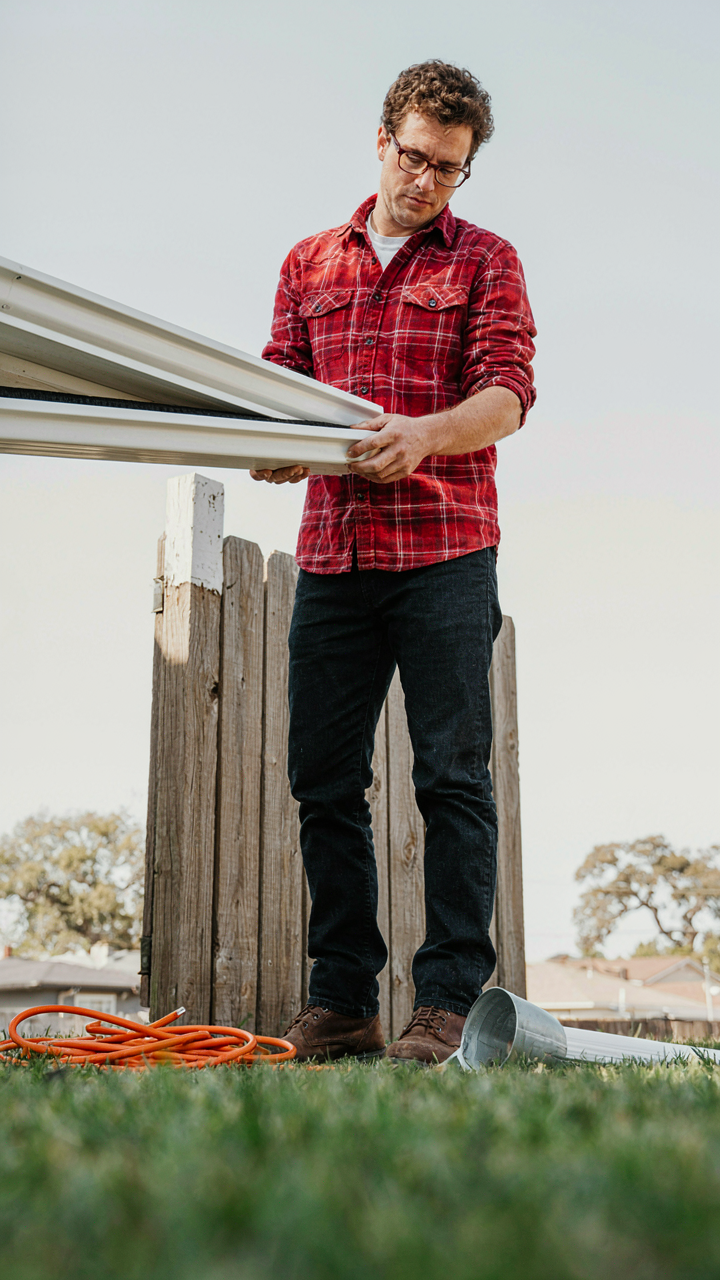
You want this to work without constant fiddling, which is why you’re reading about gutters instead of building raised beds. The mechanism is simple: gutters are channels designed by engineers to move water downhill fast. Apply that same principle to plants. You need standard K-style or half-round gutters in aluminum or vinyl, end caps, downspout elbows, and basic hardware. Aluminum costs more but won’t degrade under UV. Vinyl is cheaper and still functional for five to seven years.
Sourcing takes thirty minutes. Check your local home improvement store’s gutter section first, not online. You want to see the material thickness before committing. Most beginners overspend on specialty “garden” gutters that cost three times the price for identical performance. Buy standard building materials. Add landscape fabric to line the bottom, potting soil to fill, and you’re done acquiring. The rest is labor, not capital.
Mount It So Water Actually Flows
Everyone gets the angle wrong and then blames the system. Gutters need a minimum slope of one inch per forty feet of horizontal run to move water consistently. Most DIY installations fail because people mount gutters level or nearly level, then watch soil stay soggy while the far end dries out. Use a level and measure the drop before you drill a single hole.
Mount gutters to a solid structure: fence posts, wall studs, or a horizontal frame you build from two-by-fours. Secure with gutter brackets every two to three feet. Position the outlet end lower than the inlet end. Install a downspout elbow at the low end to direct excess water into a bucket or drainage line below. This prevents root rot from pooling water and keeps soil moisture consistent across the entire garden bed.
Modular Design: A Cybernetic Approach To Vertical Gardening Ideas Outdoor
The Real Feedback Loop
You want modularity because you’re afraid of commitment. You don’t want to build a permanent structure that fails, so you’re betting on flexibility to hedge your bet. That instinct is correct, but most vertical gardens treat modularity as a cosmetic feature when it’s actually a control mechanism. Cybernetics, the study of feedback systems, teaches us that any living system survives by sensing output and adjusting input. A modular vertical garden structure does exactly this: each tier or section operates as a discrete feedback unit that reports plant health data through visibility and access.
Traditional fixed structures hide problems. A plant suffocates in the back corner of a stacked bed system and you don’t know until it’s dead. Modular components force proximity. You inspect each section weekly because removal takes minutes, not an hour of contortion. This isn’t convenience, it’s data collection. The mechanism is simple: modular = observable, observable = correctable, correctable = survivable.
Systems That Breathe With Growth
Most people think adaptable means you can add more boxes later. That’s incomplete. True adaptability means the structure itself changes load distribution as plants mature and water weight shifts. A rigid frame distributes stress equally across all mounting points at all times. A modular system redistributes stress as sections fill or empty. This mirrors how biological systems scale, not how construction projects do.
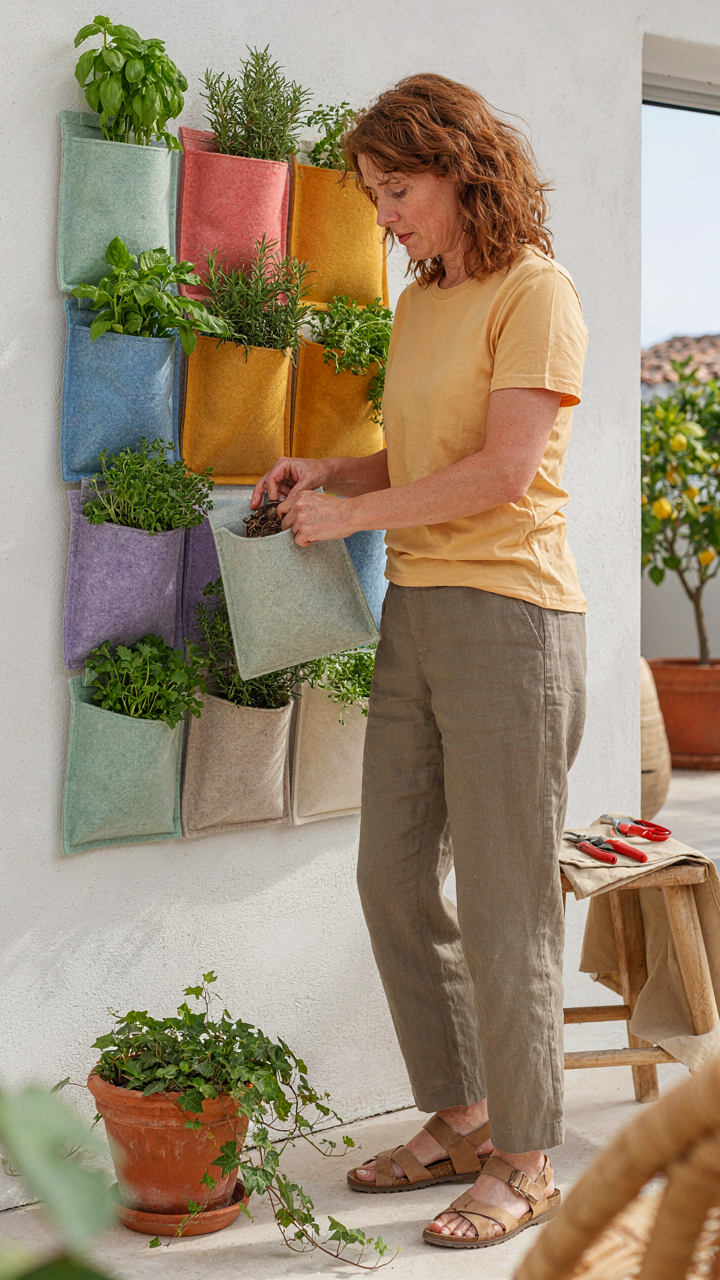
Start with a two-tier pocket wall system using felt or recycled plastic channels. Run it for a full season. Record which sections dry fastest, which plants outpace others, which mounting points sag. At season end, reconfigure tier height based on actual plant depth data, not guesses. Add a third tier only where root depth measurements justify it. The protocol is: measure, adjust, measure again. Modularity fails when it enables laziness instead of demanding precision.
Structural Integrity: More Than Just Hanging Pots

How Weight Actually Moves Through Your System
You want to build something that doesn’t collapse because you’re scared of looking incompetent in front of people who might see it. Here’s the mechanism: weight doesn’t distribute evenly in vertical systems the way it does on flat ground. Gravity pulls straight down, but your structure has to redirect that force through anchor points. Most beginners ignore this and just bolt things to walls or hang them from hooks rated for the wrong load.
Material selection isn’t about aesthetics or what you saw on Pinterest. Steel and aluminum handle tensile stress differently than wood. Steel resists bending under load but conducts temperature swings, causing expansion and contraction. Wood absorbs moisture and weakens over time unless treated. Aluminum corrodes in wet environments unless anodized. Pick the material based on where your garden sits and what weight you’re actually moving.
Wind Load And Point Failure
Physics borrowed from structural engineering applies directly here: cantilever beam theory explains why a wall-mounted trellis fails at the bracket, not the middle. The bracket concentrates all force into one location. A three-foot horizontal arm with plants ten feet up multiplies that load pressure by the distance from the wall. Most systems fail catastrophically at fasteners, not materials, because people underestimate the mechanical advantage wind creates.
Wind resistance requires you to calculate projected surface area of wet foliage, not just the frame. Soil adds pounds quickly. A vertical garden 4 feet tall by 3 feet wide holding potting mix can easily weigh 150 to 200 pounds when saturated. That load swings in wind like a pendulum. Your fasteners need 3x the rated capacity of what you calculate, and you verify that capacity is actually in the material, not just claimed on packaging. Secure your anchor points by drilling into studs or using through-bolts, never drywall anchors alone.
Plant Selection: The Overlooked Variable In Vertical Vegetable Garden Success

Root Depth Determines What Actually Grows
You want to believe any plant works in vertical systems because it feels efficient. The truth is simpler and harsher: root architecture predicts failure or yield before you plant anything. Shallow-rooted crops thrive in restricted vertical containers. Deep-rooted crops suffocate and underperform, wasting your setup entirely. Match root system depth to available container depth or watch your structure become decorative rather than productive.
Lettuce, spinach, and arugula root 6 to 8 inches deep and perform reliably in standard vertical pocket systems. Carrots, beets, and parsnips demand 10 to 12 inches minimum. Tomatoes and peppers need 12 to 18 inches of unobstructed depth to support both root mass and fruiting weight. Most beginners ignore this and plant what looks good, then blame the structure when plants stagnate by mid-season.
Where Light Hits Determines Vertical Placement
Light doesn’t distribute evenly on a vertical surface. The mechanism is basic physics: intensity drops with distance and angle from the light source. Plants positioned at the wrong height absorb half the usable light their neighbors receive, creating invisible yield gaps.
- Leafy Greens: Place at mid-height where diffused light reaches efficiently. Lettuce tolerates partial shade better than fruiting crops and maximizes output in 3 to 4 hours of direct light daily.
- Herbs (Basil, Parsley, Cilantro): Position in upper zones where light intensity peaks. These crops need 6 to 8 hours of light and respond with concentrated flavor when light exposure is highest.
- Fruiting Crops (Peppers, Small Tomatoes): Reserve top and side-facing positions for maximum light exposure. Fruiting requires 8 to 12 hours of direct light and won’t mature reliably below mid-height on a vertical structure.
- Trailing Varieties (Peas, Beans): Use vertical supports strategically so canopy doesn’t shade lower plantings. These crops photosynthesize aggressively and cast dense shadows, blocking light for plants beneath them.
- Shade Tolerant Crops (Kale, Chard): Deploy in lower zones that receive reflected or indirect light. These plants tolerate 2 to 3 hours of direct light and fill structural real estate that would otherwise produce nothing.
Most beginners invert this logic by planting shade-tolerant crops high and demanding crops low. They then conclude vertical gardening doesn’t work. Vertical placement is a light-rationing system. Treat it that way and your structure produces three times what random placement yields.
Outdoor Wall Garden Design: Blending Aesthetics With Function

Plants That Earn Their Wall Space
You want your vertical garden to look intentional, not like you’re hiding a mistake. The real mechanism is this: architectural plants work because they have strong visual signatures that don’t fade into background noise. Think of it through hierarchy theory borrowed from graphic design—certain plants command attention through leaf texture, form, or color contrast, while others disappear. Sedums, ornamental grasses, and structural evergreens don’t need perfect conditions to telegraph “I belong here.”
Plant selection isn’t decoration first. It’s a structural decision. Choose species with defined shapes—upright junipers, cascading pothos, or compact boxwoods—because formless plants make walls look unfinished. The plant does the work of design, not the frame. Commit to plants that maintain their character year-round, or your wall becomes a maintenance liability the moment seasonal decline hits.
Integration Into Existing Structures
Most people treat vertical gardens as separate objects bolted onto walls. That’s the wrong starting point. Real integration means the vertical structure becomes part of your property’s existing lines and materials, not a competing element fighting for attention. Brick walls host certain systems better than stucco. Wood fences need different anchoring than concrete. Your wall already has a visual language—the garden either extends it or disrupts it.
Match your structure to what’s already there. If your house uses horizontal lines, a trellis with staggered plantings reinforces that. If it’s angular or modern, grid-based systems win. The installation method matters equally: surface-mounted systems look added-on, while integrated systems that wrap into existing trim lines read as intentional. Measure twice and test the visual weight before committing to the installation.
Irrigation: Automate Or Perish

Choose Your Water Delivery Mechanism
You want to believe you’ll hand-water your vertical garden. You won’t. Inconsistency kills more plants than drought does. The real mechanism at work here is gravity and pressure. Drip systems leverage both to move water downward through your structure at controlled rates, eliminating the daily guesswork that kills beginners.
Gravity-fed systems work without electricity. Water sits in a elevated reservoir and drips down through tubing by force of weight alone. Pump-based systems add pressure, letting you control flow rate and reach higher tiers faster. Pick gravity-fed if your structure stays under six feet and you can mount a tank above it. Pick pump-based if you’re stacking higher or running multiple zones.
- Drip Emitters: Release 0.5 to 2 gallons per hour per hole. Prevents runoff and targets roots, not foliage. Essential for soilless systems.
- Soaker Hose: Perforated tubing that weeps water along its length. Simpler than individual emitters but less precise control. Works for dense plantings.
- Gravity-Fed Tank: Any elevated container feeds downward without power. Cheap to start. Refill manually or automate with a larger backup supply.
- Submersible Pump: Sits in a reservoir below and pushes water upward. Enables taller structures and multiple independent zones on one system.
- Timer and Valve: Automates on-off cycles. Run irrigation for 15 to 30 minutes twice daily depending on medium, plant type, and season.
Hand-watering vertical gardens fails because water runs off before soaking in. Drip systems eliminate that failure mode. Water reaches the soil directly. Check your lines weekly for clogs or leaks, and flush the system monthly to prevent mineral buildup.
Water Quality Drives Nutrient Availability
Hard water clogs emitters and locks nutrients into unavailable forms. This is basic chemistry: minerals in water precipitate as they move through tubing and soil. Soft water absorbs faster and carries dissolved nutrients more evenly to all tiers. If your tap water tests above 200 ppm total dissolved solids, filter it before the reservoir or use collected rainwater instead.
Nutrient delivery depends on water volume and frequency, not on the fertilizer strength you guessed. Vertical systems dry faster than traditional beds because soil exposure increases. Run irrigation for shorter intervals more often rather than one long soak. This prevents leaching and keeps roots consistently fed. Inject liquid fertilizer into your drip line if growing edibles, or feed through slow-release granules mixed into your growing medium at planting. Both work. Choose based on whether you want daily control or hands-off automation.
Maximizing Yield: Vertical Gardening Tips For Abundance

Staggered Planting In Tight Footprints
You want proof that your vertical structure actually works, not just looks intentional. The mechanism is simple: vertical systems have fixed capacity, so you don’t plant everything at once—you plant in waves timed to harvest cycles. This isn’t crop rotation. This is harvesting one tier while the next tier matures below it, maximizing the productivity window of a static footprint.
Succession planting works because vertical structures force you to think in layers and timing simultaneously. Plant leafy greens at week one, week two, and week three on different tiers. By week four, you harvest tier one. Tier two is now ready. Tier three continues growing. The structure never sits idle between plantings. You’re not adding square footage. You’re compressing the calendar into the space you already have.
Managing Pests Where Air Doesn’t Move
Vertical systems create a microclimate problem most people won’t admit: stagnant air in the middle and lower tiers. Pest and disease biology exploits this directly. Mites, fungal spores, and leaf-eating insects thrive in humid, still environments. The real solution isn’t spraying. It’s airflow design built into your structure from the start.
Space tiers at least eight to ten inches apart minimum. Add fans if your vertical garden is indoors or against a wall. Check the underside of leaves on lower tiers every three days—pests colonize there first because air velocity is lowest. Isolate any infected plant immediately, not to save it, but to stop the spread to the tier above, which receives better airflow and hosts your healthiest plants.
Beyond The Fad: Real Return On Vertical Gardening

The Sustainability Test That Matters
You want proof your vertical garden won’t become a graveyard you hide behind your garage. That’s the real fear here. The mechanism is simple: vertical systems fail when they’re built for aesthetics instead of maintenance. Gravity pulls water down. Uneven water distribution kills plants. Poor airflow breeds mold. These aren’t design flaws—they’re physics. A vertical structure that ignores these forces collapses within a season, regardless of how much money you spent.
The difference between a sustainable vertical garden and abandoned yard art is this: you built it for the wrong audience. Instagram followers don’t water your plants. Seasonal weather does. Your system has to handle freeze-thaw cycles, intense sun exposure, or shade depending on your zone. Sustainable vertical gardens use materials that age well—rot-resistant wood, galvanized steel, high-density polyethylene—not trendy bamboo or untreated cedar that degrades in two years. The structure itself becomes the foundation for consistent growing, not a temporary installation.
Knowledge Compounds, Materials Depreciate
Most beginners treat vertical gardening like furniture shopping: pick the right product, install it, done. This is wrong. What depreciates fastest is the structure itself. What compounds is what you learn about water pressure, drainage, plant spacing, and root depth for your specific climate. A poorly chosen trellis costs you a hundred dollars once. Not understanding how to manage moisture in a living wall costs you dozens of plants, repeatedly.
The real investment is understanding the mechanics of the system you build. Learn how much water your substrate holds before draining, and why that matters for root rot. Learn which plants tolerate dense vertical spacing and which need air gaps. Learn how to retrofit your structure when something fails. This knowledge transfers to your next vertical garden, and the one after. Materials you buy are expendable. The framework you develop is permanent.
The Real Obstacle Isn’t Structure; It’s Your Resistance To Seeing Plants As Architectural Elements

Most people treat vertical gardens as decoration you add after building a space. You’ve got it backwards. Plants are structure. They define rooms, control sight lines, and function like living walls. Stop waiting for the “perfect moment” to start. Grab a trellis today, lean it against your blank wall, and plant one climbing vine. Watch how it changes the space. Once you see plants as load-bearing design elements instead of afterthoughts, you’ll stop overthinking and start building. Your environment becomes the work of art, not the frame around it.



