

The Freeze Thaw Fallacy: Debunking Common Terracotta Pot Winter Storage Myths
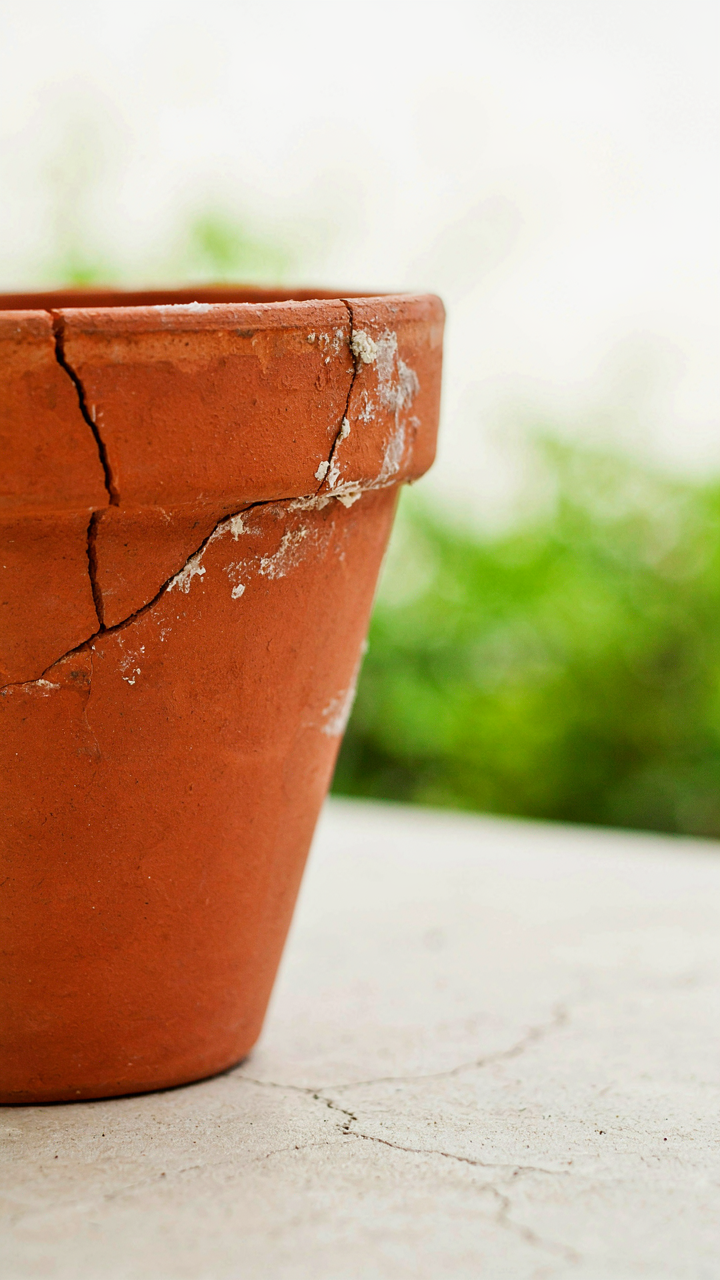
Terracotta Isn’t Actually Fragile
You want to believe your pots are delicate so you have permission to obsess over them instead of just storing them right. Here’s the reality: terracotta is fired clay, not eggshell. The actual damage mechanism in winter isn’t the pot breaking from cold. It’s water trapped inside the clay freezing, expanding, and forcing microcracks that compound year after year. The pot survives individual freezes. Repeated freeze cycles without proper drainage destroy it from the inside out.
Most people repeat the “terracotta is delicate” script because garden centers profit from you buying plastic alternatives. Terracotta pots have stored plants and water through winters for centuries without heated storage. What changed isn’t the material. It’s that people stopped draining them before storage. A dry terracotta pot tolerates freezing temperatures better than most assume. The vulnerability is moisture, not cold.
Water Absorption Is The Real Killer
Think of terracotta like a sponge in physics terms: porosity is the variable that determines expansion rate when liquids freeze inside it. Terracotta absorbs water through capillary action, pulling moisture up from soil contact, drainage holes, and ambient humidity. When that water freezes, it expands about nine percent by volume. That expansion happens inside the clay matrix where it has nowhere to go. The pressure cracks the structure from within.
The standard advice says “just move pots indoors.” Incomplete. A wet pot brought indoors still holds water. It can still freeze if your garage drops below 32 degrees Fahrenheit at night. The real protocol is draining the pot completely, letting it dry for two to three weeks before storage, then storing it in a space where it stays dry. Moisture control precedes temperature control. Store dry terracotta outside if you have to. Store wet terracotta nowhere.
The Dehydration Protocol: Prepping Terracotta Pots For Winter Garden Pots Outdoor

How To Clean Clay Without Damaging It
You want your pots to look maintained because abandonment feels like failure. The real mechanism is salt and mineral buildup. Terracotta is porous fired clay that absorbs water and dissolved minerals from soil, fertilizer, and tap water. These salts crystallize on the surface and inside the walls, trapping moisture that expands when frozen and cracks the pot from within.
The common advice to scrub aggressively with wire brushes is wrong. Use lukewarm water and a soft brush or cloth to remove loose soil and surface deposits. For stubborn white salt crusts, soak the pot in water for 30 minutes, then wipe gently. Never use pressure washers or harsh chemicals. You’re removing deposits, not refinishing the pot. Mild dish soap works if the pot is visibly grimy, but plain water removes most seasonal buildup without risk.
Complete Dryness Is The Only Insurance Against Freeze Damage
Moisture trapped in porous clay follows the same thermodynamic principle as water in a pipe: expansion during the freeze phase destroys container integrity. A wet terracotta pot left outdoors won’t survive a hard freeze cycle.
After cleaning, place pots upside down in a warm, dry location for a minimum of seven to ten days. Inverted positioning allows water trapped in the drainage hole and base to evaporate instead of pooling. Air flow matters more than heat. A garage, shed, or covered porch with good ventilation works better than direct sun exposure, which can create stress fractures in the clay. Check the inside and rim weekly by touch. The pot is ready for storage only when it feels completely dry throughout, not just on the surface.
The Stacking Strategy: Maximizing Space For How To Store Clay Pots

Stack By Rim Diameter, Not Height
You want to cram more pots into less space without admitting you’re worried about wasting money on storage real estate. Here’s the mechanism: stacking terracotta by rim diameter uses load distribution principles from structural engineering. Smaller rims sit inside larger ones, which means weight distributes across a wider surface area instead of concentrating at single contact points. This is the only stacking method that actually works at scale without creating collapse risk.
Start with your largest pot base on the ground. Place the next smaller pot directly inside it, rim to rim. Continue down through your inventory. The graduated sizes create a pyramid that’s stable because each pot’s weight transfers through its own walls to the pot below, not through fragile edges. Never stack by height alone, which groups similarly sized pots together and creates lateral pressure that terracotta can’t absorb without cracking.
Stabilizing Against Settling And Shifts
The common advice tells you to just “use padding” and call it done. That’s incomplete. Terracotta settles under its own weight during storage, and temperature fluctuations cause micro-shifts that loosen stacks over months. You need active stabilization, not passive cushioning. Place a thin plywood sheet between each stack layer to distribute pressure evenly and prevent any single pot from sinking into the one below as the clay compresses slightly.
The plywood acts as a shear plate that stops lateral movement while spreading vertical load across the rim’s entire circumference. Cut sheets to fit inside your largest pot in each stack so they don’t jut out and create trip hazards. Check stacks monthly during winter storage. If you see gaps forming between pots, add another plywood layer or reduce stack height by one pot. The cost of thin plywood is insignificant compared to replacing cracked terracotta in spring.
The Climate Control Imperative: Protecting Flower Pots And Large Pots

Temperature And Humidity Range
You’re afraid your pots will crack and you’ll have wasted money. Here’s the mechanism: terracotta is porous clay fired at high heat. When water inside the clay freezes, it expands. That expansion breaks the material from within. This is physics, not opinion.
Terracotta survives winter storage between 32 and 50 degrees Fahrenheit. Below freezing invites ice formation inside the pores. Above 50 degrees triggers premature growth cycles in dormant plants. Humidity should stay between 40 and 60 percent. Too dry and the clay shrinks unevenly. Too wet and you create conditions for rot at the soil line.
Air Movement Prevents Silent Rot
The common advice says “keep them dry.” That’s incomplete. Stagnant air kills pots faster than moisture does. Still air allows fungal spores to settle and colonize the clay surface and any soil residue inside the pot.
Ventilation works like this: moving air prevents moisture from pooling in micro-crevices where mold establishes. A single floor fan running 4 to 6 hours daily in your storage space creates enough air exchange. Position pots with 2 to 3 inches of space between each one. Stack them upside down only if they’re completely empty and you’ve cleaned the interior. Ensure your storage area has at least one open vent or crack that allows outside air to cycle through the enclosed space.
The Material Science Of Clay Pots: Lessons From Engineering

Why Your Pots Crack In Winter (It’s Not Random)
You want to know why your pots survive some winters and shatter others because you don’t want to replace them and waste money. Here’s the mechanism: terracotta is porous ceramic, meaning water fills its tiny internal voids. When temperatures drop below freezing, that water expands roughly 9 percent. This expansion happens inside the material, not on the surface, creating internal pressure that the clay structure cannot absorb. The pot fails from stress it generates internally, not from external cold.
The strength of terracotta depends entirely on how much water saturates it before the freeze. A bone-dry pot survives harsh winters. A wet pot shatters at 32 degrees Fahrenheit. This is why drainage matters more than temperature. Most people focus on how cold it gets. They should focus on how wet the pot stays. Move water out of the clay before winter arrives, and the material survives regardless of your climate zone.
How Cracks Actually Spread Through Clay
Fracture mechanics from materials engineering explains crack propagation: a small defect or stress point becomes a pathway. In terracotta, moisture saturation creates the initial stress. Once a micro-crack forms, water trapped in the clay follows that crack deeper into the material. The freeze-thaw cycle then widens the crack because ice expands preferentially along the path of least resistance. Your pot doesn’t crack randomly. It cracks along the route that absorbs water most efficiently.
Most storage advice tells you to store pots upside down or wrap them. That’s incomplete. Those tactics reduce surface water but don’t eliminate internal saturation. The real protocol: dry pots thoroughly before storage, store them in a location where humidity stays below 50 percent, and inspect them monthly for hairline cracks. A crack visible now won’t spread if moisture stays out. Catch the damage early and rotate those pots into decorative roles instead of planting ones. This extends their useful life indefinitely.
Overwintering Potted Perennials: Beyond Just The Pot

Plant Selection For Terracotta Containers
You want the pot to survive winter intact so you can use it again next year without replacing it. Here’s what actually matters: terracotta fails in freeze-thaw cycles when water inside the clay expands and contracts. The plant you choose determines how much water stays in that pot through dormancy. Hardy perennials that go genuinely dormant and stop drawing moisture are your only real option in terracotta in cold climates.
Tender perennials and tropical plants that stay semi-active through winter keep soil moist longer, which means more water locked in the clay. That water freezes, expands, and cracks the pot from the inside out. Stick to plants with a documented hardiness zone rating at or below your local winter temperature. Cold-hardy ornamental grasses, sedums, and dormant herbaceous perennials like coneflowers work. Evergreen tender plants in terracotta are a gamble you’ll lose.
Dormancy Management In Containers
From a biological standpoint, dormancy is a plant’s metabolic shutdown—and that shutdown is your leverage point for pot survival. The moment you stop watering a dormant plant, soil dries down significantly. Dry soil shrinks away from pot walls and holds far less water to freeze. Most winter damage happens because gardeners keep watering perennials that have already shut down for the season.
- Cut watering by 80-90% once growth stops: Only water if soil is dust-dry or the pot feels hollow when tapped. One deep drink before a hard freeze is usually enough for the entire winter.
- Move containers to sheltered locations: Position pots against a south or east-facing wall, under an eave, or in a garage. Wind and direct sun cause moisture loss that isn’t replaced because the plant isn’t actively growing.
- Avoid fertilizing after September: Nitrogen pushes new growth and keeps plants metabolically active. Stop feeding 8-10 weeks before your first frost date.
- Let foliage die back completely: Dead plant material signals dormancy to the organism. Cut back herbaceous perennials to ground level in late fall so you’re storing a pot with dry, inert plant matter inside.
- Group pots together for thermal mass: Multiple containers clustered together create a warmer microclimate than isolated pots. Stack them so air flows underneath to prevent ground moisture from wicking into clay.
The protocol is simple: stop feeding in early fall, reduce water intake dramatically by mid-autumn, position pots in wind-protected spots, cut plants to the ground, and let the soil dry down before the first hard freeze.
The Investment Mindset: Long Term Care For Winter Garden Containers

Seasonal Maintenance For Prolonged Life
You want your pots to outlast your interest in gardening. That’s the real motive here, and it’s fine. The mechanism is simple: terracotta degrades through freeze-thaw cycles, not storage. Soil moisture trapped inside the porous clay expands when frozen, creating microscopic cracks that compound each season. Winter storage prevents this damage, but only if you maintain the pot before it enters dormancy.
Clean pots thoroughly before storage. Remove all soil residue, mineral deposits, and algae buildup using a stiff brush and water. Dry them completely in a sheltered area for at least two weeks. Moisture trapped inside clay during storage accelerates frost damage. Store pots in a location where temperature remains stable and humidity stays moderate. Basements work better than unheated garages because they avoid the temperature swings that stress the material.
Repairing Minor Damage For Continued Use
Most advice about damaged terracotta pots tells you to replace them. That’s wrong. Small cracks and chips don’t require replacement if you address them correctly. The distinction matters: a hairline crack that doesn’t penetrate the full wall thickness can be sealed and reused for years without structural failure.
Sand the damaged area smooth with medium-grit sandpaper until you reach clean clay. Fill the gap with a two-part epoxy designed for masonry or terracotta. Press it firmly into the crack and allow full cure time per product instructions, typically 24 hours. Once cured, seal the repair and surrounding area with a food-safe, waterproof sealant rated for outdoor use. This prevents moisture reentry and stops the crack from expanding during freeze-thaw. Store the repaired pot upright in a dry location until the following growing season.
The Storage Audit: A System For Terracotta Pot Winter Storage

Checking What You Actually Have
You want to know if your setup is working so you can stop worrying about it. The real mechanism here is simple: terracotta fails in winter because it absorbs moisture, then freezes and expands. Your audit reveals whether your current storage blocks this cycle or accelerates it. Walk through your space and document three things: pot condition now, where each pot sits, and what moisture level that location maintains.
Most people skip this step because they assume their garage or shed is “fine.” It isn’t. Temperature swings from 35 to 50 degrees across a single winter do damage. Check for existing cracks or chips on every pot before storage begins. Pots with damage absorb water faster and fail first. Take photos. You need a baseline to recognize degradation next spring.
Rotating Pots Through Seasons
This borrows from inventory management in supply chains: the principle is throughput. You move pots in and out of storage based on actual freeze risk, not calendar dates. Don’t store all terracotta pots for five months straight. Rotate them based on your region’s frost window and the specific microclimates in your yard.
Establish two zones: active outdoor use and climate-controlled storage. Move pots to storage only after the final hard frost date has passed safely in your area. Bring them back out as temperatures climb in spring, but before growth season demands them. The goal is minimizing total time pots spend in wet, cold conditions. Create a simple rotation log with dates moved in and out. This prevents pots from sitting in storage longer than necessary, which is where most winter damage accumulates.
The Real Obstacle Isn’t Brittle Pots; It’s Your Brittle System For Managing Them

You don’t have a terracotta problem. You have a decision problem. Most people fail at winter storage because they never decide which pots matter enough to protect. Stop treating every pot like heirloom china. Separate the keepers from the replaceable ones today, stack the winners in a dry spot, and let the rest weather or break. Your system works when you ruthlessly prioritize what you actually care about preserving.



