

The Permeability Paradox: Why “Sealing” Is A Lie

Clay’s Actual Structure Beats Any Coating
You want to seal your terracotta because you think a barrier will solve water damage. It won’t. Terracotta clay is naturally porous by design—millions of microscopic capillaries run through it. No surface coating changes that fundamental truth. The pores exist at the molecular level. You’re applying treatment to the symptom while the mechanism stays intact beneath.
Terracotta manufacturers understood this centuries ago. They never tried to “seal” clay into impermeability. Instead, they worked within the material’s nature: glazing the interior surfaces that contact soil and water, leaving the exterior exposed to air. This isn’t sealing. It’s directing water’s path and letting evaporation happen where it matters. The coating doesn’t block moisture—it slows its entry speed and controls where it goes.
The Breathability Mechanism Wins Every Time
Physics favors systems with open flow over locked barriers. Think of it like vapor pressure equilibrium: water moves through terracotta toward lower concentration zones. Block one path, and pressure builds elsewhere until it finds another route. When you seal the exterior, you trap moisture inside the pot. The clay stays wet longer. Roots suffocate. Soil stays cold. The plant fails not from leaks but from trapped humidity.
Terracotta’s real job is transpiration—the pot itself becomes part of the water cycle. Moisture evaporates through the clay walls, cooling the root zone and concentrating nutrients in the soil. Apply an impermeable sealer and you’ve destroyed that mechanism. The pot becomes a cheap plastic container with a higher price tag. Let the clay breathe, manage drainage at the bottom, and accept that terracotta will always weep slightly. That weeping is the system working.
Beyond The Brush: The Cure For Cracks And Crazing

Water Infiltration Destroys From Inside Out
You care about this because a cracked pot feels like failure—but the real problem starts before you see any damage. Think of terracotta like a sponge with memory: water enters the clay body, expands during freezing, and contracts during heat cycles. This mechanical stress fractures the clay from within. Crazing (fine surface cracks) happens when the glaze or sealant shrinks faster than the clay underneath. Neither starts at the surface.
The mechanism is physics in action. Capillary action pulls water deep into the porous clay structure faster than gravity alone would allow. Once inside, that water has nowhere to go but freeze and thaw repeatedly if exposed to temperature swings. A pot sealed only on the exterior while remaining porous internally is doomed. Freezing cycles create pressure that no brush-on coating can hold back indefinitely. Prevention means stopping water from entering the clay in the first place, not just covering the outside.
Proper Curing Before Any Sealant
Most people skip this step or rush it. You cannot seal a pot that isn’t fully cured—moisture trapped inside will bubble underneath your sealant and create voids. New terracotta contains residual water from the firing process. Let the pot cure in a dry space for two to three weeks before sealing. Room temperature and low humidity work best.
During curing, place the pot in a location with air circulation and zero direct moisture. A garage or covered porch works. Avoid humid basements or areas near water sources. Once fully cured and completely dry to the touch, the clay will accept sealant evenly and bond properly. This isn’t optional prep work—it’s the foundation that makes every subsequent step effective. Skipping curing is why people end up resealing pots every season.
The Hydrophobic Hypothesis: What Actually Works

Water Beads On Sealed Clay Instead Of Soaking
You want your pots to last because replacing them is annoying and you’re tired of replacing them. Here’s what people miss: this isn’t magic, it’s physics. Water has surface tension—a property that makes it cling to itself rather than spread out. Terracotta is porous. Unsealed, water molecules break through that surface tension and get absorbed into the clay. Sealing changes the game by creating a barrier that water cannot penetrate. The water bead up and roll off instead. That’s the entire mechanism.
Most advice tells you to “seal properly” without explaining why certain sealants work and others don’t. The real variable is how well a sealant fills the capillary spaces in terracotta while maintaining that water-repellent layer on top. A good sealant creates both a physical block and a chemical one. Poor sealants sit on the surface and peel. Strong sealants bond to the clay matrix itself, forcing water molecules to stay cohesive and separate from the pot.
The Chemistry Of Sealants That Actually Stick
Polymer science built modern sealants. Think of polymers as long chains of molecules that interlock. When you apply a plant pot sealer, those chains don’t just coat the surface—they cure and cross-link, meaning they bond to each other and to the terracotta substrate. This cross-linking is the difference between a temporary coating and permanent protection.
Most “sealers” are just thinned varnishes. They dry on top but don’t cure into the clay. Acrylic latex sealers dry but don’t cross-link fully, leaving a waxy layer that deteriorates in UV light and temperature swings. Penetrating sealers with siloxane or silicone compounds cure chemically and form stable bonds that last seasons. Apply the sealant in thin coats, let each cure fully between applications, and the polymer chains have time to interlock completely. Rush it and you get a brittle shell that cracks and fails.
The Dan Koe Sealing Protocol: 3 Steps To Superior Pots

Start With Clean Clay
You want your sealed pots to look intentional, not like you inherited them from someone’s basement. Here’s the mechanism: sealers bond to surfaces, not to dirt. Dust, mineral deposits, and old residue create a barrier between the terracotta and whatever product you apply. Wash your pots with lukewarm water and a soft brush. Remove all visible debris. Dry them completely before moving forward, which takes 24 to 48 hours depending on humidity and pot thickness.
Moisture ruins adhesion. A damp pot surface prevents sealers from forming a proper chemical bond with the clay body. The water blocks the pores that the sealer needs to penetrate. Don’t rush this step. Many people skip or compress drying and then complain the sealer doesn’t hold. It’s not the sealer’s fault. You applied it to the wrong substrate. Wait the full time.
Apply With Pressure And Overlap
Thick, even coverage beats thin, perfect application every time. Use a brush or applicator that lets you work the sealer into the clay grain rather than just coating the surface. Work in overlapping strokes to avoid gaps where water can eventually penetrate. Most sealer failures happen because people treat application like painting a wall, when it should be treated like pressurizing a surface.
Apply the recommended number of coats. One coat on terracotta is cosmetic. Two to three coats create actual water resistance. Let each coat cure fully before adding the next one. Check your specific sealer’s documentation for cure time, which usually runs 24 to 72 hours. Rush this and you trap moisture between layers, which defeats the entire purpose of sealing and accelerates deterioration.
Paint Pitfalls: What Paint To Use On Terra Cotta Pots

The Right Paint Stops Water Damage
You want your pots to look finished without peeling in three months. Here’s what nobody tells you: terracotta is porous ceramic, and paint adhesion works like material compatibility in chemistry. The paint must bond to the surface while letting moisture vapor move through, or you trap water behind the coating and watch it fail. Acrylic latex paints breathe and bond to unsealed clay. Oil-based paints seal too aggressively and peel because terracotta expands and contracts with humidity cycles while the rigid oil film resists that movement. Acrylics win because they flex with the clay.
Most paint advice skips the real mechanism: terracotta’s porosity requires a binder that doesn’t lock moisture in. Acrylic latex absorbs into the clay’s surface pores and forms a flexible film. Oil paint sits on top like a plastic shell. When temperature or humidity shifts, the clay moves underneath while the oil coating cracks and separates. Skip oil entirely. Use interior or exterior acrylic latex rated for porous surfaces. Apply it directly to clean, dry terracotta without primer if the clay is unsealed. If you’ve sealed the pot with a hydrophobic sealer first, you’ve created a slick surface that rejects paint adhesion, so don’t do that before painting.
Building Layers Without Trapping Moisture
Multiple coats look better, but layering wrongly kills your work from inside. The mechanism is saturation: each paint layer reduces the clay’s ability to release trapped vapor. Paint one thin coat, let it cure fully between coats, and stop at two to three coats maximum. Thick paint film on porous clay acts like a dam. Water enters through the drainage hole, gets trapped under paint, and causes mold or efflorescence from inside. Thin, breathable coverage preserves the pot’s structural integrity while giving you visual depth.
The structural risk is real. Terracotta pots fail fastest when moisture accumulates behind paint seals. Apply your first coat thin enough to see slight clay texture through it. Wait the manufacturer’s recommended cure time, usually 24 hours for quality acrylics. Add a second coat if needed for coverage, then stop. The goal is paint that protects the surface while letting the clay breathe underneath. If you’re sealing the pot before painting to achieve aesthetic effects, seal only the exterior surface, never the interior or drainage area, or you guarantee moisture lockup and failure.
The “Invisible Shield” Method For How To Seal Pots Effectively

Penetrating Sealers Versus Surface Coatings
You want your pots to look untouched, like the clay itself just got tougher. That’s the real motive here, and penetrating sealers deliver it while surface coatings don’t. In materials science, we call this “substrate integration” – the sealer becomes part of the material rather than sitting on top. Penetrating sealers soak into the terracotta’s porous structure, filling capillaries and blocking water absorption from within. Surface coatings stay external, creating a film that eventually cracks, peels, or wears away.
Most guides treat these as interchangeable. They’re not. Penetrating sealers like linseed oil or siloxane-based products bond chemically with terracotta’s minerals. Surface coatings like acrylic or polyurethane sit on the clay like paint on wood – they need frequent touch-ups and don’t protect the pot’s integrity from freeze-thaw cycles. Penetrating sealers also age gracefully, fading gradually. Surface coatings fail suddenly when the film ruptures. Choose penetrating sealers if you want protection that lasts years without reapplication theater.
Reapplication Cycles For Sustained Protection
The consensus pushes “seal once and forget it.” Wrong. Penetrating sealers deplete over time as they’re exposed to UV, rainfall, and thermal stress. You’re not maintaining a static barrier but managing a gradual material depletion cycle. Most terracotta pots sealed with quality penetrating products need resealing every two to three years in outdoor conditions, or every four to five years in sheltered spaces. Check your pot annually by running water on the surface – if it beads up less dramatically than it did before, saturation is starting.
Don’t guess on timing. Mark your sealing date on the pot’s drainage hole with a marker or keep a simple spreadsheet. Reapply the same sealer type to maintain chemical compatibility – mixing sealers creates unpredictable surface interactions. For outdoor pots in wet climates, plan resealing before winter. For indoor pots near humidity sources like bathrooms, reapply every three years. The protocol is simple: assess annually, reapply every two to four years based on water absorption, and use the same product each time.
Optimizing For Oxygen: The Unsealed Advantage
When Breathability Beats Protection
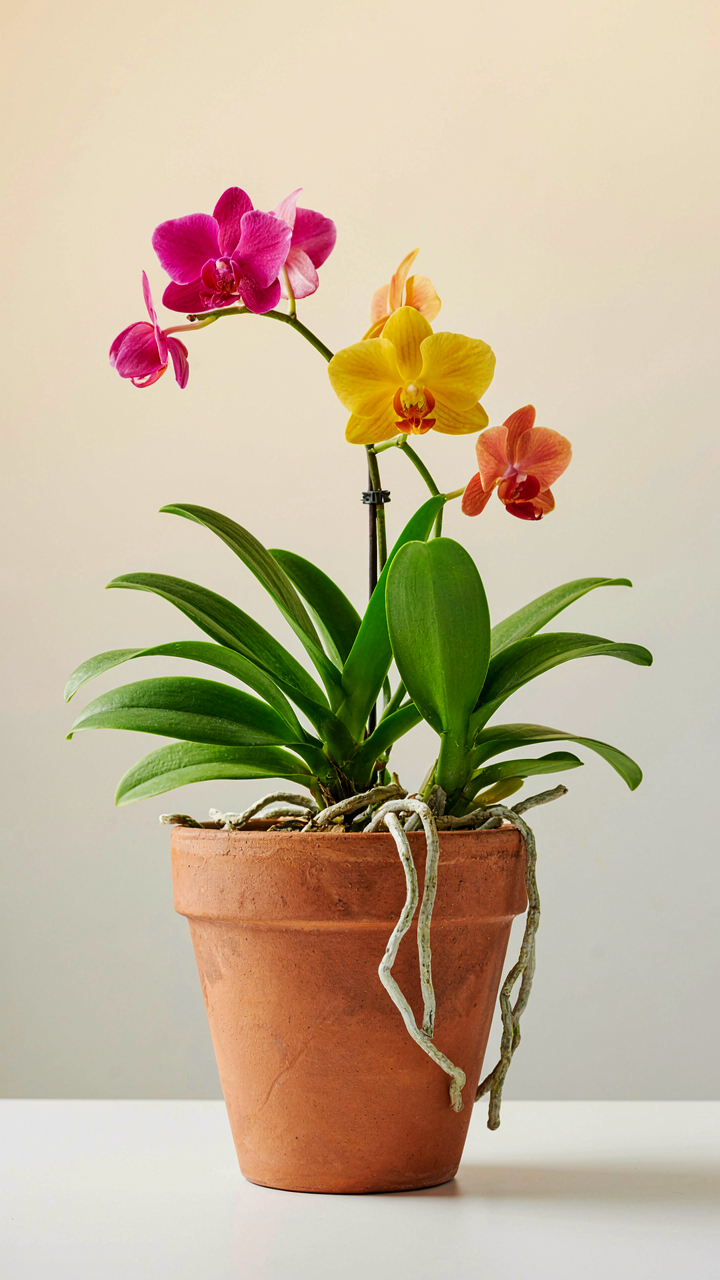
You want to seal your pots because you think it makes them last longer. That’s not wrong, but it misses what actually matters: whether your plant survives. Terracotta works like a lung in soil biology—the porous clay allows gas exchange that sealed surfaces block entirely. Unsealed terracotta lets water and oxygen move through the walls, regulating moisture at the root zone. This passive air circulation is why terracotta existed for thousands of years before plastic sealers were invented.
Sealing terracotta defeats its primary advantage. Roots suffocate when clay becomes impermeable. Most beginners seal pots to protect against water damage, then wonder why their plants weaken. The mechanism is simple: sealed clay traps moisture inside the soil profile, creating anaerobic conditions. The roots respond by rotting. Don’t seal terracotta if you want it to function as terracotta.
Knowing Which Plants Reject The Seal
Certain plant categories demand unsealed clay or they’ll decline regardless of your watering precision. Succulents and cacti need drainage speed that sealed pots cannot provide. These species evolved in arid environments where water moves fast through soil. Painted terracotta pots present a different problem: the paint layer already seals the clay, so additional sealant compounds stack and create the exact anaerobic trap you were trying to prevent.
Orchids and epiphytic plants also suffer under sealed terracotta because their root systems need constant air exposure. Alpines and rock garden specimens prefer the moisture cycling that breathable clay delivers. If you’re working with painted terracotta, stop treating it like bare clay. The paint already handles moisture control. Add another sealant layer and you’ve guaranteed root rot. Choose bare clay for high-oxygen plants or accept that your pot choice already includes a sealing mechanism.
The Opportunity Cost Of Over Sealing

When Sealing Becomes The Goal
You’re worried that under-sealing will kill your plants. That fear is backwards. Economics teaches resource allocation: you have finite time and materials, and sealing a terracotta pot is not where your return on investment lives. Most beginners seal everything because sealing feels like control. It’s not. Over-sealing locks capital into a task that doesn’t improve plant survival.
The real mechanism is simple. A sealed pot trades water regulation for permanence. Terracotta breathes by design—the material’s porosity is its function, not a flaw to fix. When you seal excessively, you’re paying the cost of sealed maintenance without the benefit sealed pots actually offer. You spend effort on multiple coats, reapplication, and monitoring a barrier that competes with the plant’s actual needs. The pot becomes the project instead of the tool.
Root Zone Asphyxiation And Nutrient Lockout
Biology calls this anaerobic stress: sealed pots trap gases and moisture patterns that roots cannot manage. Terracotta’s porous structure allows oxygen to reach the root zone from all directions—that’s non-negotiable for most plants. Over-sealing, especially with waterproof sealers on interior walls, creates microenvironments where water stagnates and oxygen depletes faster than it can be replenished. The root cannot access nutrients locked in anaerobic pockets.
Stop sealing the interior of pots unless you’re storing them empty or using them for succulents in extreme humidity. The exterior seal makes sense for frost protection or drainage control. The interior seal kills the advantage terracotta offers. A sealed interior forces you to manage moisture like plastic, but with the weight and fragility of clay. Seal only the drainage hole if you need water containment, then stop.
Deconstructing The Myth Of “Easy” Sealing

The Real Cost Of Skipping The Work
You want this to be simple because you’re afraid you’ll mess it up and kill your plants. Here’s what actually happens: terracotta is porous by design. Water evaporates through the walls constantly. Sealing slows that evaporation, which changes the soil moisture curve your plant expects. This isn’t optional complexity. It’s a trade-off you’re making whether you acknowledge it or not.
The time investment isn’t in the sealing itself. It’s in monitoring what happens after. Unsealed pots dry faster, so you water more often but with lower stakes per mistake. Sealed pots dry slower, so you water less often but create bigger problems if you misjudge. Most beginners choose “easy” sealing to avoid thinking about this choice, then wonder why their plants suffer.
- Unsealed pot behavior: Water exits through walls and drainage hole. Soil dries in 3-7 days depending on conditions. Frequent watering required but forgiving of overwatering mistakes.
- Sealed pot behavior: Water exits mainly through drainage hole. Soil dries in 7-14 days. Fewer watering events needed but each one carries higher consequence if excessive.
- Monitoring demands: Track soil moisture depth, not surface. Stick a finger two inches down weekly. Adjust watering schedule based on actual drying rate, not calendar.
- Climate factor: Hot, dry environments favor sealed pots. Humid environments favor unsealed pots. Your location determines which approach reduces your workload.
- Plant-specific needs: Succulents and cacti prefer faster drying. Ferns and tropical plants prefer slower drying. Match your sealing choice to species, not convenience.
The mechanism is simple: sealing changes the rate of water loss, which changes how often and how much you need to water. Pretending this doesn’t matter is why beginners fail. Pick a sealing approach based on your climate and plant type, then commit to the monitoring rhythm it requires.
Real Problems Worth Fixing Versus Cosmetic Noise
The advice everyone gives is broken here. They’ll tell you to seal if you see white mineral deposits or salt buildup on the pot. That’s not a problem requiring sealing. That’s a signal your water quality or feeding schedule is off. Sealing the pot doesn’t fix the root cause. It just hides the symptom.
Actual problems worth addressing: cracks that expand when wet, then shrink when dry, which can trap roots. Pots so porous they won’t retain water in hot climates even with frequent watering. Soil that stays waterlogged and causes root rot despite good drainage holes. These are genuine failures. Everything else is cosmetic frustration.
- Mineral deposits: Caused by tap water minerals or excess fertilizer, not porosity. Filter your water or reduce feeding. Sealing wastes time and money solving the wrong problem.
- Surface discoloration: Algae or mold growth from moisture and light exposure. Clean with a dry cloth and move pot. Sealing prevents it but so does placement strategy.
- Structural cracks: Freeze-thaw cycles or manufacturing defects create actual problems. These pots are already compromised. Replace them rather than seal them.
- Rapid soil drying: In hot climates, unsealed pots may dry faster than you can water. This is a real problem. Sealing or choosing larger pots both work.
- Waterlogged soil: Drainage hole clogs or soil compaction trap moisture. Clear the hole or repot with fresh soil. Sealing worsens the problem by trapping more water.
Distinguish between what’s breaking your plant and what’s bothering your eyes. Sealing terracotta makes sense only when water loss rate is the actual constraint on your plant’s survival. Use this test: if your plant is healthy but something about the pot bothers you visually, that’s a cosmetic issue. Leave it unsealed and redirect your effort to what matters.
The Real Obstacle Isn’t The Pot; It’s Your Unexamined Assumptions About Control
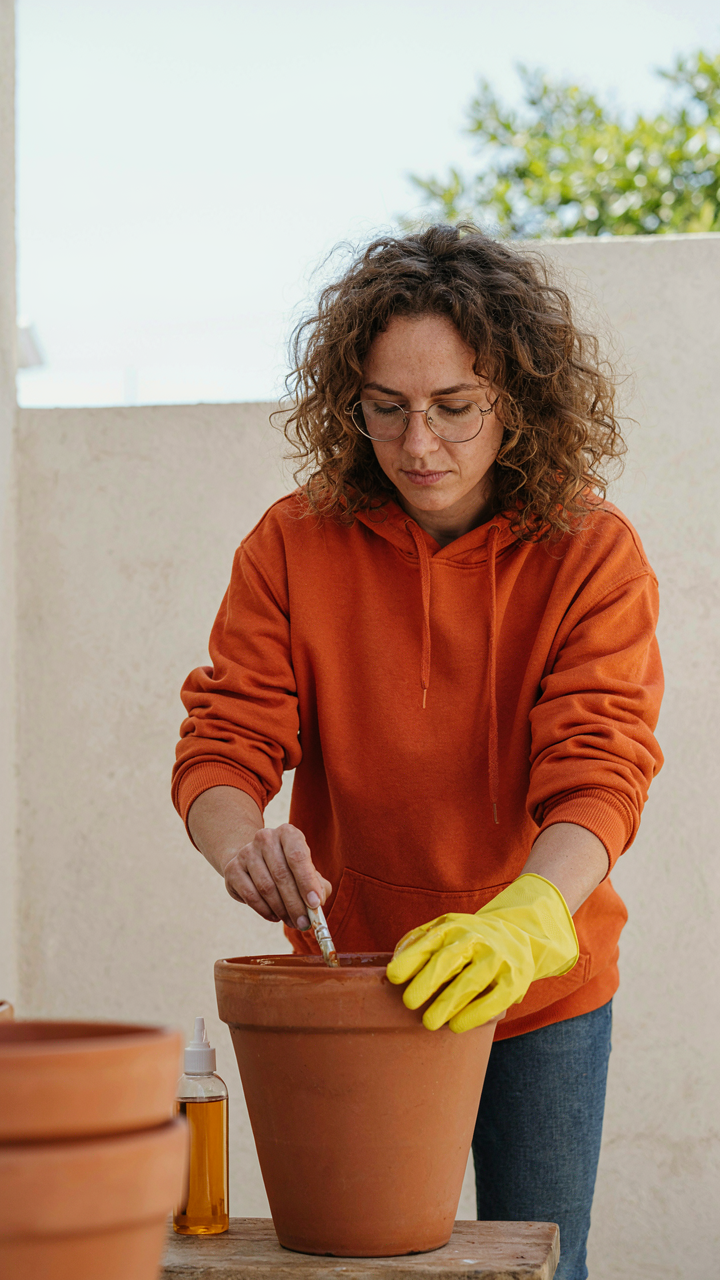
You don’t seal terracotta pots because you’re afraid of ruining them. You seal them because you’re afraid of losing control over the outcome. That fear makes you overthink it, skip steps, or never start. Stop waiting for perfect conditions. Buy a pot today, grab a sealer, and apply it. Imperfection teaches you more than paralysis ever will. Your plants don’t care about your process, only your commitment.



