
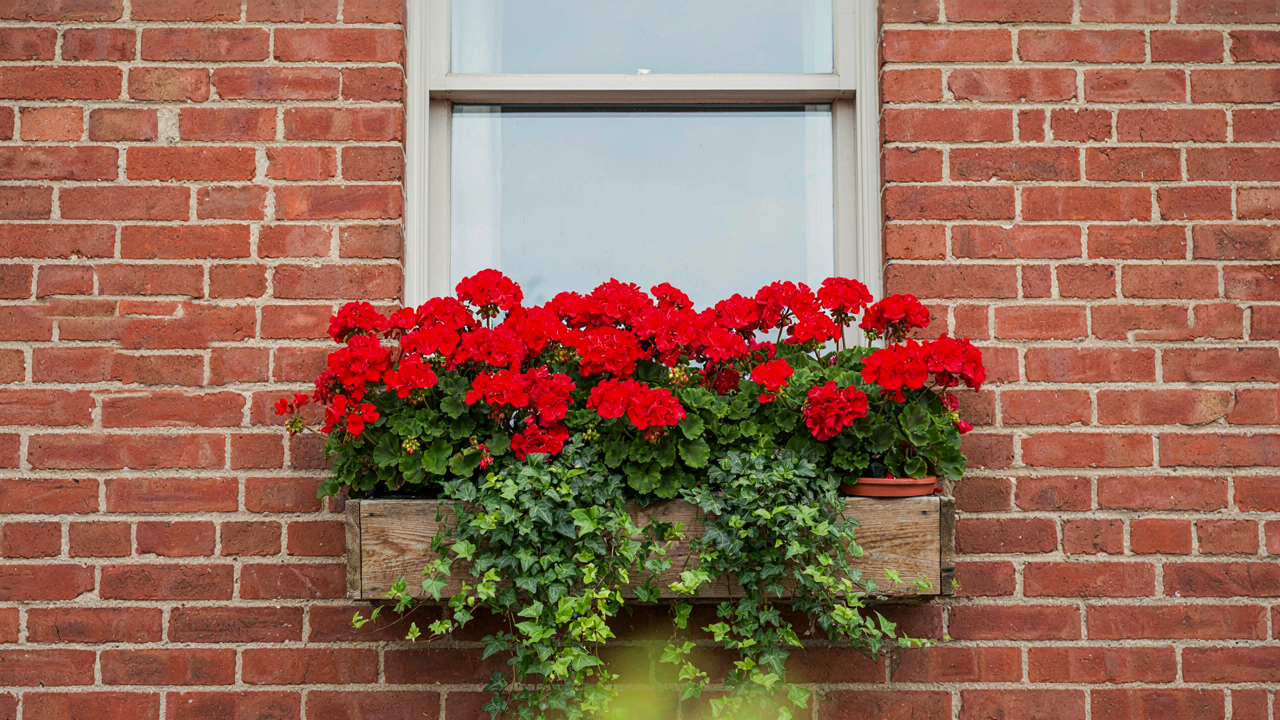
Beyond Pinterest: The Unspoken Truth Of Window Box Installation

The Effort Illusion
You want to believe that effort correlates with results, so you’ll feel less stupid if your window box fails. It won’t. Installation difficulty operates like compound interest in reverse: small mechanical errors multiply into total failure, while one correct decision makes everything else irrelevant. Most people install boxes at the wrong depth, which ruins drainage and kills plants within weeks. The box itself is simple. The timing and placement logic is what separates success from expensive decoration.
The real problem starts before you touch hardware. You’re solving for aesthetics when you should solve for physics first. Water needs somewhere to go. Your bracket needs to handle seasonal load shifts. The sill needs protection from moisture damage. Get these three mechanisms right, and plant choice becomes almost irrelevant. Get them wrong, and no amount of Instagram-worthy arrangements saves you.
When Tutorial Advice Becomes Liability
Standard how-to guides tell you to measure twice and drill once. Correct but useless. They skip the decision that actually matters: whether your window sill can handle a mounted box at all. If your sill slopes inward, moisture pools behind the box and rots your wall frame. If your sill has no overhang, water runs directly down your exterior. The installation itself is twenty minutes. The diagnosis takes an hour and determines whether this works or wastes money.
Installation guides also assume uniform conditions. They don’t account for freeze-thaw cycles in cold climates, which loosen brackets faster than daily use does. They ignore wind load variation by geography. They pretend all mounting surfaces are solid wood when many are vinyl or composite that won’t hold anchors properly. Start by mapping your specific sill condition, seasonal moisture exposure, and local wind patterns. Then the generic steps become tactical instead of decorative.
The “Under Window Planter Boxes” Reality: Choosing For Longevity, Not Likes

Material Science: Wood Versus Metal Versus Composite
You want your window box to look intentional on Instagram, but you’re really asking which material won’t rot, rust, or crack after the third season. That’s the actual decision mechanism here. Wood absorbs water like a sponge, metal corrodes from salt and moisture exposure, and composite materials resist both but carry upfront cost. Cedar and redwood last longer than pine because their natural oils resist decay, but even they fail within five to ten years in direct weather. Vinyl and fiberglass composites don’t degrade from water contact and last two to three times longer than wood, shifting maintenance burden from replacement to cleaning.
The physics here mirrors material fatigue in engineering: stress cycles break bonds. Freeze-thaw cycles split wood fibers. Salt spray oxidizes steel and aluminum. Composites distribute stress differently across their polymer matrix, which is why they resist these cycles better. If you install a wooden box and plan to repaint or replace it every three years as routine maintenance, wood works fine. If you’re installing it once and forgetting about it, composite materials are the only rational choice. The decision isn’t aesthetic until you first solve durability.
Structural Integrity And Weight Distribution
The load on your window frame isn’t spread evenly like you assume. Weight concentrates at the two mounting points where brackets attach to the wall or sill, creating tension that the window structure has to absorb. A full window box loaded with wet soil can weigh forty to sixty pounds, and that force multiplies at stress points during wind load. Brackets rated for thirty pounds mean nothing if they’re mounted on drywall alone without hitting studs or using appropriate anchors. Most installation failures happen not because brackets fail, but because the mounting surface does.
Measure twice, mount once: locate studs or use structural anchors that penetrate into masonry or concrete, not just drywall. Distribute weight across at least two solid mounting points, positioned four to six inches from each end of the box to prevent lever stress on the center. Unequal weight distribution from dense soil on one side tilts the box and pulls brackets at an angle, which accelerates failure. Before you install anything, verify the wall can handle concentrated vertical and horizontal force, not just nominal weight. The box will outlast a weak mounting system.
The 3 Axis Mounting Protocol: How To Hang Window Boxes Securely

Brackets And Anchors: The Load Path
You want this to hold. Not fail in front of guests. That’s the real concern, and it matters because a collapsed window box reads as negligence. The mechanism is simple: vertical load bearing works through a direct transfer of weight from the box down through brackets into the wall structure itself.
Brackets are the load path. They’re not decorative. A standard L-bracket transfers downward force into the wall’s framing, but only if anchored into studs or solid masonry. Drywall anchors alone fail under sustained weight. Use lag bolts into studs, or through-bolts into masonry with expansion anchors rated for your total load. Calculate the load: soil, water, plants, box material. Most window boxes reach 30 to 50 pounds when saturated. Your brackets need a safety factor of at least 4x that weight per anchor point.
Horizontal Bracing: Stop The Pendulum
Lateral movement kills mounting systems faster than weight does. Think of it as a physics problem: any horizontal force creates a lever arm that multiplies stress at the anchor points. Wind, accidental contact, and vibration from foot traffic all introduce lateral pressure that your vertical brackets weren’t designed to handle alone.
Add diagonal bracing or a rear-mounted support arm. This creates a triangulated load path that absorbs side-to-side movement before it reaches the wall anchors. Secure the rear bracket to the window frame or wall studs, not just the sill. Install the rear support before adding weight. The box should not move detectably when you push it sideways with moderate force.
DIY Window Box: The Engineering Of Impermanence

How Water Moves Through Soil
You want your window box to look effortless, which means you’re actually terrified of killing plants in front of your guests. Physics solves this. Capillary action is the mechanism that moves water upward through soil against gravity, and it’s the reason most window boxes fail—people misunderstand it entirely. Soil particles hold water in thin films. Water molecules bond to each other and to soil. This creates an upward pull that distributes moisture throughout the medium, even above the drainage hole.
The common advice is to just add drainage holes and call it solved. Wrong. Poor drainage kills plants faster than no drainage does because oxygen can’t reach roots. The real engineering move: you need pore space deliberately engineered into your soil mixture. Mix standard potting soil with perlite or pumice at a 3:1 ratio. This breaks up capillary chains and creates air pockets. Roots drown not from water presence but from water that stays without oxygen flowing through it. Your drainage protocol requires both downward water movement and horizontal air circulation within the box itself.
Replicating Natural Water Cycles In Confined Space
Biomimicry teaches us to copy systems that work. In nature, water cycles through soil, plants absorb it, plants transpire it, and the cycle repeats. You can’t replicate that in a box without active management. The constraint of a window box means water can’t percolate downward indefinitely like it does in ground soil. Instead, it pools and stagnates. The fix is matching water input to plant demand and soil capacity, not to what looks good on install day.
Water cycle replication requires three components working together: drainage material at the base (broken terracotta shards or landscape fabric over drainage holes), aerated soil mix in the middle, and plant selection that matches sun exposure and wind velocity at your specific window. This last part kills most attempts—people plant shade species in south-facing boxes expecting them to thrive. Measure your window’s direct sunlight hours and wind exposure before choosing plants. Then water on a schedule that matches evaporation rate, not a fixed day each week. Check soil moisture two inches down before watering. The mechanism that sustains plants through the season is matching inputs to outputs, not mimicking nature vaguely.
How To Build A Flower Box For Window That’s Actually Unique
Scale And Proportion Win Before Plants Do
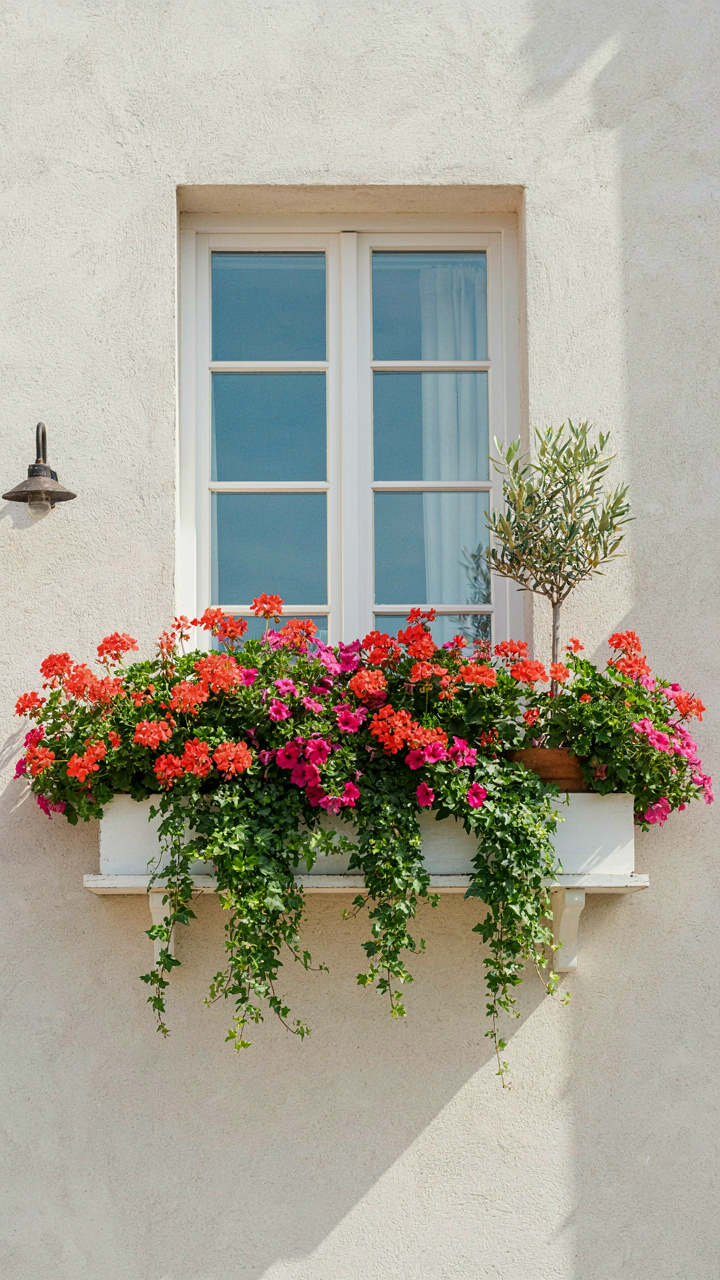
You want people to notice your window box and think you have taste. The real mechanism is this: scale operates like leverage in physics. A small box on a large wall disappears. A massive box on a small window screams amateur. Most people install boxes that match their window dimensions exactly. That’s the mistake. Your box should extend 25 to 33 percent beyond the window frame on each side to create visual weight that anchors the facade. The depth matters equally. A shallow box forces you into thin-rooted plants. A four to six inch depth gives you real design freedom without looking cartoonish.
Proportion isn’t about matching. It’s about creating tension that the eye finds interesting. A horizontal window demands a box with volume. A vertical or square window handles taller planting arrangements. The rule most guides miss: the box width should dictate plant selection, not the reverse. Measure your actual window opening. Add your extension on both sides. Build or source your box to those dimensions first. Then choose plants that fill that container intelligently. This inverts the typical process and eliminates the cramped look ninety percent of installations carry.
Contrast Creates The Signal
Common advice says fill boxes with complementary colors and textures. That’s lazy. Real impact comes from deliberate contrast that makes viewers stop scanning. Introduce elements that break the plant-only expectation: trailing vines against rigid architectural stems, matte foliage against glossy leaves, fine-textured asparagus fern against thick succulent rosettes. Vary planting density too. Cramming every inch reads as confused. Strategic gaps between groupings create rhythm and let light move through the arrangement instead of stopping at the surface.
The texture play extends to materials outside the plants themselves. A wood box against stone or brick reads differently than metal. Weathered finishes age faster and signal intention rather than newness. Movement matters more than people admit. Ornamental grasses or lightweight trailing plants catch wind and create visual life even when the viewer is stationary. Install your box secured to the wall or window frame first, then stage your plant groupings dry before planting. This step prevents the expensive mistake of repositioning after soil and roots settle in.
The “How To Make A Window Box” Myth: Customization As Strategy

Matching Your Box To What’s Actually Around It
You want your window box to look intentional, not like you bought the first thing Home Depot had in stock. That’s the real motive here, and it matters because architecture isn’t neutral—it’s a constraint that either works with you or against you.
Think of architectural style as a design constraint system, borrowed from engineering. Just as engineers must work within load-bearing parameters, window box design must respect the existing visual load your facade carries. A Victorian facade with ornate trim demands a different box proportion and material weight than a mid-century flat-front building. Measure your trim width, lintel depth, and sill projection first. These numbers dictate box depth and bracket style, not aesthetics.
Most people skip this step and mount whatever fits the hardware. The result looks borrowed, not built. Your box should sit as if the house was designed to receive it. If your facade is clean lines and minimal ornamentation, a deep wooden box reads as clutter. If it’s detailed masonry with heavy cornicing, a thin metal trough disappears. Match material warmth and visual weight to what already exists.
Sourcing Materials Beyond The Standard Plastic Liner
The standard advice says use plastic or treated wood for window boxes. That’s incomplete because it ignores material performance under specific conditions and how unconventional materials actually age.
Galvanized steel, copper, and cast concrete offer different longevity profiles and visual trajectories. Galvanized steel resists rust but looks industrial, which works for loft conversions and modern industrial facades but fails on colonial homes. Copper develops patina over time, shifting color—a feature, not a bug, if you plan for it during seasonal events. Cast concrete takes stain and paint differently than plastic, holding detail longer and reading as permanent rather than temporary.
Source through specialty suppliers rather than garden centers. Metal fabrication shops will custom-bend guttering stock into window box dimensions at reasonable cost. Concrete contractors have offcuts and can form custom sizes. Reclaimed architectural salvage dealers carry vintage boxes in period-appropriate styles. The mechanism here is simple: material selection determines maintenance frequency, replacement timeline, and whether your installation looks seasonal or permanent. Choose material that will improve rather than deteriorate during the months between events.
How To Install Window Boxes: The Iterative Design Loop
Test Fits And Real World Adjustments
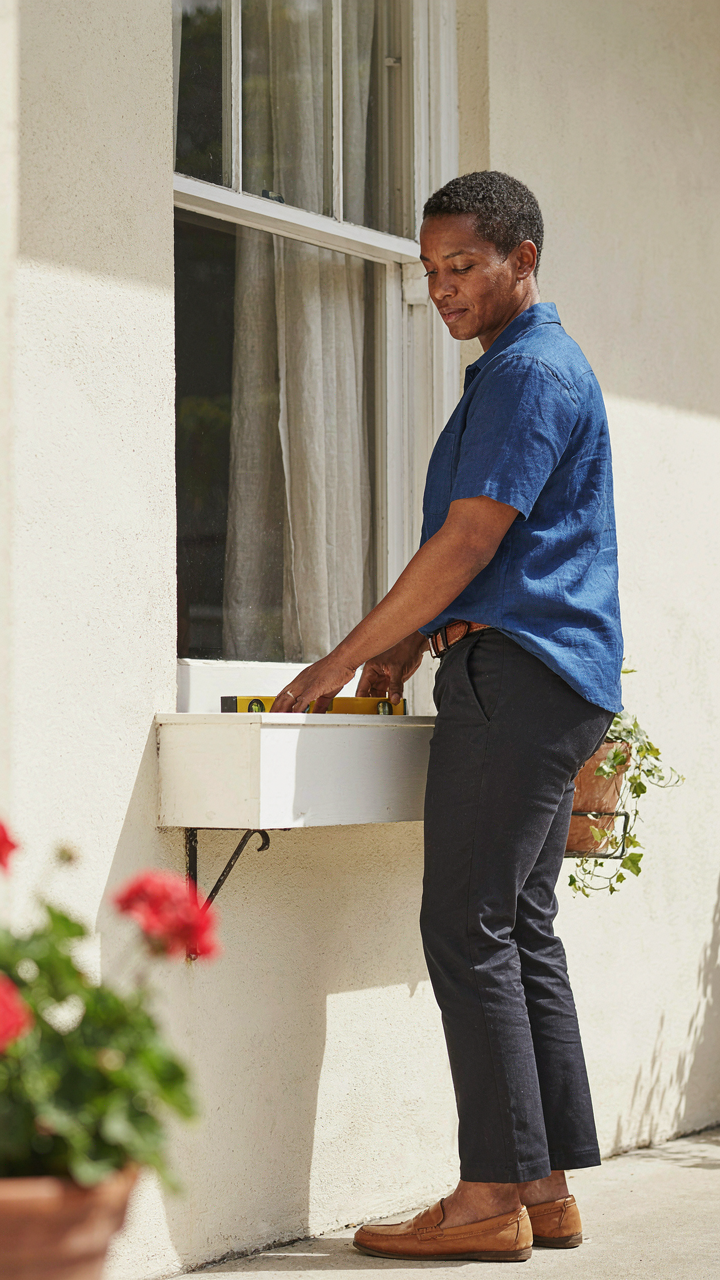
You want to install a window box once and have it look intentional. That’s not how materials work. The real motive here is avoiding the shame of a second attempt, but what you actually need is a feedback loop. Borrow from manufacturing: tolerance stacking means each component’s slight variance compounds into visible misalignment. Your bracket sits 2mm higher than planned. Your box depth doesn’t account for the sill’s subtle slope. These aren’t failures. They’re data.
Do a complete dry fit before fastening anything. Hang brackets, rest the box, check sight lines from street level and inside. Measure the gap between box and window frame at three points, not one. Look for rocking. If the box settles into a tilt, shim now, not after installation. Mark every problem with tape. This takes an hour and saves a day of uninstalling.
Optimizing For Microclimates After Installation
Most people finish installing and call it done. They don’t. Your window box lives in a specific microclimate: one side may get four hours more sun than the other, wind funnels through that corner, rain drains differently on the north exposure. These aren’t general conditions. They’re local facts that change plant survival rates.
Monitor the box’s performance over two weeks. Note where soil dries fastest. Check which plants show stress first. Adjust soil composition if needed, add drainage if water pools, reposition plants to balance sun exposure. If the box gets scorching afternoon heat, move shallow-rooted plants inward. If frost settles in the corner, those plants fail first in spring. Refinement is the protocol, not an afterthought.
Window Planter Boxes DIY: The True Cost Of Cheap Shortcuts

When Budget Becomes Liability
You’re drawn to this section because you think you’ll save money. You won’t. The mechanism is simple: material failure compounds. Cheap soil degrades faster, poor drainage forces root rot, weak brackets fail under seasonal load, and you replace everything within one season instead of five. You’ve now spent more and wasted time. Economics calls this the cost of repeated capital expenditure. In window boxes, it’s replacement cycles that drain your budget.
Poor materials don’t fail gracefully. A corroded bracket gives way mid-season when flowers are at peak growth. Acidic soil that came from the discount bin now kills expensive plants you selected for the occasion. Cheap liners puncture. Water pools where it shouldn’t. You don’t notice until damage spreads and recovery becomes impossible.
Quality Materials Pay Forward
The real decision isn’t about spending more upfront. It’s about transaction frequency. You buy once every five years or five times every year. A pressure-treated cedar planter with proper drainage components and quality potting mix lasts through multiple seasons. The replacement box made from untreated wood and cheap soil needs replacing before next spring. The math favors durability.
- Pressure-treated or composite planter boxes: Cedar or recycled plastic resist moisture and seasonal expansion without cracking. Untreated wood warps and splits within two years of freeze-thaw cycles.
- Heavy-duty drainage layers: Gravel, landscape fabric, and perforated liners prevent standing water. Skipping this leads to root disease by mid-season regardless of plant quality.
- Professional-grade potting mix: Contains consistent nutrients and drainage structure. Cheap soil compacts, loses aeration, and requires amendment or replacement every season.
- Stainless steel or galvanized brackets: Resist corrosion through seasonal weather. Painted steel brackets rust through welds, fail suddenly, and drop boxes into landscaping or walkways.
- Quality liners with reinforced seams: Withstand root pressure, freeze expansion, and multiple water cycles. Budget liners develop pinhole leaks that create damage invisible until plants decline.
When you spec quality components upfront, your installation becomes a fixed asset instead of an annual maintenance burden. You’re not replacing hardware every spring. You’re maintaining what works.
The Unseen Maintenance: Keeping Your “Special Occasion” Alive

Water, Feed, Defend
You want your window box to survive past the event so you can claim you have a garden. Here’s the mechanism: plants die because people either drown them or starve them, rarely both at once. Watering needs depend entirely on soil depth, drainage holes, and climate. Shallow boxes dry faster. Check soil moisture by pressing your thumb an inch down. If it feels dry, water until it drains from the bottom. Don’t water on a schedule. Water when the plant tells you it needs it.
Feeding enters the picture after four weeks. Window boxes hold limited soil volume, so nutrients deplete quickly. Use a balanced fertilizer diluted to half strength every two weeks during the growing season. Pests exploit stressed plants. Inspect undersides of leaves weekly for spider mites, aphids, or whiteflies. Spray affected areas with neem oil or insecticidal soap at dusk when beneficial insects sleep. Prevention beats treatment.
Rotate Plants Before They Fade
Seasonal rotation isn’t about aesthetics. It’s about matching plant biology to temperature and light. Pansies and violas thrive in spring and fall cold. Marigolds and impatiens dominate summer heat. In fall, switch to mums and ornamental kale. In winter, ivy and hellebores handle frost. Plan your rotation in advance, not when plants start declining.
Replace spent plants immediately when they lose vigor. Don’t wait for them to completely fail. A fading plant signals the box is reaching its capacity for that species in that season. Pull it, refresh the top layer of soil with compost, and install a seasonal replacement. This keeps the box visually intact and prevents pest populations from exploding in dying material. Execute the swap within a week of detecting decline.
Your Window Box Isn’t A Decoration; It’s A Performance, And Most Setups Are Stage Failures
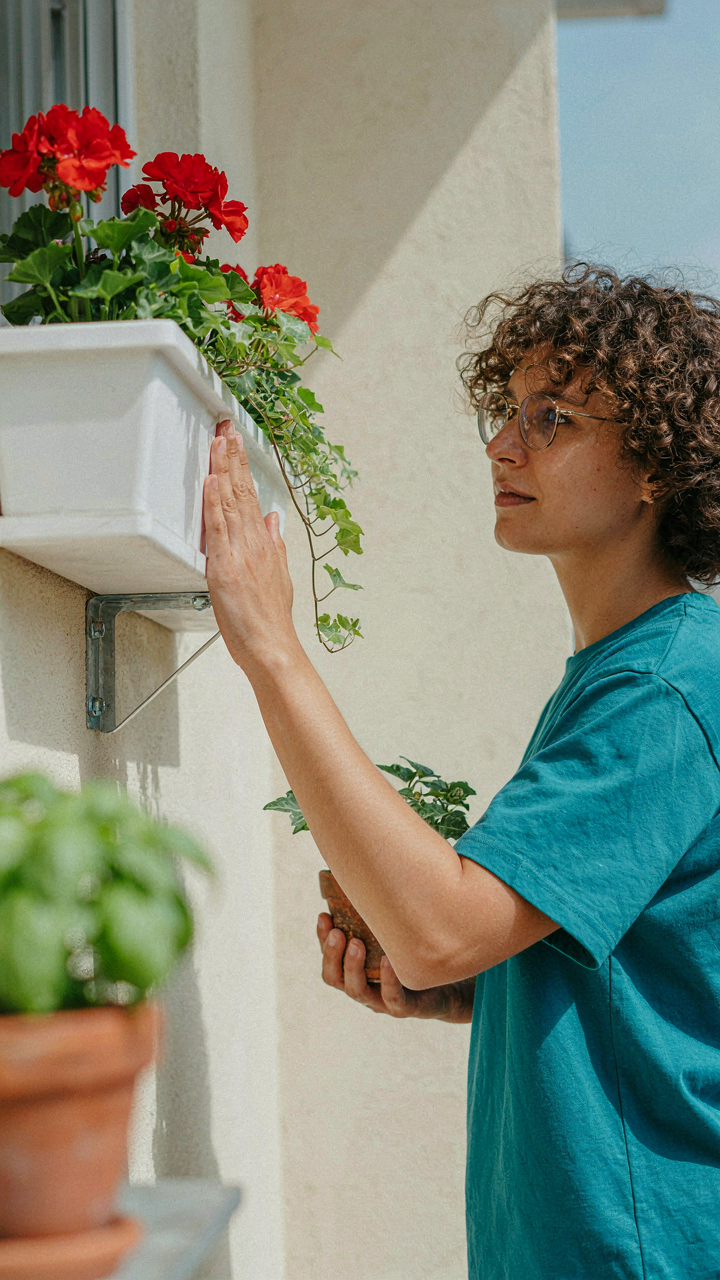
Most people install window boxes and wonder why they fail. They treat installation like a checklist instead of a structural problem. The real issue: you’re not anchoring for the weight you’re actually adding, not the weight the manual says. Go measure your window frame right now. Find where it’s solid. That’s where your brackets go. Everything else is theater.



