
The Filtration Fallacy: Why Your “Clean” Water Is Still A Mess

What Your Filter Actually Does And Doesn’t
You want to believe a filter solves the problem so you can stop thinking about it. Here’s the mechanism: filters trap particles, not the biological processes that degrade water quality. Most residential filters catch debris down to 20 to 100 microns, which sounds precise until you realize bacteria operate at 0.5 to 5 microns. Your filter removes leaves and silt while the real culprits—algae spores, biofilm, and decomposing organic matter—pass straight through or establish themselves downstream.
The common advice treats filters like magic boxes. They’re not. A filter extends time between cleanings but creates false confidence. You stop inspecting the water. You assume circulation means purity. Meanwhile, trapped debris becomes a nutrient bed for biological growth inside the filter housing itself. The filter becomes a liability if you don’t service it weekly. Most people check their filters monthly or never. That’s the gap between what people think they’re buying and what they actually get.
Biofilm: The Invisible Infrastructure War
Apply the lens of microbiology here: biofilm is an organized colony structure, not random bacterial sludge. Your fountain hosts a full ecosystem—bacteria, fungi, protozoa—all building protective matrices on surfaces the water touches. They’re not invading. They’re colonizing, which is a biological term for establishing a self-sustaining structure that actively resists removal.
You cannot filter your way out of biofilm. Mechanical removal doesn’t eliminate it permanently because spores remain dormant in the water and substrate. The winning protocol involves three sequential actions: drain and scrub all surfaces with a brush to physically break the matrix, refill with fresh water, and add a biocide rated for ornamental water features once per week. Then maintain circulation. Stagnant water is biofilm’s oxygen. Moving water is your only free defense.
The “Set It And Forget It” Lie: Consistent Input, Not Reactive Panic

Daily Checks Versus Monthly Emergencies
You want to believe maintenance happens on your schedule, not the feature’s. The truth is simpler: water features degrade on a curve, and you’re choosing between small daily inputs or large reactive costs. A five-minute daily inspection catches problems before they compound into algae blooms, pump failures, or structural damage that demands weekend heroics.
Most people skip daily checks, then panic when water clarity drops or flow weakens. By then, you’re cleaning filter media that’s already clogged, treating water chemistry that’s already imbalanced, or replacing a pump that warned you through reduced output for weeks. Daily checks mean scanning water level, listening for pump irregularities, and noting color or debris changes. You catch the mechanism early. Monthly emergencies mean you lost.
The Compounding Effect Of Small Consistent Tasks
Economics teaches compound interest. Water feature maintenance teaches compound decay. Neglecting filter cleaning for two weeks doesn’t cost twice as much as one week ignored. It costs exponentially more because debris accumulates, restricts flow, stresses the pump, promotes algae growth, and degrades water quality simultaneously. One skipped task triggers five others.
The protocol is mechanical, not motivational. Clean or rinse filter media every three to five days depending on debris load. Check water level before running the pump daily. Test pH and alkalinity weekly if you have fish or plants. Remove visible debris immediately. This routine prevents the cascade. You’re not being disciplined for discipline’s sake. You’re interrupting the exponential curve before it accelerates beyond your control.
The Unseen Enemy: Algae Control Beyond The Chemical Quick Fix

Natural Predators And Plant Choices
You want clear water without buying chemicals every month because you’re tired of the cost and the work. Here’s the reality: algae thrives on one thing—excess nutrients, mainly nitrogen and phosphorus. Biology teaches us about competitive exclusion, where one organism outcompetes another for the same resources. In water features, you apply this by introducing organisms that consume those nutrients before algae does. Snails, certain fish species, and beneficial bacteria all compete for the same nitrogen and phosphorus algae needs to bloom.
Submerged plants like anacharis and rotala work the same way. They absorb excess nutrients faster than algae can grow. Add five to seven snails per hundred gallons of water, stock floating plants to cover thirty to fifty percent of the surface, and you’ve starved the algae of its fuel source. This takes two to three weeks to show results, but it works because you’ve addressed the mechanism, not just the symptom. The chemical approach kills algae; the biological approach prevents it from having a reason to exist.
UV Sterilizers: When And How To Deploy
UV sterilizers don’t kill algae in the water. They kill the reproductive cells that cause algae to spread. Most people buy them thinking they’re a blanket solution and then complain they don’t work because green water comes back. UV only neutralizes algae spores and bacteria passing through the light chamber. You need water circulation to move all the water through the sterilizer regularly, typically over eight to twelve hours per day minimum.
Deploy a UV sterilizer only after you’ve eliminated the nutrient source. Running UV on a feature with excess phosphorus is like mopping while the faucet runs. Size the sterilizer to match your pump flow rate—undersizing it means algae spores bypass the light. Position it between your pump discharge and the feature return, run it four to six hours daily during peak algae season, and replace the bulb yearly because UV output degrades. This stops reproduction; nutrient management stops growth.
The Winterization Protocol: Protecting Your Investment From The Elements

Draining Before The First Freeze
You’re really worried about losing money on a feature you paid for and won’t see work for five months. That fear is rational, but the mechanism is simple: water expands when it freezes. Ice formation inside pipes, pumps, and basins cracks them from the inside out. In the Chicago area, you drain everything before the first consistent freeze, typically by mid-November. Don’t wait for the forecast. Act when nighttime temperatures stay below 40 degrees Fahrenheit.
Start by shutting off the pump and letting water circulate one final time to clear debris. Then drain the basin completely using the drain plug or a submersible pump. For in-ground features, you may need to blow out underground lines with compressed air to remove trapped water. Any water left behind becomes a liability. Flush hoses and disconnect them from all connection points. This step takes two hours and prevents thousands in damage.
Storing Pumps And Components Correctly
Most people store pumps wrong because they skip the cleaning step and assume “dry storage” means leaving them in an unheated garage. That’s incomplete. Pumps corrode from residual mineral deposits and algae left inside the housing. Clean the pump body and intake screen thoroughly with a soft brush and fresh water before storage. Drain any remaining water from the motor housing by inverting it and shaking gently. Store the pump indoors in a temperature-controlled space, not in an unheated shed where condensation builds.
Delicate components like UV lights, filters, and valves follow the same protocol: clean, drain, store inside. Wrap the pump cord loosely around the unit without kinking it, and store on a shelf away from temperature swings. Check storage conditions monthly during winter. If condensation appears on the pump housing, move it to a drier location. Moisture plus cold equals corrosion. By spring, your equipment will start on the first attempt instead of requiring repairs.
Pump Power: Choosing The Right Engine For Your Garden Fountain

Match Pump Size To Water Volume And Desired Effect
You want your fountain to look effortless, like it just works. The real problem is you’re guessing at pump power instead of calculating it. Hydraulics is the field here, and your pump operates on a single principle: gallons per hour (GPH) must align with your pipe diameter and desired flow height. A pump rated for 500 GPH won’t create the same effect in a small tabletop basin as it does in a large koi pond. The mismatch kills performance.
Start by measuring your basin volume in gallons, then determine your target flow rate. A gentle cascade needs 200 to 500 GPH. A dramatic vertical jet demands 1000 GPH or more, depending on nozzle size. The formula is simple: total basin volume should cycle through the pump every two to four hours. If your basin holds 100 gallons and you want a two-hour cycle, you need a 50 GPH minimum. Oversizing wastes electricity and causes splashing outside containment. Undersizing creates a sad trickle nobody notices.
Diagnose Pump Failures Before You Replace Them
Most people throw out working pumps. The advice to “just buy a new one” is lazy and expensive. Pump failure rarely means the motor died. Usually, sediment clogs the intake, mineral deposits restrict the impeller, or the power cord connection corroded. These are fixable in minutes.
Check intake screens first. Debris blocks water entry and creates cavitation, the grinding sound that feels like catastrophic failure. Clean the screen with a soft brush and running water. Next, disassemble the pump housing if possible and inspect the impeller for calcification. White buildup means mineral accumulation from hard water. Soak the impeller in white vinegar for two hours, then scrub gently. Test the power connection with a multimeter. A loose or corroded terminal point stops voltage flow completely. Tighten or replace the connector before declaring the pump dead.
Water Chemistry Simplified: Beyond The Pool Boy’s Jargon

Understanding PH And Hardness In Your Water Feature
You want to avoid looking incompetent in front of guests, so you buy expensive chemicals you don’t understand. Here’s the mechanism: pH measures how acidic or alkaline your water is on a scale of zero to fourteen. Hardness measures dissolved minerals, primarily calcium and magnesium. Your feature’s water sits stagnant, so minerals concentrate and pH drifts. Most homeowners ignore both until algae blooms or mineral crusts form. Neither happens overnight, which means you have a window to act before damage becomes visible.
pH below 6.8 corrodes metal and stone. pH above 8.2 promotes algae and cloudiness. Hardness above 300 parts per million creates scale buildup on pumps and surfaces. The physics of osmosis applies here: water naturally moves toward mineral balance, but your stagnant feature resists that equilibrium. You’re fighting entropy in a closed system. Test your water every two weeks during warm months. Most features operate best between pH 7.0 and 8.0, with hardness between 100 and 200 ppm.
Simple Testing And Natural Adjustments, Not Endless Chemicals
The pool industry profits from fear and complexity. You don’t need a technician or a cabinet of bottles. Buy a basic test kit with pH and hardness strips, or use a digital tester from any hardware store. They cost under fifteen dollars and give you actionable data in seconds. Strip tests work fine for maintenance purposes. Take a reading from mid-depth water, away from the pump intake, to get an accurate picture of what’s actually circulating through your feature.
For pH adjustment, use what you already have. Vinegar lowers pH naturally and costs nothing. Baking soda raises it. Add small amounts, wait forty-eight hours, then retest. Mineral buildup requires mechanical removal or a dilution strategy: drain thirty percent of your feature every month and refill with fresh water. This approach works because new water dilutes accumulated minerals without chemical intervention. Don’t drain and refill the entire feature every time. That’s overkill and wastes resources. Your protocol: test, adjust conservatively, retest after two days, then drain a portion monthly to reset mineral load.
The Debris Dilemma: Preemptive Strikes, Not Constant Scooping
Position Plants Like Defensive Perimeter
You want a water feature that doesn’t demand your attention every weekend. That’s the real reason you’re reading this. Most people treat plant placement as decoration, but it’s actually perimeter defense. Trees and shrubs shed leaves, needles, and organic matter directly into water. The mechanism is simple: proximity equals contamination. Place deciduous trees upwind and at least fifteen feet from your feature. Evergreens shed year-round but in smaller quantities, so position them further back. This isn’t about aesthetics. It’s about reducing the raw input of debris before it becomes your problem.
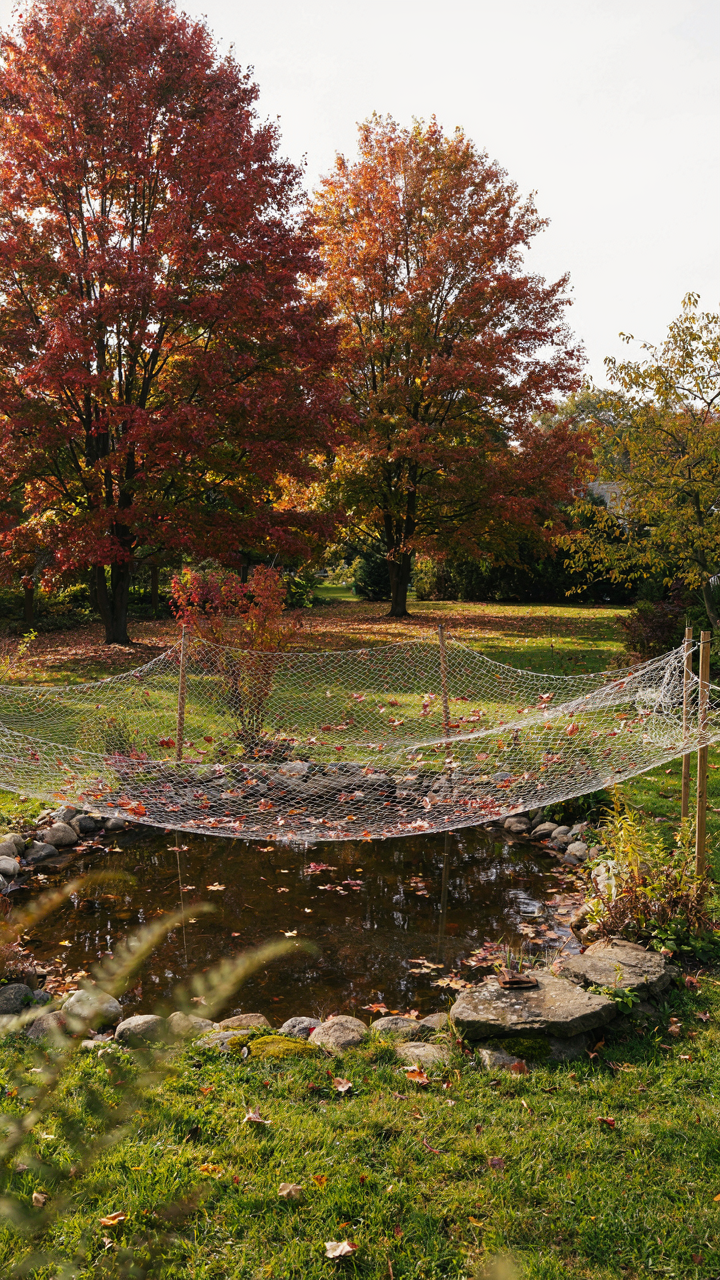
Netting works as a temporary tactical layer during high-shed seasons. Stretch fine mesh across the water surface in fall when leaf drop accelerates. Remove it daily or every other day to prevent leaves from breaking down in the water and fouling the bottom. This catches material before decomposition begins, which is when it becomes a nutrient load that feeds algae. The trade-off is visual clutter, but that’s acceptable for two to four months yearly. Once spring arrives and trees stabilize, remove the netting entirely. Position your feature away from trees, then use netting as a seasonal enforcement tool.
Automated Skimmers Handle The Volume
The common advice says “skim your water daily.” That’s fantasy for most people. The real solution isn’t discipline. It’s removing the decision from your hands. Automated skimmers circulate water continuously and trap floating debris before it sinks. They’re mechanical, not magical—they simply move water through a collection basket by running a pump and directing surface flow toward an intake. Cost ranges from low-end fountain attachments to serious pool-style systems depending on your feature size.
Lazy isn’t a character flaw here. It’s operational wisdom. A skimmer running eight hours daily catches more material than you scooping twice a week. The debris accumulates in a basket you empty weekly instead of floating in your water decomposing into sludge. Install one based on your water volume and feature depth. It won’t eliminate maintenance, but it shifts the burden from constant vigilance to one simple weekly task. Run your skimmer during peak debris season, dial it back during stable months, and you’ve solved the core problem.
The Infrastructure Illusion: Your Pond Liner Isn’t Invincible

Find Leaks Before They Find You
You want to believe your liner will last forever because replacing it feels catastrophic. It won’t, and the mechanism matters: civil engineering uses load path analysis to track where stress concentrates. Your pond liner’s stress concentrates at temperature fluctuations, UV exposure, and mechanical punctures. Most people ignore the slow creep until the pond empties in a week.
Detect leaks by establishing a baseline water level mark. Use a permanent marker on a fixed object—a stone, stake, or edge—and photograph it weekly. A drop of more than one-eighth inch per day signals a problem. Evaporation alone runs one-quarter inch per week in hot climates, so isolation matters. Dye testing pinpoints exact leak locations: release food coloring near suspected areas and watch it get pulled toward the breach. The dye method works because water always moves toward the lowest pressure point.
Patch The Damage Immediately
Common advice says “monitor small leaks.” That’s wrong. A small leak becomes a structural collapse because water pressure compounds the damage. Patch within 48 hours of detection. Liners deteriorate fastest at the failure point due to constant pressure differential.
Use a patch kit designed for your liner material. EPDM liners (the standard type) require EPDM-specific adhesive patches. Drain the pond below the leak level, dry the area thoroughly, roughen the surface with sandpaper, apply the patch with firm pressure for two minutes, and wait 24 hours before refilling. The patch bonds only if you eliminate moisture and surface contaminants. Keep a repair kit poolside at all times.
The Ecosystem Edge: Letting Nature Do The Heavy Lifting

Beneficial Bacteria And Plants Do The Work You Don’t Want To
You want a water feature that doesn’t demand constant attention. The real mechanism here is microbial biology: beneficial bacteria colonize your water and surfaces, consuming the organic waste that feeds algae and pathogens. This is how nature scales. Plants amplify the effect by outcompeting algae for nutrients and producing oxygen. You don’t add these and forget. You create the conditions for them to establish dominance.
Introduce bacteria and plants in the right sequence to avoid crashes. Start bacteria colonies before adding plants, giving microbes 7 to 10 days to establish before competing for resources. Plants need light, stable pH, and established bacterial populations to thrive without becoming stressed entry points for disease.
- Nitrifying Bacteria Cultures: Direct inoculation with Nitrosomonas and Nitrobacter strains converts ammonia to nitrate, removing the nitrogen spike that triggers algae blooms. Apply after water stabilizes at target temperature.
- Aquatic Plants (Rooted): Marginal plants like water iris absorb excess nutrients directly through roots. They establish faster than floating varieties and provide surface coverage that reduces light penetration for competing algae.
- Floating Plants: Water lettuce and frogbit provide shade while establishing bacterial mats on root structures. Their rapid growth rate makes them useful indicators of nutrient levels and water quality shifts.
- Substrate Bacteria Colonies: Beneficial bacteria attach to gravel and rock surfaces where they multiply exponentially. These biofilms become your system’s chemical processing centers, removing nitrogen compounds continuously.
- Enzyme Additives: Enzyme products break down organic sludge into simpler compounds bacteria can process faster. They accelerate the initial colonization phase by 3 to 5 days in new systems.
The common mistake is overshooting bacteria inoculation or planting too densely. Overcrowding creates competition for oxygen and causes die-off, which actually increases water toxicity. Introduce bacteria at labeled rates, space plants according to mature size, and wait 14 days before assessing whether adjustments are needed.
Self Cleaning Systems Require Strategic Design, Not Constant Intervention
A well-designed water feature self-cleans through circulation and biological load management. The mechanism is flow rate: moving water prevents stagnation where anaerobic bacteria thrive and sediment accumulates. Stagnant water becomes a disease vector. Moving water becomes a maintenance tool. Pump your system to turn over the full volume every 2 to 4 hours minimum. This isn’t arbitrary. It’s the threshold where beneficial bacteria outpace pathogenic colonization.
The second factor is biological load matching. Your system’s bacteria and plants can only process so much organic input before overwhelmed. Calculate load by considering fish population, feeding rates, plant density, and surface area available for bacterial biofilm. Undersizing any component forces you back into manual cleaning. Proper sizing lets nature handle the work. Run filter media that maximizes surface area, maintain circulation at design specs, and monitor clarity weekly to catch load creep before it requires intervention.
The “Expert” Trap: Why DIY Water Feature Maintenance Wins

Self Reliance Builds Real Competence
You want someone else to handle this so you don’t look incompetent if something breaks. That’s the real fear underneath. But here’s the mechanism: maintenance work teaches you how your water feature actually functions. You spot problems before they become expensive. You understand which components fail first. You know what normal operation looks like.
Most people outsource maintenance and stay dependent on the next service call. You learn the system by working it. Skimming debris, cleaning intake screens, checking pump flow rates, inspecting seals for leaks. These tasks aren’t complex. They require attention, not expertise. After three maintenance cycles, you’ve seen every failure mode your feature can have. That’s competence. That’s power over your own property.
The Service Industry Depends On Your Doubt
The standard advice says hire professionals for everything. Wrong. Professionals profit when you don’t maintain things yourself. They diagnose slow pump flow as a replacement need when a blocked intake filter caused it. They recommend full system overhauls when vinegar and a brush solve the mineral buildup. The economic incentive is clear: keep customers believing maintenance is too complicated for them.
Most water feature problems solve with basic cleaning and observation. Green algae growth needs regular skimming and UV exposure management, not chemical treatments or expensive filters. Pump cavitation from low water levels prevents itself through weekly level checks. Calcium deposits dissolve with vinegar soaks on fittings and nozzles. These are protocols, not mysteries. Start with what you can see and touch. Document what changes week to week. That data becomes your maintenance system.
The Real Problem Isn’t Your Fountain; It’s Your Relationship With Consistent, Deliberate Action
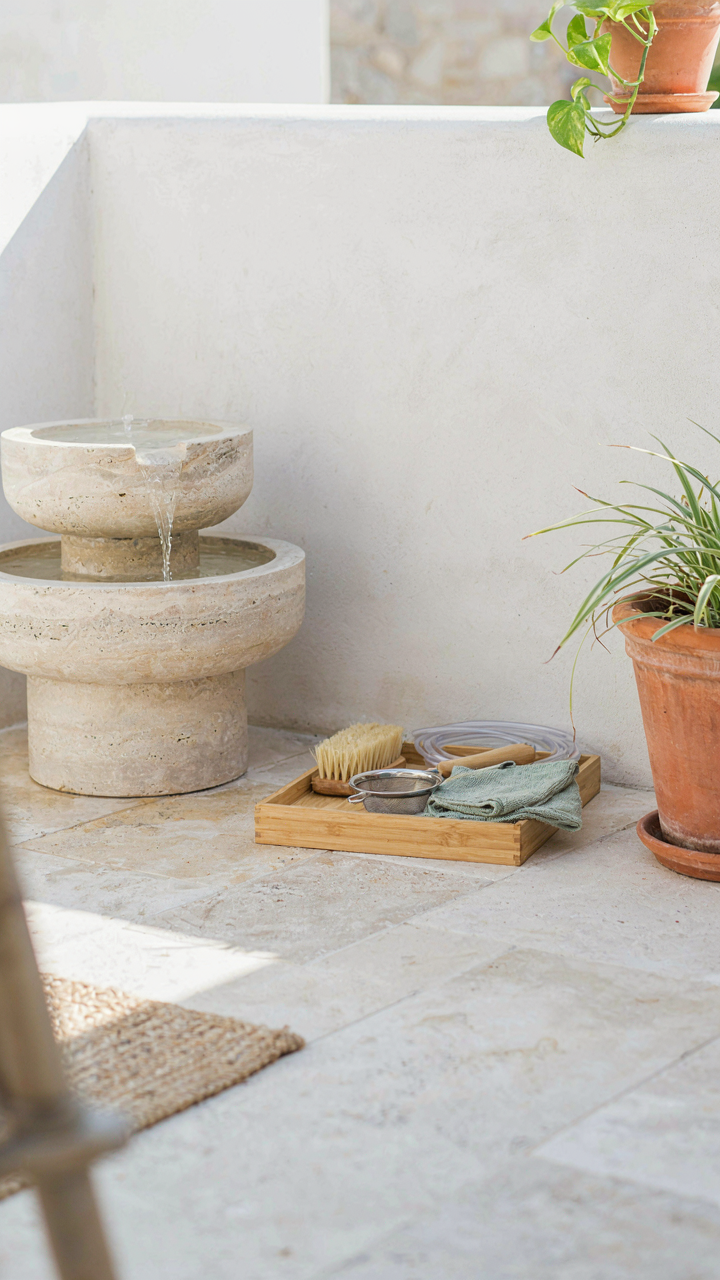
You don’t have a water feature problem. You have a commitment problem. Every maintenance task you’ve read here dies the moment you stop showing up. The fountain doesn’t care about your good intentions. Start today by setting one alarm on your phone for next week’s cleaning. That single action separates people who have beautiful water features from people who have green, stagnant excuses. Maintenance isn’t hard. Discipline is.



