

The Illusion Of Illumination: Why Generic Solar Lights Fail

Light Pollution Versus True Accentuation
You want to believe a solar light makes your garden look expensive. That desire blinds you to the actual mechanism at play. Light pollution in residential gardens operates like economic inflation: more light doesn’t equal better results, it just dilutes the value of every photon. A well-placed solar light creates contrast and draws the eye to a specific feature. A scatter of cheap solar lights creates visual noise that erases the thing you wanted to highlight.
The physics here is straightforward. Your eye perceives brightness relative to surrounding darkness, not in absolute terms. A single 50-lumen solar light hitting a stone pathway against dark mulch reads as intentional. Five identical lights scattered across your yard create ambient wash that flattens every surface into sameness. The expensive gardens you admire use fewer, better-positioned lights to create hierarchy and depth. The mechanism: darkness is the medium, light is the accent.
Placement Mistakes That Kill The Effect
Common advice tells you to space solar lights evenly along borders or pathways. This is wrong. Even spacing eliminates focal points and turns your garden into a parking lot. The real mistake isn’t even, it’s thoughtless. Most people install solar lights where they’re convenient to reach or where previous owners put them, not where they serve a purpose.
Effective placement starts with identifying what you want to see after dark. A mature tree’s canopy, textured stone, water feature, or architectural detail. Position your solar light to cast the feature into relief, not to light up the space around it. This means placing the light lower or at an angle, not centered. The outcome: your garden reads as designed, not decorated. Start by placing one light. Observe it for a week. Add the second light only after proving the first one worked.
The Unseen Battery: Optimizing Solar Garden Light Placement

The Angle That Nobody Measures
You want your lights to look effortless, which is why you’re avoiding the math. But placement isn’t aesthetic—it’s physics. Solar panels operate on the principle of incident angle: the relationship between incoming light and panel surface determines charge speed. A panel facing the sun head-on captures maximum photons. Tilted panels waste energy.
Most solar garden lights ship with fixed panels angled at 45 degrees, a compromise that underperforms everywhere. Your location’s latitude determines the optimal angle for peak winter and summer sun. At winter solstice, the sun hangs lower on the horizon than summer solstice. A light positioned to capture winter sun won’t capitalize on high summer angles. Duration matters as much as intensity—six hours of direct exposure beats twelve hours of diffused light. Panel efficiency drops sharply when the sun sits below 30 degrees on the horizon.
Where Shadows Kill The Charge Cycle
Shadows aren’t just inconvenient. They’re invisible drain. A single tree branch crossing a panel for two hours cuts daily charge by 25 to 40 percent, depending on panel size and shadow density. Most people place lights under trees or near structures for aesthetic reasons, then wonder why batteries deplete in three days.
The charge cycle needs unobstructed southern exposure in the Northern Hemisphere, northern exposure in the Southern Hemisphere. Morning shadows from structures won’t damage charge if the panel gets midday and afternoon sun. Shadows that fall between 10 AM and 3 PM—when solar intensity peaks—cost the most. Position lights at least three feet from roof lines, fence edges, and tree canopies. Check your placement at the equinox, when sun angles change fastest. If the light charges fully in winter with shadows present, it’s positioned correctly year-round.
The Luminous Layering Protocol: Beyond A Single Glow
Three Direction Strategy
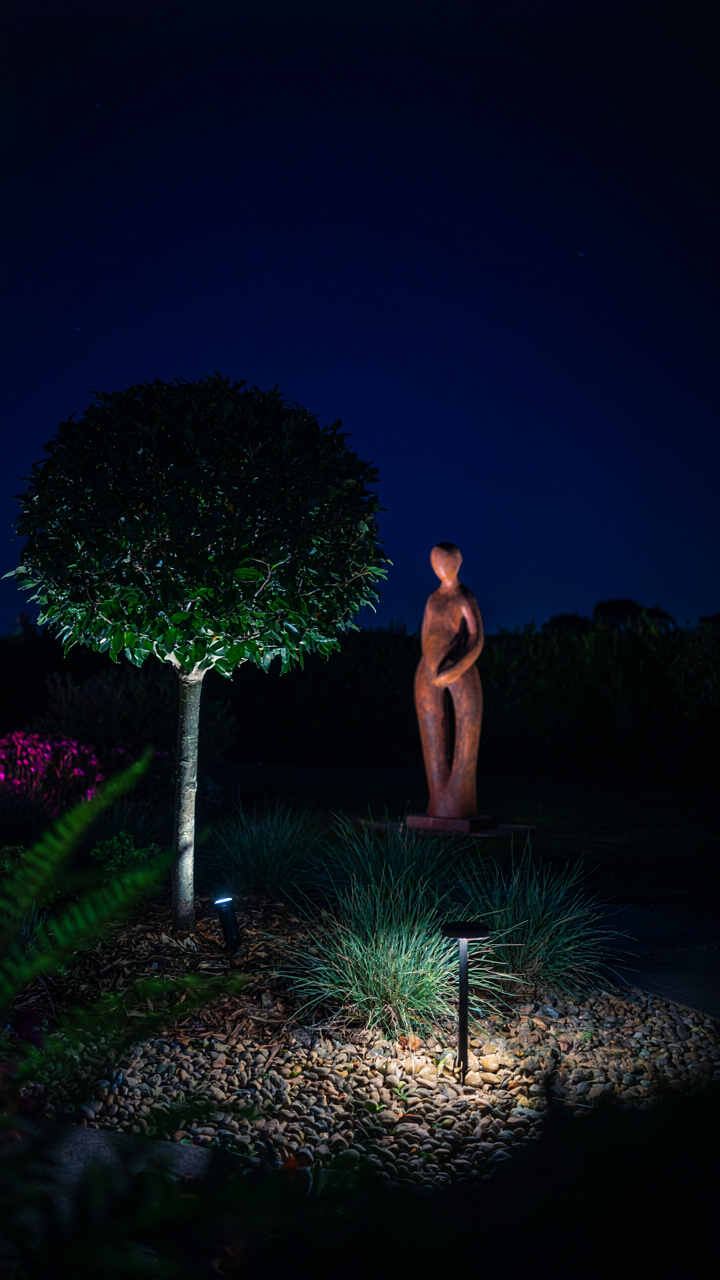
You want people to notice your garden at night without admitting you spent money on it. That’s the real reason layering matters. Uplighting, downlighting, and backlighting aren’t aesthetic choices—they’re optical mechanics. Each direction serves a function. Uplighting pushes light upward into foliage and structures, creating silhouettes and drama. Downlighting casts light from above onto pathways and plant beds, controlling where feet land and where eyes focus. Backlighting sits behind objects, separating them from the background.
The mistake most people make is installing lights at one height facing one direction, then wondering why everything looks flat. Solar lights have limited output, so placement matters more than wattage. Uplights force shadows upward. Downlights flatten space when overdone. Backlights only work when the observer stands opposite the light source. Mix all three in a single garden zone and you solve the flatness problem. Start with one downlight per pathway section, one uplight per focal plant, and one backlight per structure you want to separate from its backdrop.
Depth Through Contrast And Distance
Architecture uses layering—foreground, midground, background—to make spaces feel larger than they are. Solar garden lights do the same job through controlled brightness falloff. The mechanism is simple: closer lights appear brighter, distant lights dimmer. Your eye registers this as depth. Install bright solar lights near the house, medium brightness in the middle garden zones, and dim accent lights at the property edge. This graduated intensity makes a small garden read as intentional and spacious, not cluttered.
Distance between light sources matters more than most people realize. Lights clustered together create a bright blob. Lights spaced ten to fifteen feet apart create visual rhythm and let shadows form between them. Those shadows are structural elements, not voids. A mixed brightness strategy also reveals plant texture. Bright downlighting on a textured ground cover shows detail. Softer backlighting on the same plant from ten feet back creates mood. Deploy solar lights at varied distances from viewer position and at varied heights. This single protocol generates the dimensional effect that reads as professional, not like someone threw lights around randomly.
DIY Garden Ideas Decoration Creative: Repurposing For Radiance

Turning Everyday Objects Into Solar Fixtures
You want to feel resourceful and clever, like you’ve discovered something others missed. The real mechanism here is simple: a solar garden light is just three components—a photovoltaic cell, a rechargeable battery, and an LED. Anything else is housing. Once you accept that, you stop thinking about “decorating” and start thinking about containment. You’re not creating art. You’re protecting circuitry.
Most people fail at this because they prioritize aesthetics over function. They trap the solar panel under opaque material, or position the light where it collects shade. The light dies in weeks. Instead, treat the solar panel as non-negotiable real estate. It must face south and stay exposed. Build your repurposed container around that constraint, not against it.
- Mason jars with painted bases: Strip the solar light, mount the panel on the jar’s lid facing upward, let the LED hang inside. Paint only the lower third to avoid blocking light absorption on top surfaces.
- Wine bottles and test tubes: Insert the entire solar unit vertically into a clear or frosted bottle. The narrow neck creates a chimney effect that helps dissipate heat from the LED and extends battery life.
- Copper pipe frames: Solder or clamp solar components into geometric copper structures. Copper oxidizes to green patina over time, giving natural aging without degradation of electrical performance underneath.
- Reclaimed brass candlestick holders: Mount the solar panel flat on top like a traditional candle, with the LED pointing downward through the hollow stem. Brass doesn’t rust and conducts heat efficiently.
- Terracotta pot stacking: Nest inverted pots with strategic drainage holes to create shadow patterns. Position the solar panel horizontally on the top pot, facing unobstructed sky at your latitude’s optimal angle.
The mistake people make is assuming repurposing means sacrifice. It doesn’t. You’re solving a physics problem. The better you understand heat dissipation, light angles, and weatherproofing, the longer your fixture performs. Start with materials you already own, but test the panel’s output weekly for the first month. If brightness drops, you’ve made a containment error.
Creative Housing: Glass, Metal, And Natural Elements
Glass jars solve one problem and create another. They transmit light beautifully but trap moisture and heat inside. This kills rechargeable batteries faster than any other environmental factor. If you use glass, drill a small hole near the bottom for condensation escape, then cover it with a single-layer coffee filter held by a rubber band. This maintains airflow without letting insects nest inside the fixture.
Metal housings, especially stainless steel or aluminum, outperform glass because they shed water and dissipate heat. They also age visibly, which bothers most people initially. That’s actually useful information. Corrosion patterns tell you where water is pooling. If rust appears in a spot, you’ve found your drainage failure. Natural elements like driftwood, stones, and moss serve primarily as wind breaks and shade creators. They don’t extend light life, but they do protect the fixture from lateral rain and direct UV exposure. Combine a metal core with natural exterior elements for both performance and visual interest. The housing should do two jobs: protect the components and direct water away from electrical connections.
The Biometric Lighting Blueprint: Understanding Your Garden’s Flow
When Plants Set The Schedule
You want your garden to look intentional and alive, not like a gas station parking lot at 2 AM. That’s the real reason this matters. Biology teaches us circadian rhythm, and solar garden lights operate as environmental cues that either reinforce or disrupt plant behavior. Plants don’t respond to light intensity alone; they respond to light duration and spectrum. A solar light with warm color temperature (2700K) mimics sunset and signals plants to conserve energy. Cool light (5000K+) mimics midday and triggers growth responses. Your placement determines which signal reaches which plants.
The mechanism is simple: plants measure day length through phytochrome, a protein that detects red and far-red light. Solar garden lights powered by standard LEDs emit primarily in the visible spectrum, which means they won’t confuse your perennials’ flowering cycles if you keep them pointed low and away from foliage. A 20-lumen warm-white solar light positioned at ground level illuminates the hardscape without flooding leaf surfaces. Position matters more than brightness because directional light teaches your plants where the real sun ends and the design begins.
Light As Navigation Layer
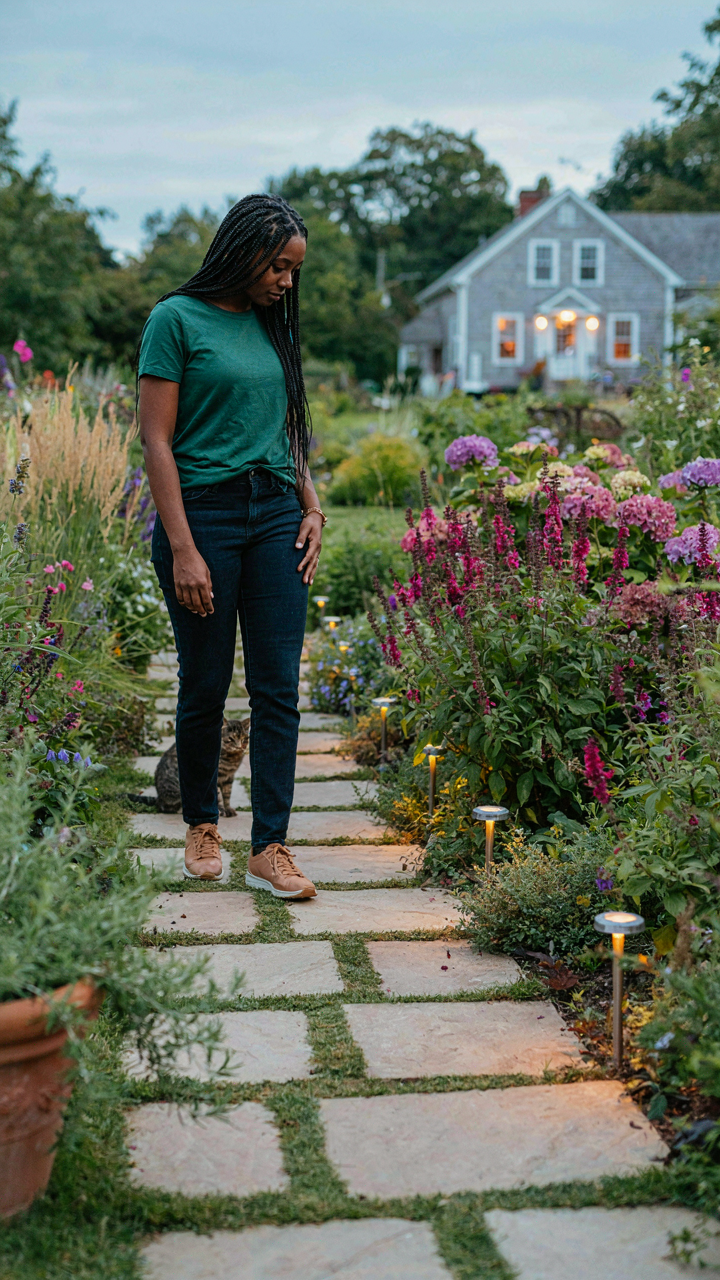
Most garden lighting advice treats illumination as decoration rather than infrastructure. It’s not. Guiding foot traffic with light is a wayfinding system, borrowed from urban design principles where pedestrians follow lit paths unconsciously. Solar garden lights function as spatial anchors that define walkable zones without barriers. A 2-3 lumen solar path light spaced every 4-6 feet creates threshold markers your eyes read before your brain processes them. You don’t decide to follow the lights; your vestibular system already knows the route because the light told it.
The protocol: install solar lights along the exact edges of foot-worn paths, not centered on them. Edge placement creates a subtle border your foot anticipates. Place lights at consistent intervals so rhythm builds expectation. A solar light’s battery depletes predictably based on seasonal sunlight, so reposition underperformers before dusk in winter when they’ll sink below 1 lumen output. Test the spacing by walking the path at night without thinking about placement; if you hesitate or pause, the gaps are too wide.
Smart Solar Light Integration: The ‘Set It And Forget It’ Myth
When Your Lights Actually Respond To The Environment
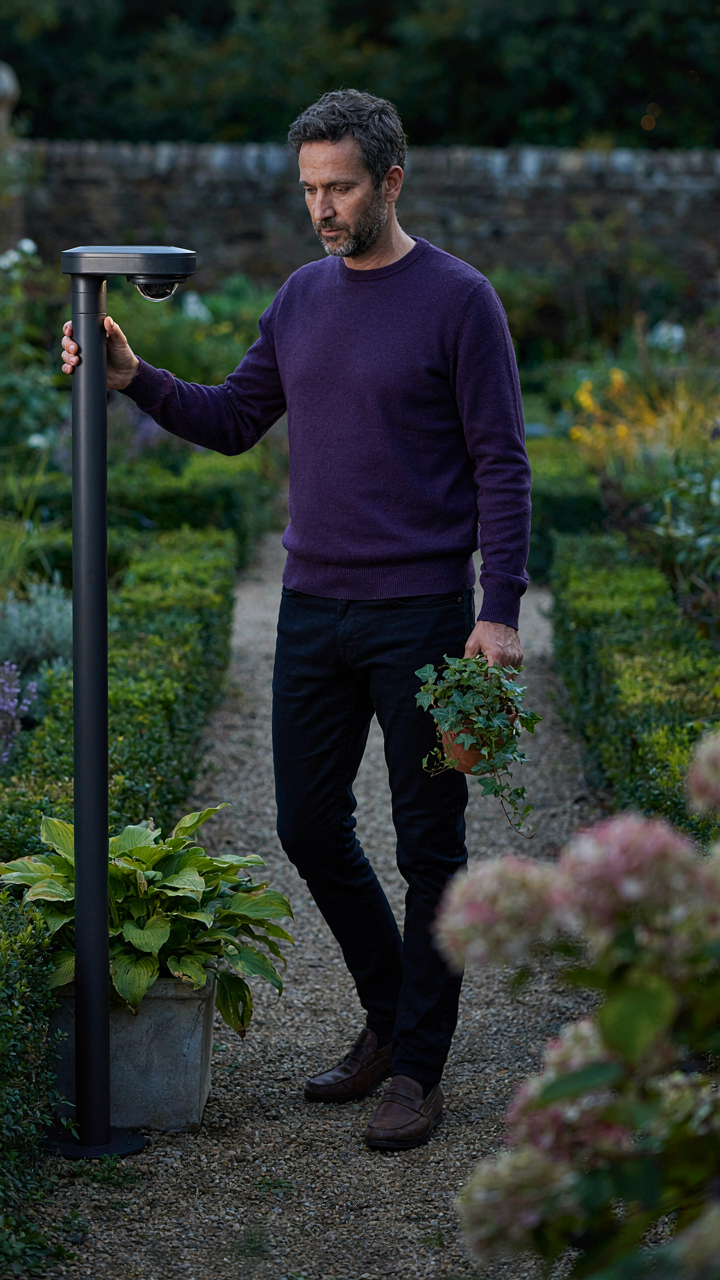
You want to buy solar lights and pretend they’ll work forever without thinking about them again. Here’s the mechanism: most solar lights fail because they lack feedback systems. They turn on and off on fixed schedules, blind to actual conditions. Real performance comes from sensors that read light levels and motion, then adjust behavior accordingly. This isn’t convenience. It’s the difference between a tool that works and one that wastes energy doing the wrong thing at the wrong time.
Photocells detect ambient light and trigger activation only when darkness falls below a threshold, not on a preset clock. Motion sensors add a second layer, keeping lights dormant until movement appears, then brightening on demand. This dual-input approach mirrors what economists call “conditional resource allocation”—you spend energy only when conditions justify it. Without sensors, your light burns through battery charge at fixed times regardless of whether anyone’s present or if residual twilight remains. The battery depletes faster, the light fails sooner, and you’re back shopping for replacements.
The Programming Gap Nobody Mentions
Everyone talks about “setting it and forgetting it,” but that advice skips the actual work. Most cheap solar lights come with one mode: on at dusk, off at dawn. That’s not programming—that’s abandonment dressed as simplicity. Real integration means deciding what purpose each light serves, then configuring its behavior to match. A pathway light needs constant illumination. A motion-triggered security light needs brief bursts. A decorative accent needs dimming cycles. One setting kills all three functions.
Smart solar lights with programmable logic let you define on-time, off-time, and brightness curves per light or per zone. You input these parameters once during installation, then the light’s microcontroller runs that logic every night. The payoff: battery life extends because the light never burns brighter than necessary, and it never stays on when the space is empty. Set the parameters based on actual usage patterns, not guesses. Check the result after two weeks, adjust if needed, then stop touching it.
Garden Pathway Illumination: Guiding With Intent, Not Glare

The Spacing That Actually Works
You want your pathway lit because an unlit path reads as neglect, and neglect signals low status. The real mechanism is visibility threshold: solar lights need spacing that eliminates trip hazards without creating a runway. Most people space pathway lights every 4 to 6 feet, but this assumes consistent lux output. Solar garden lights vary wildly by battery capacity and LED wattage, so measure actual throw distance on your specific model before committing to placement. A weak 20-lumen light needs closer spacing than a 50-lumen unit. The pathway itself matters too. Dark mulch absorbs light; pale gravel reflects it. Test one light at your typical evening foot traffic time, then adjust spacing based on where shadows actually fall, not manufacturer specs.
The secondary factor is rhythm. Consistent spacing creates visual predictability, which your brain reads as intentional design rather than accident. Uneven spacing signals confusion. If your pathway curves, maintain visual intervals even if physical distance changes. A 90-degree turn or elevation shift needs a light placed to mark the transition, not to maintain mathematical spacing. This isn’t about aesthetics, it’s about preventing the moment your guests hesitate mid-stride because they can’t see what comes next.
Creating Contrast Without Assault
The common mistake: people install bright pathway lights that wash out surrounding space, killing the garden entirely. Lighting design borrows from military doctrine: you illuminate the target zone while preserving peripheral awareness. Applied to solar garden lights, this means your pathway light should direct eyes downward to the ground plane, not cast ambient glow that bleaches out texture and depth in nearby planting beds.
Solar lights with downward-facing optics or baffles prevent sky glow and glare. The light hits the path and surrounding mulch without spilling upward into trees or across faces. Cooler color temperatures (4000K to 5000K) read as more clinical and safer, which fits a pathway. Warmer tones (2700K) work better at garden perimeter lights where you want transition and mood. Install pathway lights at low height, typically 12 to 18 inches above ground. This creates shadow and depth on the path surface, which actually enhances safety by making elevation changes readable. You see what you’re walking on, not what’s hidden above it.
Outdoor Solar Lights: Weatherproofing Your Brilliance

Materials That Don’t Fail You
You want your lights to look intentional five years from now, not corroded into embarrassment. The mechanism is simple: weatherproofing is material selection, not coating applied afterward. Aluminum housings oxidize in predictable ways. Stainless steel resists corrosion longer but costs more upfront. Plastic degrades under UV exposure within 18-24 months unless stabilized with UV inhibitors during manufacturing, not sprayed on.
- Anodized Aluminum: Chemically treated to create an oxide layer that blocks moisture penetration. Resists salt spray and maintains structural integrity in coastal environments for 7-10 years.
- 304 or 316 Stainless Steel: 316 performs better in salt environments. Requires no coating and won’t rust, though higher cost limits use to premium fixtures.
- Polycarbonate Lens Covers: Resists impact and UV degradation when manufactured with stabilizers. Yellows slightly over time but maintains light transmission better than acrylic.
- Silicone Gaskets and Seals: Maintains flexibility across temperature swings from 40F to 150F. Synthetic rubber alternatives dry out and crack, making replacement necessary every 3-4 years.
- Powder Coat Finishes: Applied before assembly and cured in ovens, these bond to metal better than spray paint. Protects against scratches and corrosion when applied thickness exceeds 2-3 mils.
Quality materials compound savings over time because replacement costs exceed the difference in upfront price within two replacement cycles. Buy fixtures where the manufacturer lists material specs plainly instead of hiding them behind marketing terms like enhanced or premium.
Clean Contacts, Clean Current
Most solar light owners think maintenance means washing the panel. That’s incomplete. The real degradation happens inside where moisture corrodes the connections between the battery, LED, and circuit board. A thin oxide layer forms on metal contacts and blocks voltage transfer, reducing brightness by 30-40% without visible damage. This happens faster in humid climates and takes two years in dry ones.
Check the solder joints and contact terminals every six months by gently opening the fixture housing with a plastic tool. If contacts appear dull or discolored, clean them with a cotton swab slightly dampened with isopropyl alcohol and let dry completely before reassembly. Replace silicone gaskets if they’ve hardened or cracked. This five-minute intervention prevents 60-70% of premature failures and extends operational life by three to five years.
Yard Lighting Ideas: Beyond The Garden Bed, Into The Landscape
Illuminating Structure And Natural Elements
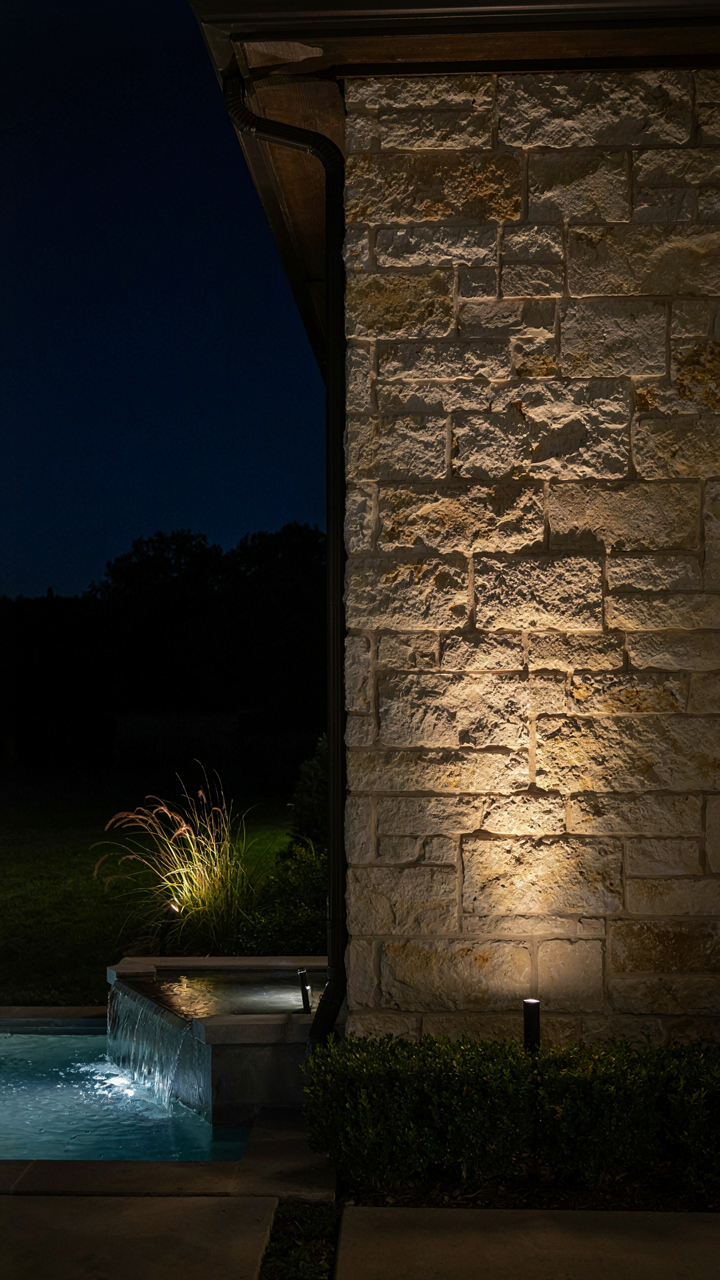
You want your yard to look intentional at night because you suspect it looks accidental during the day. The mechanism is contrast: solar lights don’t create atmosphere, they create definition. Architectural lighting—borrowed from theater design—uses what’s called “key light” positioning. Place a solar light to one side of a tree, wall, or water feature, not centered. This creates shadow and depth instead of flattening everything into sameness. Aim solar uplights at tree trunks or house corners. Sidelighting a water feature—pond, fountain, or stream—bounces reflection across the surface and makes the water readable at night.
Most people bury lights too close to the object. Distance matters. A solar light six feet away from a tree trunk creates texture on bark. Two feet away washes it out. For architectural features like stone walls or wooden siding, position lights low and angle them upward at 45 degrees. This reveals material character without glare. Water requires different logic: place lights at ground level facing the surface, not above it. The light refracts off the water and amplifies brightness without harsh spots. Test positions before installing—solar lights are portable, so move them around the yard first.
Directing Attention And Reshaping Perception
The real game is visual hierarchy. Your eye travels where light is brightest. Solar lights are weak, so use that. Place one bright focal point—a upgraded solar light with higher lumens or a cluster of three standard ones—at the yard’s farthest point or deepest corner. Your brain perceives depth and distance. A small yard becomes larger. A long, narrow lot feels wider if you light the far edge instead of the near edge. This is pure spatial psychology, not decoration.
Focal points work best when isolated. Don’t scatter lights evenly across the landscape. Create zones: one lit corner for seating, one for the garden bed, one for the tree line. Unlit space between them trains the eye to move deliberately. Solar pathway lights serve dual purpose here—they guide foot traffic while creating visual lines that organize the entire yard. Place them in slight curves rather than straight rows. Curves make spaces feel larger and more intentional. The protocol is simple: identify your yard’s visual weaknesses, place one solar light cluster there first, then build outward. Light scarcity reads as design. Light everywhere reads as accident.
Your Garden’s True Brilliance Isn’t About The Fixture, But Your Refusal To Be Passively Lit

Most people buy solar lights and call it done. You’re not most people. The real move is treating your garden like a space that demands intentional design, not afterthought decoration. Stop accepting what comes in the box. Walk your garden at sunset today and map where light actually matters. One strategic placement beats ten mediocre ones scattered everywhere. Your garden doesn’t need more light. It needs light with purpose.



