Why Resin Homework Art Is The Ultimate School Keepsake
Sentimental Value
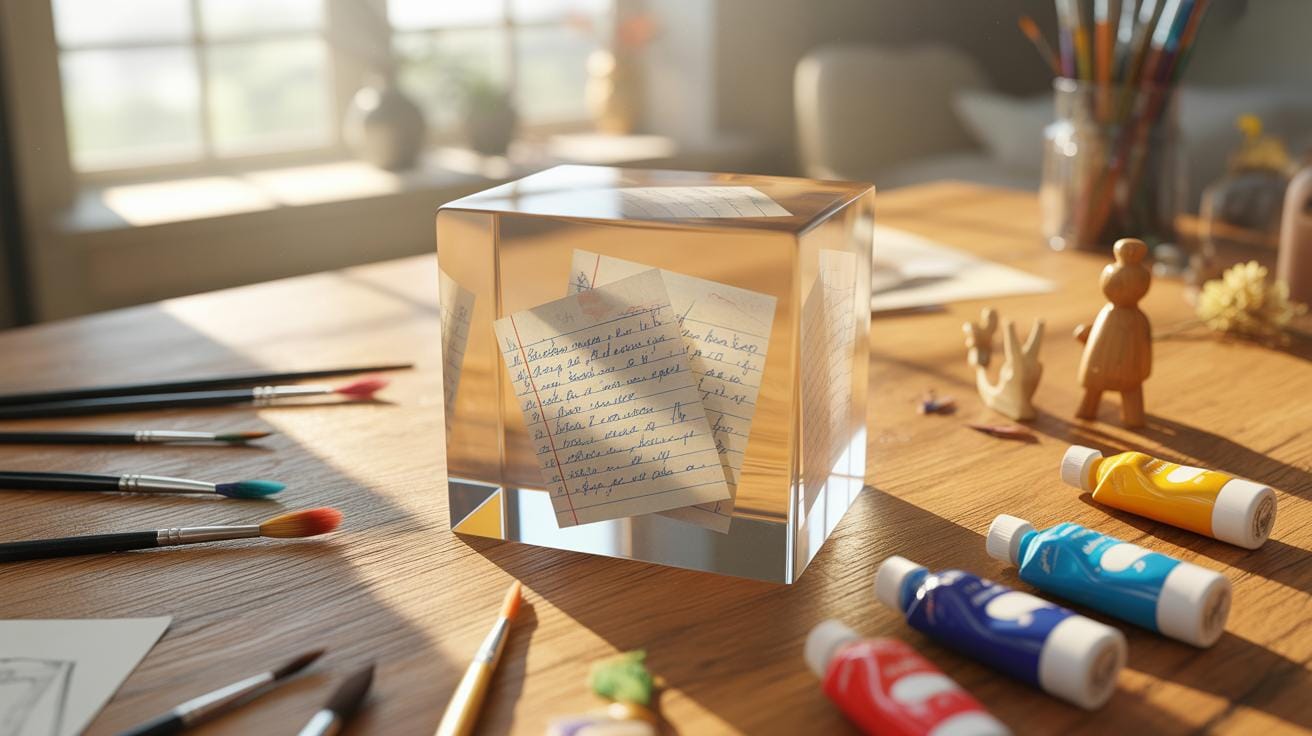
Preserving childhood schoolwork captures a specific moment in time forever. Most parents store old tests and drawings in dusty folders where nobody sees them. Resin For Beginners offers a solution by turning these papers into durable blocks of history. You can see your handwriting from third grade or a high score on a math quiz clearly through the clear plastic. This method makes Resin Art For Beginners accessible for every family.
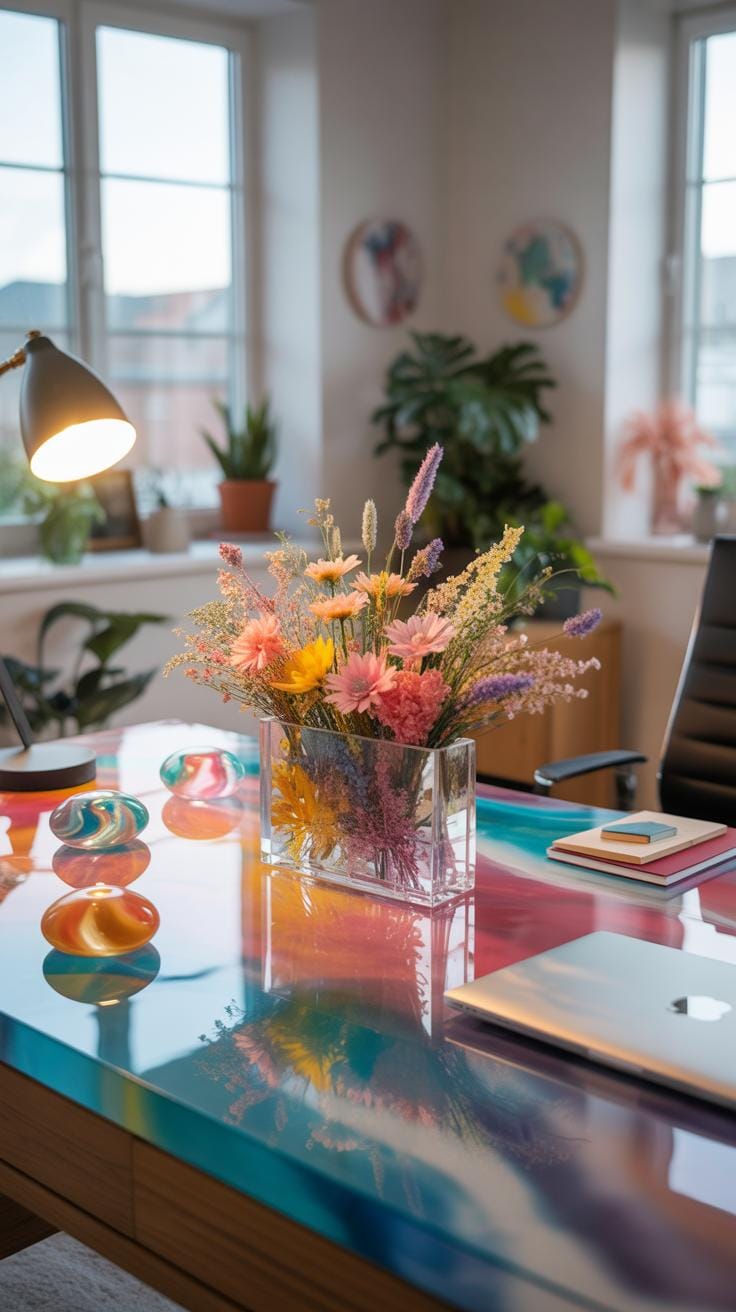
Your home becomes a gallery of personal growth when you display these items. Creating Resin Home Decor Ideas using graded papers tells a story of hard work and learning. These objects serve as physical trophies of your academic journey. Guests will notice the unique textures and colors within your various Resin Creations. This hobby turns paper memories into sturdy pieces that withstand the passage of time without yellowing or tearing.
Sustainability In Art
Using old homework as a base for creativity keeps paper waste out of the trash. Students produce stacks of worksheets every year that usually end up in landfills. Your Diy Resin Projects give these scraps a new life as functional items. Using Resin Art Materials to seal paper prevents it from breaking down or rotting. This simple practice turns standard recycling into high-quality household objects that look professional.
Artists often seek ways to make their work more eco-friendly by using salvaged goods. When you follow a Resin Crafts Tutorial, you learn how to encapsulate thin sheets without ruining them. These techniques apply to larger builds like Resin Furniture or small trinkets. Collecting materials from your backpack provides an endless supply of free resources for Resin Art Ideas Projects. You save money while building a collection of items that honor your educational path.

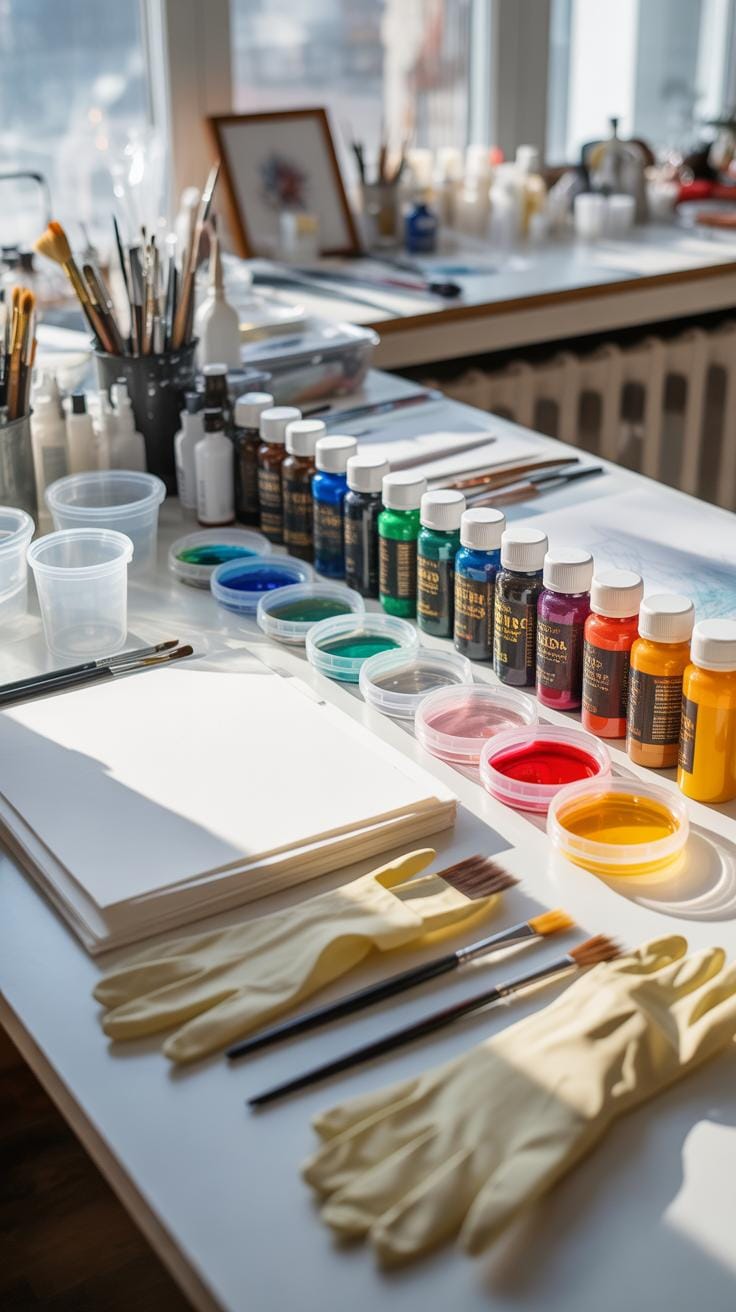
Essential Resin Art Materials For Your Project
Required Supplies Checklist
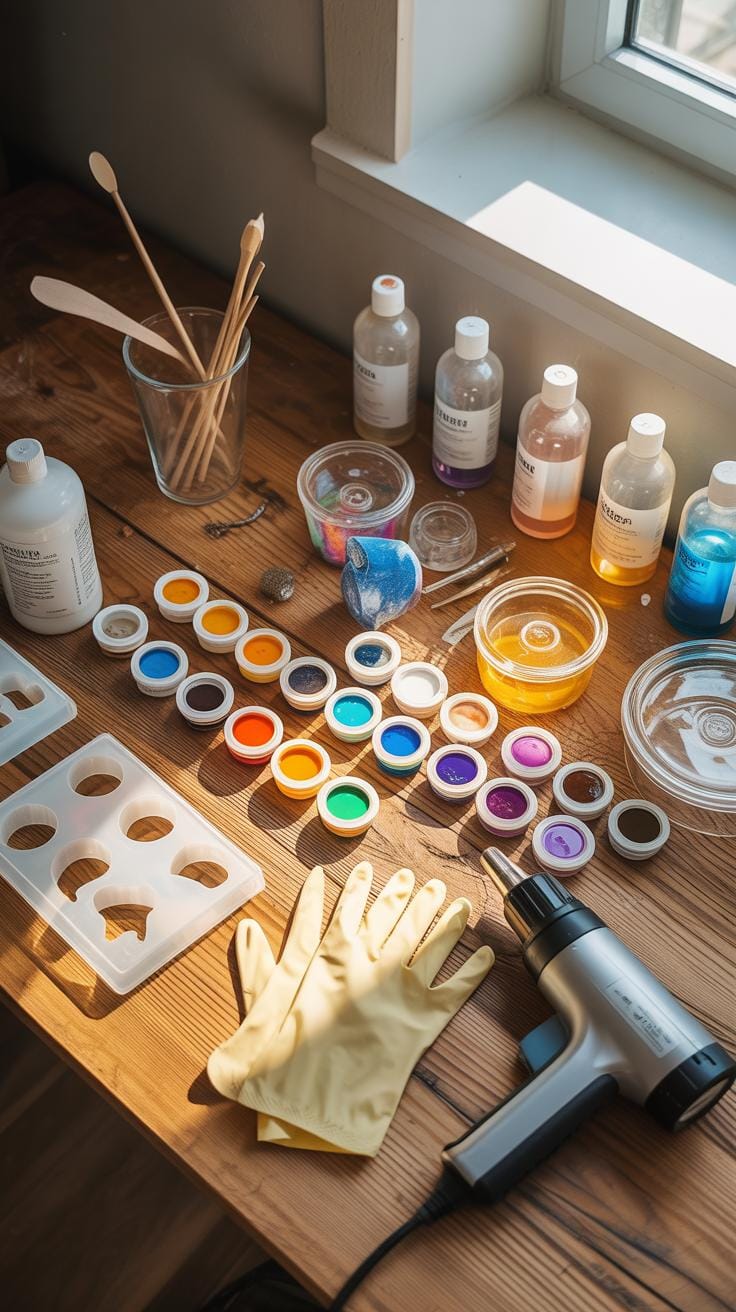
Successful Resin Art Materials gathering starts with protecting your paper memories from moisture. Typical school paper is porous and will soak up liquid quickly. You must seal your homework with a clear glue or specialized sealant before starting. This step keeps the ink sharp and prevents the page from turning into a see-through mess once you pour the mixture over your old assignments.
- Epoxy Resin: This two-part liquid system consists of a resin and a hardener. When mixed correctly, it undergoes a chemical reaction to create a crystal-clear plastic. It is the core component for all Resin Art For Beginners.
- Nitrile Gloves: Safety is a priority when working with chemicals. These gloves protect your skin from irritation and keep your hands clean during messy Diy Resin Projects. They are more durable than latex and resist Tears well.
- Silicone Molds: These flexible containers come in various shapes like squares or circles. They allow you to pop out your finished homework art easily once it cures. Silicone is non-stick, making it the best choice for Resin Creations.
- Sealing Agent: A simple clear coat or decoupage glue works well to protect paper. Applying this layer ensures the homework does not absorb the liquid. It preserves the original color and texture of your school notes for years.
- Mixing Tools: You need graduated measuring cups and sturdy stir sticks to combine the liquids. Accurate measurements are vital for the resin to harden properly. Improper mixing can leave your homework art sticky or soft instead of solid.
Organizing your workspace is the next step in this Resin Crafts Tutorial. Use a level surface so the liquid settles evenly across the paper. Keep a heat gun or a small torch nearby to remove tiny air bubbles that rise to the top. Having these tools ready helps you focus on the creative side of Resin Art Ideas Projects without any stressful interruptions.
Choosing The Right Resin
Selecting the correct liquid depends on the size of your project. For Resin For Beginners, a standard casting resin is usually the best choice. This type of resin handles the weight of paper well and cures with a glossy finish. It works perfectly if you want to make Resin Home Decor Ideas like paperweights or thick blocks that stand on a shelf.
If you plan on making larger pieces like Resin Furniture, you will need a deep pour formula. This liquid stays cool even when you pour it in thick layers. Thinner liquids work better for small items like coasters or bookmarks. Always check that your choice has UV protection to prevent your homework from turning yellow or brittle as the years pass by.
Resin Art For Beginners Preparing Your Paper
Sealing The Homework
Paper absorbs liquid quickly because it possesses a porous texture. If you place raw homework pages into liquid resin, the fibers soak up the chemicals. This creates ugly dark spots or translucent patches that ruin the legibility of your writing. Sealing your paper creates a protective barrier. Use a thin layer of Mod Podge or a clear acrylic spray to lock the ink and paper fibers safely inside before you start any Resin Art For Beginners.
Applying a sealant protects your memories from fading or changing color over time. This step is vital for Resin Crafts Tutorial projects because it maintains the bright white look of the notebook paper. Coat both sides of the page and the edges thoroughly. Allow the sealant to dry completely so no moisture remains trapped. Proper sealing ensures your Diy Resin Projects look professional and stay clear for years in your Resin Home Decor Ideas.
Layout And Design Preparation
Plan your artistic composition on a clean dry surface before you mix your Resin Art Materials. You might choose to preserve a whole essay or use shredded scraps for a textured appearance. Some people prefer cutting out specific highlights like a gold star or an impressive grade. Arranging your items first helps you visualize the final look of your Resin Creations. This planning prevents mistakes once the sticky Resin For Beginners begins to harden.
Move your paper pieces around until the balance feels right for your specific project goals. Consider how the text interacts with the shape of your mold or the surface of Resin Furniture. Taking photos of your favorite layouts helps you remember the exact placement later. Solid preparation is a key part of Resin Art Ideas Projects. Good design leads to beautiful results that capture your school years perfectly without the stress of rushing the chemical process.
A Step By Step Resin Crafts Tutorial For Homework Preserves
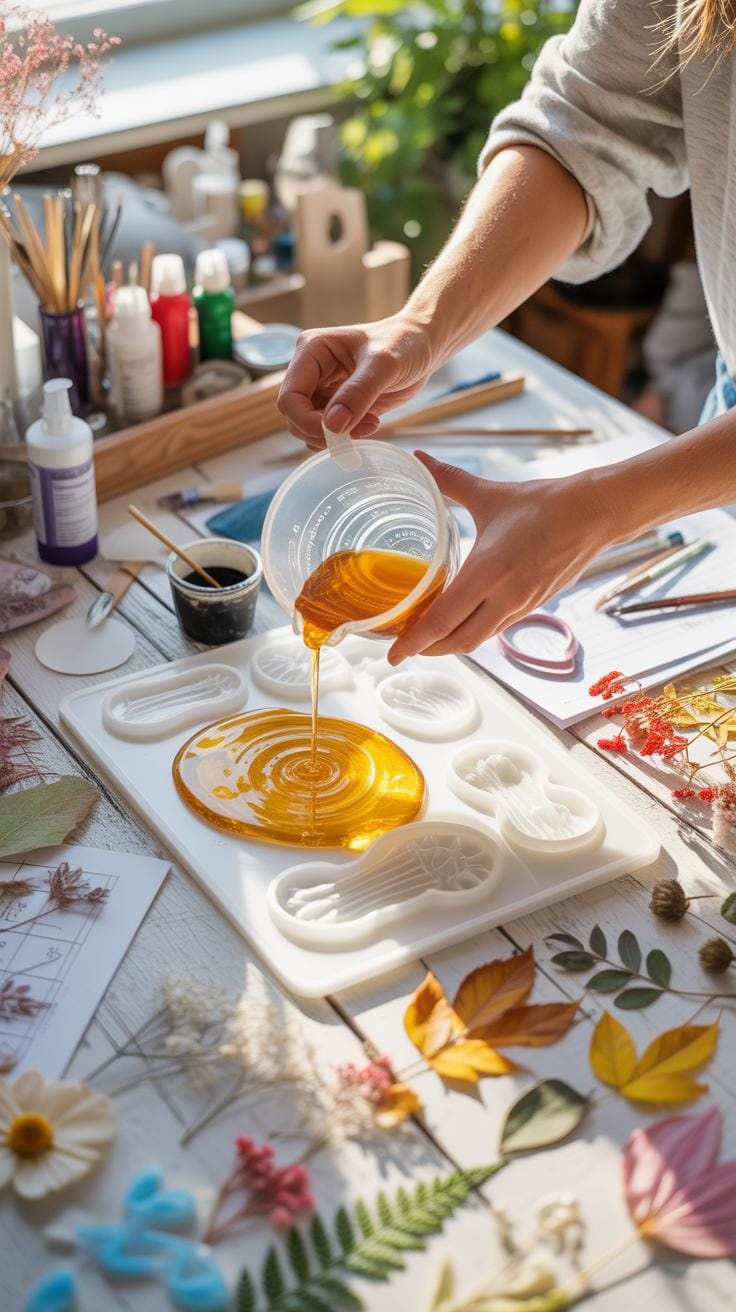
The Casting Process
Starting your journey into Resin Art For Beginners requires a clean space and a steady hand. You first need to measure your resin and hardener using the precise ratio listed on your Resin Art Materials bottles. Stir the mixture slowly to avoid creating too many air bubbles. A clear mix ensures your old school papers remain easy to read once you place them inside the mold.
- Mixing the Resin: Combine the two parts in a plastic cup and stir for three minutes. Scrape the sides and bottom of the container to ensure a complete chemical reaction occurs for your Diy Resin Projects.
- The Base Layer: Pour a small amount of clear liquid into the mold to create a thin floor. This step prevents the paper from touching the very bottom and helps the item stay centered within your Resin Creations.
- Placement: Lay your sealed homework assignment face down onto the wet base layer. Press it gently to make sure no large air pockets stay trapped underneath the paper’s surface during this part of the Resin Crafts Tutorial.
- Bubble Removal: Use a heat gun or a small torch to sweep across the surface of the liquid. The heat causes trapped air to rise and pop quickly which keeps your Resin Home Decor Ideas looking professional.
- The Final Pour: Cover the paper with the remaining mixture until the mold is full. Follow the Resin For Beginners guide by letting the piece sit undisturbed in a level spot for at least twenty-four to seventy-two hours.
This stage of Resin Art Ideas Projects requires patience while the liquid turns into a solid. Moving the mold too early can cause ripples or slanted lines in the finished piece. Keep the temperature in the room steady to help the chemicals cure properly. Once the surface feels hard to the touch you have successfully preserved a piece of your personal academic history.
Preserving the lessons of the past transforms yesterday’s effort into today’s glass-like treasure. By capturing our growth in such a permanent light, we turn the struggle of learning into a lasting work of art.
— Maya Angelou
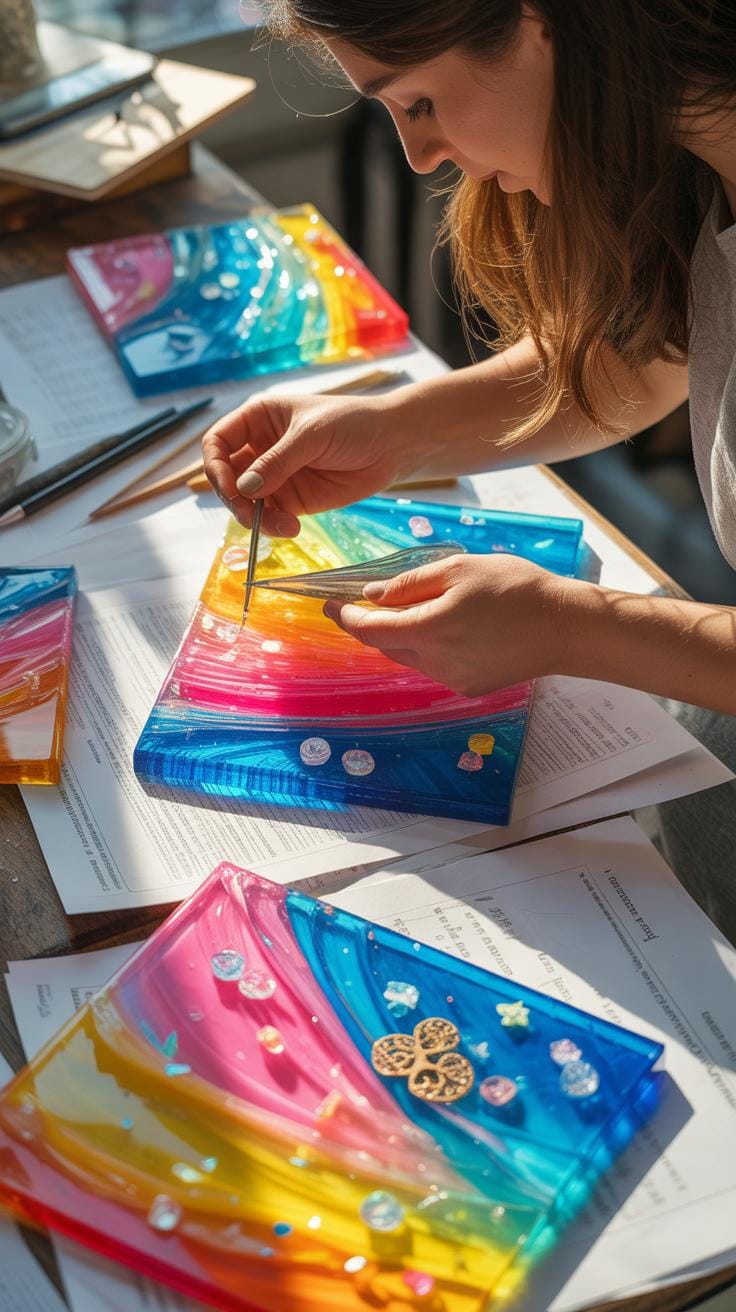
Curing And Finishing Touches

Place a large box over your work to block hair and dust from landing on the sticky surface. A clean environment ensures a smooth top that looks like clear glass. If you see a stray particle use a toothpick to lift it out immediately. Curing takes time but a protected space leads to better results for your handmade Resin Furniture and small keepsakes.
After the resin hardens completely remove the piece from the mold. You might find sharp edges along the back rim where the liquid met the plastic. Use fine-grit sandpaper and water to smooth these spots down. Rubbing the surface with a polishing compound brings back the high shine. Your finished project now stands as a lasting memory of your student days.
Creative Resin Art Ideas Projects For Old Assignments
Academic Paperweights And Blocks
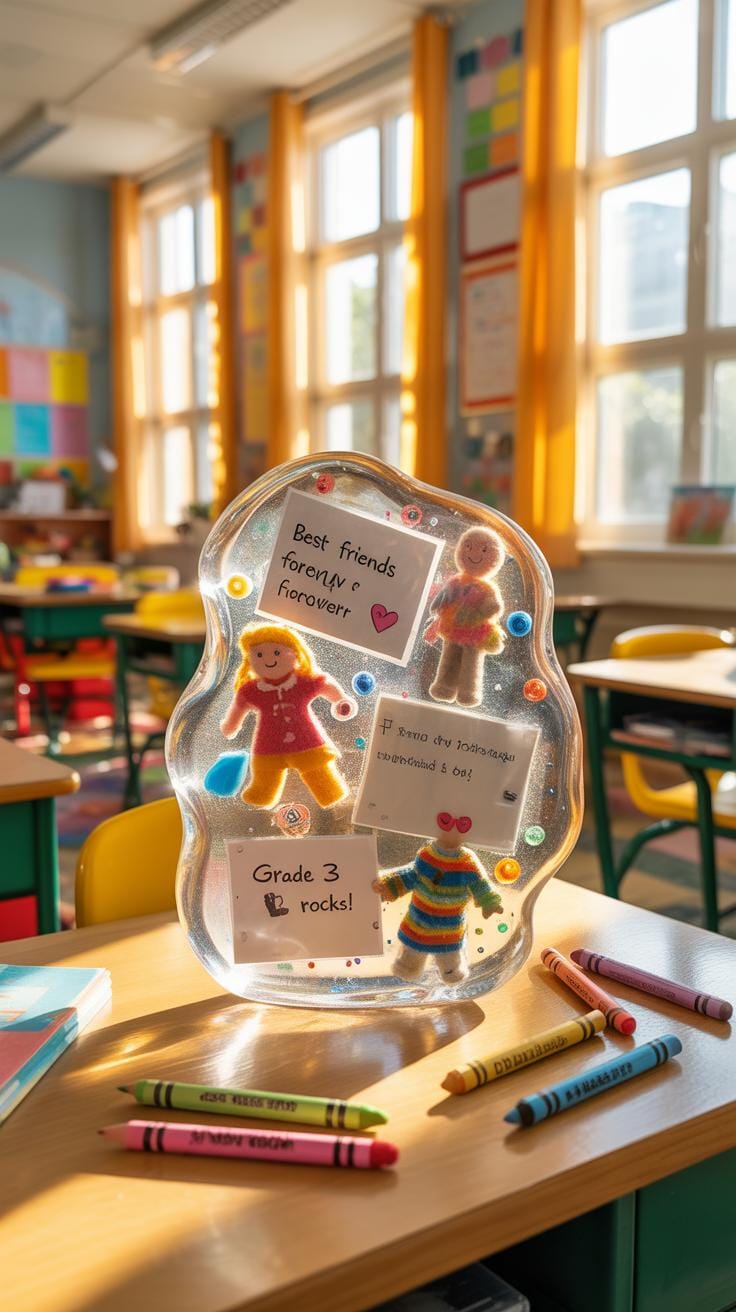
Deep casting allows students to preserve large portions of their history in solid forms. You can pour clear liquids into square molds to trap graded tests or handwritten essays. These Resin Art Ideas Projects show the growth of your handwriting and knowledge over many years. Using high quality Resin Art Materials ensures the block remains crystal clear and heavy enough to hold papers down on a busy desk.

Pouring in layers is the best trick for Resin For Beginners who want to avoid bubbles. You place the homework scraps in the middle layer so they seem to float in mid air. This simple Resin Crafts Tutorial step prevents the paper from sinking to the very bottom. These Resin Creations turn mental effort into physical beauty. They fit perfectly with other Resin Home Decor Ideas because they look like glass sculptures.
Personalized Stationery And Bookmarks
Small scraps of old homework work perfectly for making durable bookmarks. You can cut out a gold star or a teacher’s comment from an old essay. Place these pieces into thin rectangular molds to start your Resin Art For Beginners journey. These Diy Resin Projects protect the fragile paper from moisture and tearing. Your old assignments become useful tools that help you finish reading new books every single day.
Crafting thin items requires patience and a steady hand during the pouring process. You can mix tiny amounts of glitter into your Resin Art Materials to highlight the ink on the page. These small items are faster to finish than Resin Furniture and require less space. They make wonderful gifts for classmates or teachers. You will enjoy seeing your childhood hard work every time you open a textbook or a favorite novel.
Incorporating Resin Home Decor Ideas Into Your Workspace
Gallery Wall Integration

Mounting resin pieces on your wall creates a unique look for your office or bedroom. These items serve as a modern version of a framed diploma or certificate. The clear material makes the paper look like it is floating in glass. This method adds a three-dimensional effect to your space. You can arrange several small pieces together to tell a story about your school years.
Many people use Resin Art For Beginners techniques to start their collection. You need specific Resin Art Materials like mixing cups and a heat gun to remove bubbles. These Resin Creations turn old homework into lasting memories that catch sunlight perfectly. Using Resin For Beginners methods ensures the paper stays flat and does not yellow over time. It makes your walls look personal and creates a professional finish.
Functional Coasters And Trays Serving
Turning math equations or science diagrams into coasters protects your desks from water rings. These items work well for daily use because the cured surface is very hard. Visitors will enjoy seeing your old notes while they drink their tea or coffee. These Resin Home Decor Ideas combine your personal history with useful objects. They turn your old school successes into parts of your furniture that people can touch.
You can follow a Resin Crafts Tutorial to learn how to pour layers safely. These Diy Resin Projects require patience while the liquid sets into a solid shape. Many people use these Resin Art Ideas Projects to make gifts for family members or former teachers. Adding these pieces to your Resin Furniture collection keeps your workspace organized and tidy. The smooth surface stays clean easily and makes your study area feel more creative and fun.
Mastering Resin For Beginners Safety And Success Tips

Workspace Ventilation And Safety
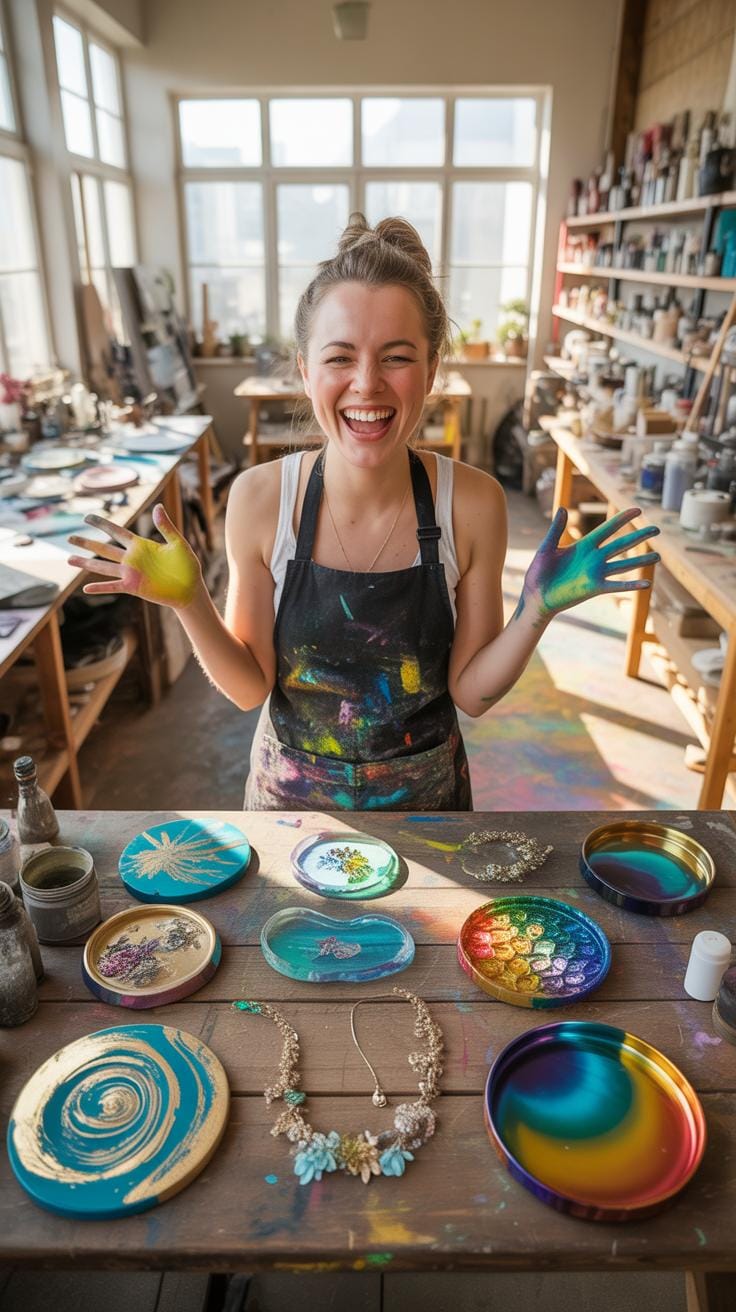
Success with Resin Art For Beginners starts with a clean and safe environment. You must work in a room with open windows or a strong fan. Always wear a nitrile pair of gloves and a respirator mask with organic vapor filters. These Resin Art Materials protect your skin and lungs from sticky spills and strong chemical fumes. Taking these steps makes Diy Resin Projects much more enjoyable.
Safety is the most vital part of a Resin Crafts Tutorial. Many people create beautiful Resin Home Decor Ideas in their garage or a dedicated craft room. Use a plastic sheet or silicone mat to catch any drips on your table. Keeping your space organized helps you focus on your Resin Creations. Good habits ensure you can finish your homework art projects without any health risks or messy accidents.
Avoiding Common Mistakes
Temperature control is a key secret for Resin For Beginners. Resin that is too cold will become thick and full of tiny bubbles. Warm your resin bottles in a bowl of warm water before you mix them. This trick makes the liquid clear and smooth for your Resin Art Ideas Projects. Consistent warmth helps the chemical reaction work perfectly every time you start a new piece.
Moisture is the enemy of high quality Resin Furniture and small art pieces. Ensure your mixing cups and stirring sticks are completely dry. Even a tiny drop of water can make the resin turn cloudy or stay soft. Clean your tools with rubbing alcohol to remove dust or old residue. Following these simple rules will help you create professional results with all your homework preservation projects and artistic builds.

Upgrading To Resin Furniture Using Scholar Records
Homework Inlay Table Tops
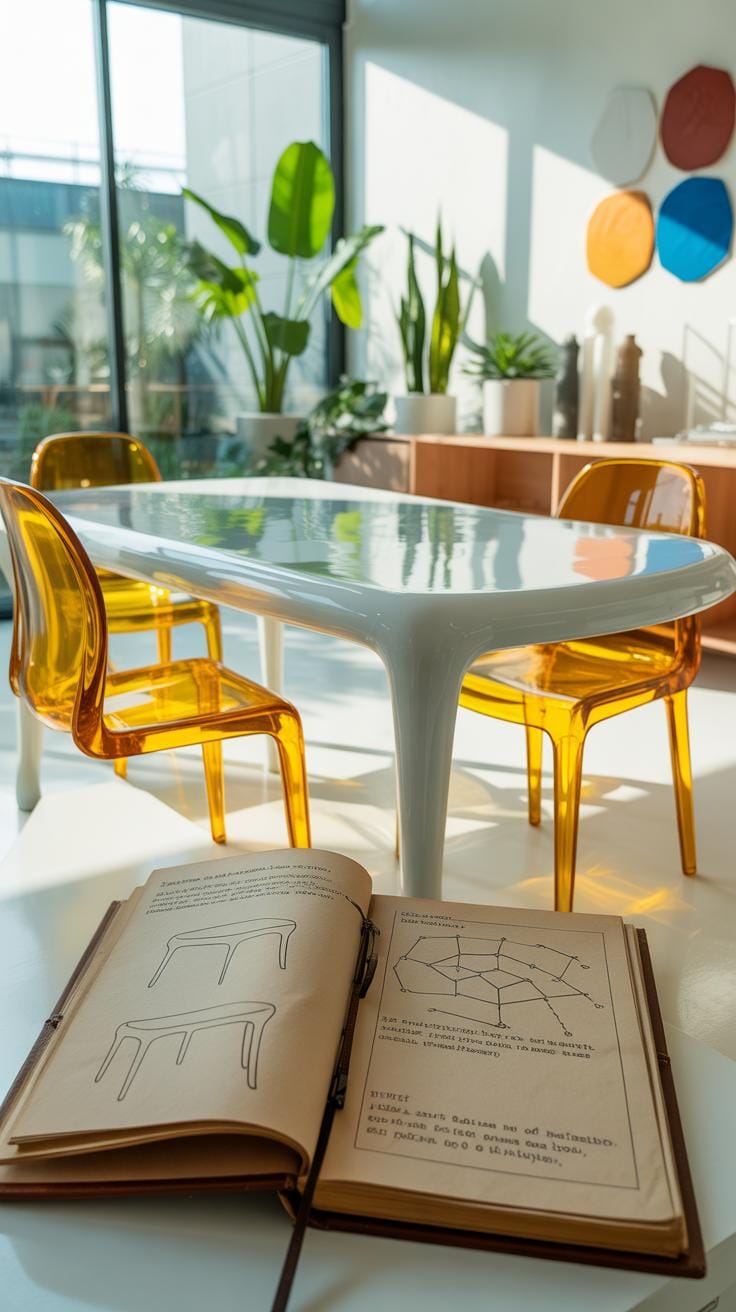
Large scale furniture projects turn old school papers into functional history. You can preserve a full semester of handwritten notes beneath a clear surface. This method creates a sturdy desk or dining area. Use quality resin art materials to ensure the surface stays level and clear. Beginners can follow a resin crafts tutorial to learn how to seal the paper first. This prevents the ink from bleeding into the liquid.
A custom desk serves as a permanent timeline of your education. You can arrange calculus formulas or history essays into a visual collage. These resin furniture pieces offer a smooth finish for daily work. Proper resin for beginners tips suggest pouring in thin layers to avoid bubbles. Use these resin home decor ideas to make your old study hours visible. Guests will love seeing your actual schoolwork inside the tabletop.
Side Table Accents
Smaller furniture items allow for subtle academic details. You can place single pages or math diagrams into the center of a wooden side table. This style mixes natural wood textures with modern resin creations. It brings a sophisticated look to your living room or bedroom. These diy resin projects help you practice working with different surfaces. You can use resin art for beginners techniques to bond the plastic to the wood.
Accent tables make great resin art ideas projects for people with limited space. You can choose your best graded papers to show off your hard work. The clear coat protects the fragile paper from spills and dust. These pieces act as small monuments to your personal growth. Follow a basic resin crafts tutorial to master the edges of the inlay. Your furniture will tell a story about your school years for a long time.
Sharing Your Resin Creations With The World
Photographing Resin Art
Position your work near a bright window to capture clear images. Natural light coming from the side prevents harsh glares on the glossy surface. Good lighting shows the small handwriting and paper textures hidden inside the plastic. Using a simple background keeps the focus on your Resin Art For Beginners projects. Clear photos prove that you mastered the basic steps of this Resin Crafts Tutorial successfully.
High quality images highlight the clear finish and depth of your work. Move your camera to different angles to show how light hits the edges. Close up shots reveal the graduation year or special grades on the paper. These photos act as a digital gallery for your Resin Art Ideas Projects. Sharing your work online helps others pick the right Resin Art Materials for their own personal hobby.
Gifting Preserve Academic Memories
Turning old school papers into gifts creates a lasting memory for parents. Encased homework reflects the hard work a student put into their education. These items serve as better keepsakes than paper because they do not yellow or tear. People often use Resin For Beginners techniques to make these heartfelt presents. A handmade paperweight or coaster fits perfectly into many Resin Home Decor Ideas for a study.
Teachers also appreciate receiving Resin Creations that showcase a students growth. You can turn a math test or an essay into Diy Resin Projects that last forever. This method preserves history better than a folder in a closet. Some artists even use these skills to make durable Resin Furniture pieces featuring vintage school reports. Gifting these items shares a story of learning and success with the people you love.
Frequently Asked Questions

Is it safe to preserve paper assignments in resin without the ink bleeding?
Preserving your school memories through resin homework art is a wonderful idea, but paper is porous and can absorb chemicals. To prevent the ink from bleeding or the paper from looking “wet,” you must seal both sides of your homework with a clear sealant or white glue first. Once it is completely dry, you can safely pour the resin over your documents for a crystal-clear, permanent finish.
How do I prevent bubbles from forming around my old worksheets in the resin?
Bubbles often get trapped under paper layers when creating resin homework art. To avoid this, pour a thin base layer of resin first and let it become tacky. Gently press your sealed homework onto the layer, smoothing out any air pockets with a popsicle stick. Finally, pour the top coat slowly. Using a heat gun or a specialized torch can also help pop any stubborn surface bubbles for a professional look.
Can I create this type of art using affordable supplies from a local craft store?
Absolutely! You don’t need a professional studio to get started. Most local craft stores carry beginner-friendly epoxy kits and silicone molds that are perfect for smaller projects like coasters or paperweights. By using recycled school papers as your primary medium, you are already saving on materials. Just ensure you invest in a quality UV-resistant resin to keep your sentimental artwork from yellowing over time as it sits on display.


