Introduction
Dried flower art offers a unique way to bring nature indoors. The Boho Chic dried flower art wall hanging combines rustic charm and natural elements to create beautiful decor. This art form uses dried flowers and plants to design pieces that last a long time without wilting.
You will learn how dried flower art originates and why it fits perfectly into bohemian style homes. This introduction will guide you through crafting steps, design ideas, and tips to care for your wall hanging. Explore how you can refresh your living space with this natural and artistic touch.
What is Dried Flower Art
Dried flower art is, at its core, the craft of using naturally preserved flowers to create lasting pieces of decoration. Instead of fresh blooms that fade quickly, dried flowers keep a version of their beauty for months, sometimes years. The idea is simple: capture the charm of a flower’s shape and color, and then arrange it in a way that appeals to your sense of style. You might find dried petals forming a delicate wreath, or pressed blooms framed like a miniature garden frozen in time.

This practice isn’t new. People have been drying flowers for centuries, often to keep memories alive or as elements in art projects. It’s fascinating how the process sits at the intersection of nature and human creativity. When you work with dried flowers, you’re dealing with something that’s both organic and static, which gives the art a unique tension. There’s an honesty to it — it’s nature, but paused.
Origin and Evolution
The roots of dried flower art trace back to ancient times. Early civilizations noticed that flowers could be dried and preserved, using them in rituals or as decorative elements. Victorian England, for example, embraced flower pressing within letters and scrapbooks, giving these pieces personal meaning. Over time, dried flower art moved beyond simple preservation into more elaborate designs, reflecting cultural shifts in how people relate to nature and home decoration.
What’s interesting is how modern artists reimagined these traditional methods. Instead of just pressing flowers onto paper, many now arrange them in three-dimensional forms—wall hangings, shadow boxes, even sculptures. The craft has expanded, mixing old and new, and it sometimes feels like a quiet rebellion against fast-moving trends. You could say dried flower art has grown because it fits this craving for something slower, something that ages with a certain grace.
Key Characteristics
What sets dried flower art apart from other art forms is its blend of texture, color, and permanence. Unlike fresh flowers, which demand immediate attention, dried flowers invite you to look closer, slowly appreciating their muted shades and fragile contours. Their colors tend to be softer—dusty pinks, faded greens, deep browns—creating a timeless mood.
Materially, working with dried flowers requires careful handling because they’re brittle and delicate. The art often involves layering different shapes and sizes to build dimension, which means the arrangement feels both natural and intentional. It’s the kind of art that doesn’t just decorate a space; it adds a quiet atmosphere, almost as if nature’s presence lingers within your room. Maybe it’s this mixture of fragility and endurance that makes dried flower art so compelling to many people.
Materials Needed for Dried Flower Art
When you begin working with dried flower art, the materials you choose can make a big difference in the outcome—sometimes in ways you wouldn’t expect at first. The core items include the flowers themselves, backing surfaces, adhesives, and tools. It’s tempting to grab any flowers you find, but the type you pick really shapes your piece’s longevity and look.
Choosing the Right Flowers
Not every flower dries equally well. You want those that keep their color and shape after drying. Think about flowers with a sturdy structure, like statice, hydrangeas, or strawflowers. They often maintain their form without crumbling. Bright colors usually fade, but some, like deep reds or oranges, tend to hold up better.
Also, consider the thickness and moisture content. Thicker petals take longer to dry and can mold, while thin, delicate petals dry quickly but might become brittle. It’s a bit of trial and error—you might find you prefer certain flowers just by trying them out. Plus, oddly shaped flowers add texture and dimension, but they can be tricky to press flat if that’s your goal.
Supporting Tools and Supplies
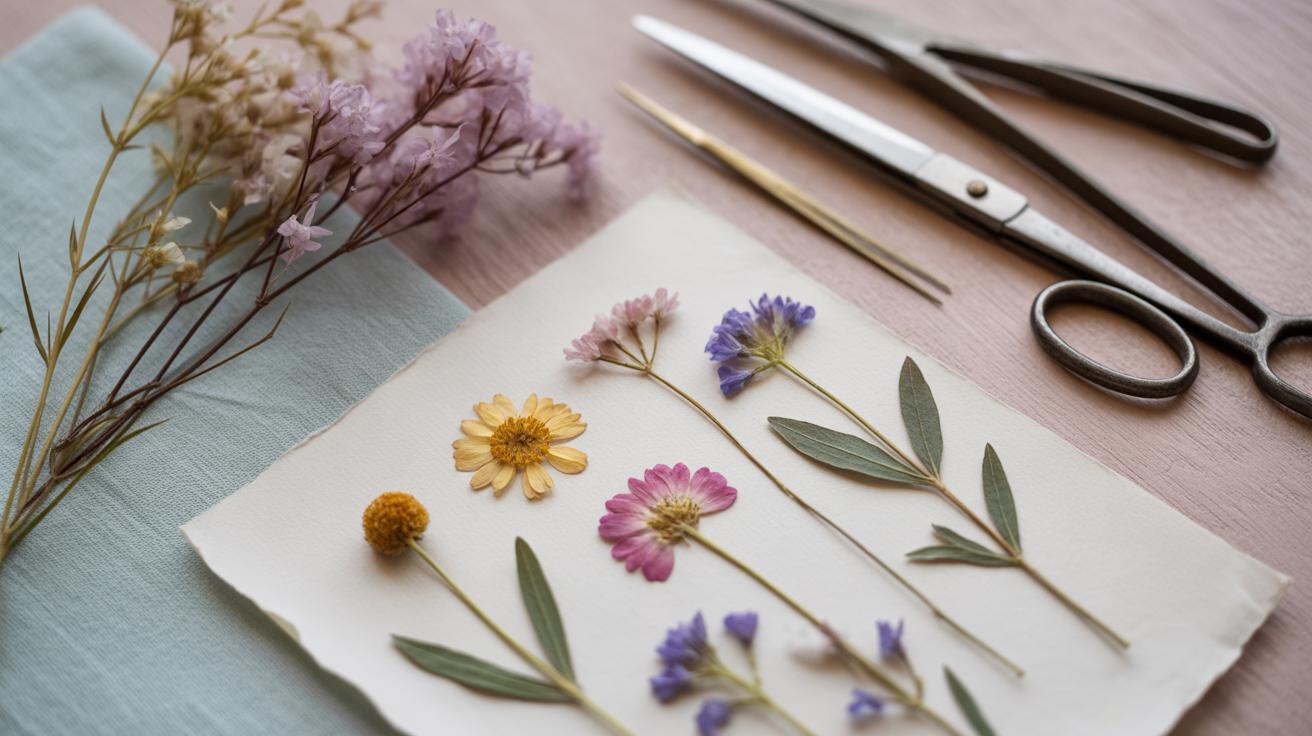
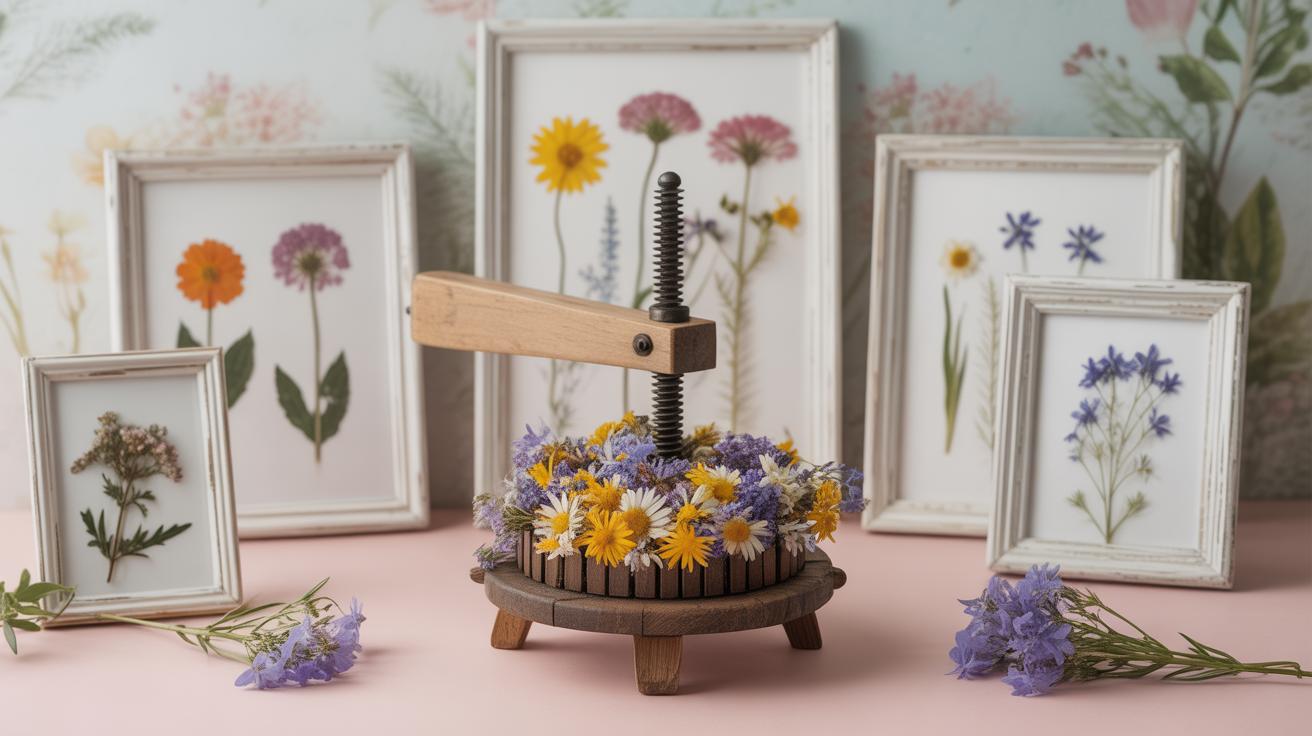
Presses are really handy. You can buy one or DIY with heavy books and blotting paper. It’s not just about flattening flowers; proper pressing prevents them from curling or molding during drying. Frames or shadow boxes help protect your finished art, keeping dust and moisture away, which can otherwise damage the fragile petals.
Adhesives matter too. Craft glues that dry clear work well, but some artists swear by natural alternatives like gel mediums, especially if they want to avoid yellowing over time. Tweezers and fine brushes also come in handy, helping you place tiny blooms without damaging them. You might think a simple glue stick does the job, but it often lacks the necessary hold or dries too quickly.
Choosing materials might seem straightforward, but the details can surprise you. Ever noticed how glue can sometimes discolor petals or how a frame’s backing affects how flowers lay? Each decision shapes your art piece in subtle ways you might not catch right away.
The Process of Drying Flowers
Drying flowers for art isn’t just about drying them out. It’s a bit of an art itself. You want to maintain the delicate shape and color that originally drew you to the bloom. There are a couple of main methods: pressing and air drying, each with its quirks and benefits.
Pressing vs Air Drying
Pressing flowers flattens them, which works great for cards or framed pieces. You simply place your flower between sheets of absorbent paper and press with a heavy book or a flower press. The process takes around one to two weeks, depending on the flower’s thickness. Pressing keeps colors often brighter, but you lose the 3D form, which isn’t always desired.
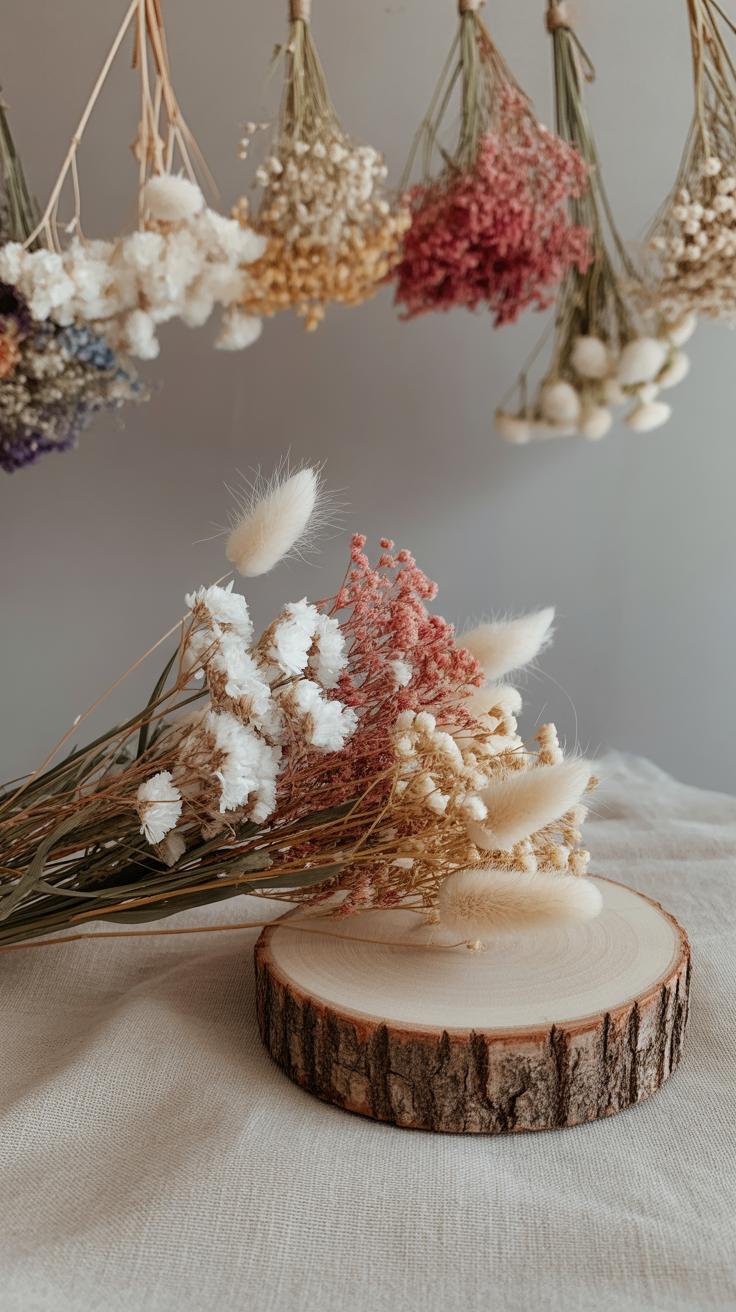
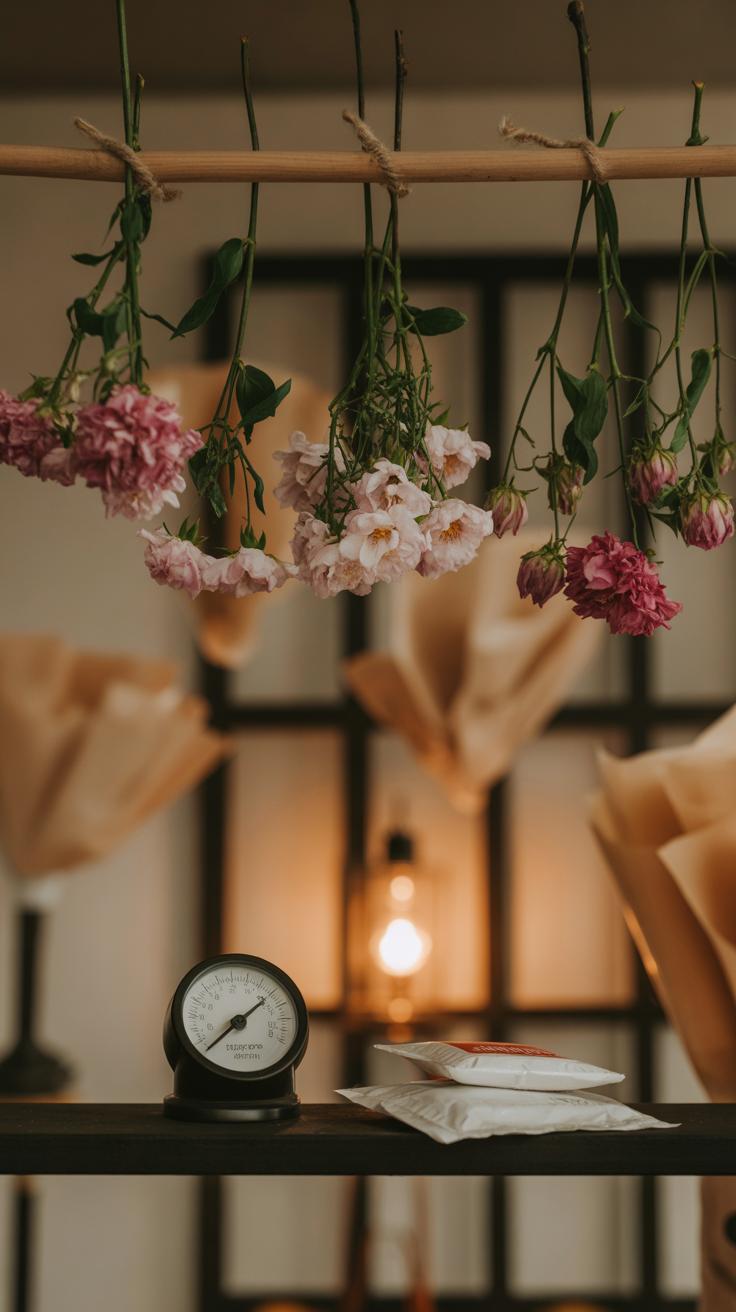
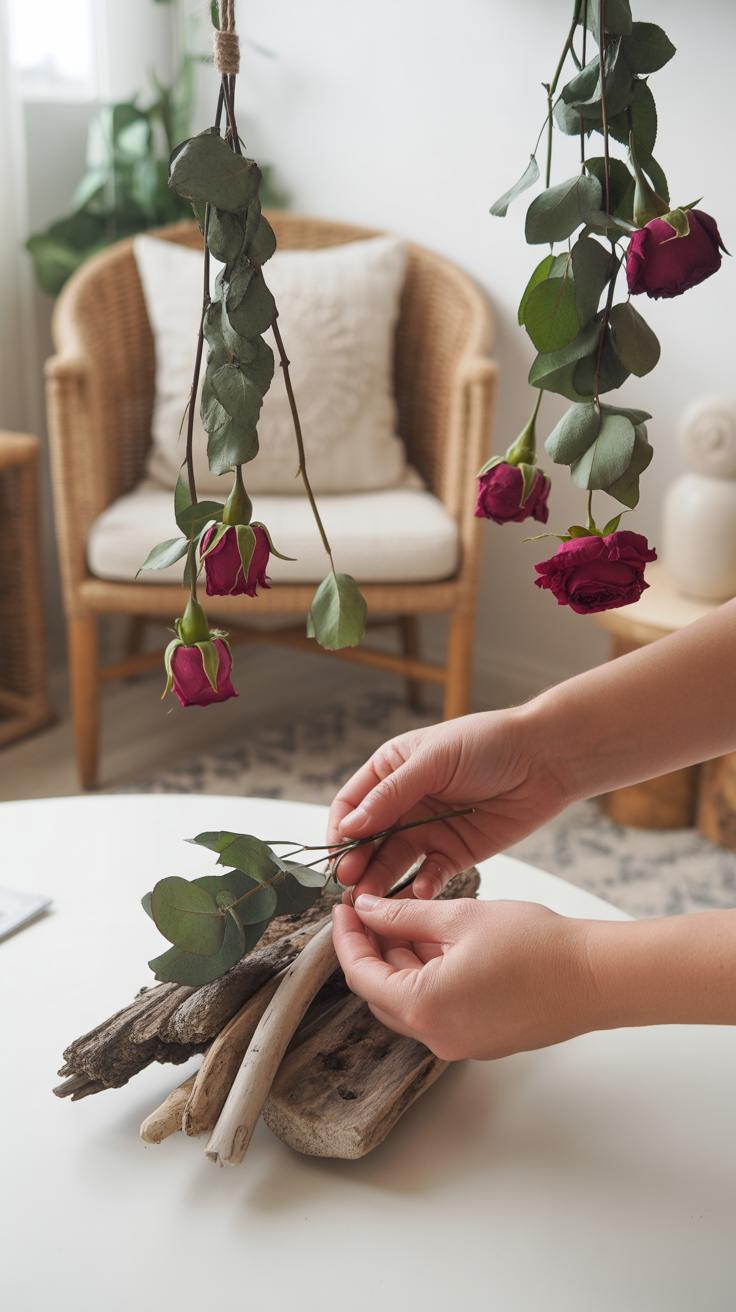
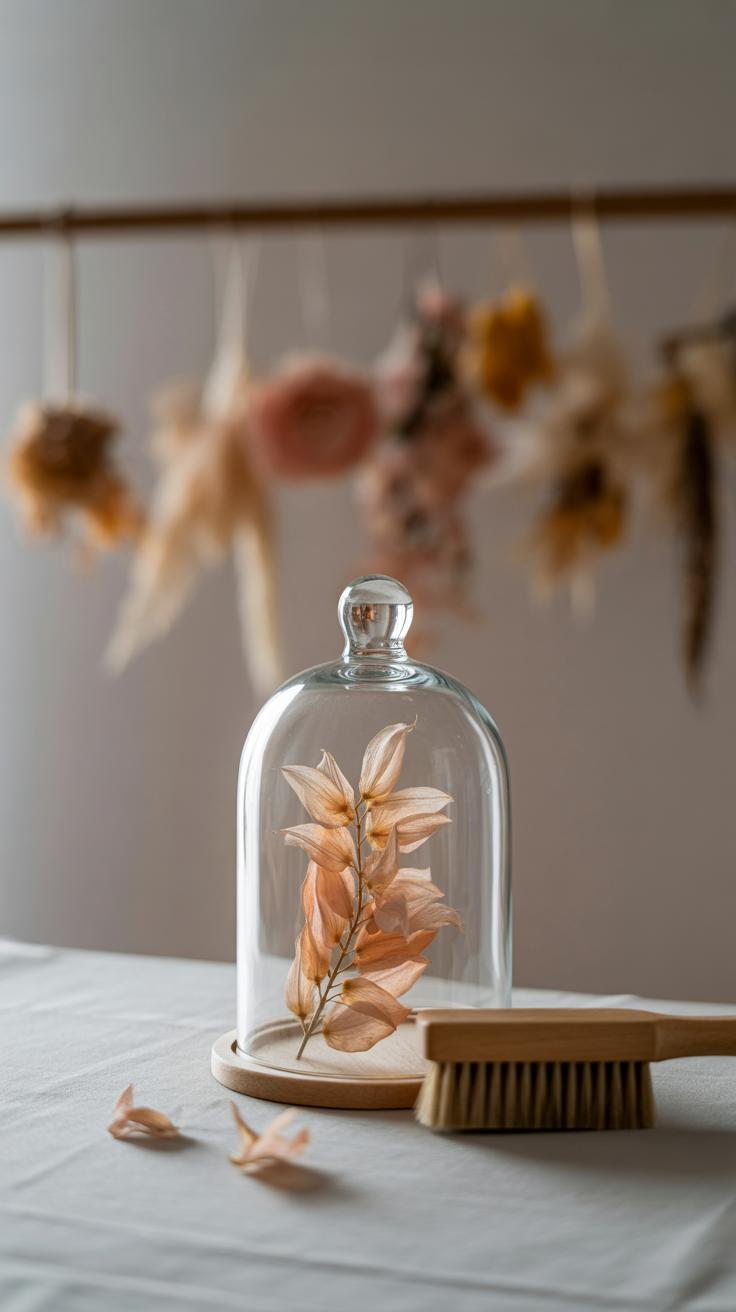
Air drying, on the other hand, preserves the flower’s shape in three dimensions. Hang the stems upside down in a dry, dark, well-ventilated space. Expect waiting times from one to three weeks. Air drying tends to dull some colors and can make petals brittle, but it’s great for arrangements that call for dimension and texture, which you might want when creating a boho chic wall hanging.
Protecting Color and Shape
Color retention can be tricky. Using a silica gel or placing flowers between towels with some weight helps retain brightness during pressing. For air drying, a dark and cool room prevents too much fading from sunlight, but it slows drying too—sometimes you want to wait a bit longer rather than rush the process.
You might try spraying the dried flowers with a light coat of hairspray or a floral sealant to protect fragile petals from crumbling. But be cautious, as over-spraying can make flowers stiff or discolored. I often think it’s a bit of trial and error, depending on the flower variety and your local humidity.
The choice between methods really depends on what you want to achieve in your art. Pressed flowers suit flat designs while air-dried flowers add depth. Sometimes, mixing the two gives you just the right layered effect. What’s your go-to method? It might depend on the flower and mood you want to set in your space.
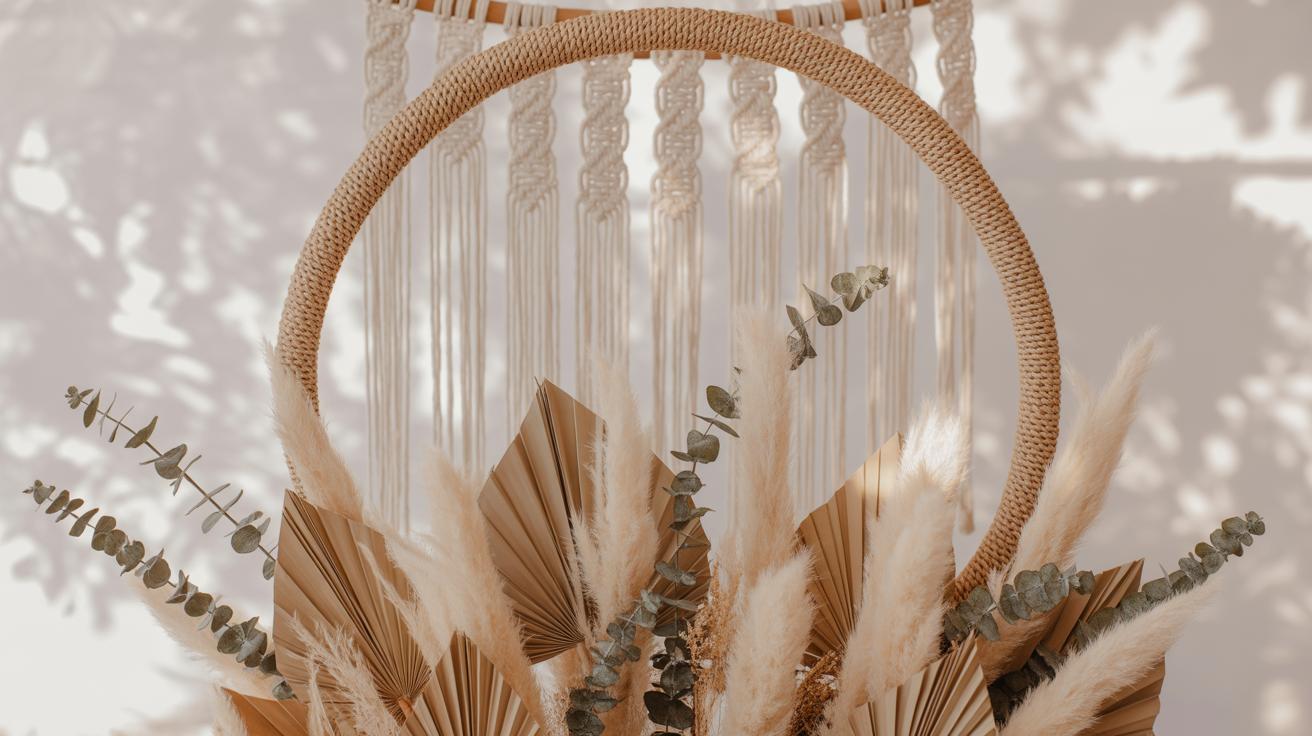
Ideas for Designing Boho Chic Wall Hangings
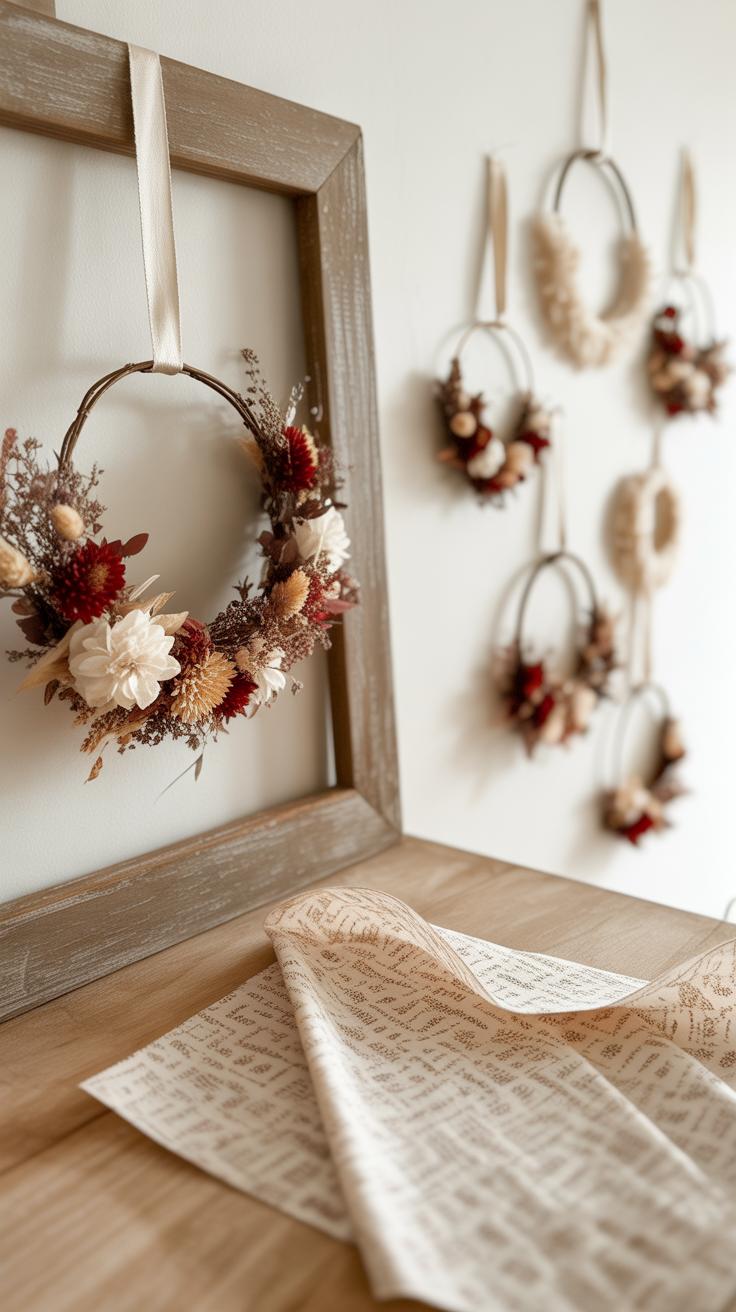
When arranging dried flowers for a Boho Chic wall hanging, balance is key, but don’t aim for perfect symmetry. You can create interesting patterns by grouping blooms in clusters that naturally vary in size and shape. Think of loose semicircles, scattered bouquets, or layered vertical lines. For example, placing delicate sprigs alongside larger blossoms can create a rhythm that feels both relaxed and intentional.
Patterns don’t need to be overly repetitive. Sometimes, a slightly off-center arrangement draws the eye better than a perfectly aligned one. Try mixing circular and linear shapes—maybe a wreath-style border with a vertical cascade in the middle. It’s about finding harmony, not rigidity.
Mixing textures and colors further brings life to your piece. Pair soft pampas grass with spiky preserved wheat or feathery bunny tails to add depth. Color-wise, combining muted earth tones with brighter, dried florals—say pale blush roses and warm mustard strawflowers—adds a tactile and visual contrast that really pops against a neutral wall.
Don’t be afraid to play with unexpected pairings. Rough eucalyptus leaves with delicate statice or dried lavender can surprise and delight. Sometimes, this mix-up creates a mood that feels more authentic, less staged. What textures or colors do you think might clash but actually work together?
Overall, your goal is to keep things feeling organic and approachable. Reflect on your space and what vibe you want—earthy calm, cheerful warmth, or subtle bohemian elegance—and use that to guide your pattern and texture choices. It’s an imperfect kind of beauty, really, but that’s what makes Boho Chic so appealing.
Creating Your First Dried Flower Wall Hanging
Preparing Your Workspace
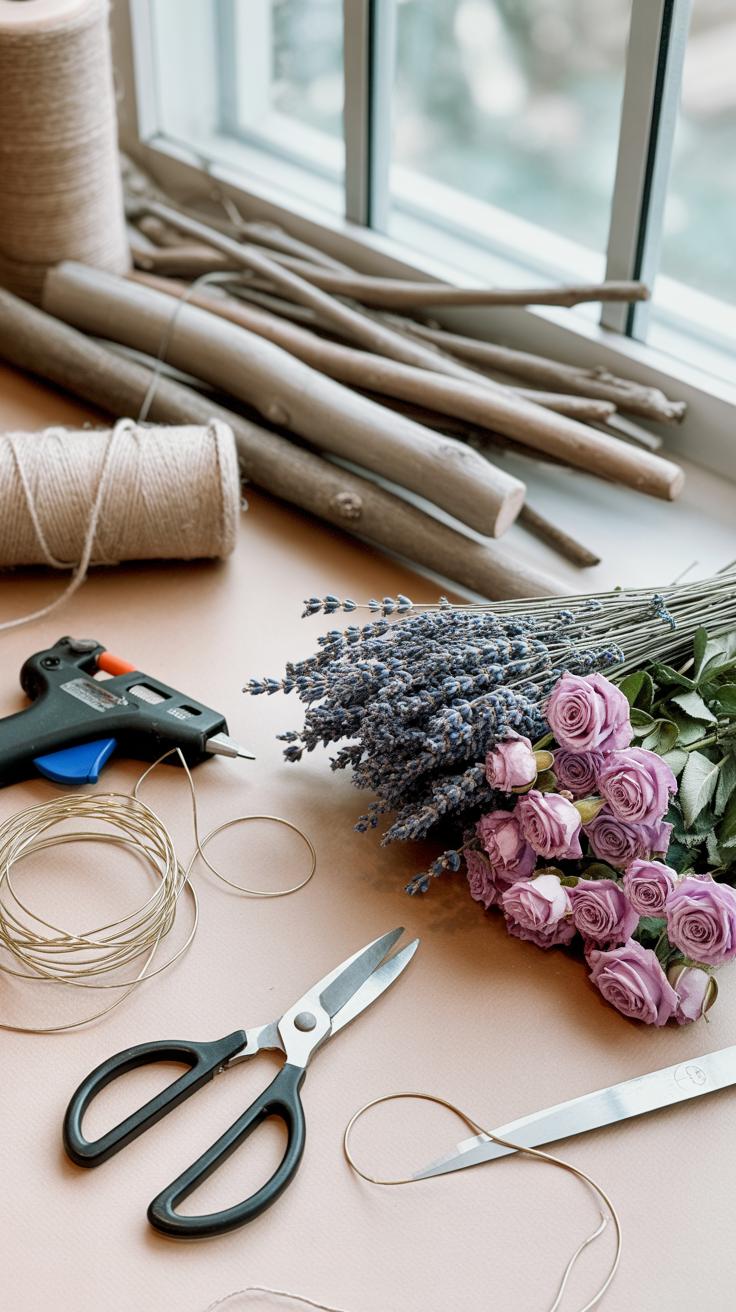
Before you start, find a clean, flat surface with good light. Natural light is best if you can, but a desk lamp works too. Gather all your materials in one spot—flowers, scissors, wire, glue, and your backing board. I usually like to have a tray or shallow box nearby to hold small bits and prevent them from scattering everywhere.
Don’t rush this part. Take a moment to arrange your flowers by size and color. You might want to lay them out loosely to get a feel for how you want them arranged later. Think about keeping your tools within easy reach but not cluttered—too many things piled up can make it harder to focus and can lead to mistakes.
Also, a dust cloth helps since dried petals can be delicate and messy. A tidy workspace keeps your pieces intact and your creativity flowing.
Assembling and Securing Flowers
Start by placing your larger flowers first on the backing. You want a base or focal points to build around. I find it’s best to position them without attaching immediately—just test different spots. Don’t hesitate to move things around; sometimes what looks good in theory needs tweaking once you see it together.
To fix flowers securely, use a hot glue gun or floral wire depending on the piece’s size and weight. Glue sets faster but can be tricky with fragile petals because it might cause discoloration or stiffness, so test a small hidden part first if you want to be safe. Wire gives more flexibility and allows adjustments later, though it’s a little trickier to master.
For smaller blossoms or delicate stems, gently insert thin floral wire through or wrap around the base, then press it flat against the backing. If you’re gluing, dab just a tiny bit—too much glue can darken the petals or create lumps. Layer your flowers carefully, overlapping edges just a bit so they hold together well but still keep their organic shapes.
When everything feels balanced, don’t rush to add extra elements. Sometimes minimalism brings out the flowers’ natural beauty best. At least for a first attempt, take your time to evaluate before final fixing—poorly secured flowers won’t last, and that’s frustrating. Remember, your wall art should last for years and look just as good close up as it does from afar.
Enhancing Your Wall Hanging with Frames and Backings
Frames and backing materials can completely change how your dried flower art looks—and even how long it lasts. Picking the right frame isn’t just about style; it’s about protecting those delicate blooms. Think about whether you want a frame that feels rustic, modern, or maybe something in between. Wood frames often bring warmth and complement natural elements, but metal can offer a sleek contrast. You might find that a thin, minimalist frame lets the flowers breathe visually, while a thicker one provides a bold outline that focuses attention.
Backing choices deserve more thought than you might expect. Plain paper or cardboard backing keeps it simple and stable, but sometimes adding fabric or patterned paper beneath the flowers adds unexpected depth. Imagine a subtle linen texture behind soft petals—it can make the whole piece more tactile, and honestly, I’ve found it gives even simple arrangements more life. You can experiment with colors to either highlight or tone down the flower hues.
Don’t forget the role of mounting: some use glue, others pins or tape. Each method affects how securely the flowers stay put, which becomes really obvious as time passes. What materials do you think would hold your favorite flowers well? Sometimes a sturdy backing with a bit of cushion feels safer, but it might bulk up your piece more than you’d like.
Caring for Your Dried Flower Art
Keeping your dried flower art looking nice isn’t as simple as just hanging it and forgetting about it. These delicate pieces need some care to stay fresh, or at least close to it, for months or even years. I’ve noticed that even a little dust can dull their charm, so gently cleaning is crucial.
Cleaning Tips
Dust can be more persistent than you expect. Try using a soft brush, like a makeup brush or a small artist’s paintbrush, to remove dust without crushing petals. Blowing air gently—maybe with a handheld fan or even a hairdryer on the coolest, lowest setting—can help too. Wiping with a damp cloth isn’t the best idea; dried flowers don’t react well to moisture, so keep liquid away.
Protecting from Damage
Light does funny things with dried flowers, often fading their colors over time. Keeping your art out of direct sunlight, or at least rotating its position, can slow this. Moisture is another enemy. Rooms with high humidity—bathrooms, for example—might cause your piece to warp or grow mold, which is disappointing and tricky to fix. Pests can also sneak in, although it’s rare; if you notice tiny holes or unexplained crumbling, consider a well-ventilated spot and occasionally inspect your art.
In the end, some wear and soft change might be okay. It’s part of their quiet story, I suppose. But with a little care, you can keep your dried flower wall hanging looking lovely for a good long while.
Incorporating Dried Flowers in Your Home Decor
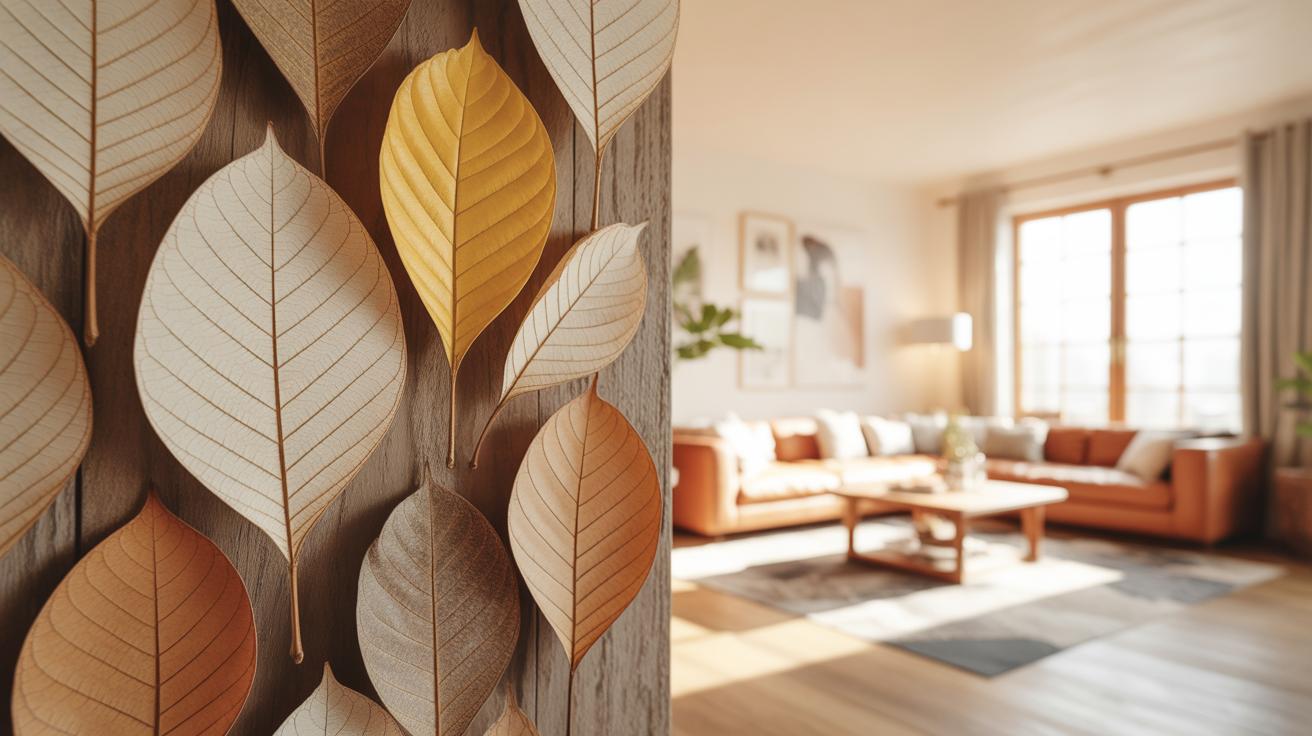
Dried flower art has this quiet way of bringing a sense of calm and natural charm to any room. You might think they only work in certain spaces, but they actually fit well from living rooms to bathrooms, kitchens, even bedrooms. In the living room, a well-placed dried flower wall hanging can soften the edges of bold furniture or add interest above a mantle or couch. In bedrooms, these pieces create a gentle, peaceful vibe—almost like a tangible breath of fresh air without the fuss of care. Kitchens? They add surprising warmth, especially when combined with rustic or vintage elements.
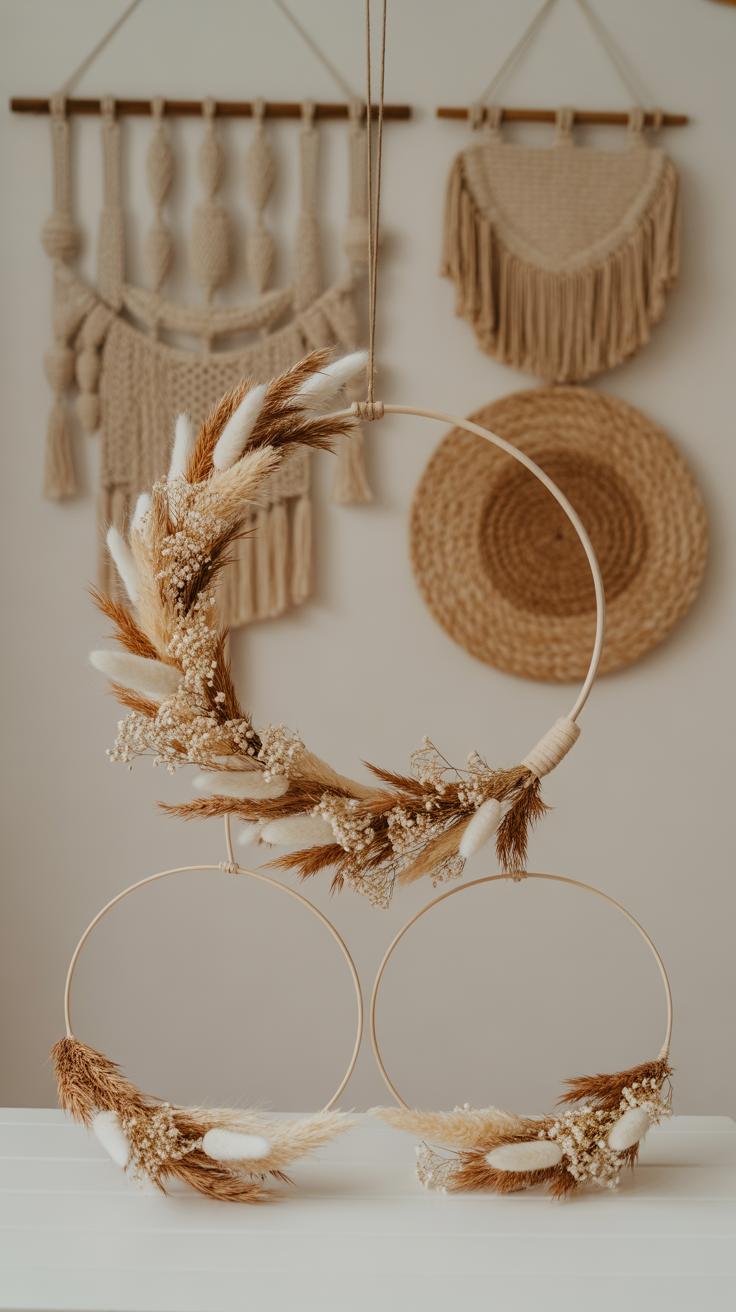
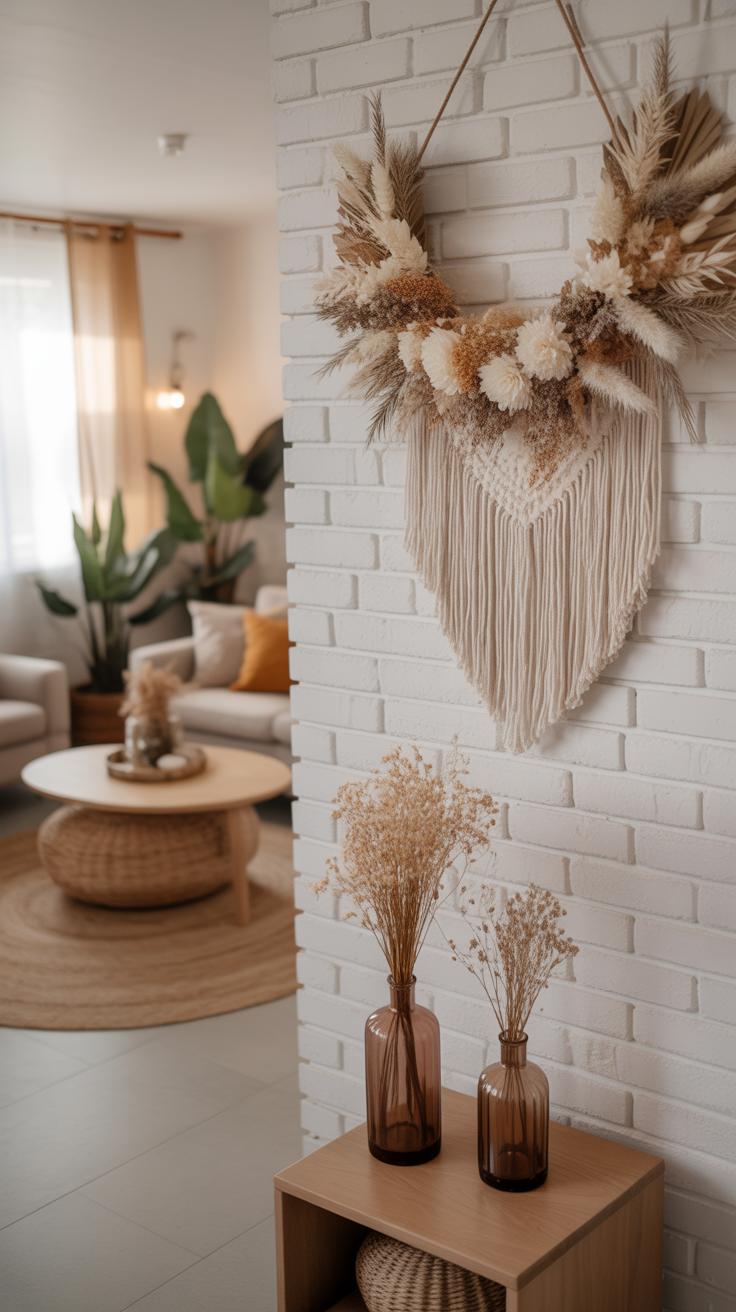
Boho Style Influence
Boho décor thrives on organic materials and a carefree, layered aesthetic. Dried flowers naturally fit into this theme because of their imperfect beauty and muted tones. If you want to lean into the Boho vibe, think about mixing your dried flowers with woven wall hangings, macramé, or earthy ceramics. The softness of dried petals contrasts nicely with rougher textures, emphasizing that relaxed, eclectic mood Boho styles aim for. Maybe use wild grasses alongside your florals or opt for loose, unstructured arrangements—nothing too polished. That relaxed feel is exactly what draws people to Boho, so don’t worry about every stem being perfect.
Blending with Other Decor Items
Pairing dried flower art with your furniture and other accessories can either amplify a room’s warmth or tune down its edge—depending on your choices. For example, wooden furniture, especially pieces with natural grain showing, seems to resonate well with dried florals. Throw in some linen or cotton cushions and you get a casual yet thoughtful look. If you prefer modern décor, try framing dried flower art in sleek, minimal frames. This mix can surprise you—the soft, organic lines of flowers against clean, sharp furniture create an inviting contrast.
- Place dried flower hangings near textured surfaces like jute rugs or leather armchairs for a tactile feel.
- Combine with metallic accessories—think brass or copper—to add a bit of warmth without losing natural charm.
- Don’t be afraid to stack art—layer smaller dried floral pieces with other wall art or mirrors to keep things interesting.
Have you ever noticed how dried flower art seems to invite you to slow down, just for a moment? Sometimes, blending them into your space doesn’t require a grand design change—just thoughtful placement and pairing that echo what you already love.
Exploring Modern Techniques and Trends
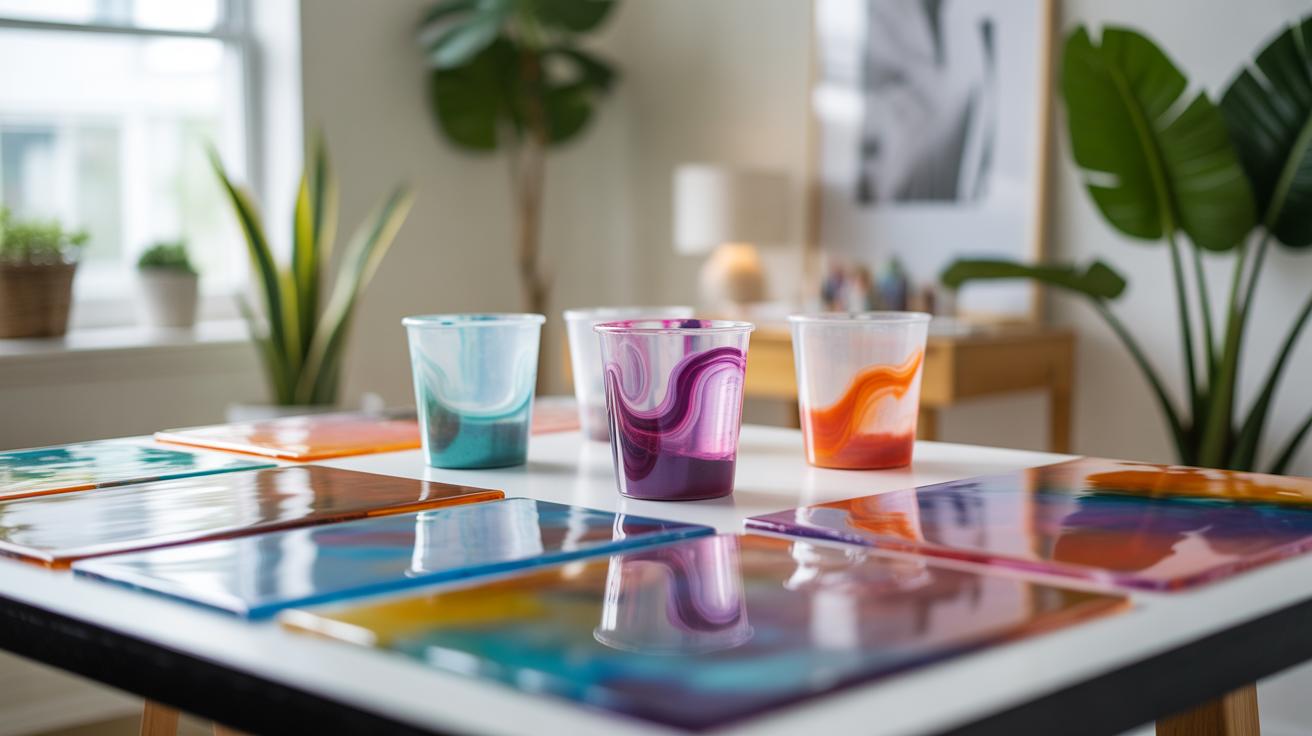
When it comes to dried flower art, the old ways of pressing and air-drying are still around, but there’s a new wave of tools and approaches changing the game. For example, advanced silica gels and microwave drying techniques help maintain the original hue of flowers much longer. You might be surprised how these methods prevent the colors from dulling, making your art last for years without fading noticeably.
Some artists even use UV-resistant sprays to shield delicate petals from sunlight damage—sort of like sunscreen for flowers. It’s a small step but can really extend the life of your arrangement if you like to display it near windows. And drying chambers, controlled for humidity and temperature, have become more accessible. These allow consistent results where flowers keep their shape better than traditional methods.
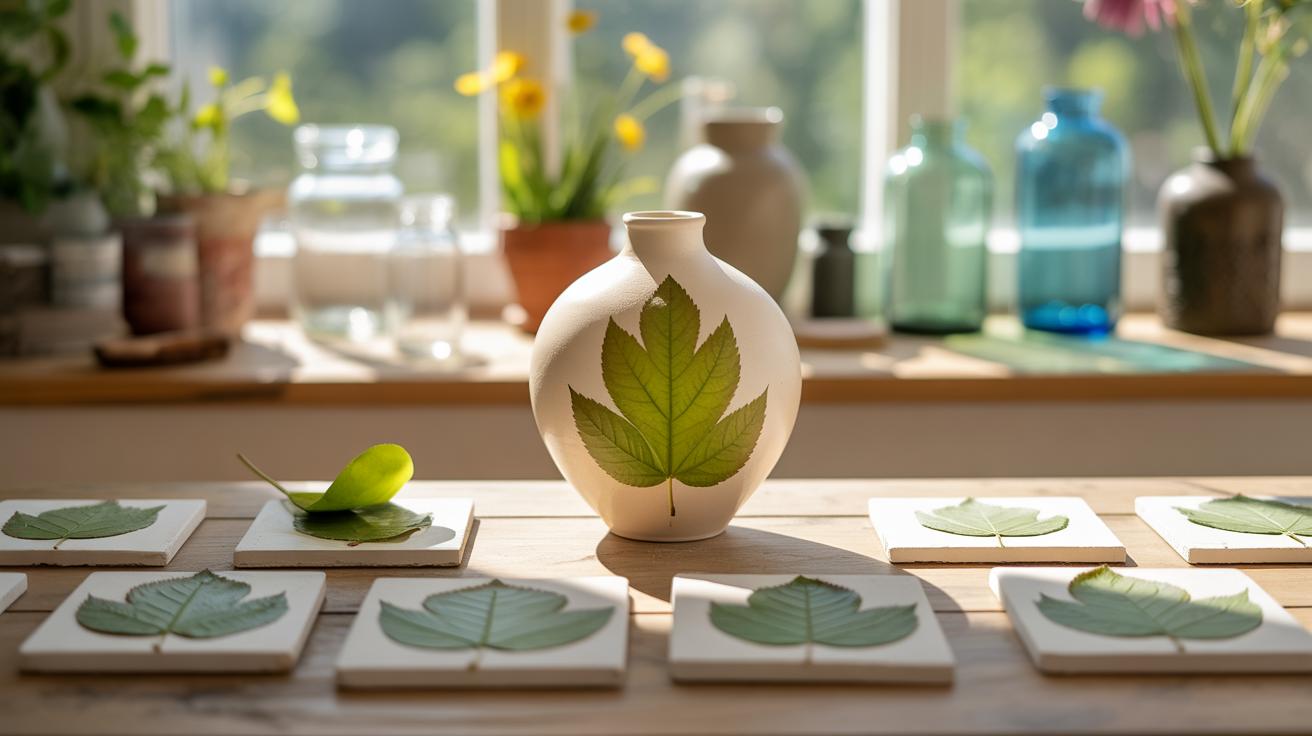
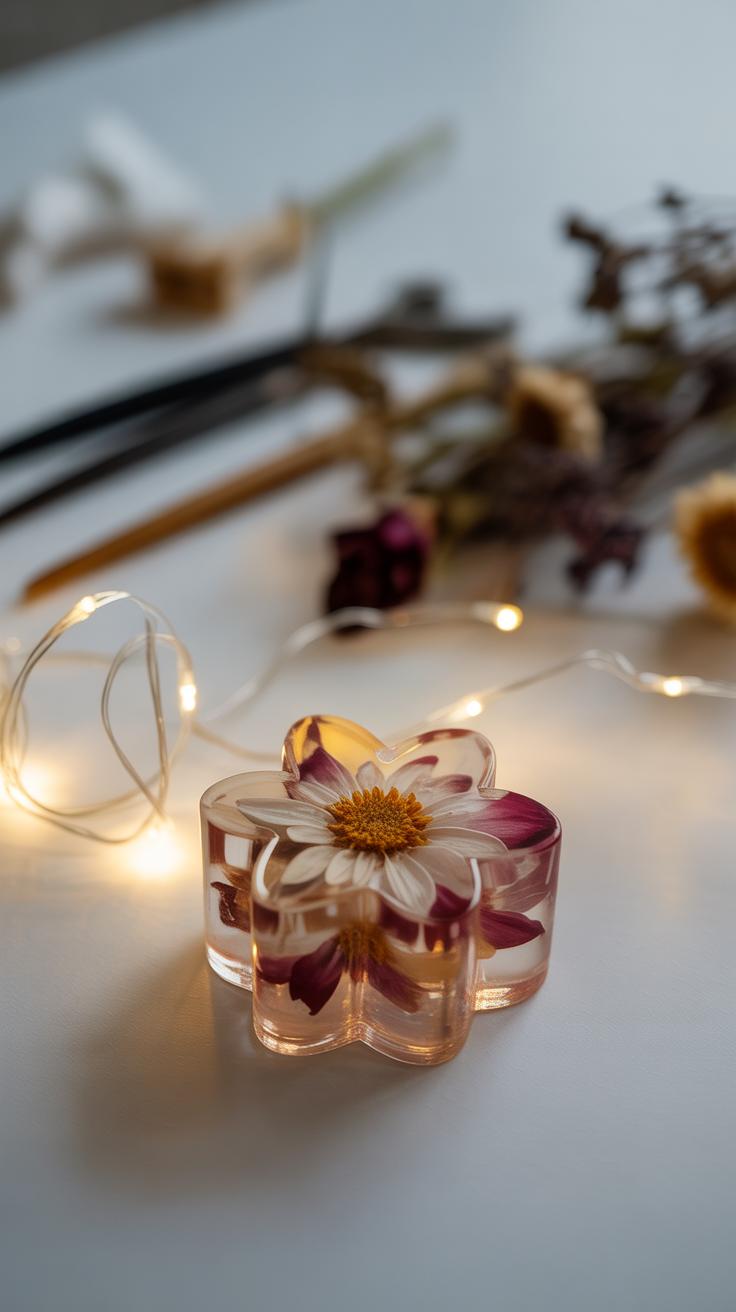
On the creative side, styles vary quite a bit now. Minimalist arrangements featuring just a few stems arranged asymmetrically contrast with fuller, wild bouquets that look like they were gathered from a meadow. Layering dried flowers between clear resin to create three-dimensional, almost floating displays is gaining traction, too. Some artists experiment with mixing dried blooms and pressed leaves for textural variety. If you think dried flower art is just about rustic cottage vibes, there’s plenty happening beyond that.
Thinking about your own space, which trend feels more “you”? Are you drawn to the sleek resin pieces or something a bit more natural and freeform? Exploring these new techniques might spark ideas you hadn’t considered before.
Where to Find Inspiration and Resources
Finding fresh ideas for dried flower art sometimes feels like hunting for a needle in a haystack, especially when you’re just starting. Yet, inspiration is actually everywhere—if you know where to look. Online, there’s a surprising amount of communities where people share everything from simple arrangements to elaborate wall hangings. Places like Etsy forums or Pinterest boards often have rich collections that can spark your creativity, though sometimes it’s overwhelming to sift through the sheer volume.
Social media platforms tend to be more immediate and interactive. Instagram accounts dedicated to dried florals, or Facebook groups like “Dried Flower Enthusiasts,” offer a space to exchange tips, ask questions, and see how others approach their art. Reddit’s crafting threads aren’t a bad spot either for more informal, down-to-earth discussions.
If you prefer hands-on learning, local workshops can be quite rewarding. Small art studios, garden centers, or community colleges sometimes run classes where you can actually feel the flowers, experiment with pressing or arranging, and get direct guidance. These sessions can also connect you with fellow flower lovers, which might lead to ongoing support and ideas.
Don’t overlook books either. Titles like “The Art of Preserving Flowers” or “Dried Flower Creations” offer clear techniques and inspiration, though some might feel a bit dated compared to current trends. Still, they provide foundational knowledge that online content often skips.
Overall, your best bet might be combining online exploration with offline practice. That way, you tap into diverse perspectives and develop your own style rather than just copying. What kind of sources do you find most inspiring? Maybe this mix will help you settle on something that feels genuinely yours.
Conclusions
Boho Chic dried flower art wall hangings allow you to add a personal and natural element to your home decor. You can create pieces that reflect your taste and style while preserving the beauty of flowers. The process is simple, yet creative and rewarding.
By understanding the techniques and care involved, you can keep your dried flower art stunning for years. Why not start your own project and see how this art form brightens your space and lifts your mood with its natural charm?


