
The Function First Greenhouse Flooring Mandate
Water Has To Go Somewhere
You care about this because a failed floor kills your entire event. Water pools. Roots rot. Guests stand in mud. The mechanism borrowed from hydrology is percolation: the rate at which water moves through soil. Your greenhouse floor must achieve positive percolation or you’ve built a bathtub. Gravel bases, permeable pavers, and sloped concrete all manipulate this single variable. Most people ignore slope entirely, then panic when standing water appears after rain.
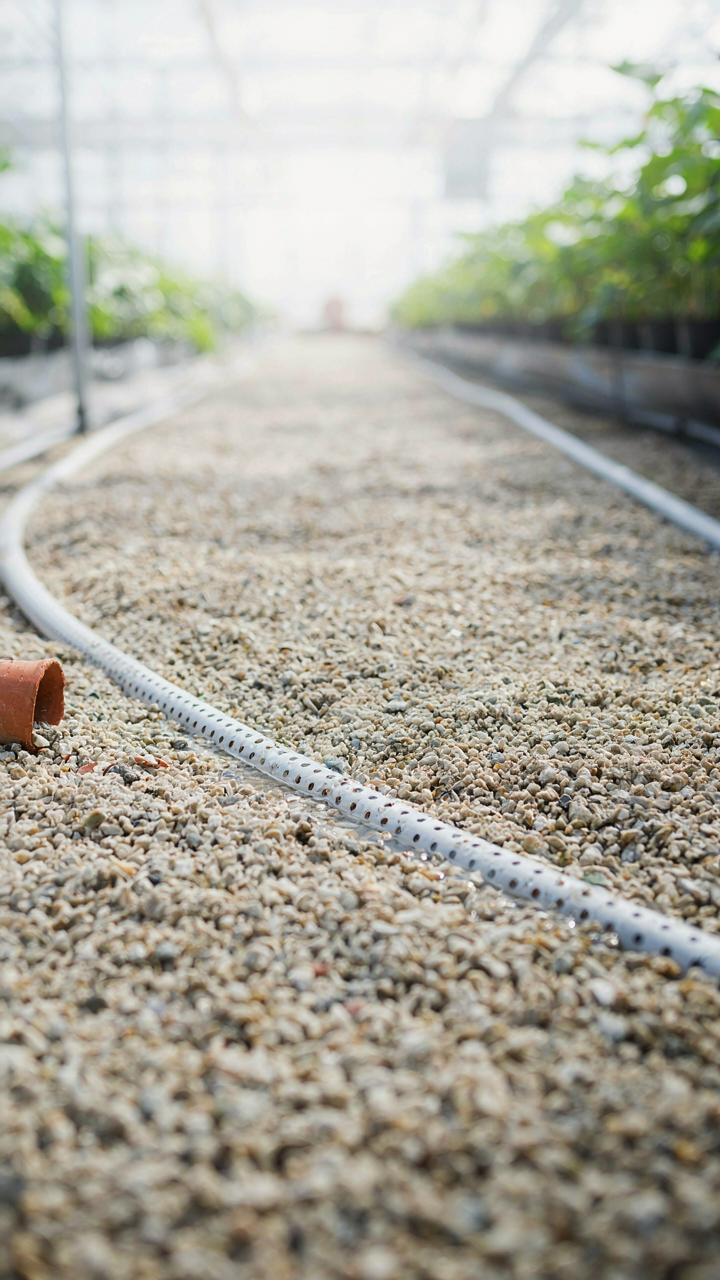
A one percent grade minimum is non negotiable. That means one foot of drop per hundred feet of length. Without it, capillary action pulls moisture upward into your substrate, turning the floor into a swamp from beneath. Subsurface drainage runs perpendicular to your slope and exits at the lowest point. Perforated pipe buried six inches under the floor layer moves water off-site before pooling occurs. This is not optional for special events where foot traffic matters.
Load Bearing Decides Your Material Budget
Physics governs what breaks and what holds. Structural engineers call this bearing capacity: the weight a surface can support per square foot before failure. Your greenhouse floor must handle concentrated loads from catering equipment, temporary staging, and dense crowds. Concrete handles this better than aggregate because it distributes force across a wider base. Pavers handle it inconsistently unless set on proper bedding depth and compaction.
Calculate real load before choosing material. A catering station with equipment weighs roughly 50 pounds per square foot. A crowd standing shoulder to shoulder adds another 150 pounds per square foot. Gravel beds compress under this weight unless compacted to near concrete density. Recycled rubber mats and permeable pavers designed for commercial use resist rutting better than decorative landscape materials. Select your floor by worst case scenario, not by what looks good in photos.
Beyond Appearances: Real Greenhouse Flooring Ideas

Gravel Systems For Optimal Drainage
You want gravel because it looks intentional and costs less than alternatives. The real reason to install it: drainage is a physics problem, and gravel is the permeable medium that solves it. Water moves through gravel via capillary action and gravity simultaneously, meaning excess moisture exits fast while the material still holds enough water retention for roots that need it.
Gravel doesn’t compact evenly. You’ll need angular stone, not rounded river rock, because angular pieces lock together and resist displacement under foot traffic and equipment weight. Replace the top two inches annually since fine particles work down into the base layer. This isn’t maintenance you skip and this material works best in greenhouse sections where you move equipment or walk frequently, not where plants sit static.
Permeable Pavers For Heavy Traffic
The consensus says permeable pavers are “sustainable.” The mechanism is simpler: they distribute load without creating a continuous hard surface that pools water and rots roots. Permeable pavers let water infiltrate while supporting weight that would crush gravel or compact soil into clay.
Permeable pavers come in concrete, recycled plastic, or composite material. Concrete pavers are cheapest but require polymeric sand between joints to function as a system, and that sand degrades in one to three years depending on UV exposure and water volume. Install them on a compacted base layer at least two inches thick. Most greenhouse operators underestimate the prep work and end up with pavers that shift within a season. Get the base right, and heavy rolling equipment moves without damage.
The Tactical Flooring Adaptability Protocol
Swappable Surfaces For Quick Transitions
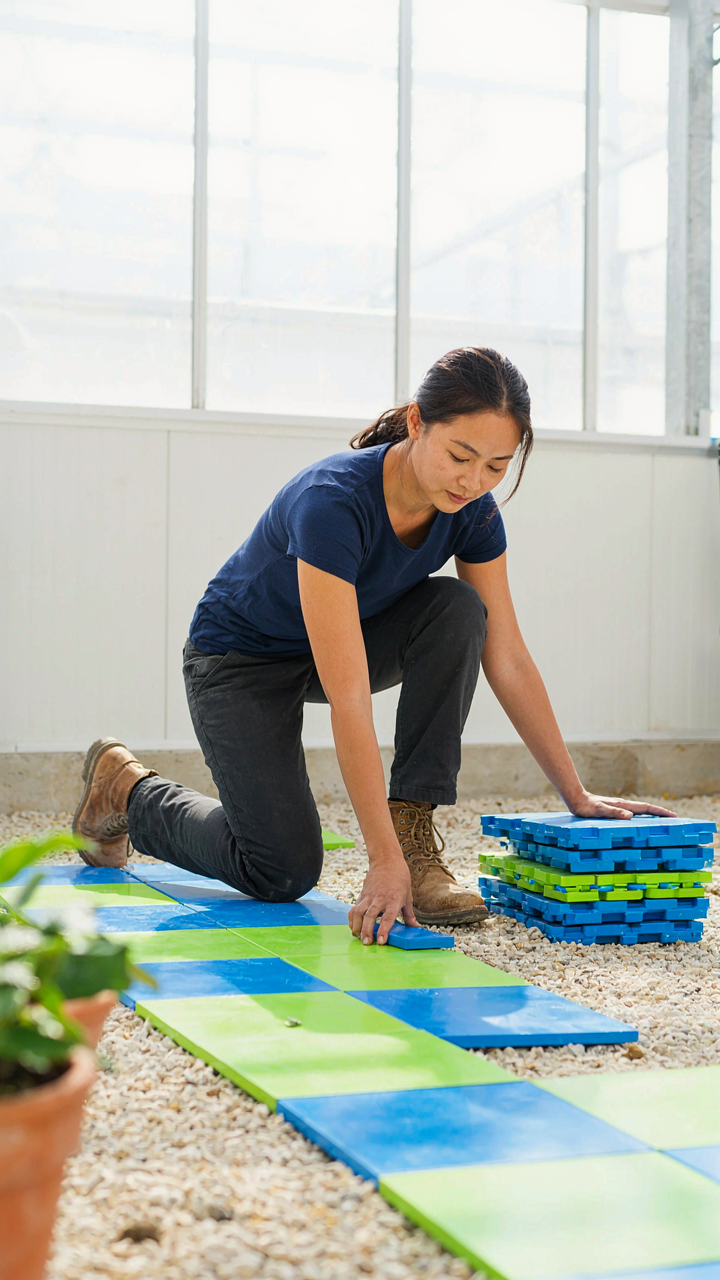
You want your greenhouse to look intentional for that one event without spending money on permanent solutions. The real mechanism here borrows from manufacturing’s concept of modularity: breaking a system into independent parts you swap without disrupting the whole. Greenhouse flooring works the same way. Interlocking tiles, removable mats, and temporary decking let you change the surface in hours, not weeks. The floor becomes inventory you rotate based on what the space needs to do that day.
Polypropylene interlocking tiles are the clearest example. They lock together without adhesive, sit on top of existing gravel or concrete, and lift out individually if one piece damages. You can create patterns, change them next month, then revert to the original layout. Rubber gym mats work similarly but cost more and suit specific aesthetics. The tactic: measure your greenhouse floor precisely, buy modular pieces in bulk, and store unused sections flat in a dry space. This moves flooring from permanent infrastructure into operational equipment.
Event Ready Staging Without Permanent Damage
The common advice says “just use what you have.” That fails because event floors need different properties than working floors. A production greenhouse needs drainage and root stability. A wedding or market event floor needs level surfaces, visual appeal, and minimal mud transfer. You’re solving two different problems with the same space, which means permanent flooring always disappoints for one use case.
Temporary plywood platforms work for high traffic areas during events. Lay 3/4 inch exterior plywood on adjustable shims or temporary supports to level it, then remove it after. For softer aesthetics, lay outdoor carpet or burlap over the platform. The platform elevates guests above soil moisture and creates clean sight lines in photos. Document the exact shim placements with photos and measurements so you rebuild it identically each time the event repeats. After the event ends, pull everything and your greenhouse returns to production mode.
Ditch The DIY Greenhouse Flooring Traps

Where Budget Decisions Go Wrong
You want to save money upfront because you’re not sure this greenhouse will work out long-term. Here’s the mechanism: cheap flooring materials fail faster in greenhouse conditions because humidity, temperature swings, and standing water create a hostile environment that accelerates decay. Concrete cracks. Gravel compacts and migrates. Untreated wood rots in two seasons. You end up replacing it all within three years, spending double what proper installation cost initially.
The hidden cost isn’t the replacement labor. It’s the crops you lose while sections of flooring are unusable, the mold that spreads from deteriorating substrate, and the structural damage water causes when it pools where it shouldn’t. Greenhouse flooring isn’t aesthetic. It’s infrastructure. Treat it as such and your cost math changes entirely.
The Durability Threshold That Actually Matters
Most advice says pick materials that “last long.” That’s incomplete. Think in terms of load bearing and drainage capacity, not just material lifespan. Concrete handles weight and heavy foot traffic well, but it cracks under freeze-thaw cycles without proper slope and drainage. Gravel costs less but requires annual raking and eventual replacement because it migrates and compacts unevenly. Rubber matting handles moisture but degrades under direct UV if your greenhouse lacks shade cloth.
The real decision framework is this: match material choice to your specific water management system, not the other way around. Sloped concrete with French drains works. Permeable pavers with subsurface gravel work. Loose gravel without slope and drainage doesn’t. The material itself matters less than whether you’ve engineered water to leave, not accumulate.
Elevate Your Greenhouse Base: The Substrate Advantage
Build From The Ground Up
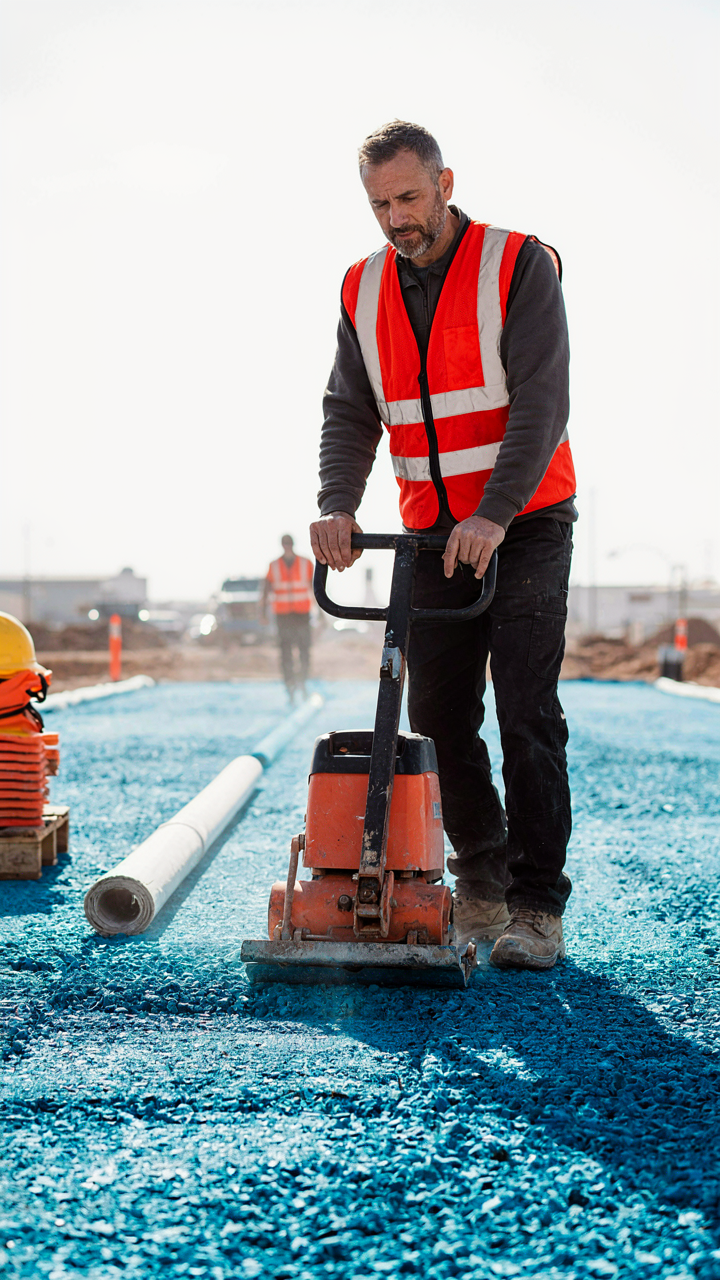
You want this to look intentional when guests arrive. That’s the real reason you’re reading this section. The mechanism is physics: a greenhouse floor bears load differently than you think. Uneven settling kills both aesthetics and plant health. Compacted aggregate forms the load-bearing layer that prevents that collapse.
Four to six inches of crushed stone or gravel, properly tamped, creates a stable base that won’t shift under foot traffic or equipment weight. The particle size matters. Angular stones lock together better than rounded ones. Tamp in layers, not all at once. This prevents the settling that betrays poor construction months after the event ends.
Moisture Control Below The Surface
Most greenhouse flooring guidance stops at “add gravel and call it done.” That’s incomplete. A vapor barrier separates your floor from ground moisture, which rises through capillary action whether you acknowledge it or not. This isn’t optional for special occasions where appearance holds for hours under scrutiny.
Install the barrier after compacting your aggregate but before laying your finished floor surface. Use polyethylene sheeting at minimum six mil thickness. Overlap seams by six inches and seal them. This halts ground water vapor from migrating upward and destabilizing your surface material. Check seams quarterly to catch tears early, because moisture damage accelerates once it starts.
Best Greenhouse Floor: Investment Vs. Expense

Quality Materials Hold Their Value Over Time
You’re scared you’ll waste money on a greenhouse floor that falls apart in three years. Here’s the mechanism: concrete degrades through freeze-thaw cycles and chemical exposure, while gravel compacts unevenly and requires constant replacement. Materials with structural integrity actually reduce your total cost of ownership because you stop buying the same thing twice.
Concrete, polycarbonate, and rubber mats absorb initial cost upfront but survive a decade or more with minimal intervention. Gravel and sand require annual raking, topping off, and replacement every two to five years. This isn’t philosophy—it’s basic material science. The cheaper option today becomes the expensive option when you factor in labor, disposal, and repeated purchases over time.
Calculate True Cost, Not Just Price
Economics teaches “marginal utility”—the real benefit of each additional dollar spent. Apply this to greenhouse flooring by dividing total five-year cost by the number of uses, not just the purchase price. Concrete costs more upfront but spreads that cost across hundreds of event setups or growing seasons.
Map out actual expenses: material cost, installation labor, replacement timeline, maintenance hours, and disruption from repairs during use. Poured concrete averages 1200 to 2500 dollars installed and lasts fifteen years minimum. Gravel costs 300 to 600 dollars but needs replacement every three years. The gravel looks cheaper until you do the math. Run the calculation quarterly to catch when a material stops making financial sense.
Potting Sheds & Greenhouse Floor Ideas: Synergies

When Adjacent Structures Actually Matter
You want your potting shed and greenhouse to look intentional together because you’re afraid a mismatch signals poor planning. Here’s the mechanism: material continuity between structures creates visual coherence that amplifies the perceived quality of your entire setup. Concrete, gravel, or permeable pavers don’t just sit on the ground independently. They’re part of a spatial grammar that either reads as deliberate or accidental.
The flooring you choose in your greenhouse directly influences what makes sense outside it. If your greenhouse sits on reinforced concrete, your potting shed entrance should either continue that concrete pad or transition to it via a defined threshold. Gravel-only solutions work only if both structures use the same substrate and drainage pattern. Mismatched materials create cognitive friction. Your eye registers the discord before your brain names it.
Material Compatibility And Transitional Flow
Compatibility in landscape design borrows directly from physics: frictionless transitions require matching coefficients of expansion. Concrete and permeable pavers expand differently under temperature shifts. Concrete expands uniformly at roughly 0.00001 inches per degree Fahrenheit. Pavers shift independently, creating gaps at joints. Your flooring choice determines whether water flows from greenhouse to shed or pools unpredictably between them.
The real error most people make is treating these spaces as separate problems. They aren’t. If your greenhouse uses compacted stone base under polycarbonate or glass, your potting shed should use the same base. This prevents settling differential where one structure sinks while the other holds. Match your gravel grade, your compaction depth, and your edging material. This specific protocol prevents the creep that makes structures look neglected within two seasons.
The Bio Mimicry Of Greenhouse Flooring
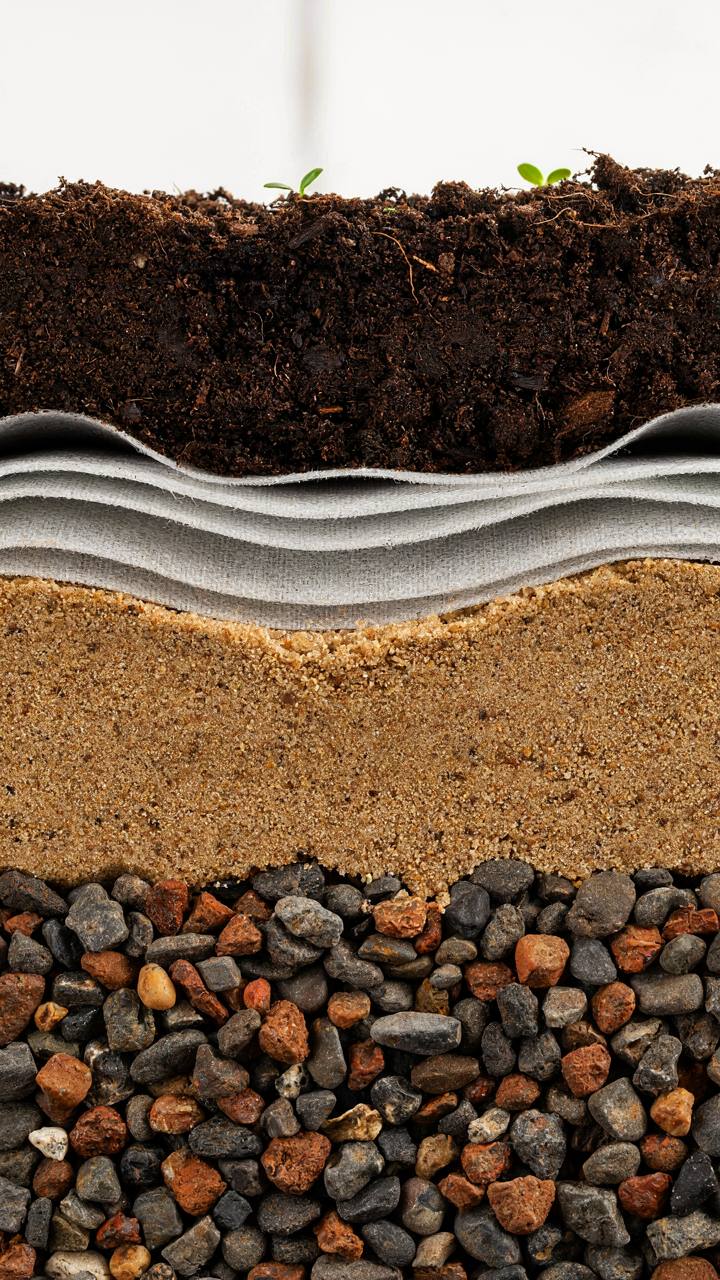
Water Moves The Way Forests Move Water
You want to sound intelligent by talking about “sustainable design.” That’s not the real reason you’re here. You want flooring that actually works without constant maintenance and doesn’t fail during peak season. The mechanism is simple: evolutionary biology teaches us that drainage systems in nature self-regulate through layering and particle size variation. Forest floors don’t flood because water finds the path of least resistance through stratified materials. Greenhouse flooring options succeed when you copy this exact principle by stacking materials in order of permeability, not aesthetics.
Natural ecosystems don’t use uniform materials. Soil, decomposed matter, sand, and gravel arrange themselves by density and particle size over time. Greenhouse floors need the same structure. Gravel base, then sand, then permeable membrane, then growing medium creates the identical stratification. Water percolates downward predictably. Roots access moisture without sitting in it. You’re not designing a floor. You’re engineering a hydrological layer cake that mirrors what took nature millennia to perfect.
Adaptability Over Rigid Specifications
The common advice says “choose your flooring material first, then build around it.” That’s backwards. Evolution builds traits that respond to changing conditions, not traits locked into one scenario. Your greenhouse flooring options must handle seasonal water fluctuation, weight distribution changes, temperature swings, and use pattern shifts. Concrete cracks. Gravel settles unevenly. Permeable pavers shift under frost. Materials that seem stable actually fail because they’re too rigid.
The adaptation happens through composite layering, not single-surface solutions. A gravel and sand base shifts slightly under stress but redistributes weight evenly. Permeable grid systems flex with frost heave. Rubber crumb mixed with stone compresses and rebounds. Your flooring protocol requires you to test material combinations under the specific conditions your greenhouse encounters, document the movement, and adjust particle size or depth accordingly each season. This isn’t maintenance. This is calibration based on real performance data.
Green House Floor Ideas: Beyond The Superficial

When Light Becomes Structure
You want your greenhouse floor to look intentional for guests. That’s the real reason you’re reading this. Here’s what nobody tells you: lighting integrated into flooring works like a circuit board—every element must serve dual function or it fails. Most greenhouse owners treat light as decoration and flooring as pure utility. That’s backwards.
LED strip systems embedded in permeable flooring materials create functional pathways while managing heat distribution. Recessed lighting in gravel or decomposed granite floors draws attention to plant displays without casting harsh shadows across growing areas. The key is matching light color temperature to plant growth zones. Cool white light (5000K-6500K) works near seedlings. Warm white (2700K-3000K) suits decorative plantings visible during evening events. Install the wiring before pouring or laying any base material—retrofitting creates weak points where water pools and electricity fails.
Access Points That Don’t Announce Themselves
Hidden utility corridors separate functional greenhouses from event spaces. Here’s where greenhouse flooring actually earns its purpose: creating clean zones for guests while concealing every pipe, valve, and control system underneath.
- Removable Decking Panels: Composite or treated wood sections sit flush in high-traffic areas. Lift them to access irrigation lines, drainage systems, and electrical conduits without tearing up the entire floor during maintenance or events.
- Raised Platform Sections: Elevate portions of flooring 6-12 inches above grade to hide utilities beneath. Stairs or ramps connect sections seamlessly while creating storage compartments for tools and supplies out of sight.
- Gravel Stabilizer Grids: Plastic or recycled composite grids sit under permeable flooring materials. They create defined pockets where PVC lines run horizontally, preventing damage from foot traffic while remaining invisible from above.
- Modular Concrete Pavers With Channels: Pre-cast pavers include routed channels on the underside. Stack them to create hidden conduits for wiring and tubing, then finish the top surface as polished or sealed concrete.
- Hinged Trap Doors: Conceal main water shutoffs, electrical panels, and emergency drain valves beneath decorative flooring. Size them to fit standard utility box dimensions, then cover with matching materials when closed.
The mechanism here is separation of systems. Your event floor is a performance surface. Your utility infrastructure runs parallel underneath, accessible only when you need it. Mark access point locations on a scaled drawing before installation. This prevents guests from standing on hidden doors and stops you from accidentally laying permanent materials over trap doors you’ll need to reach during the growing season.
The Myth Of “Special Occasion” Flooring

Temporary Fixes Never Survive Contact With Reality
You want a flooring solution that looks good for one event then disappears without trace—that’s the real ask here. But borrowing from systems engineering, temporary infrastructure fails because you build tolerance into it from day one. You accept movement, settling, and poor drainage because “it’s only for a weekend.” The mechanism is simple: materials chosen for ease of removal lack the compaction, drainage management, and foundation work that prevents failure. Gravel, rubber mats, and lightweight decking don’t bond to soil. Water pools beneath them. Foot traffic creates ruts in weeks.
The cost math breaks fast. You install temporary flooring for an event, remove it, store it, then install again for the next occasion. Material degrades between uses. Transport damages edges. You replace sections annually. Over three years, you’ve spent more on repeated installation labor than a permanent solution would cost. The real problem isn’t the flooring material—it’s the decision to treat the greenhouse floor as scenery rather than infrastructure. Stop pretending events are the primary use case.
Design For The Actual Greenhouse You’re Running
Permanent flooring works because it optimizes for what greenhouses actually do: cycle water, support weight, enable access, resist decomposition. Most greenhouse owners describe their space as special-occasion only because they haven’t used it efficiently enough to justify permanent flooring—circular reasoning that kills their own project. Instead, design the floor around the 80% use case: daily plant management, watering systems, equipment movement. Special occasions happen on top of functional infrastructure, not instead of it.
Concrete, recycled asphalt, or compacted stone base layers with permeable surface options (gravel, recycled rubber, composite boards) handle year-round conditions while staying accessible for event modifications. You can dress temporary elements on top—renting event-specific runners, platforms, or staging—but the underlying floor remains stable. The protocol: establish your primary growing season water patterns first, choose flooring that manages that reality, then design events around proven drainage. Special occasions don’t require special floors. They require floors built to outlast the next five seasons of actual use.
The Only Truly Special Floor Is The One That Serves Your Long-term Vision, Not A Single Event

Stop treating your greenhouse floor like a one-off photo op. Every material choice you make either compounds your effort over years or creates debt you’ll pay later. Durable concrete, permeable pavers, or gravel aren’t boring. They’re the difference between a greenhouse that works for you and one that works against you. Pick up a flooring sample from a local supplier today and walk it through your actual space. Your future self doesn’t care about the event. Your future self cares about what still stands when the party ends.



